Once you've registered the item master and location, the next step is to register your current inventory levels.
※ For basic concepts like "objects" or "modules," please refer to Sanka Basics.
In this guide, you'll learn:
- How to individually add inventory
- How to bulk register inventory using Sanka's template
- How to edit registered inventory information
- How to archive inventory information
How to add Inventory individually
① In the "Inventory Management" module, select the "Inventory" object.
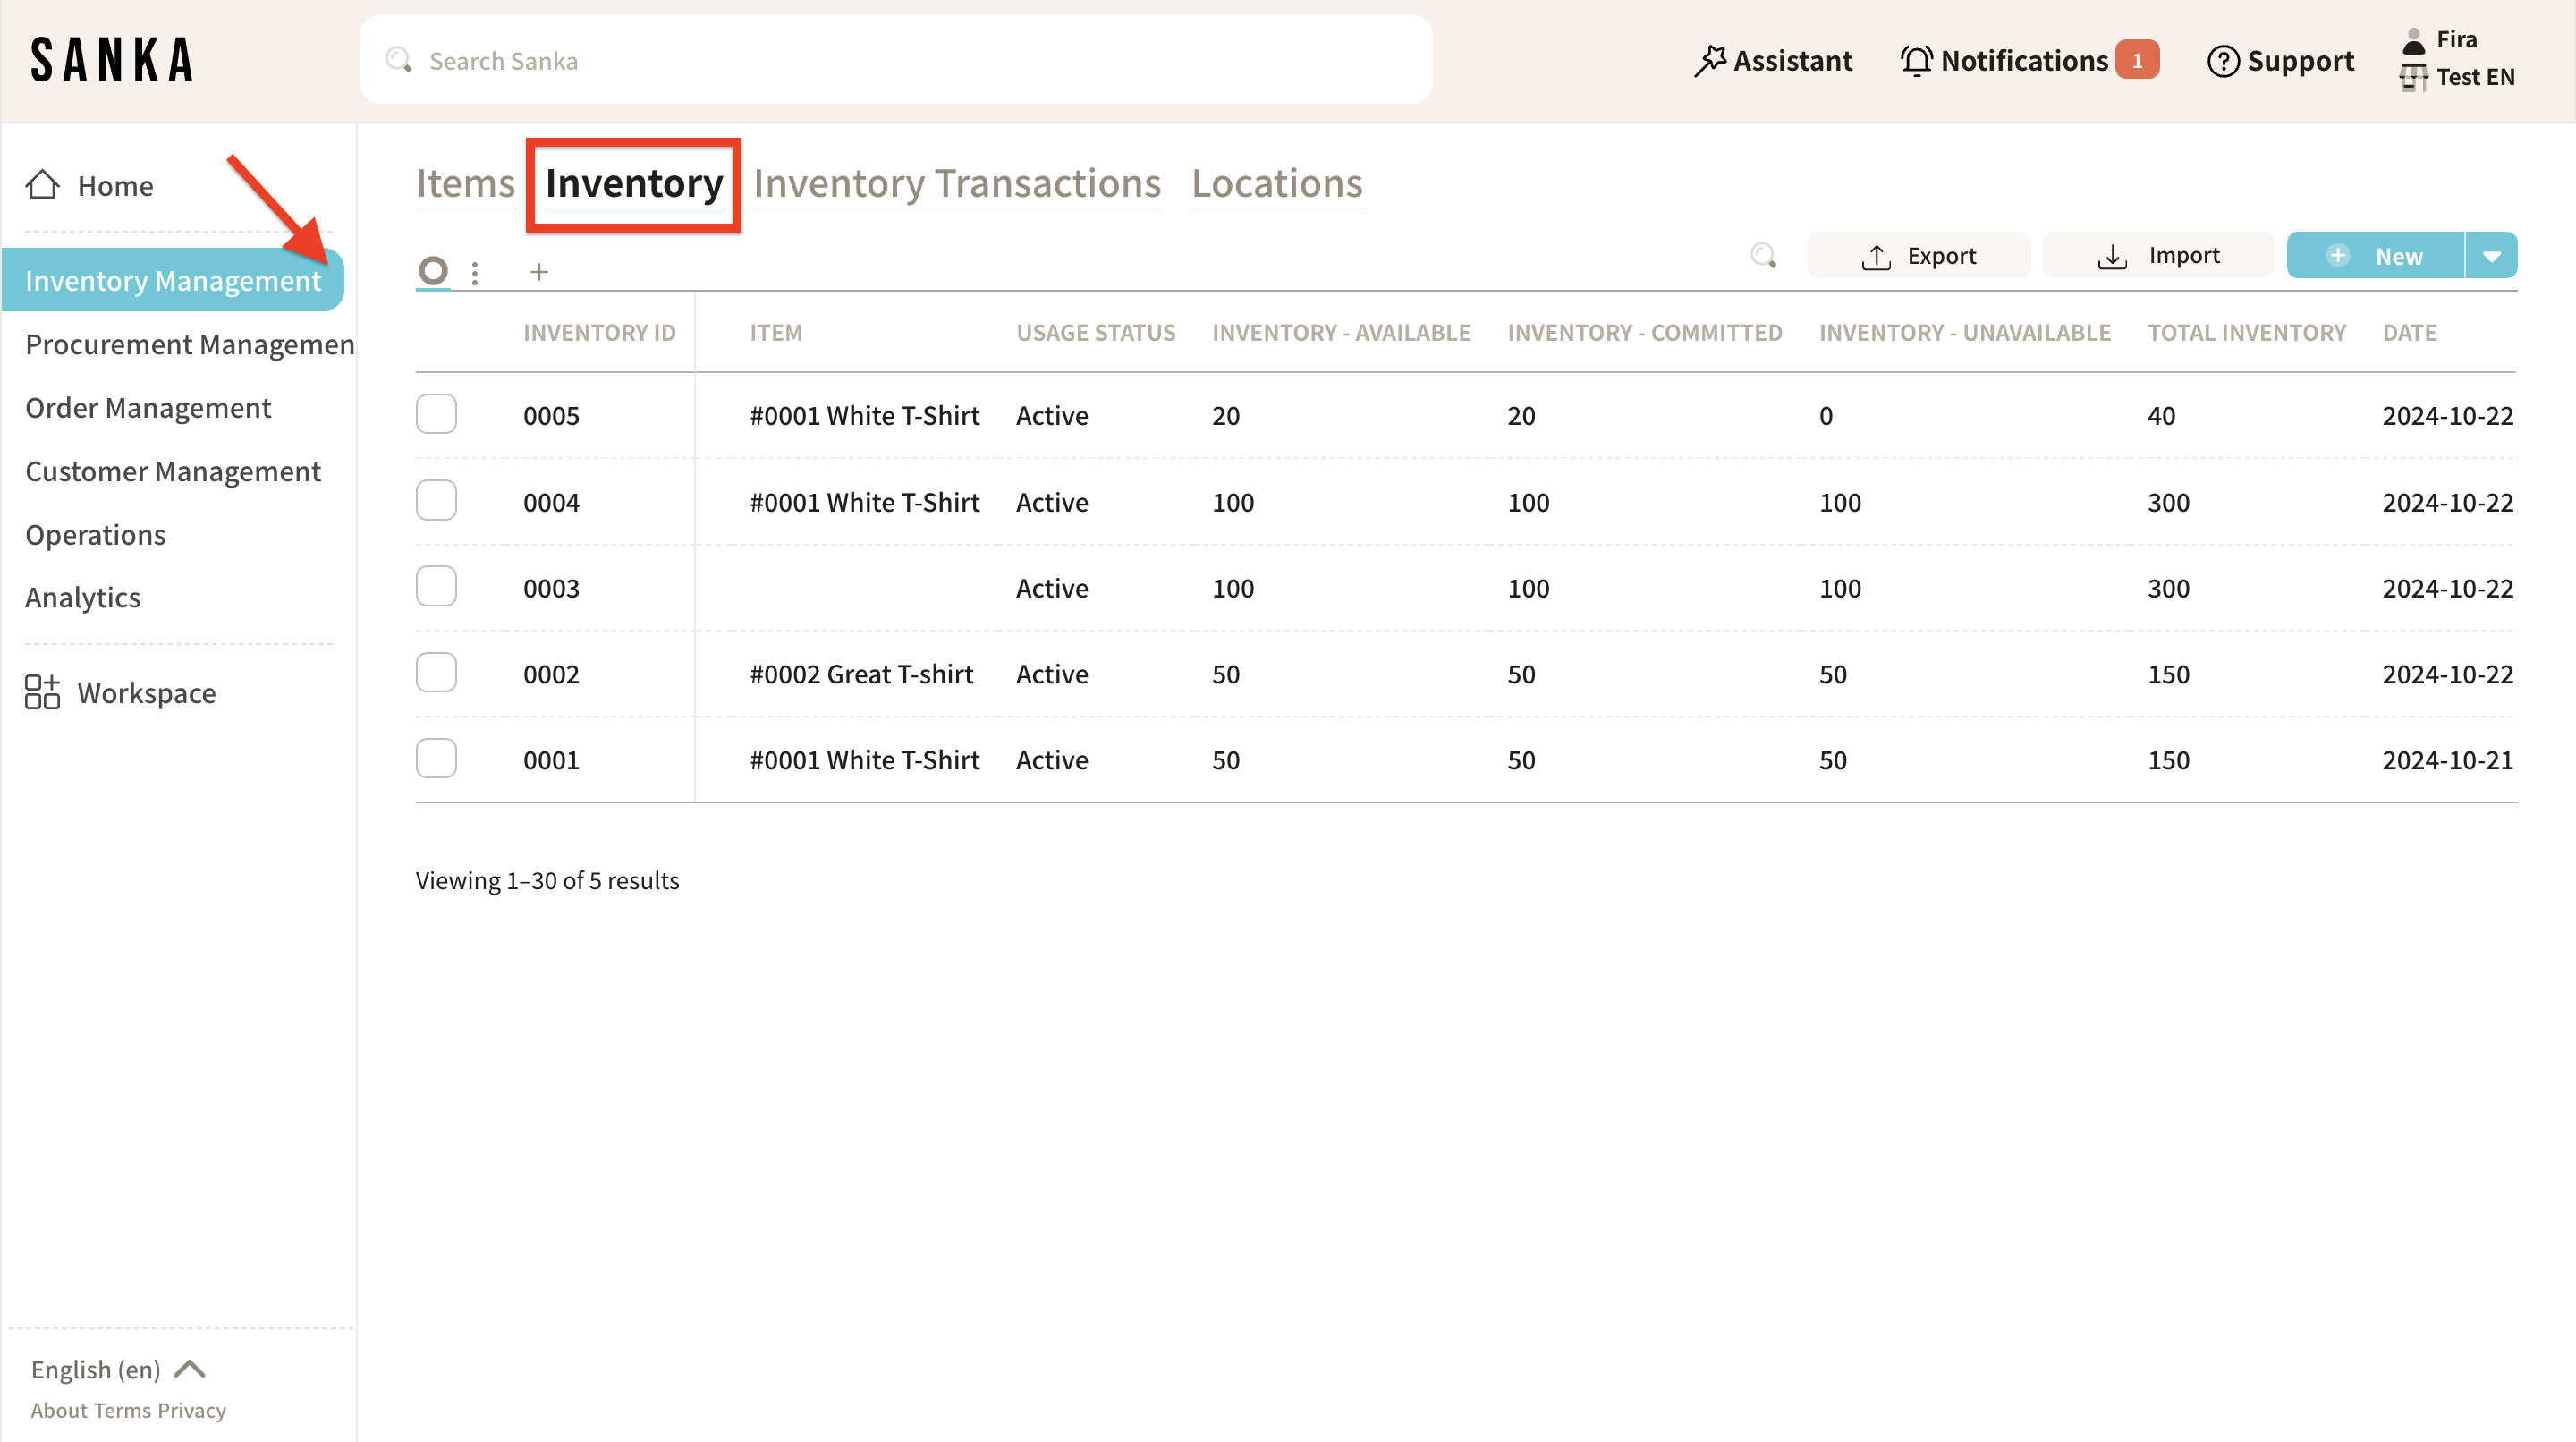
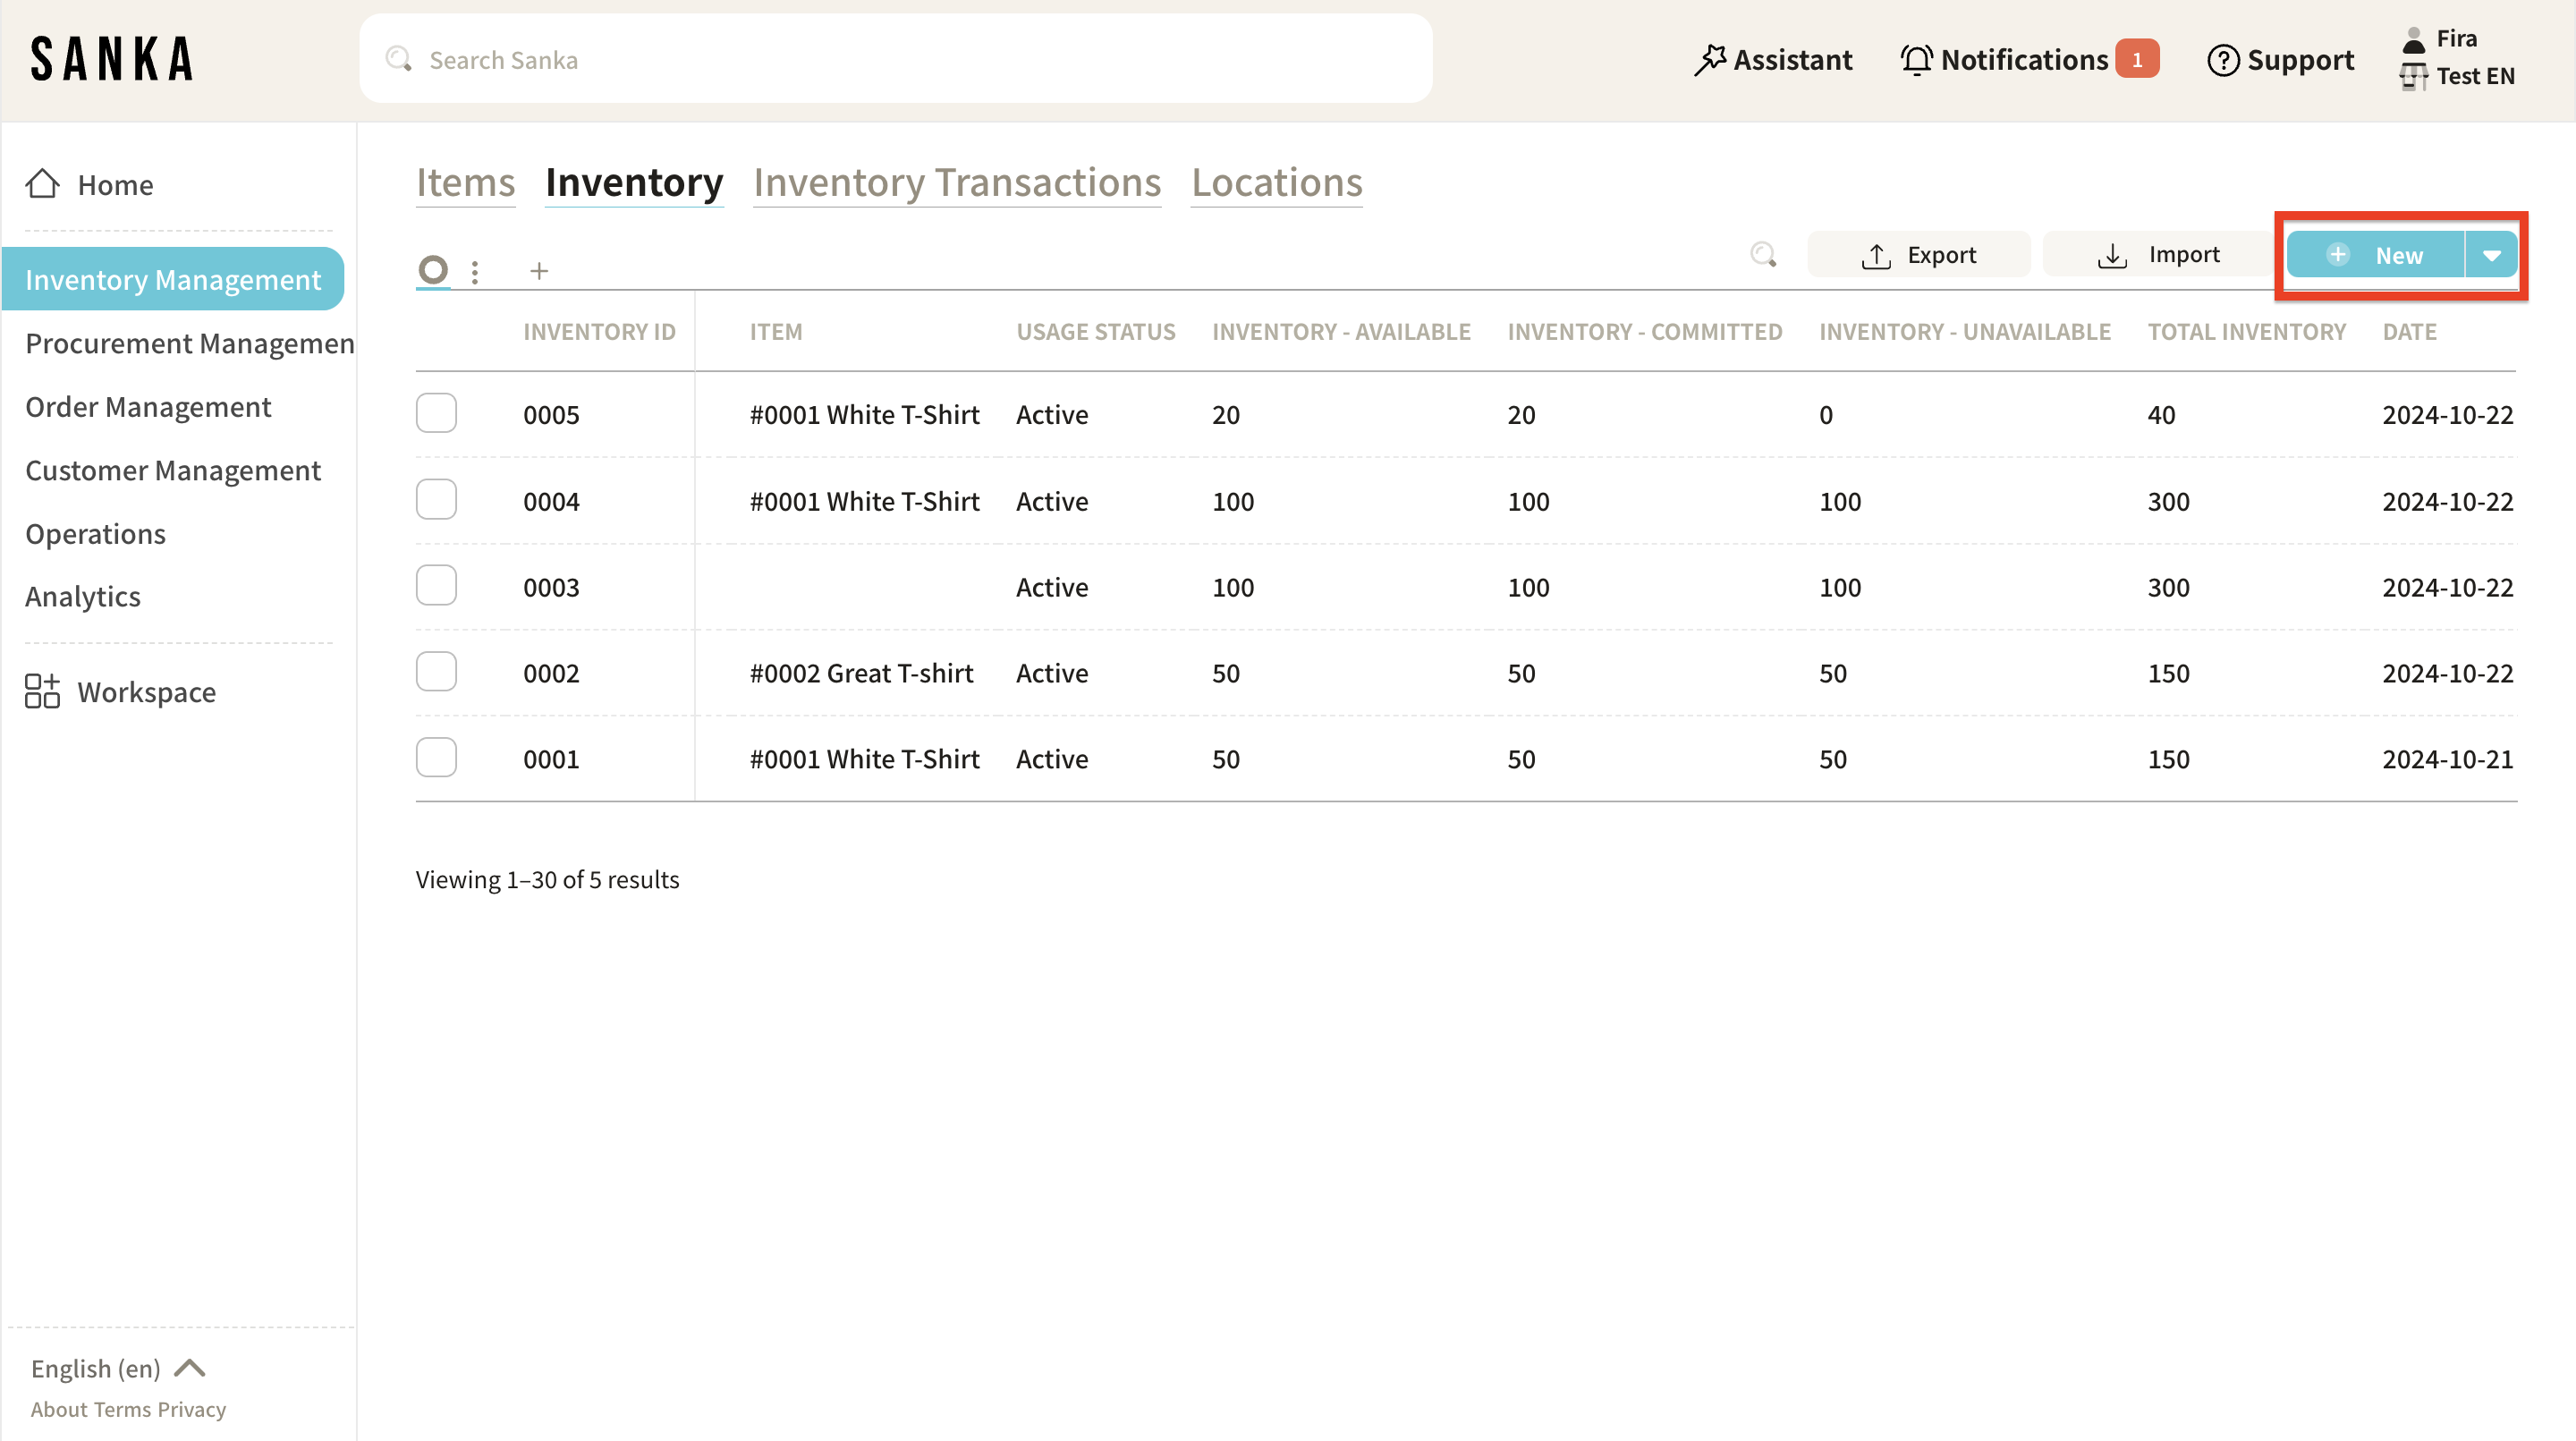
② Click the "New" button at the top right of the page.
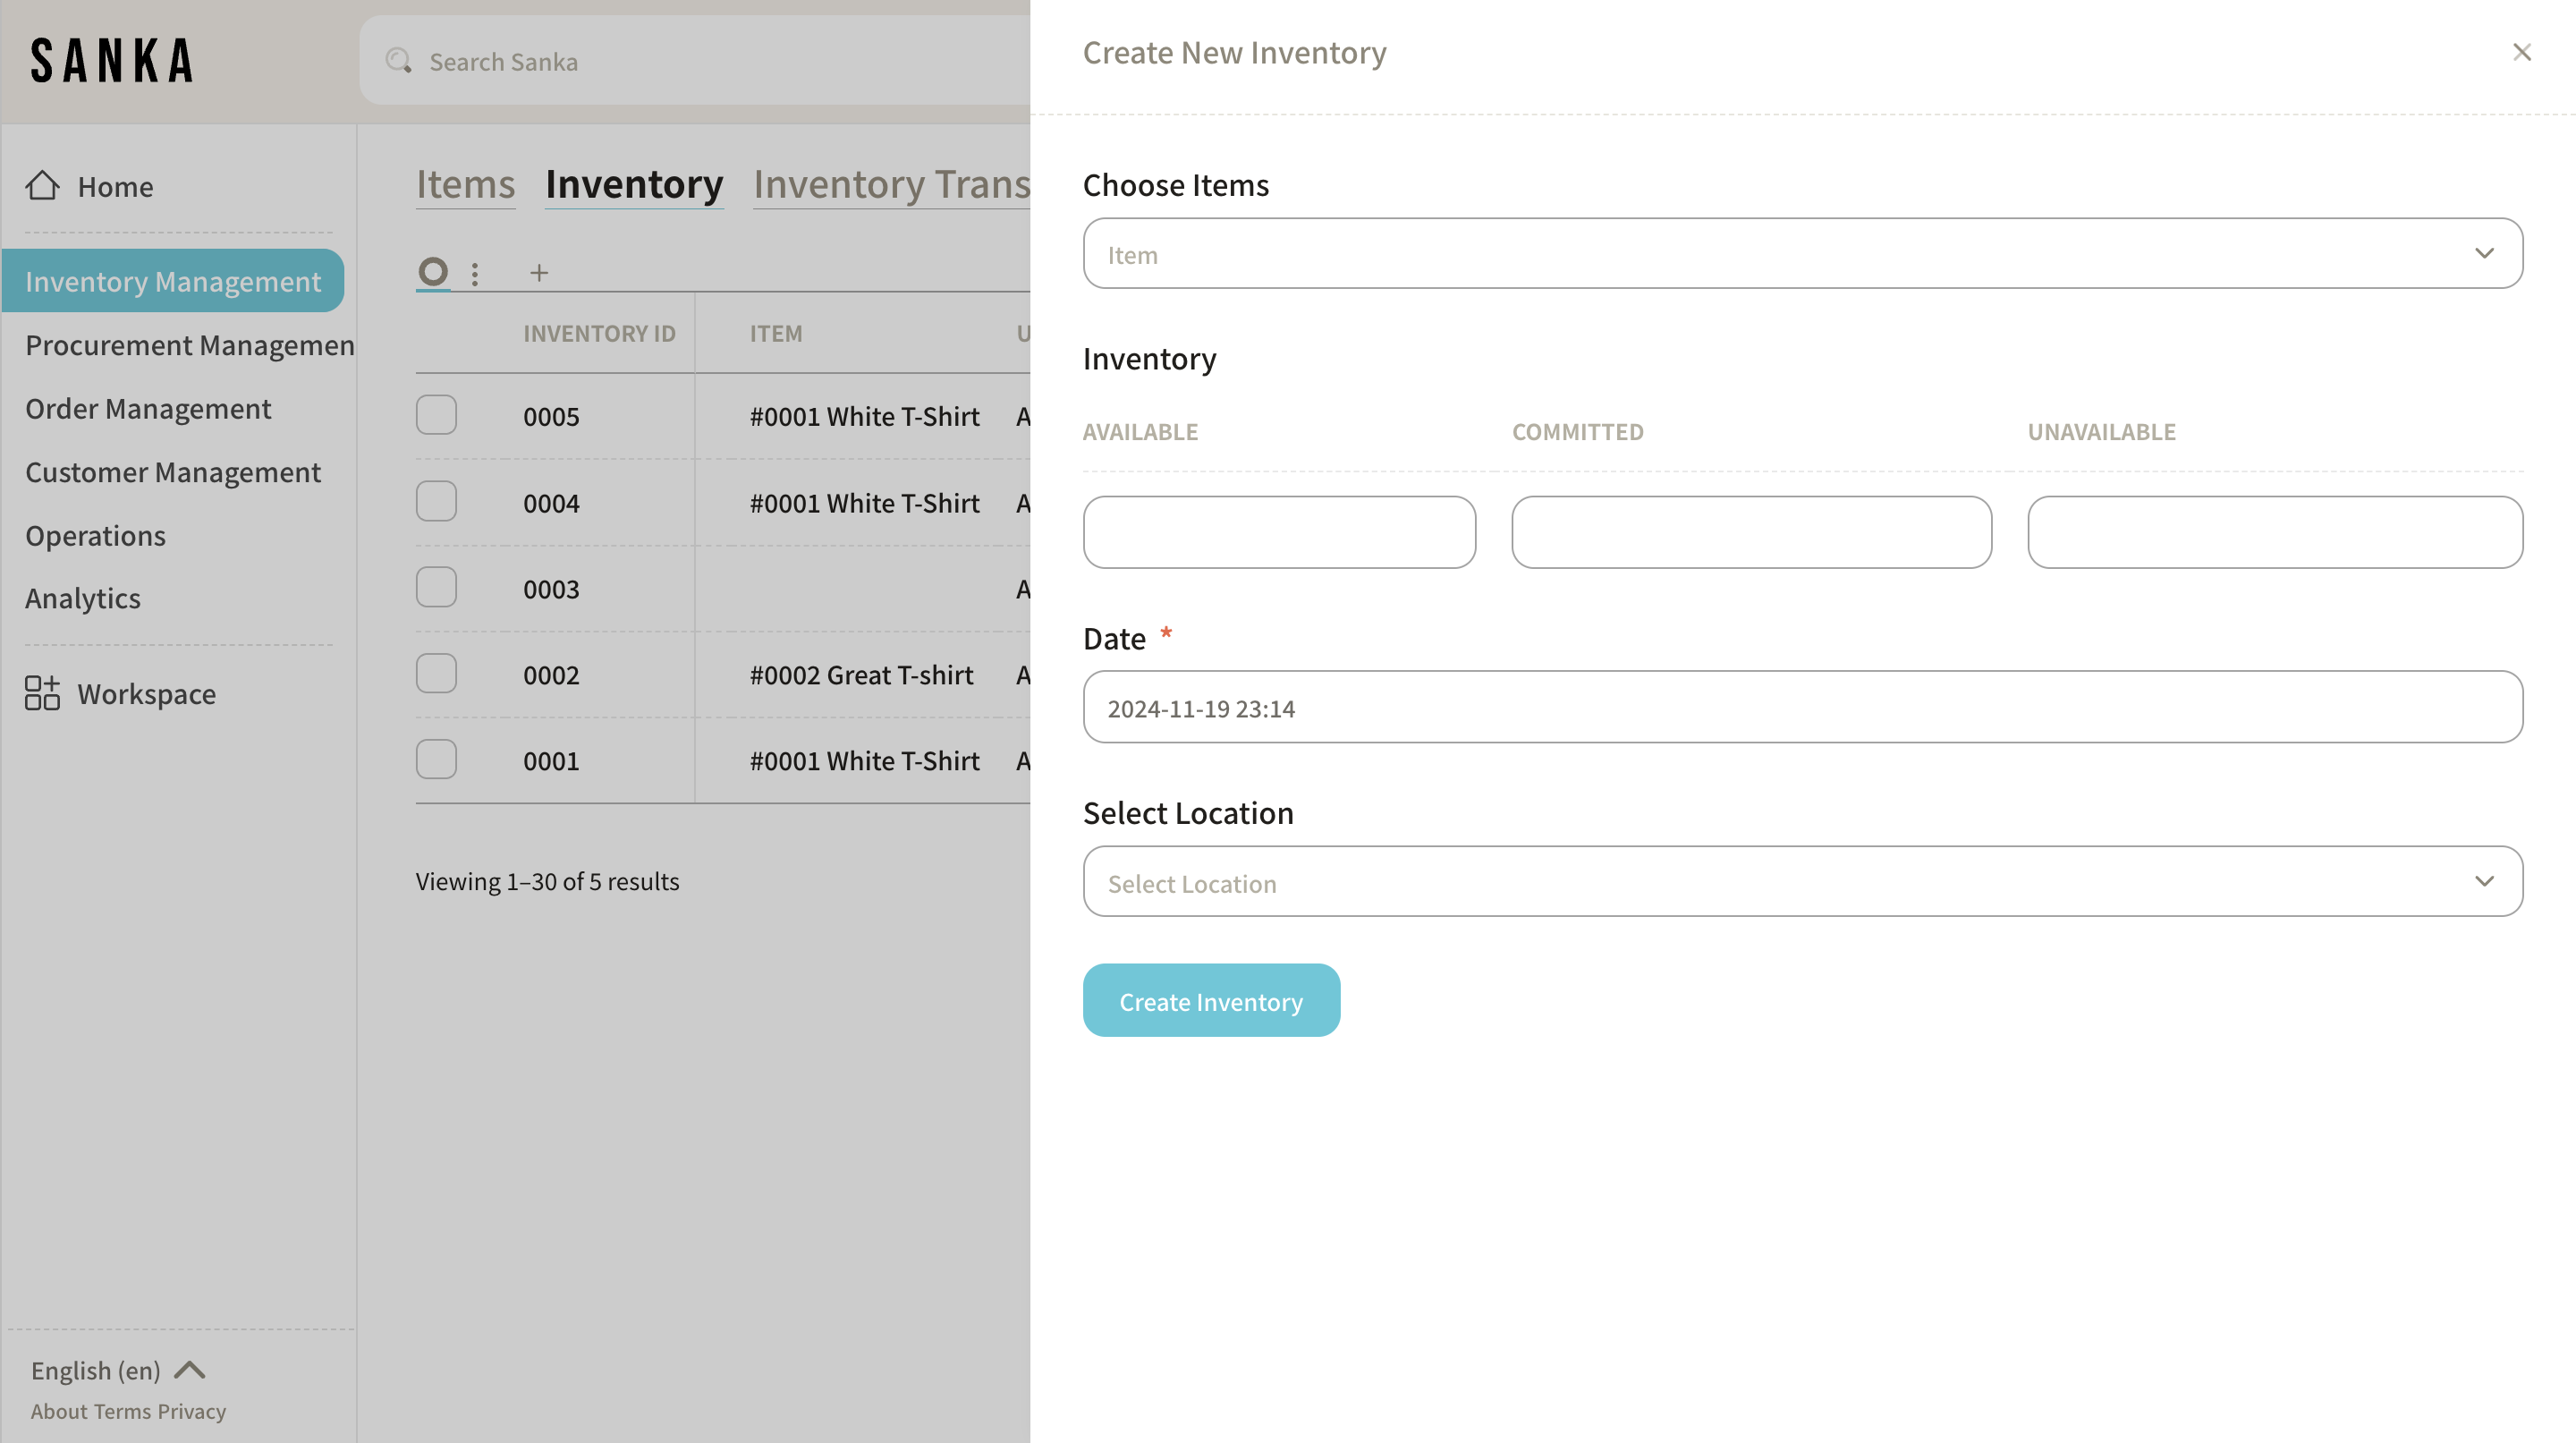
③ A "Create New Inventory" detail page will appear.
④ Click "Select Item" to show the items previously registered. See the item master creation guide here.
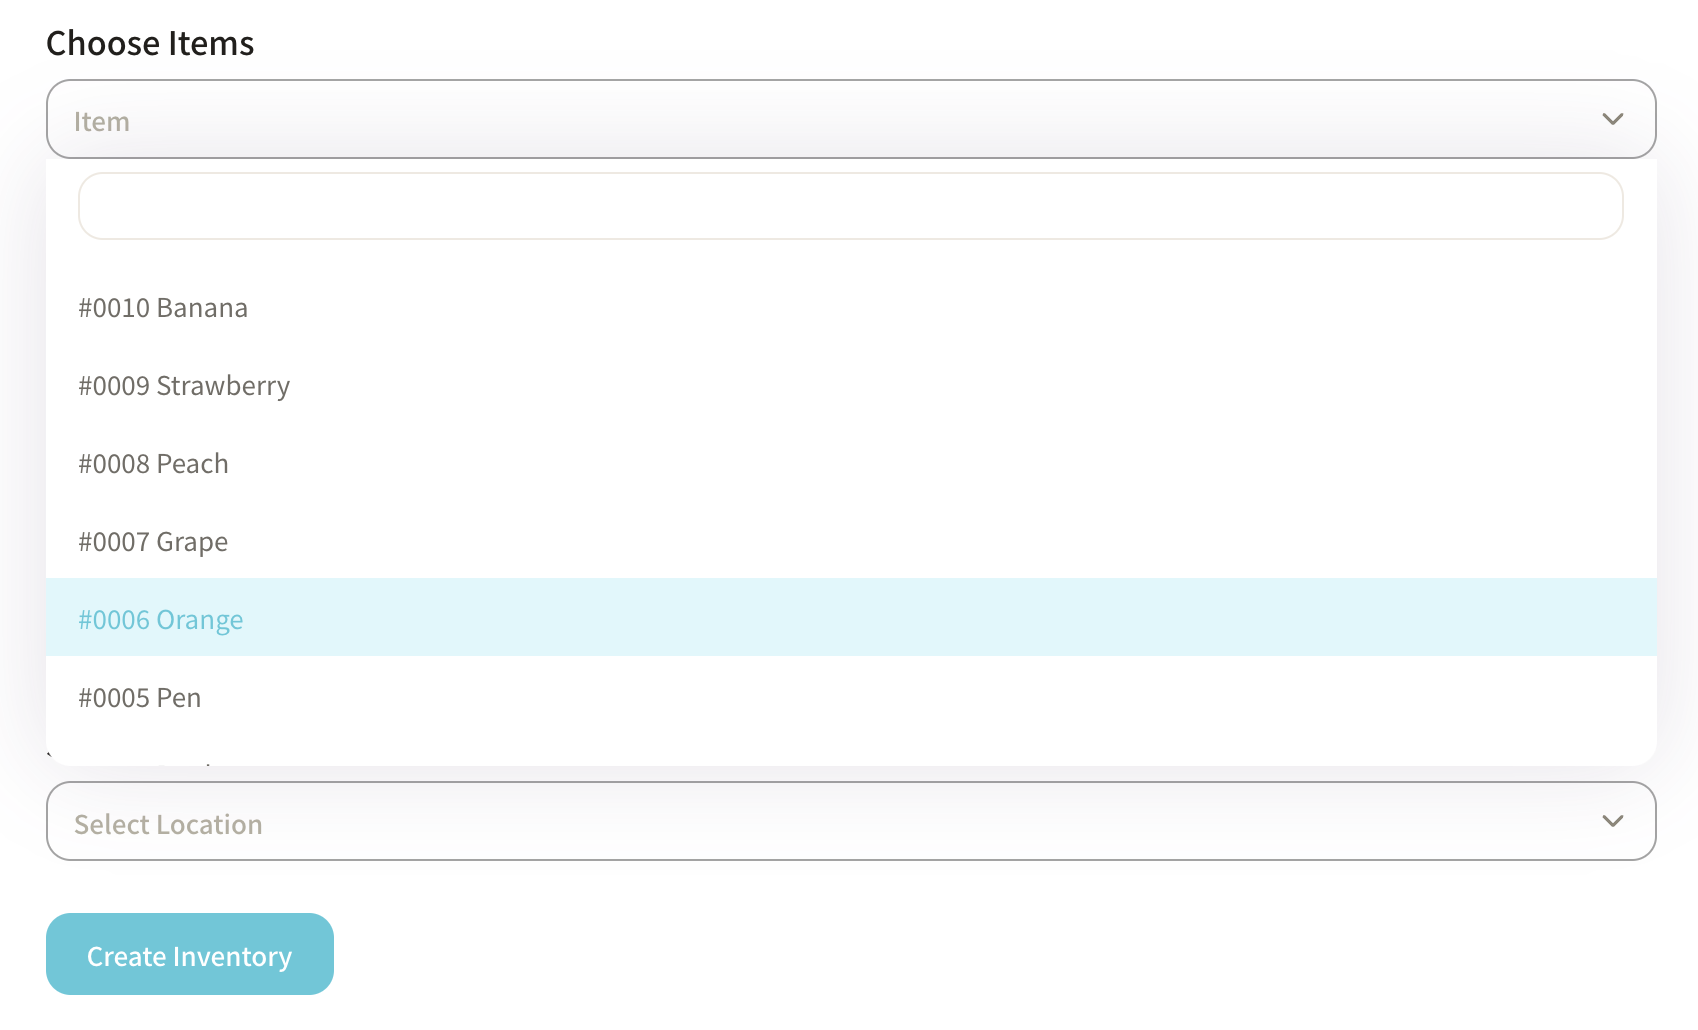
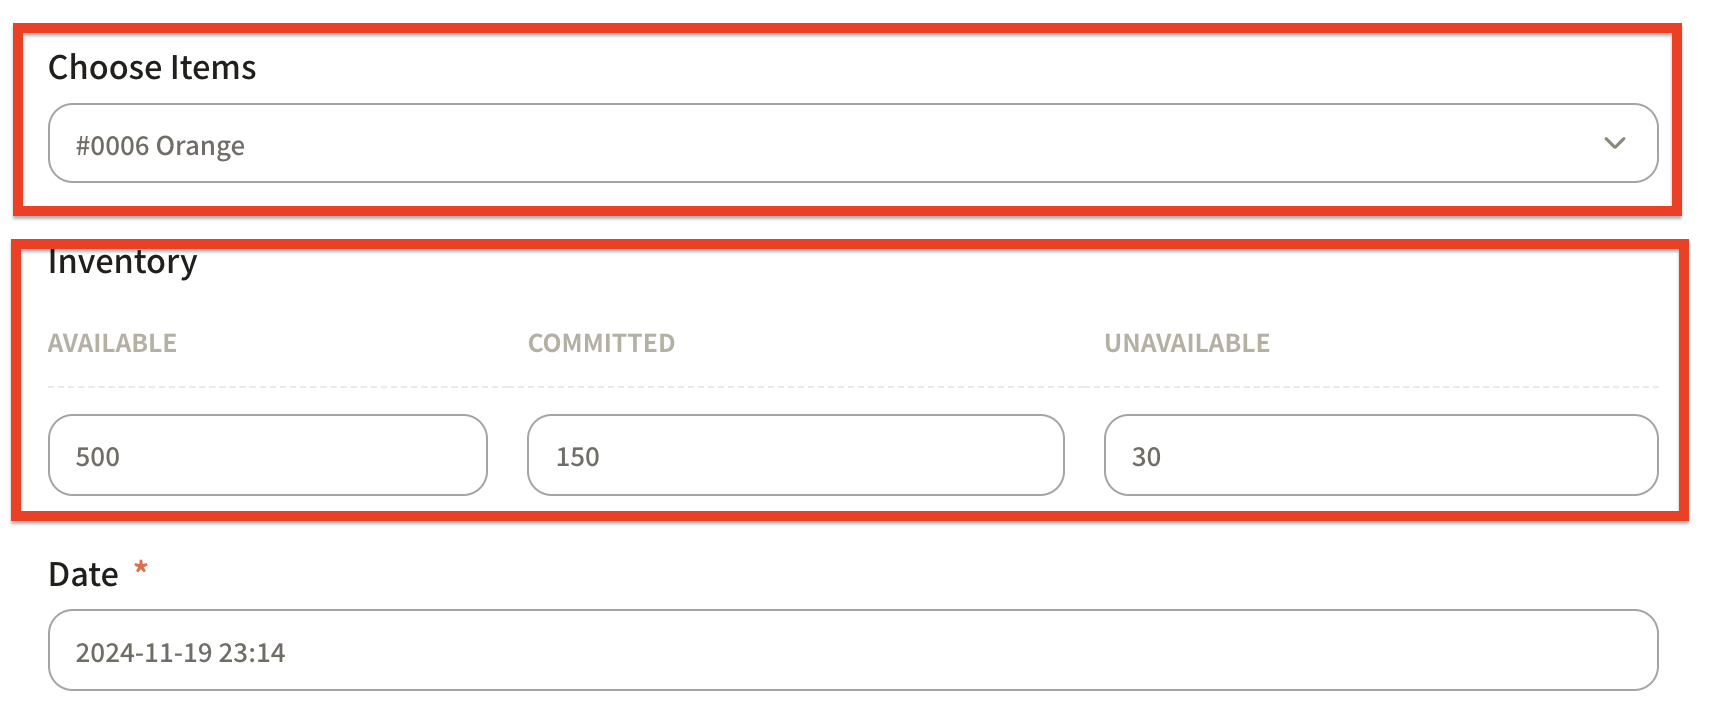
⑤ Choose the item for which you want to add inventory and input the inventory details. Adjust inventory quantity as follows:
- Available: Inventory that is available for sale.
- Committed: Inventory that has been ordered and is no longer available for sale.
- Unavailable: Damaged or unsellable inventory.
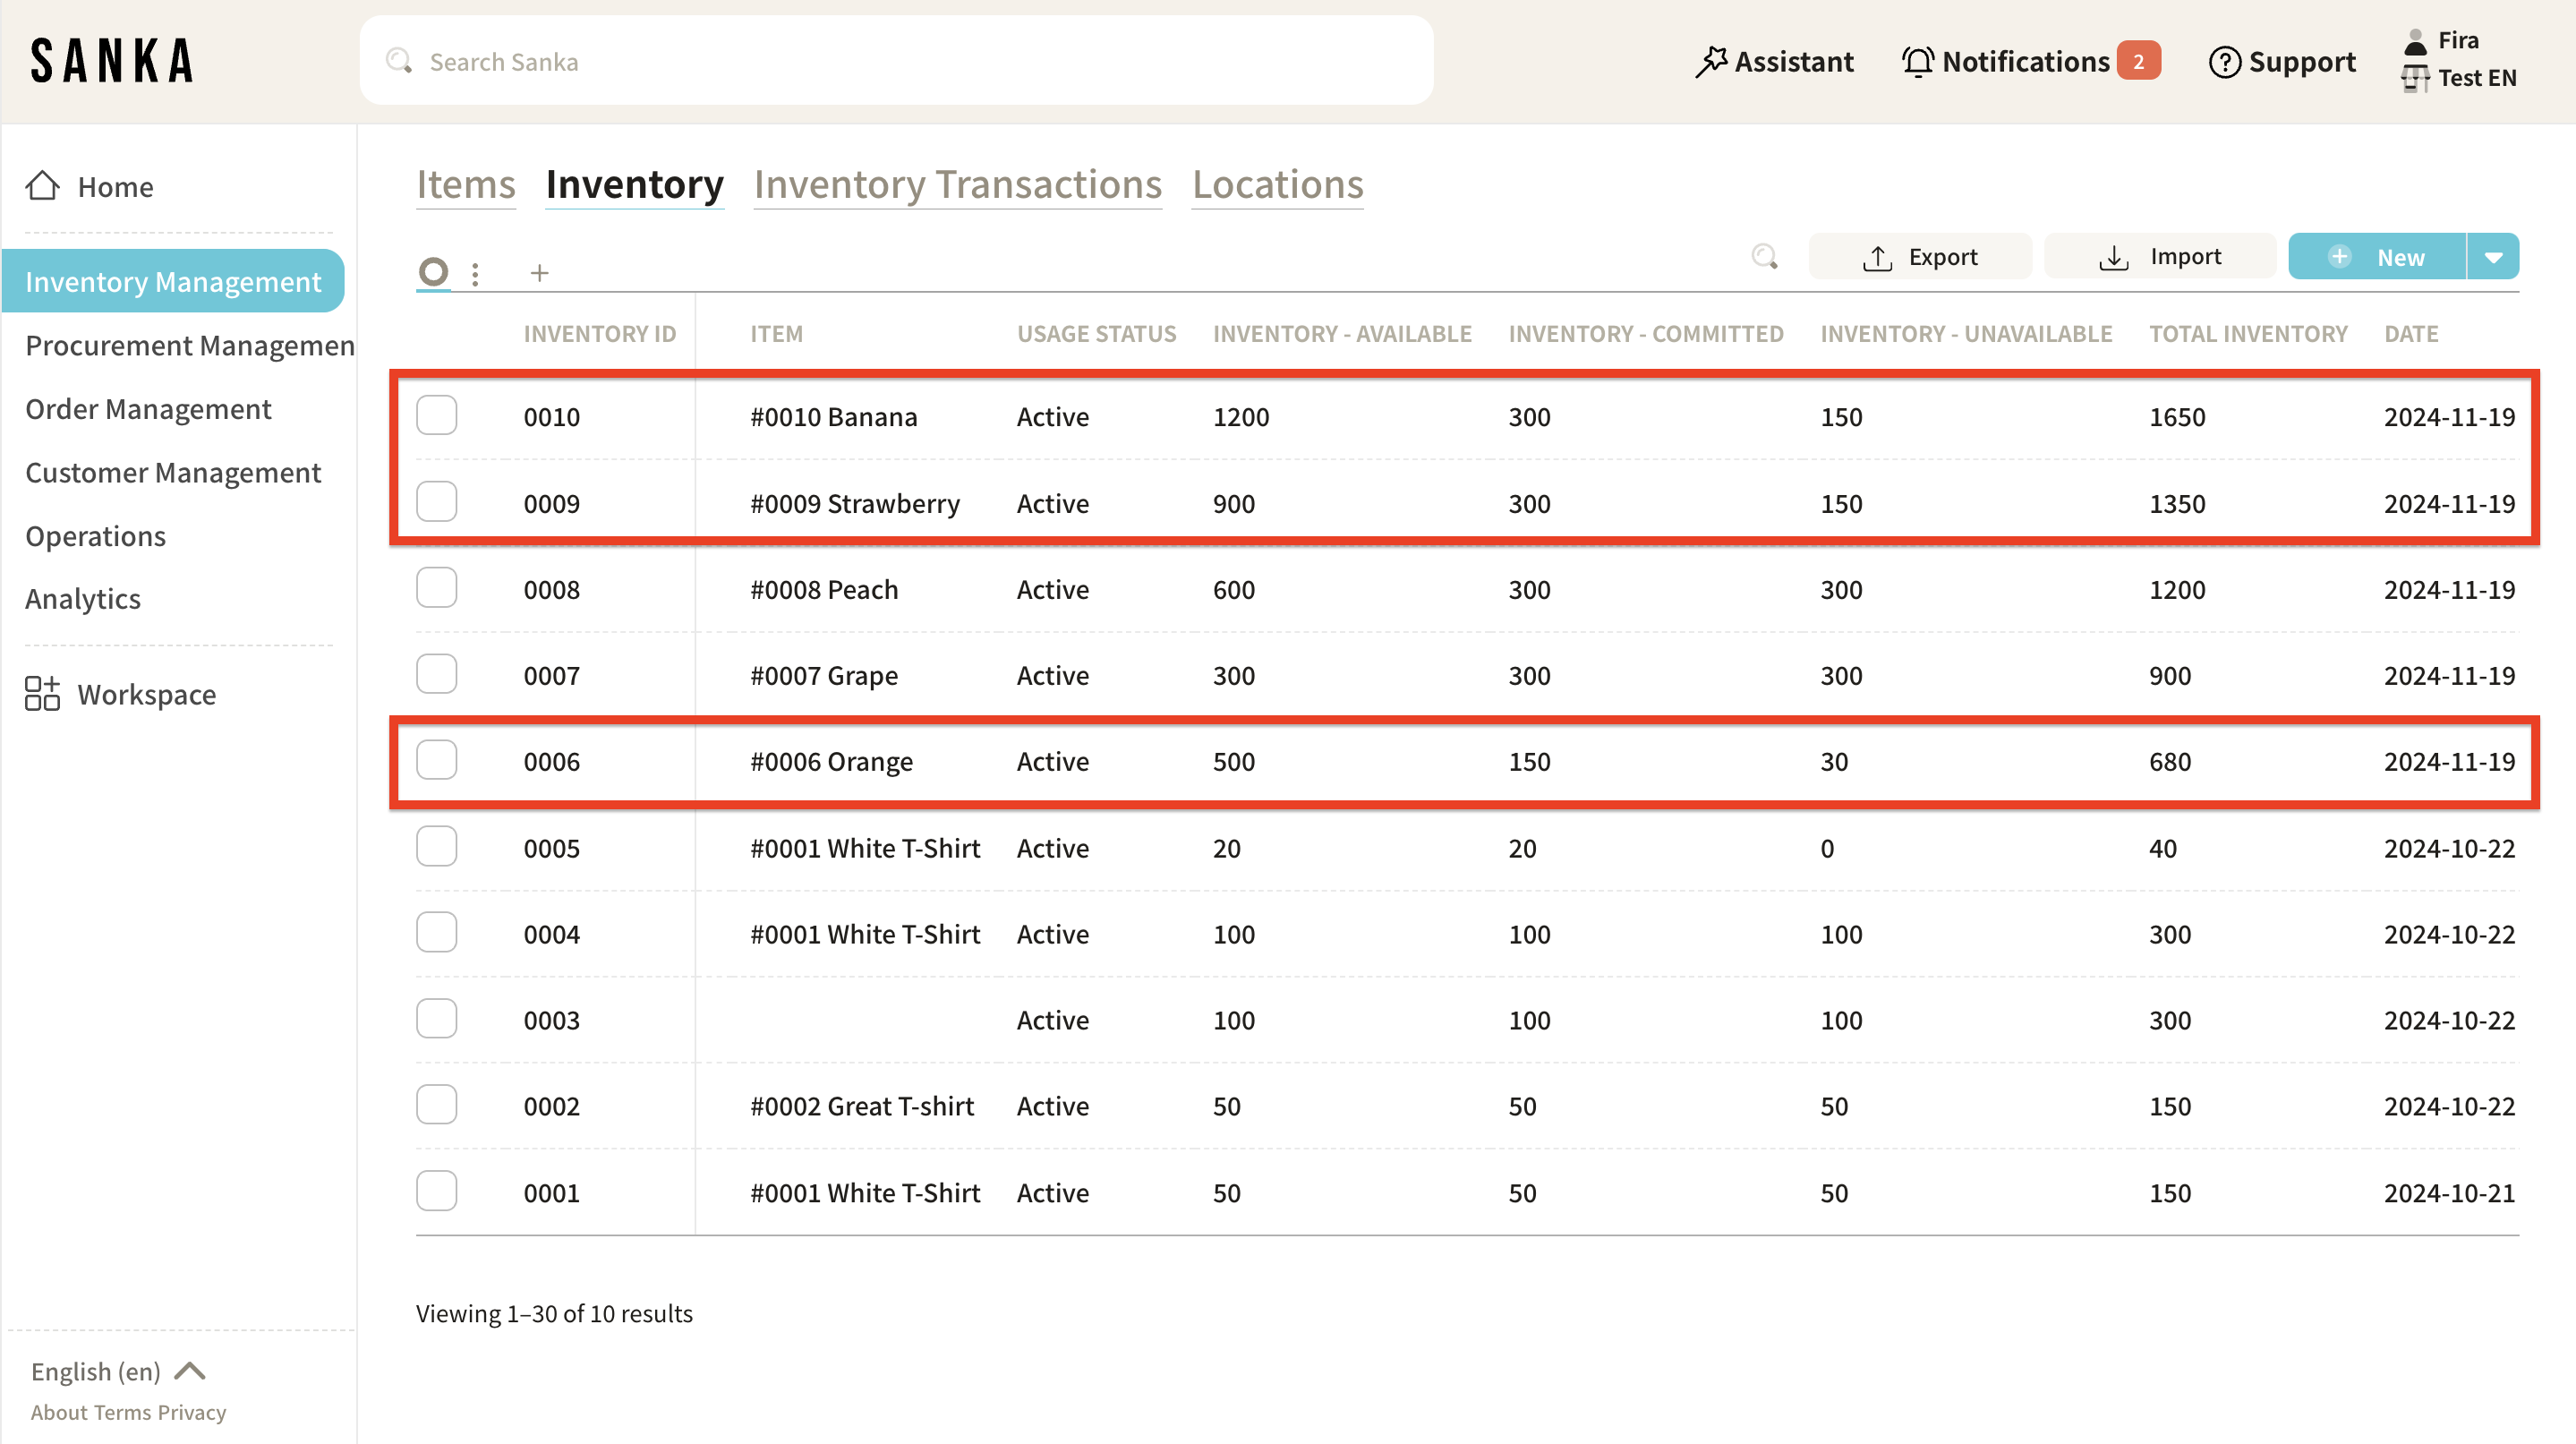
Example registration:
- Item: #0006 Orange
- Available: 500 units
- Committed: 150 units
- Unavailable: 30 units
※ The "Date" will automatically be set to the current date when creating the inventory.
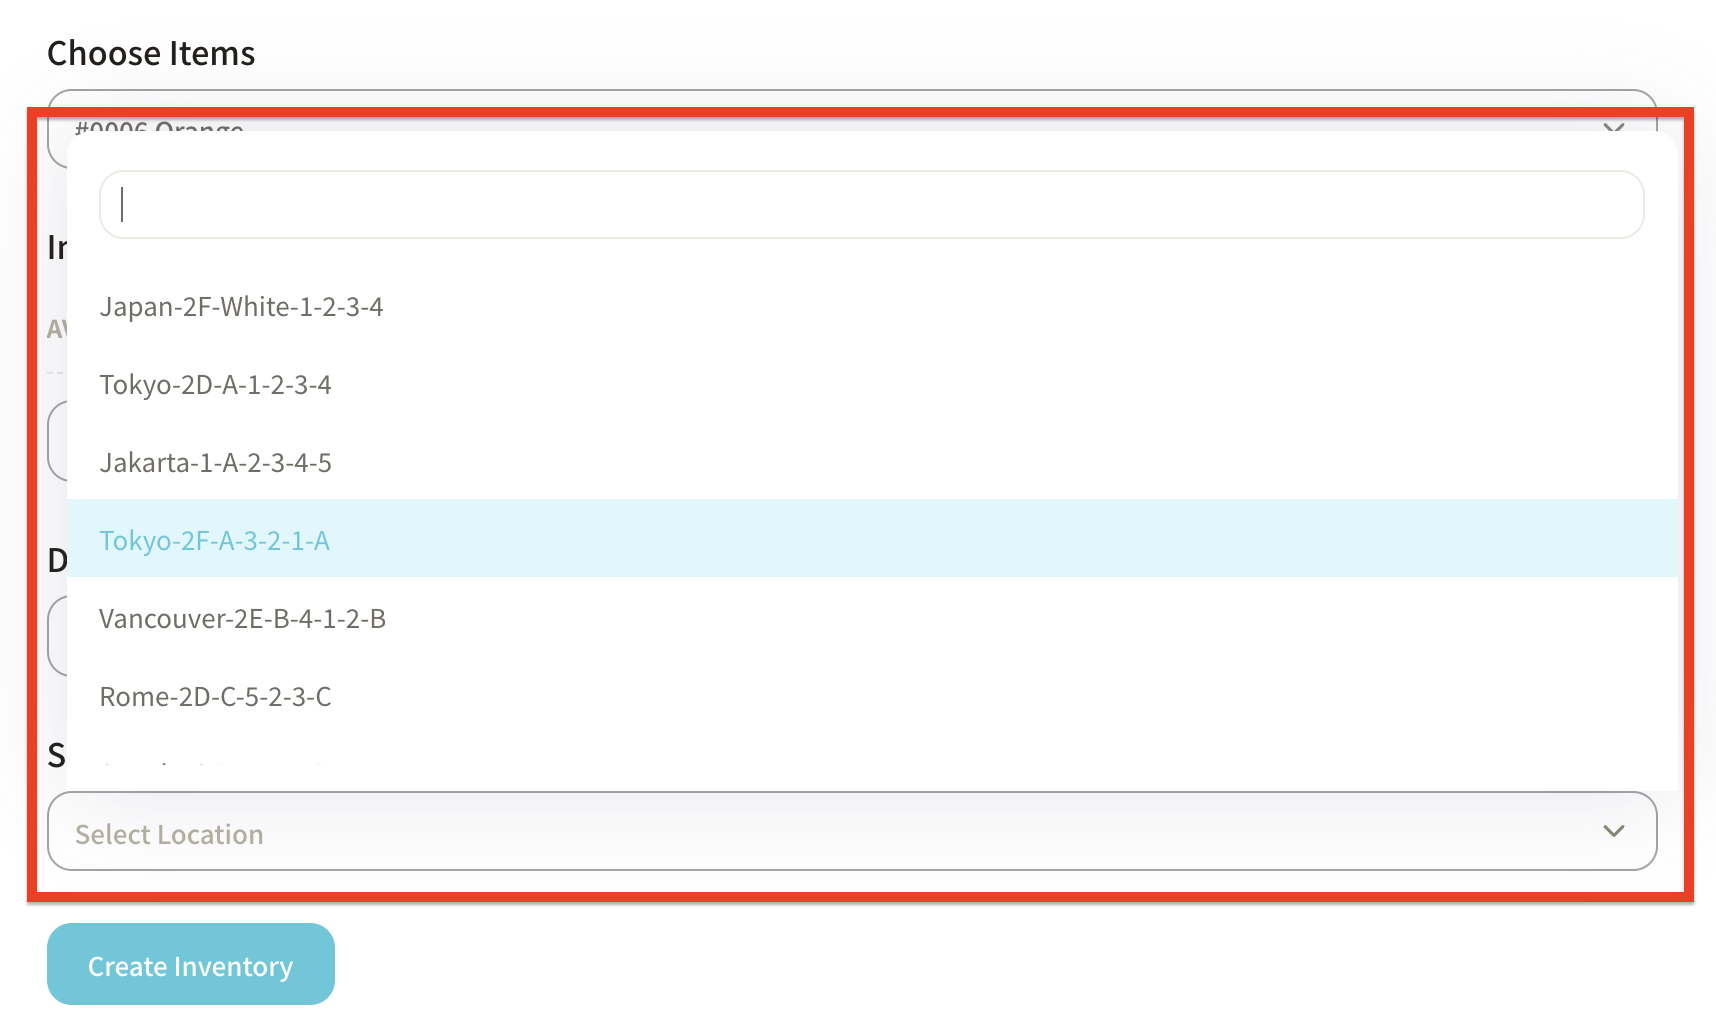
⑥ Click "Location" to show the registered storage locations. See location registration guide here.
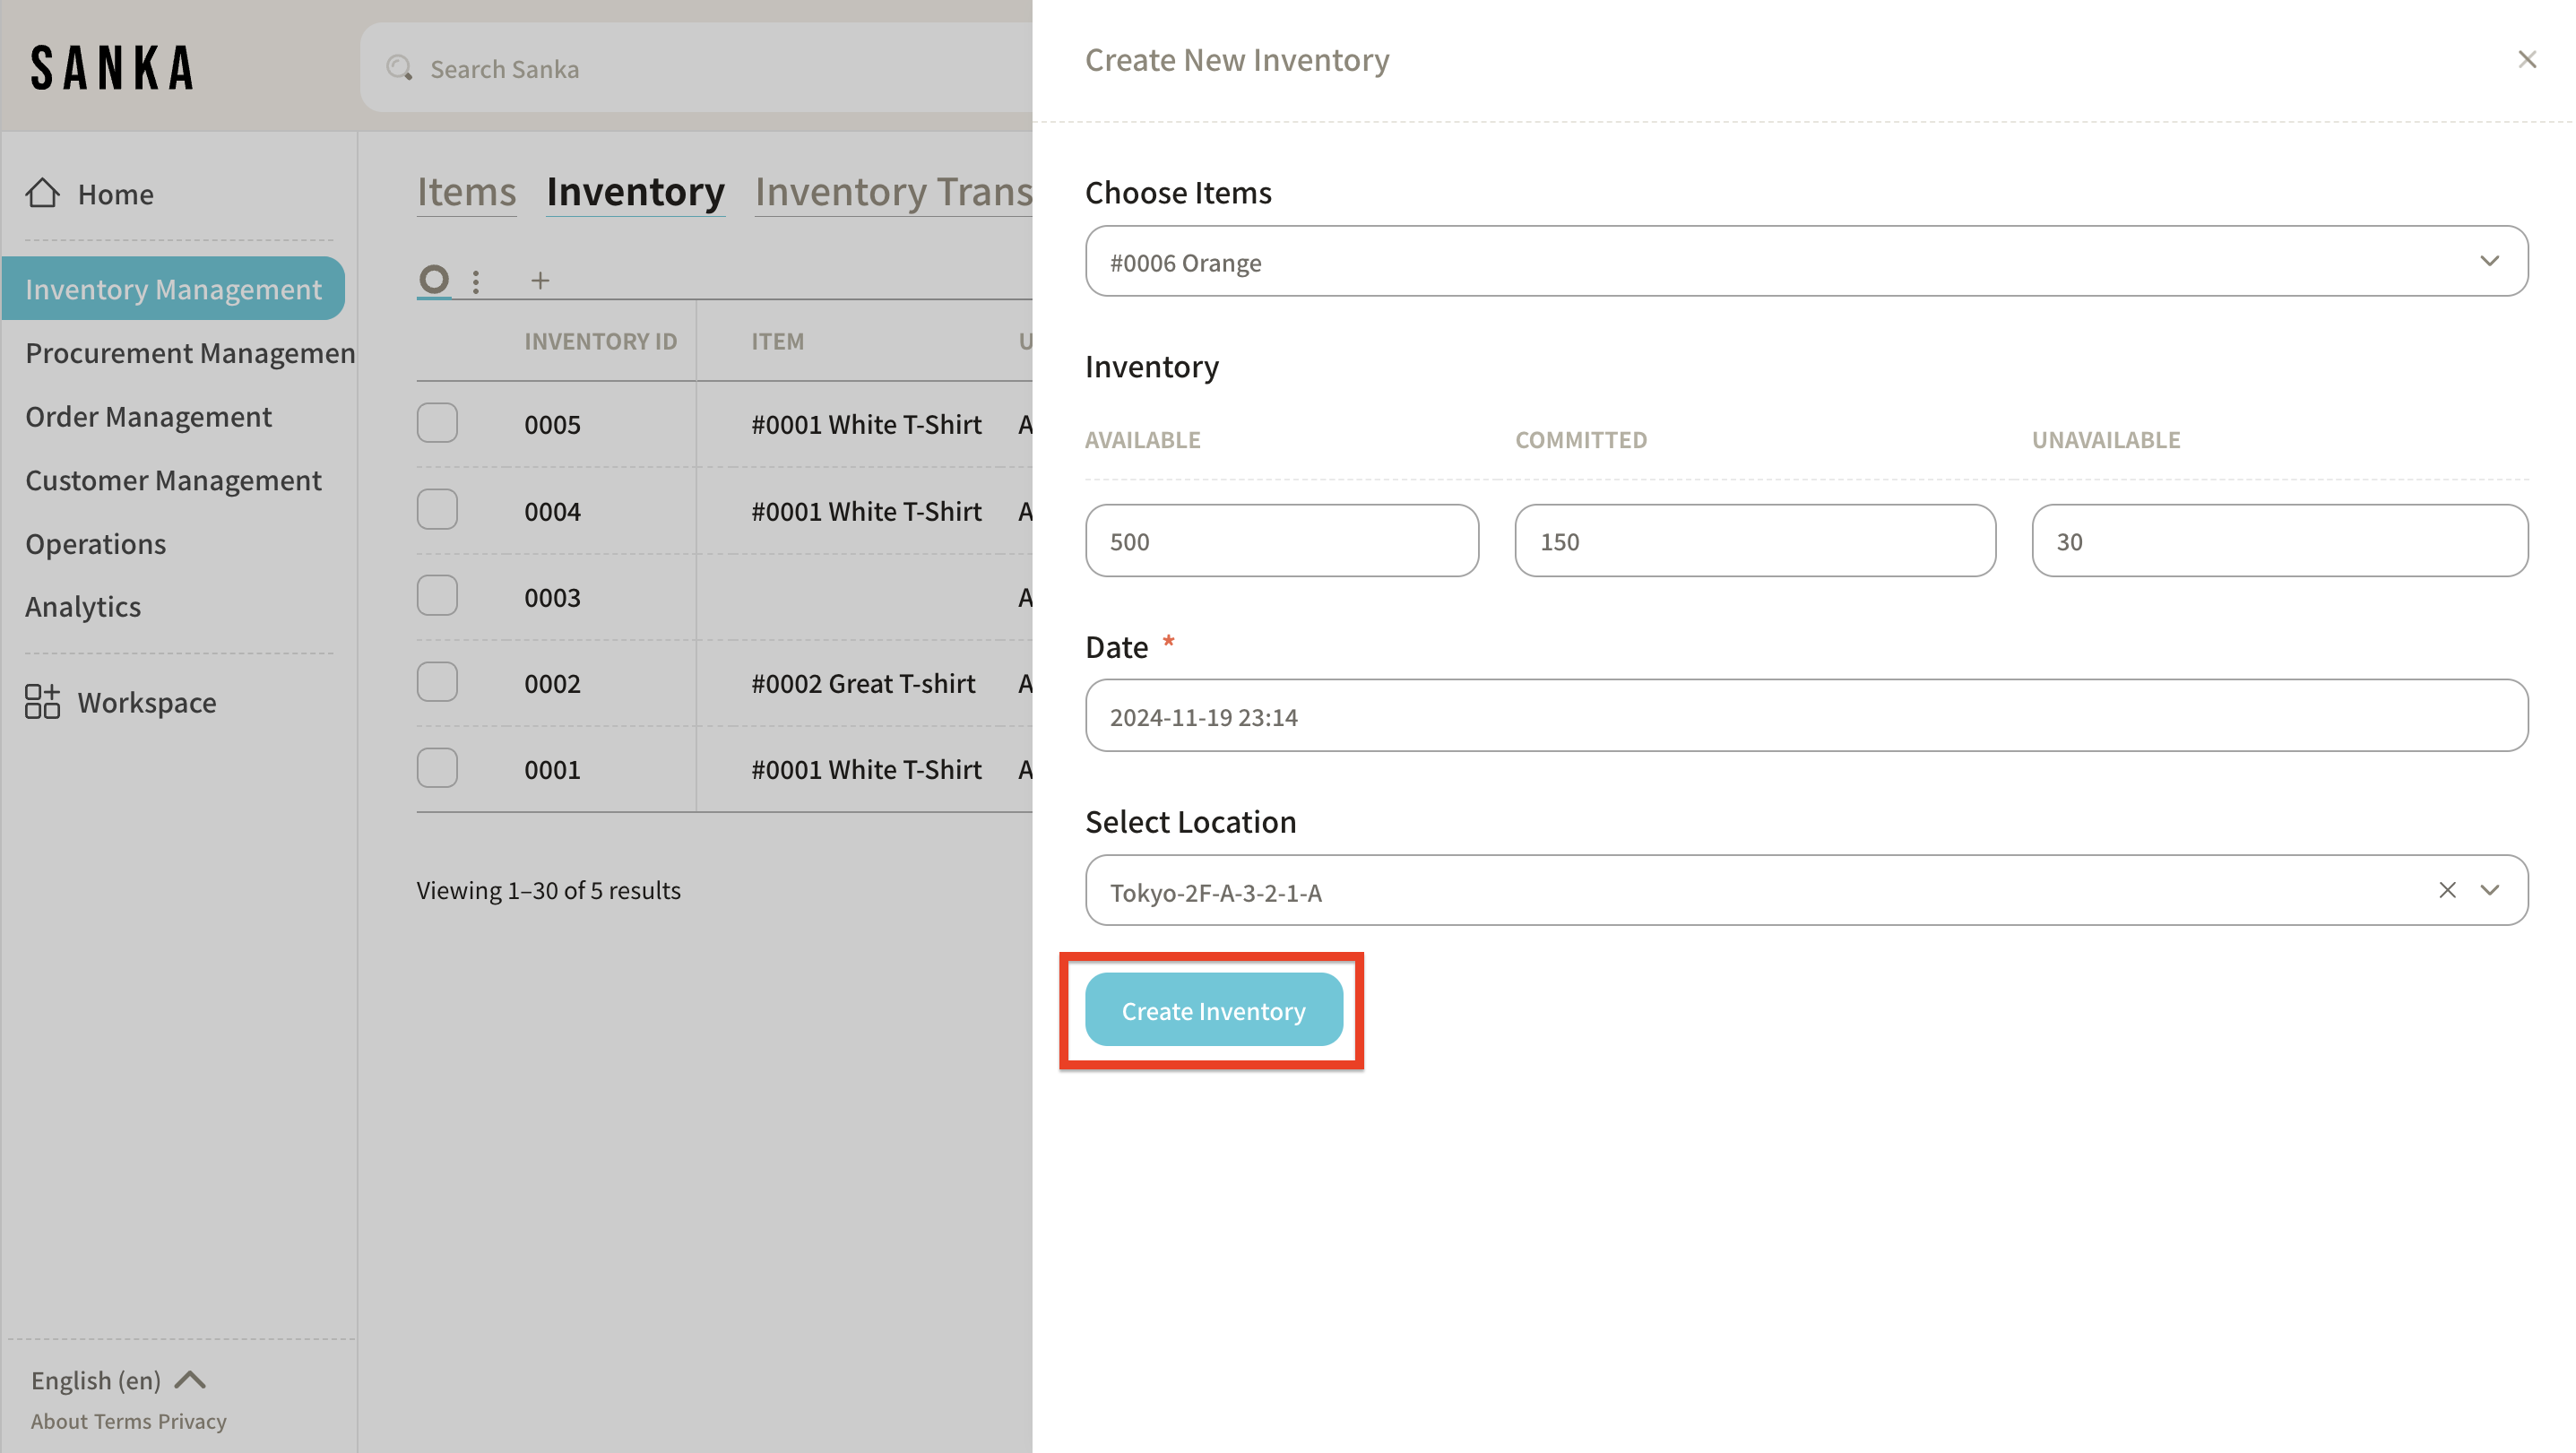
⑦ Click "Create Inventory."
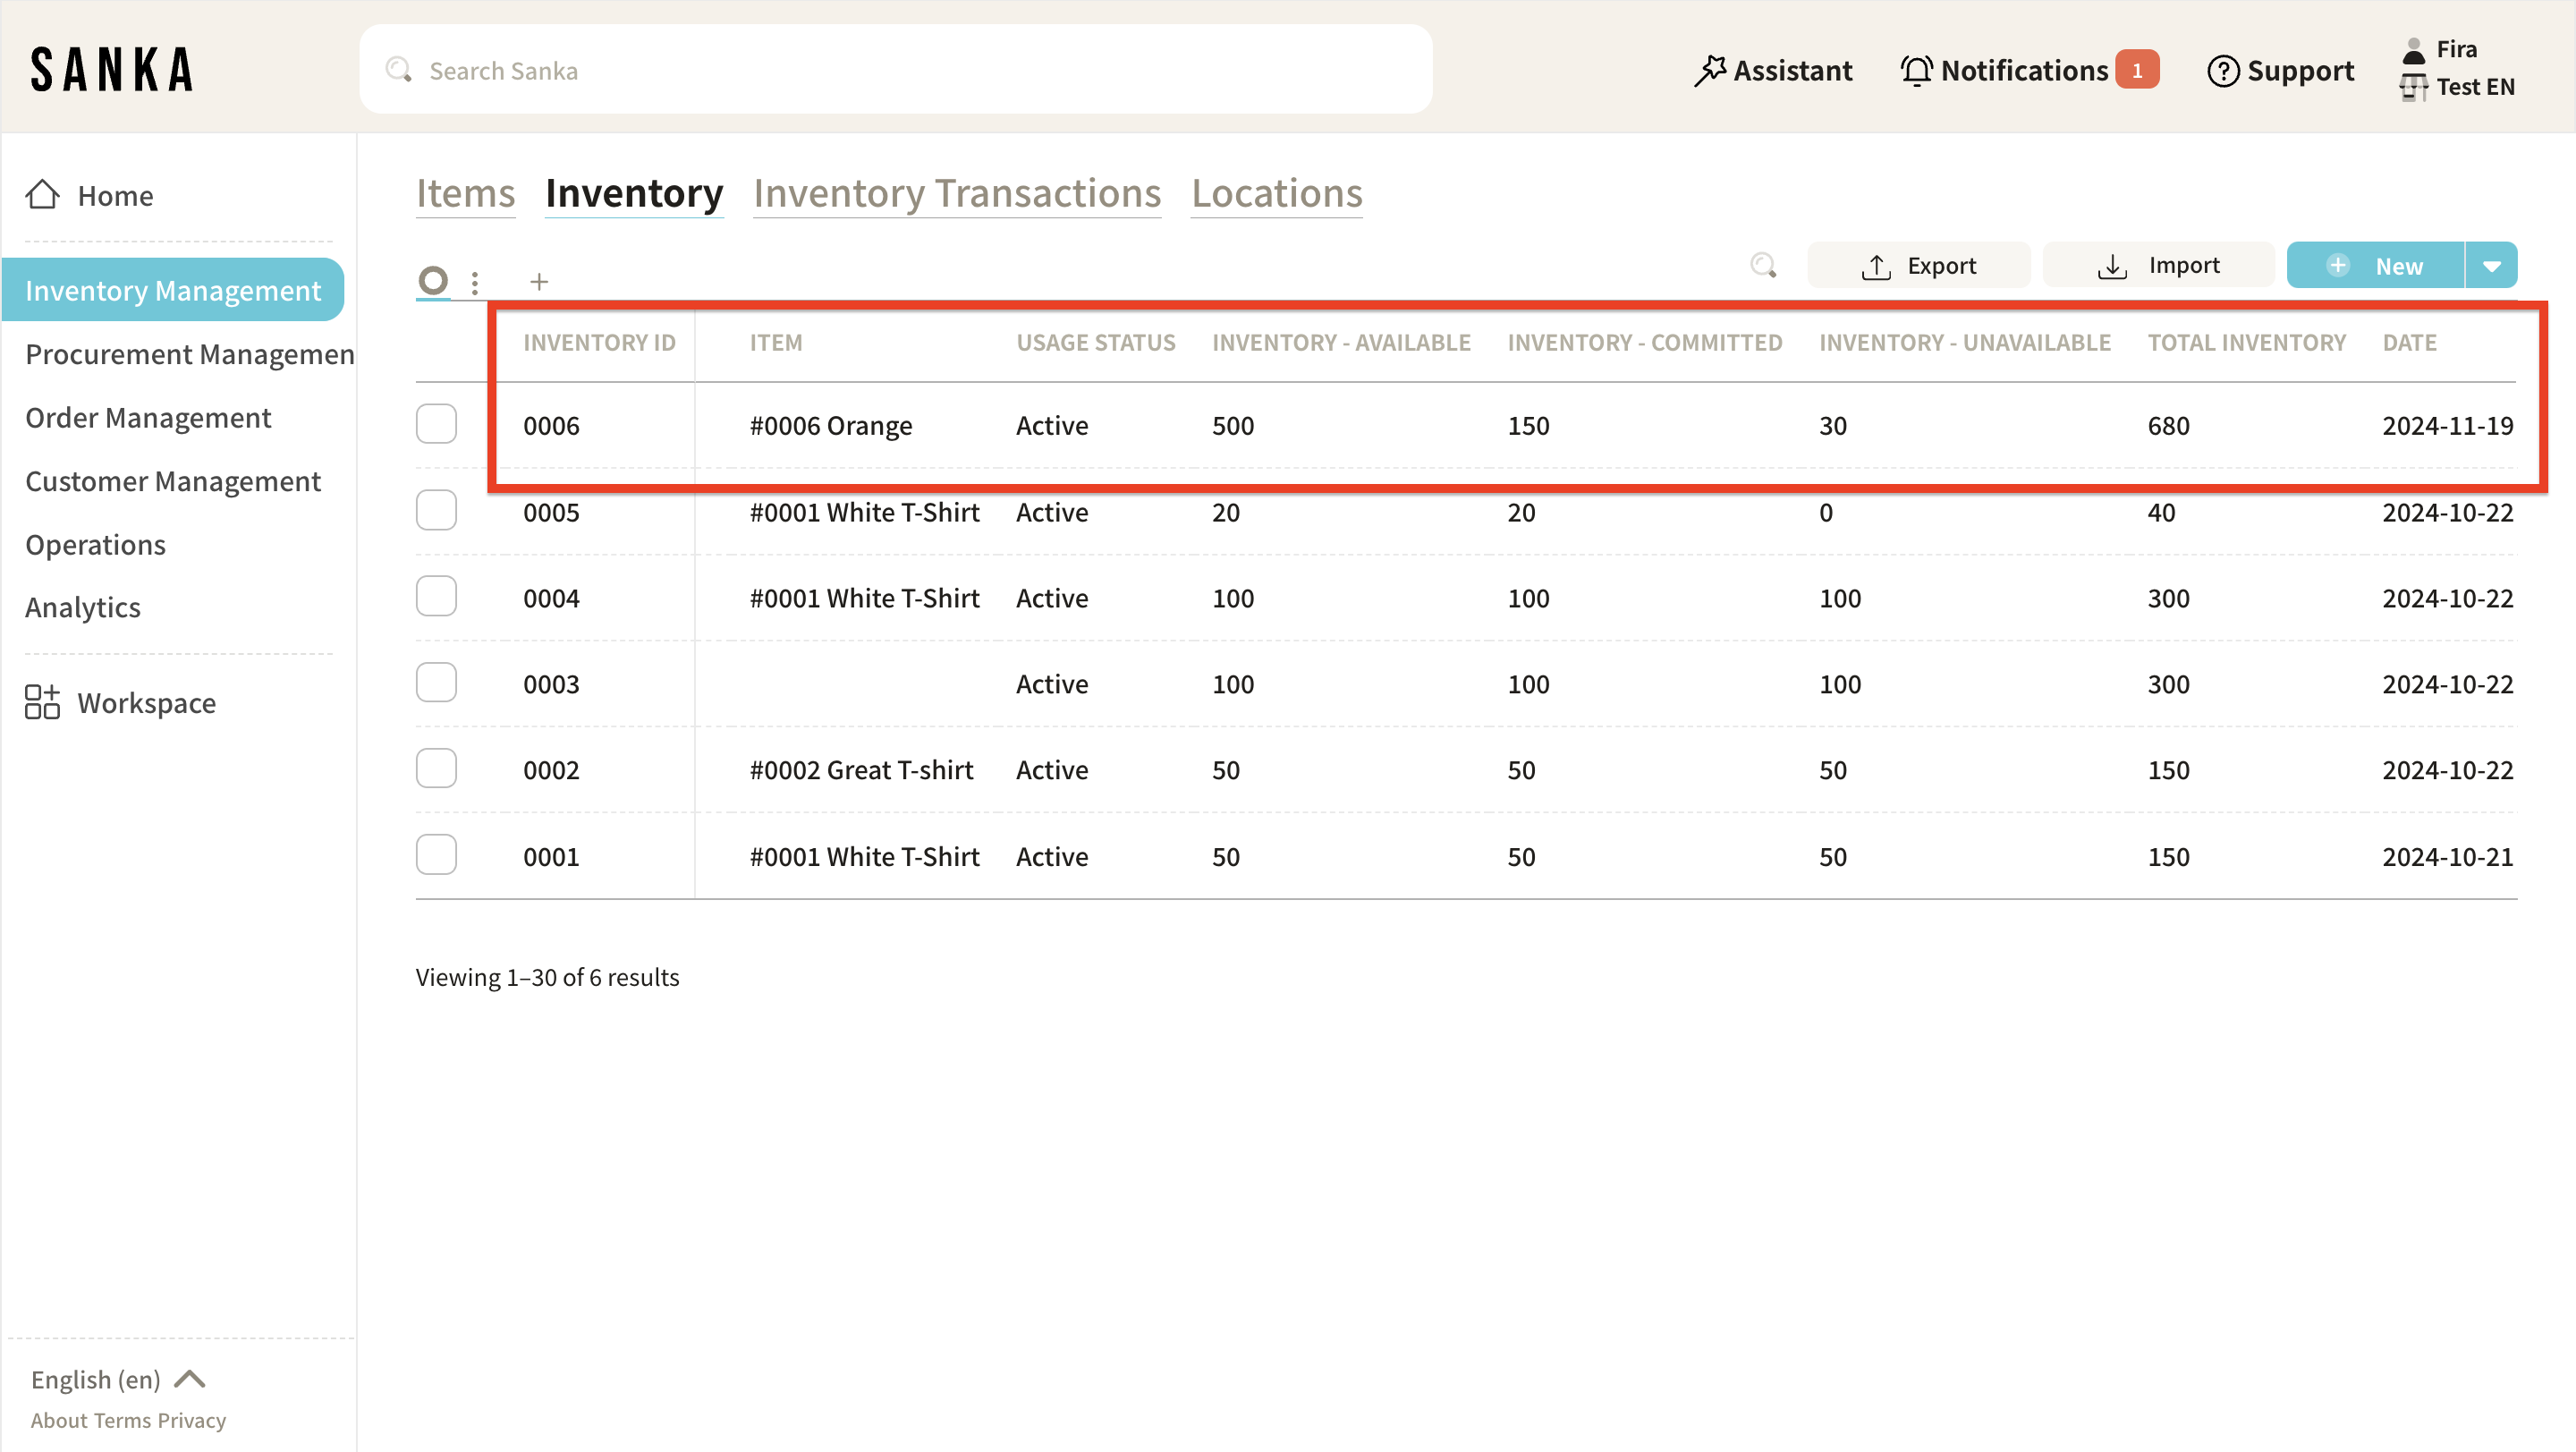
⑧ The inventory status will be updated. The "Total Inventory" field will automatically calculate and show the total count from "Available," "Committed," and "Unavailable."
Bulk registering Inventory with Sanka's template
To register multiple items at once, use Sanka's Inventory CSV Import Template.
① In the "Inventory Management" module, select the "Inventory" object.

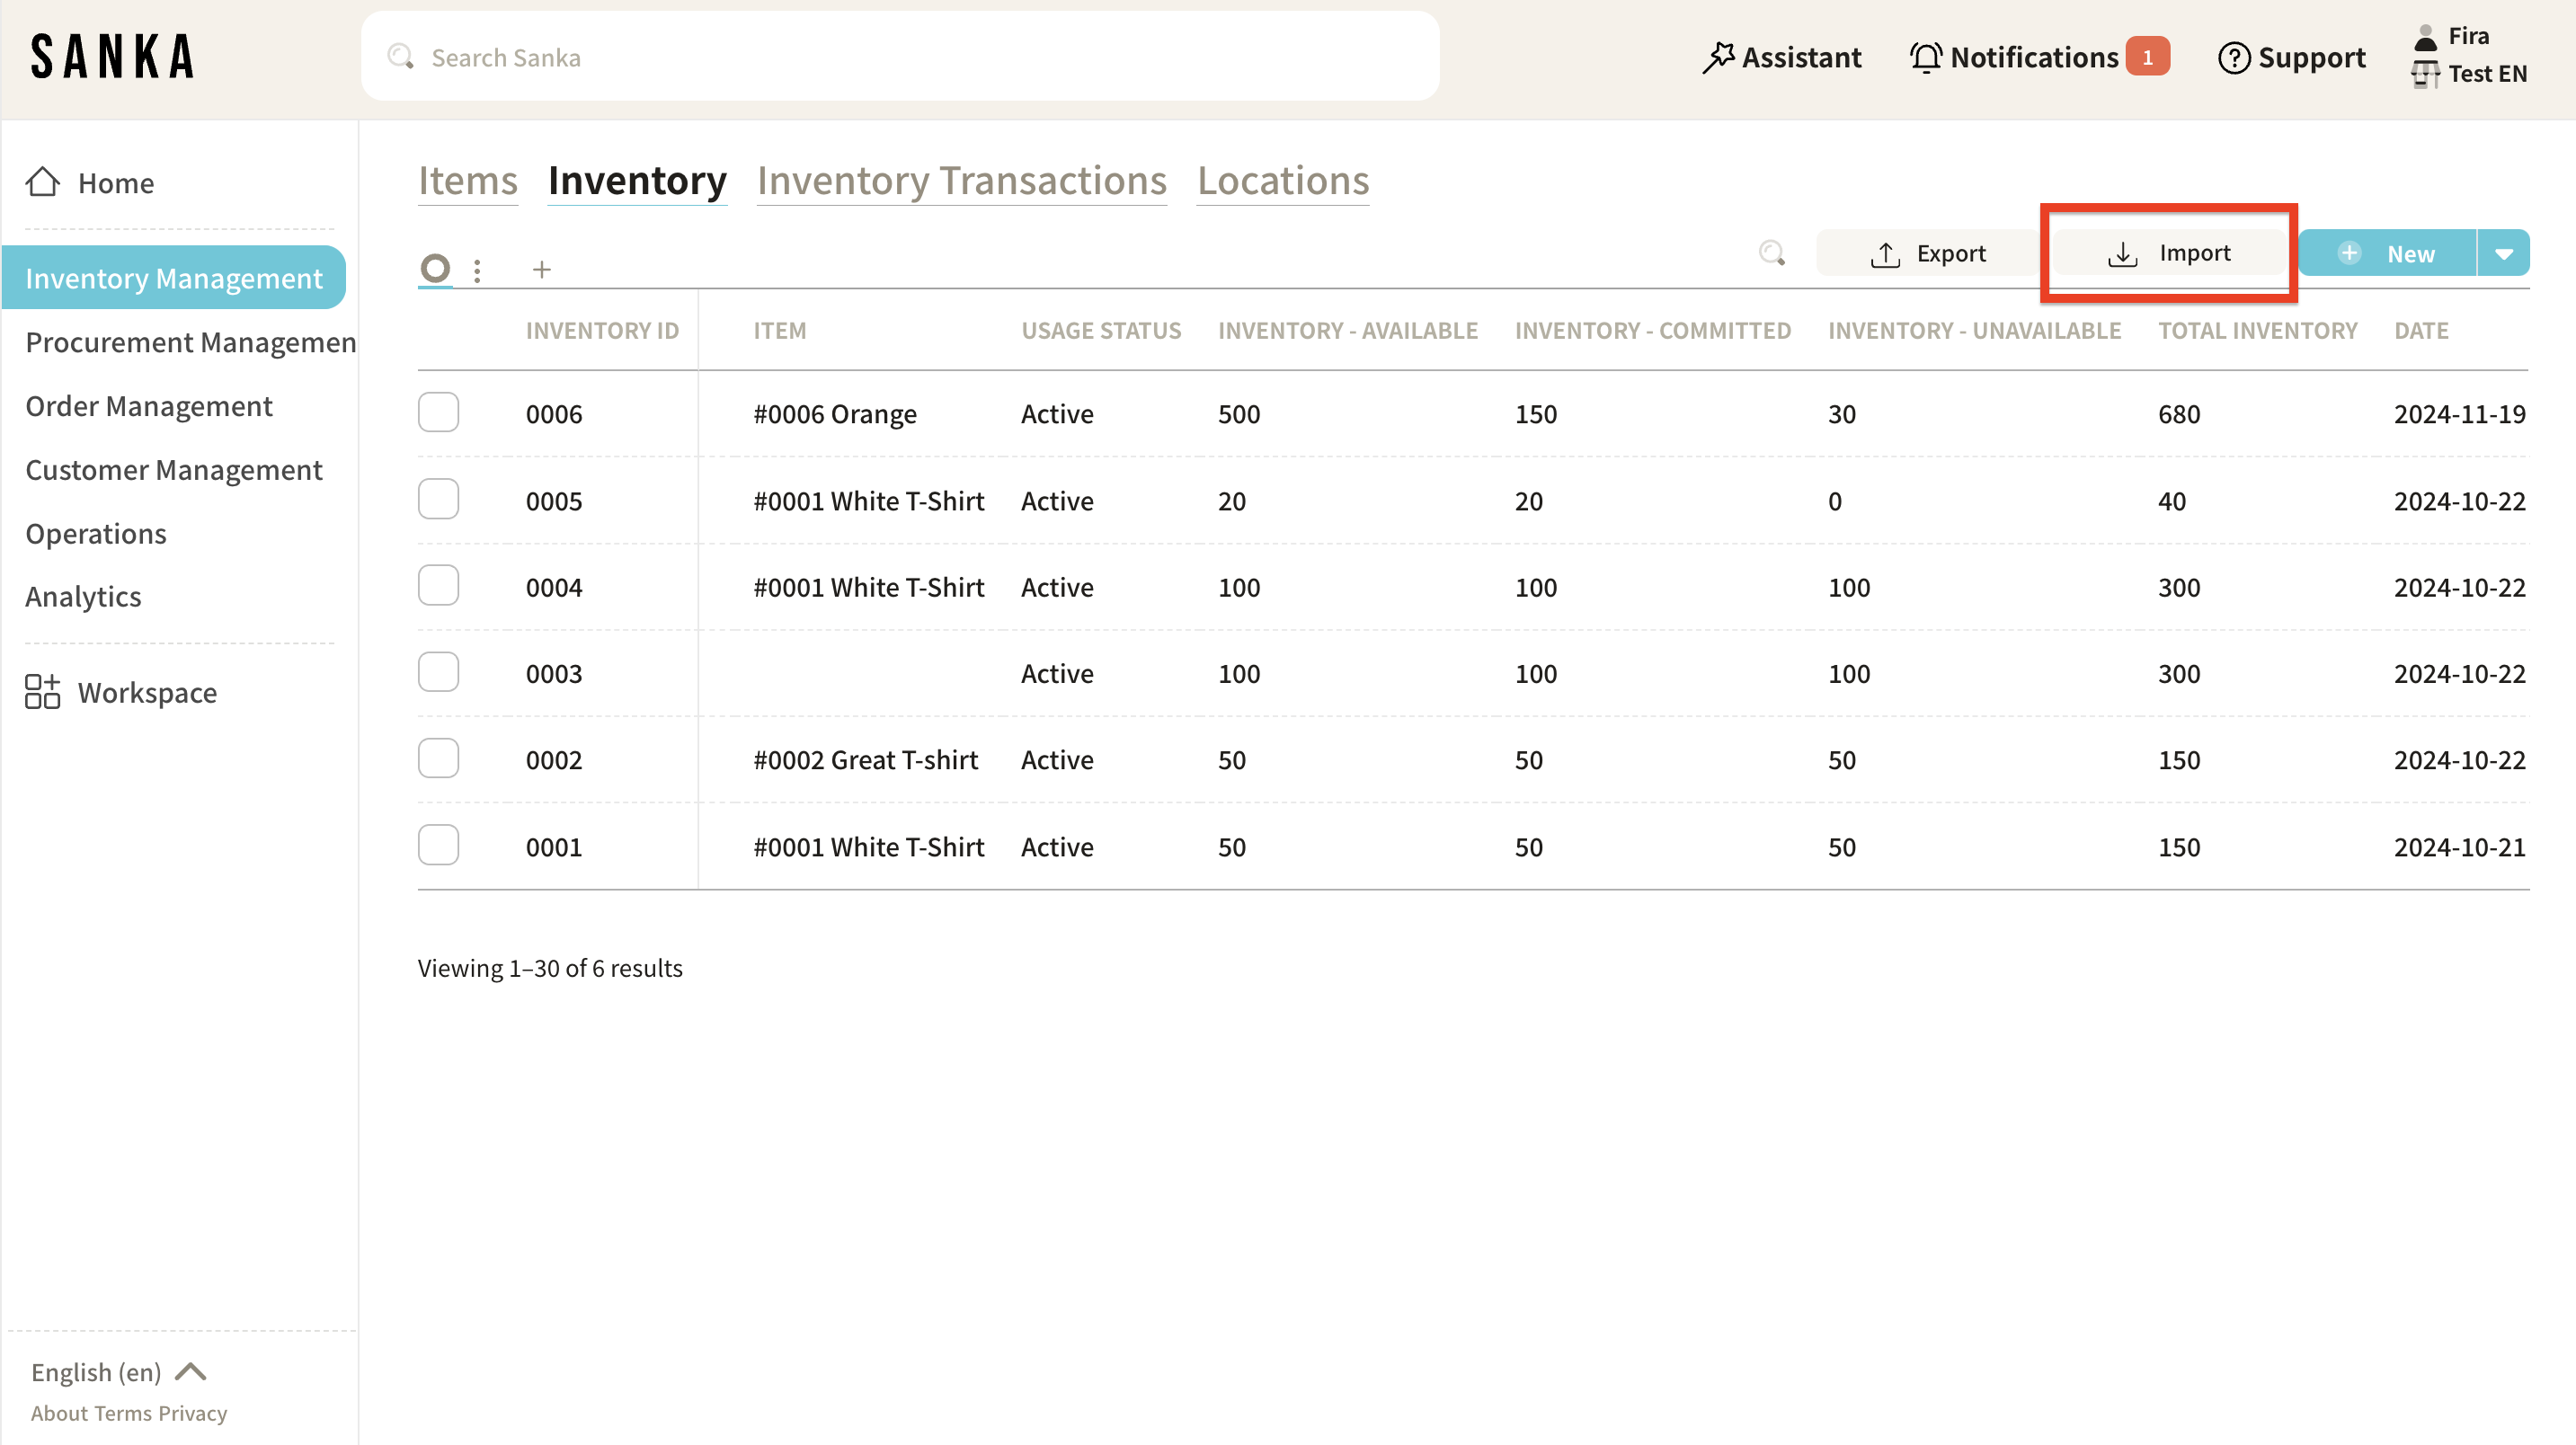
② Click the "Import" button at the top right of the screen.
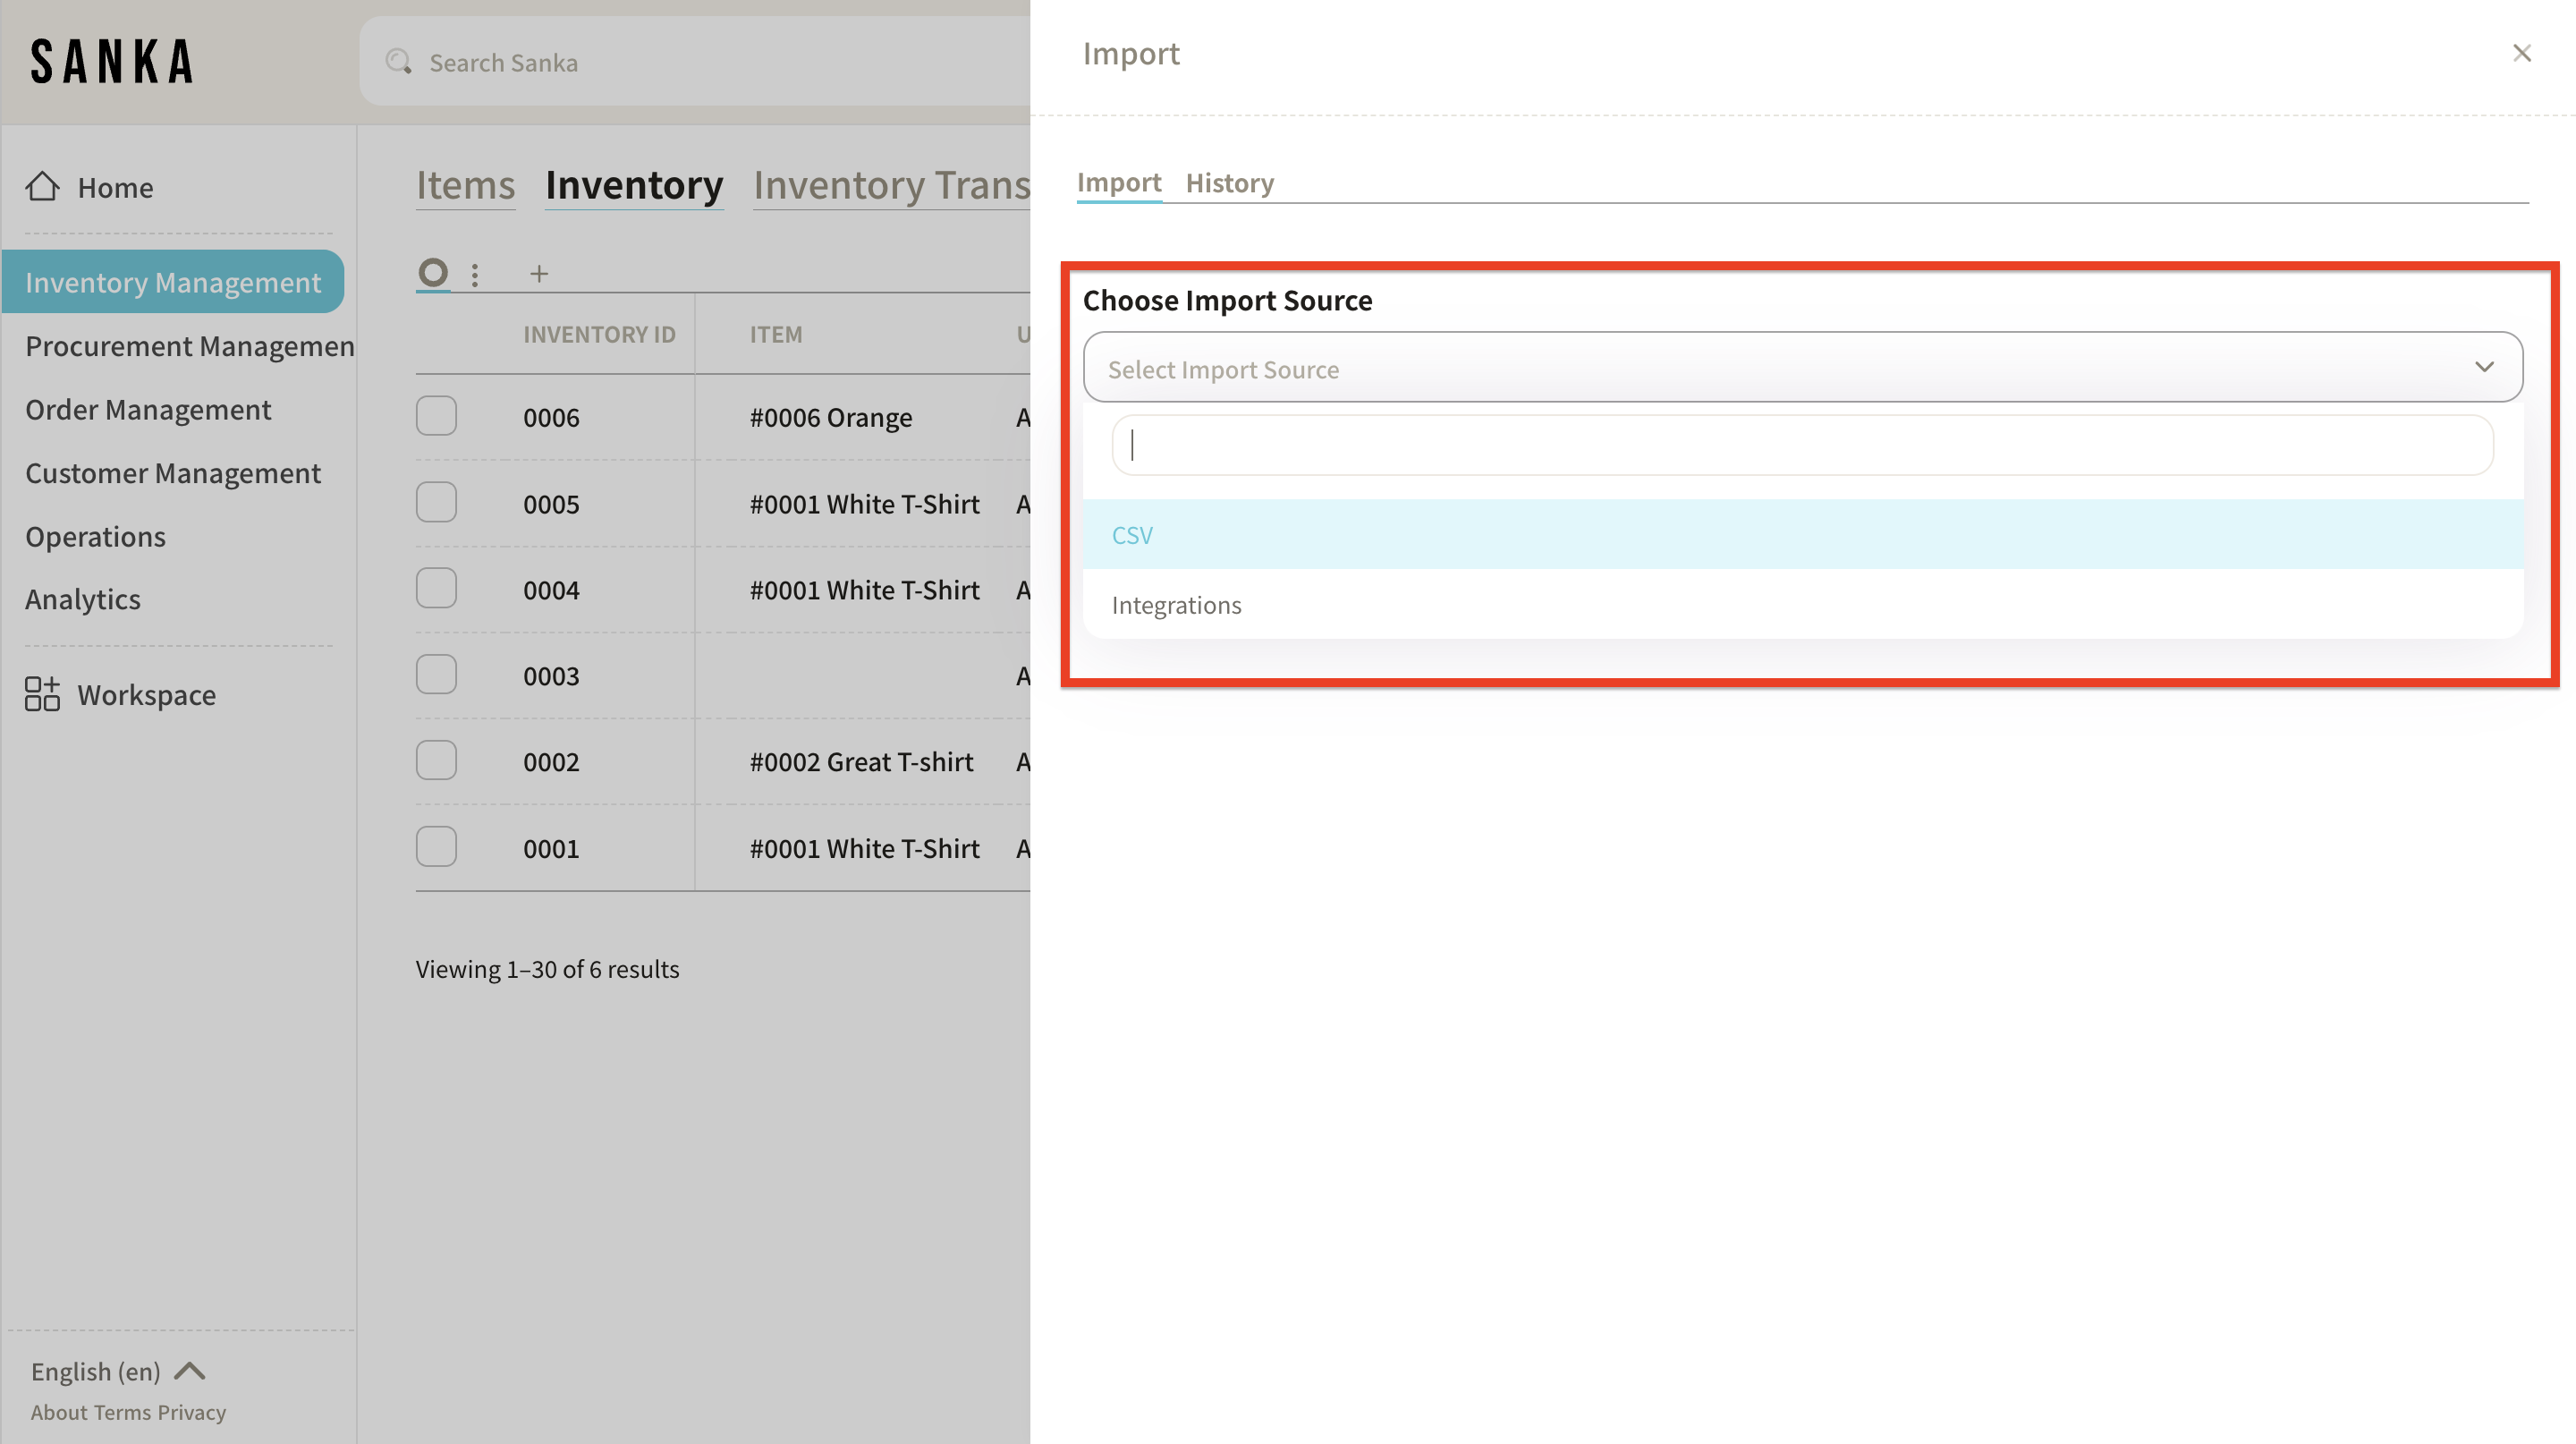
③ In the "Import" menu, click "Select Source" and choose "CSV File."
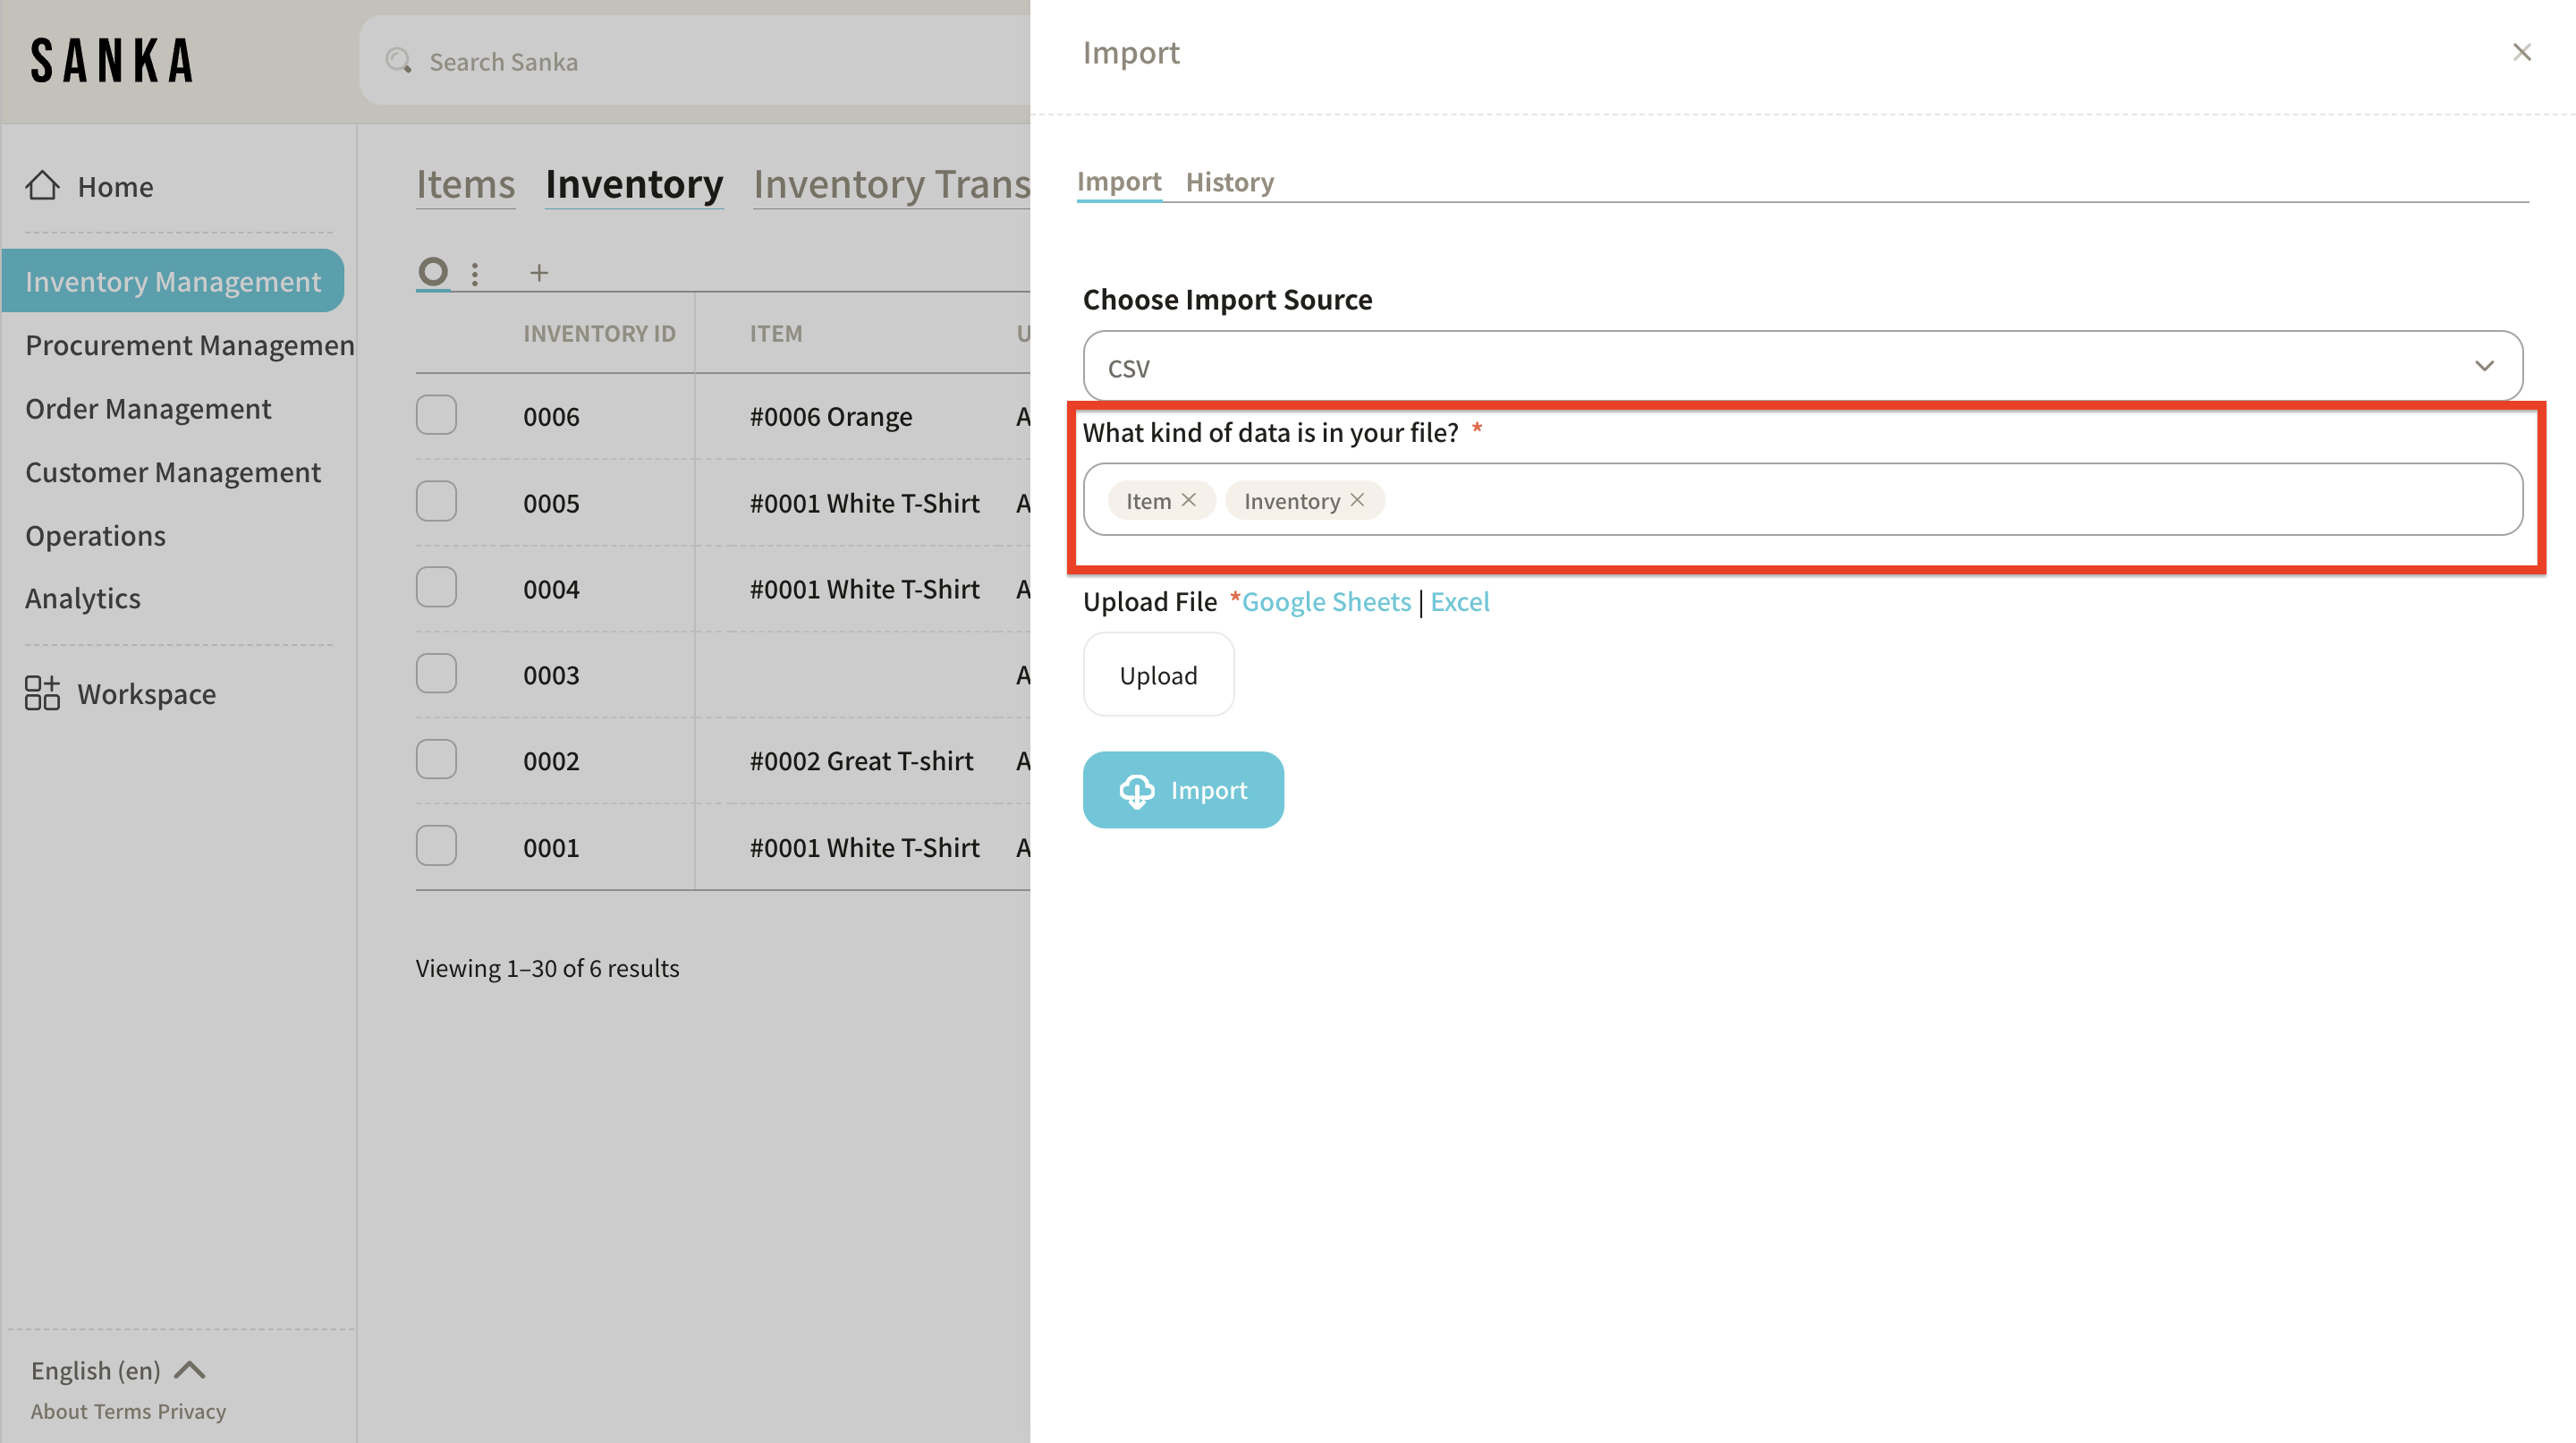
④ In the "What kind of data is in your file?" field, select the relevant fields. For this guide, we selected "Item" and "Inventory."
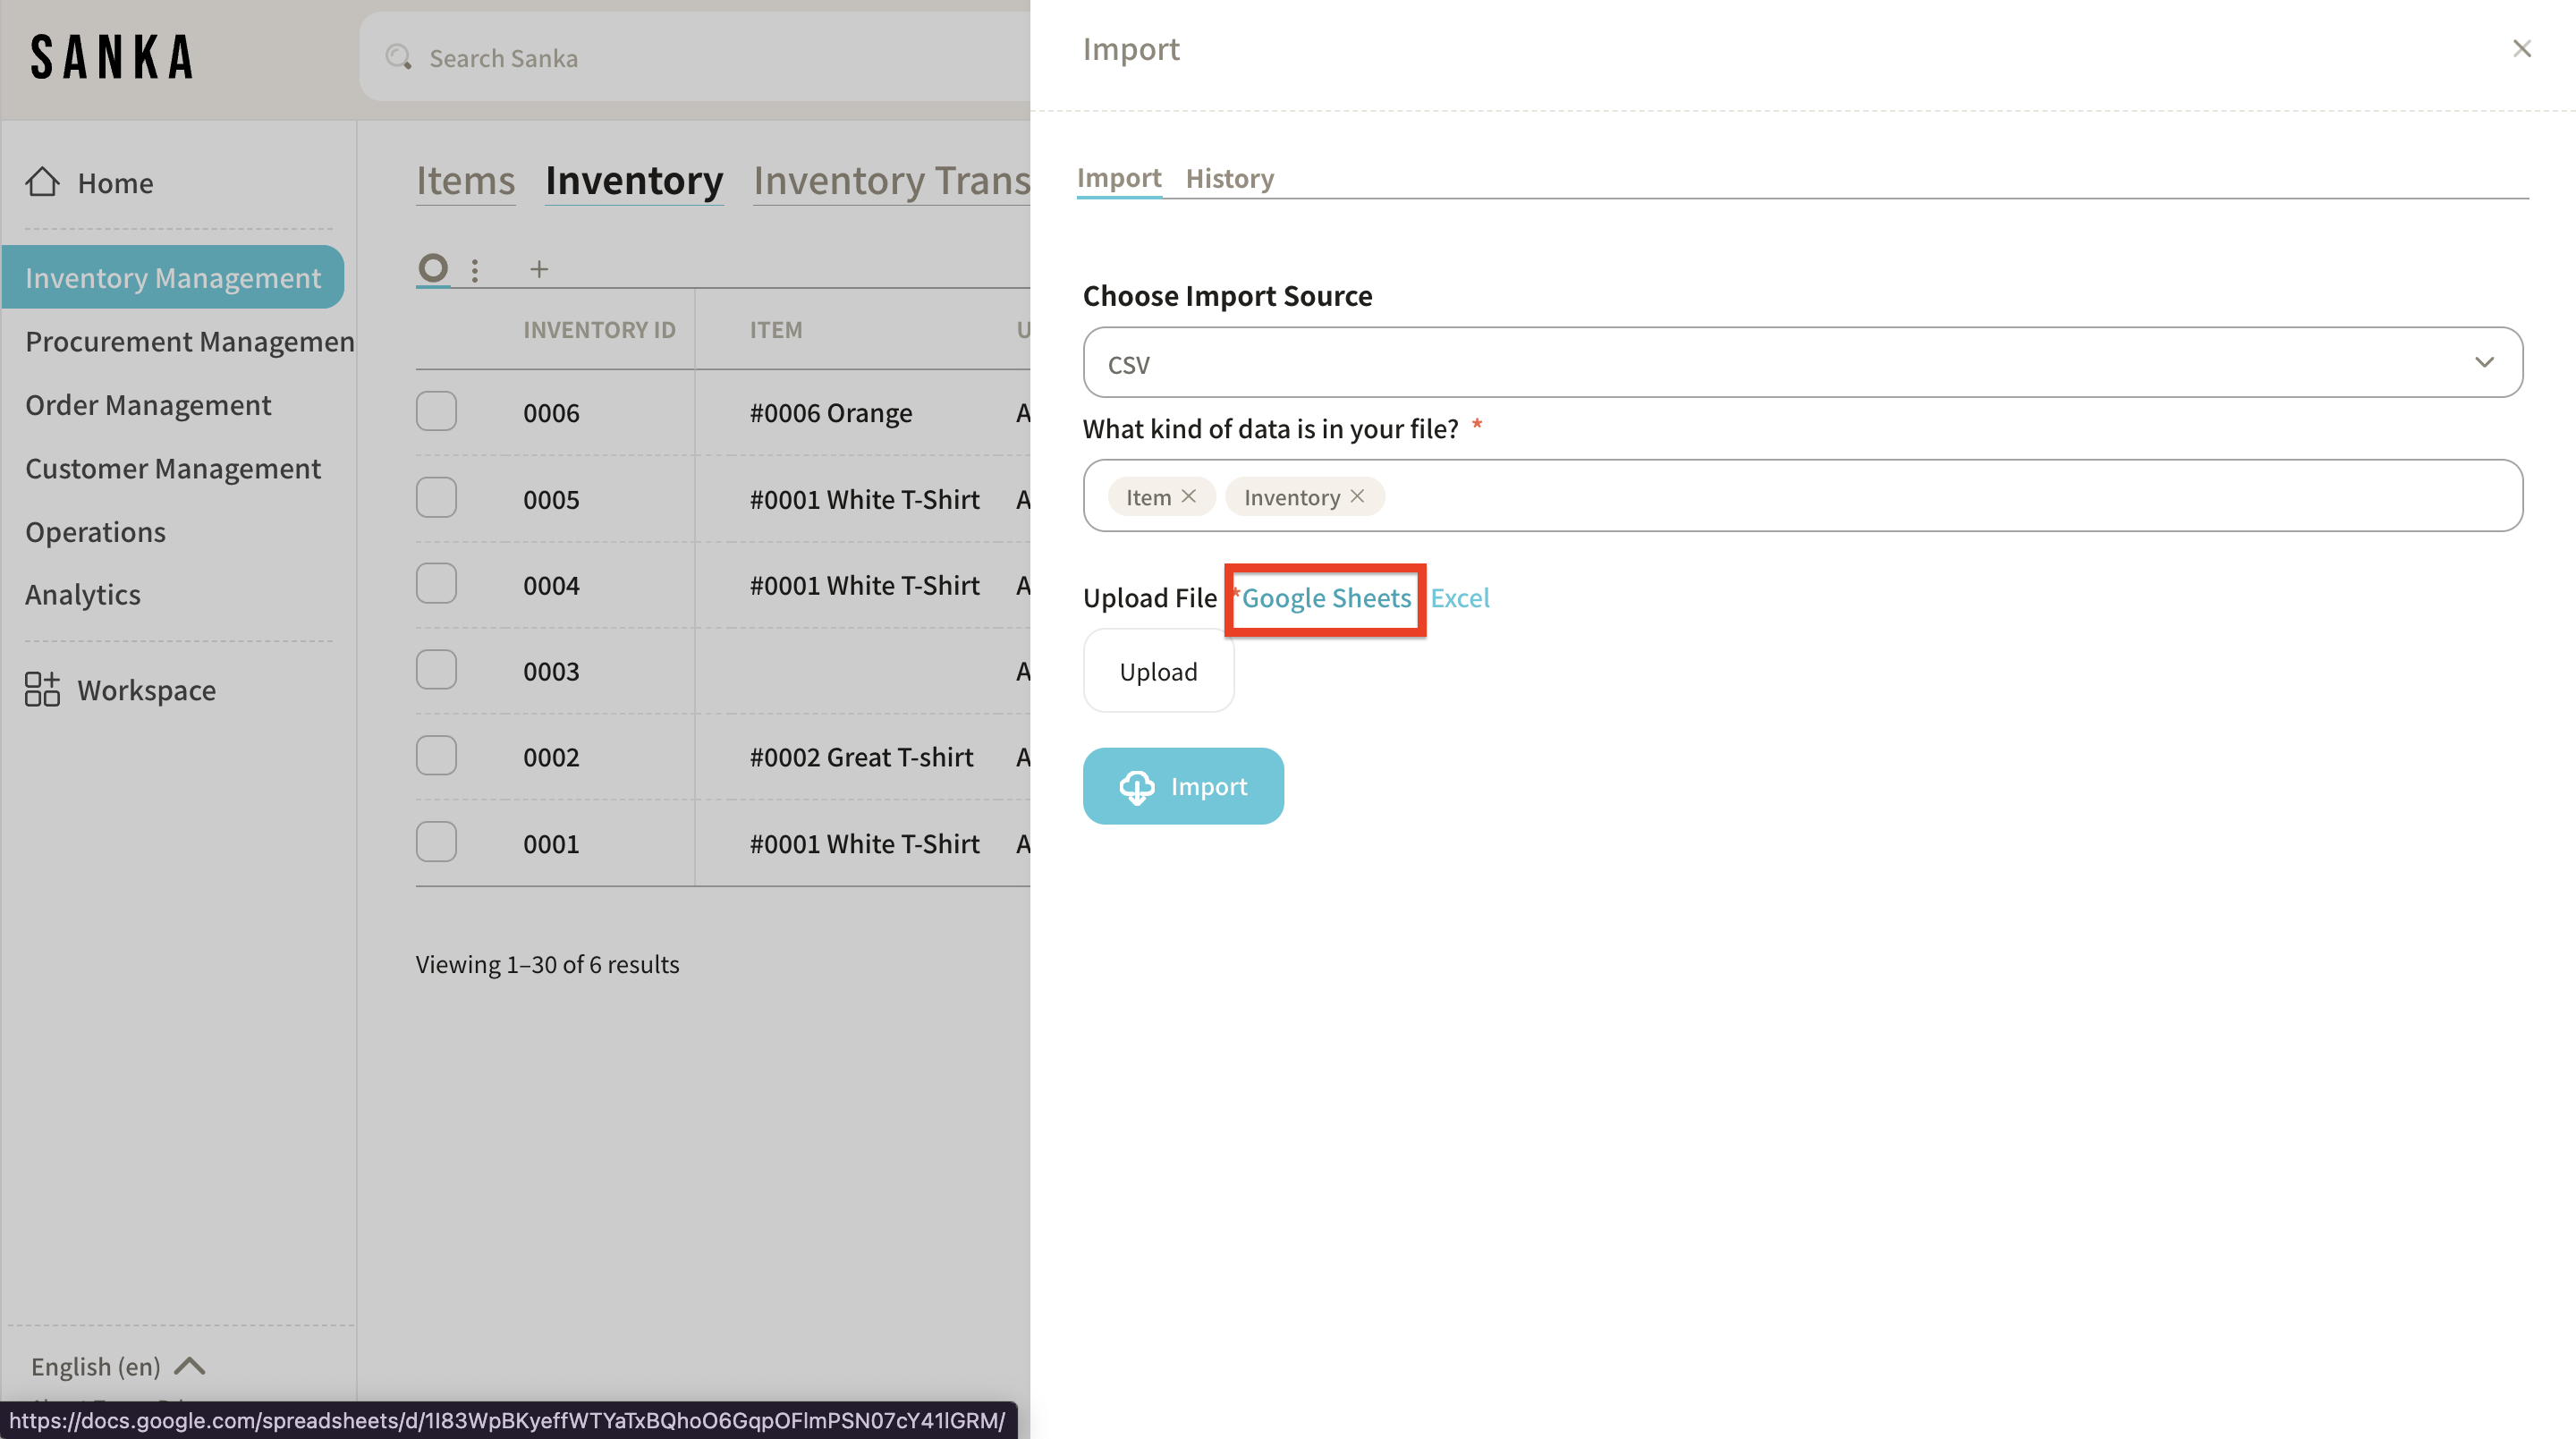
⑤ Click "Google Sheet" to open Sanka's "Inventory CSV Import Template."
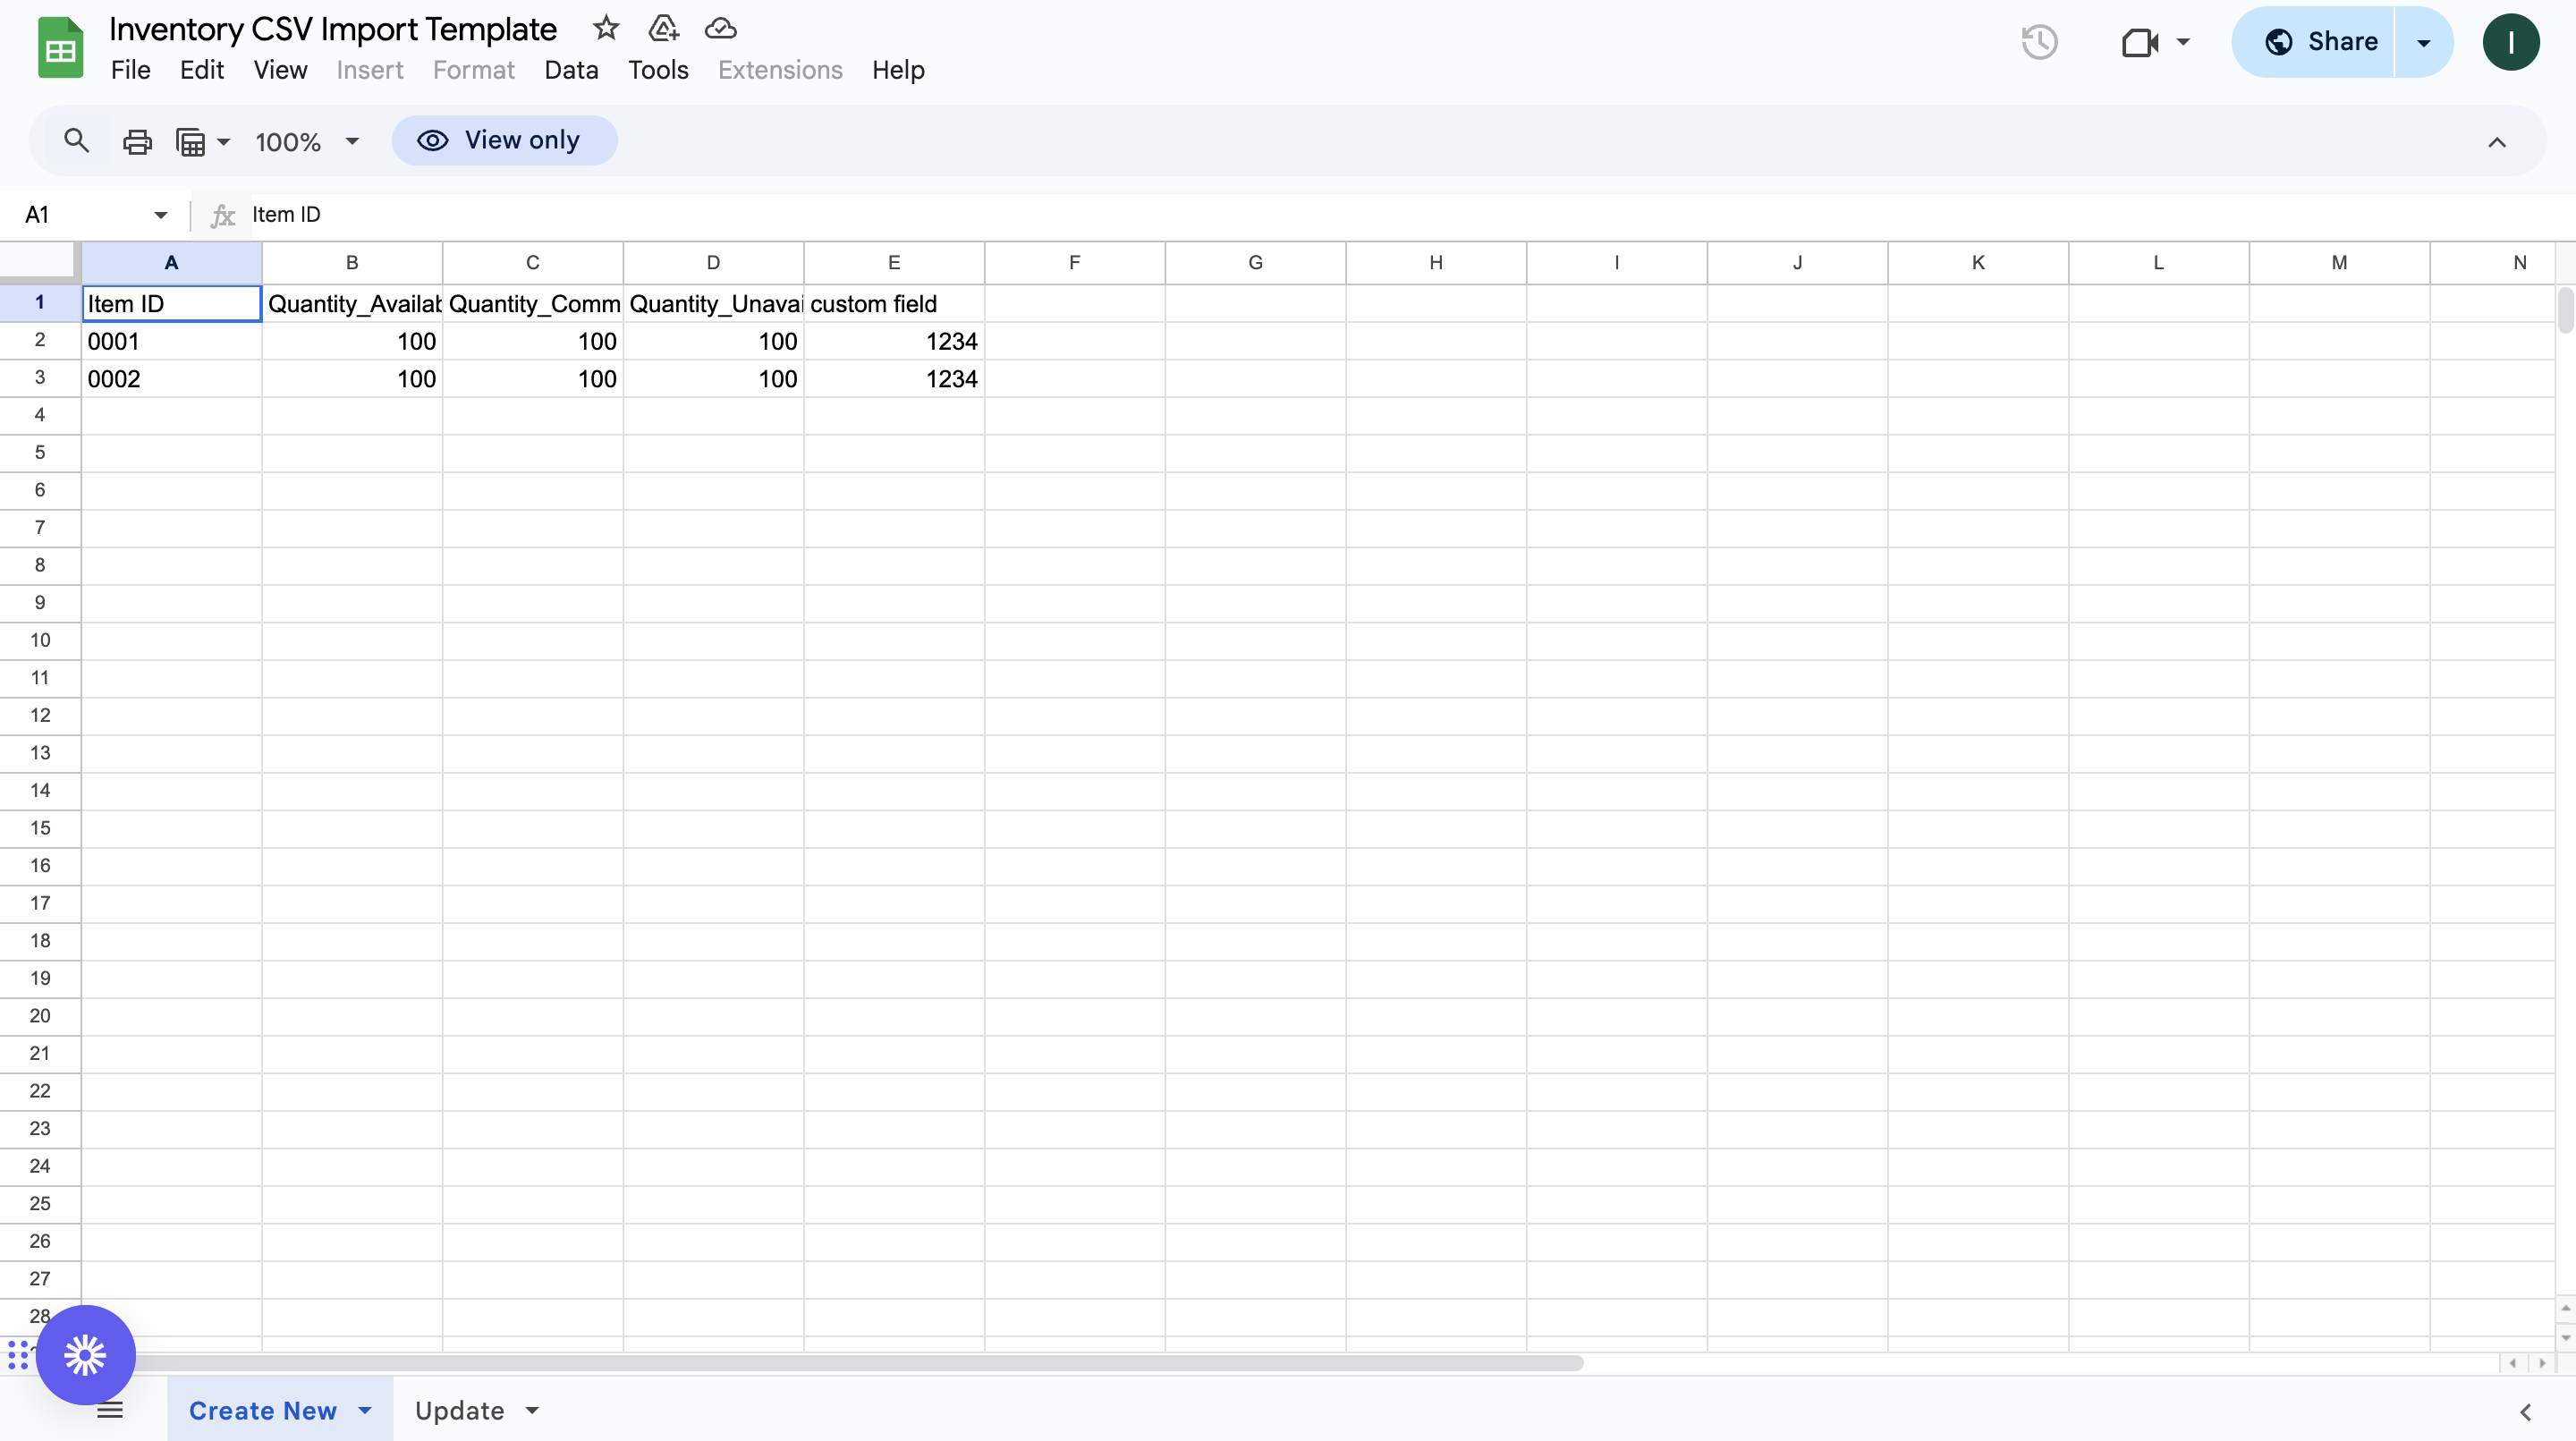
⑥ Download the template to your desktop. - Select "File" → "Download" → "Comma-separated values (.csv)" and save it to your preferred location.
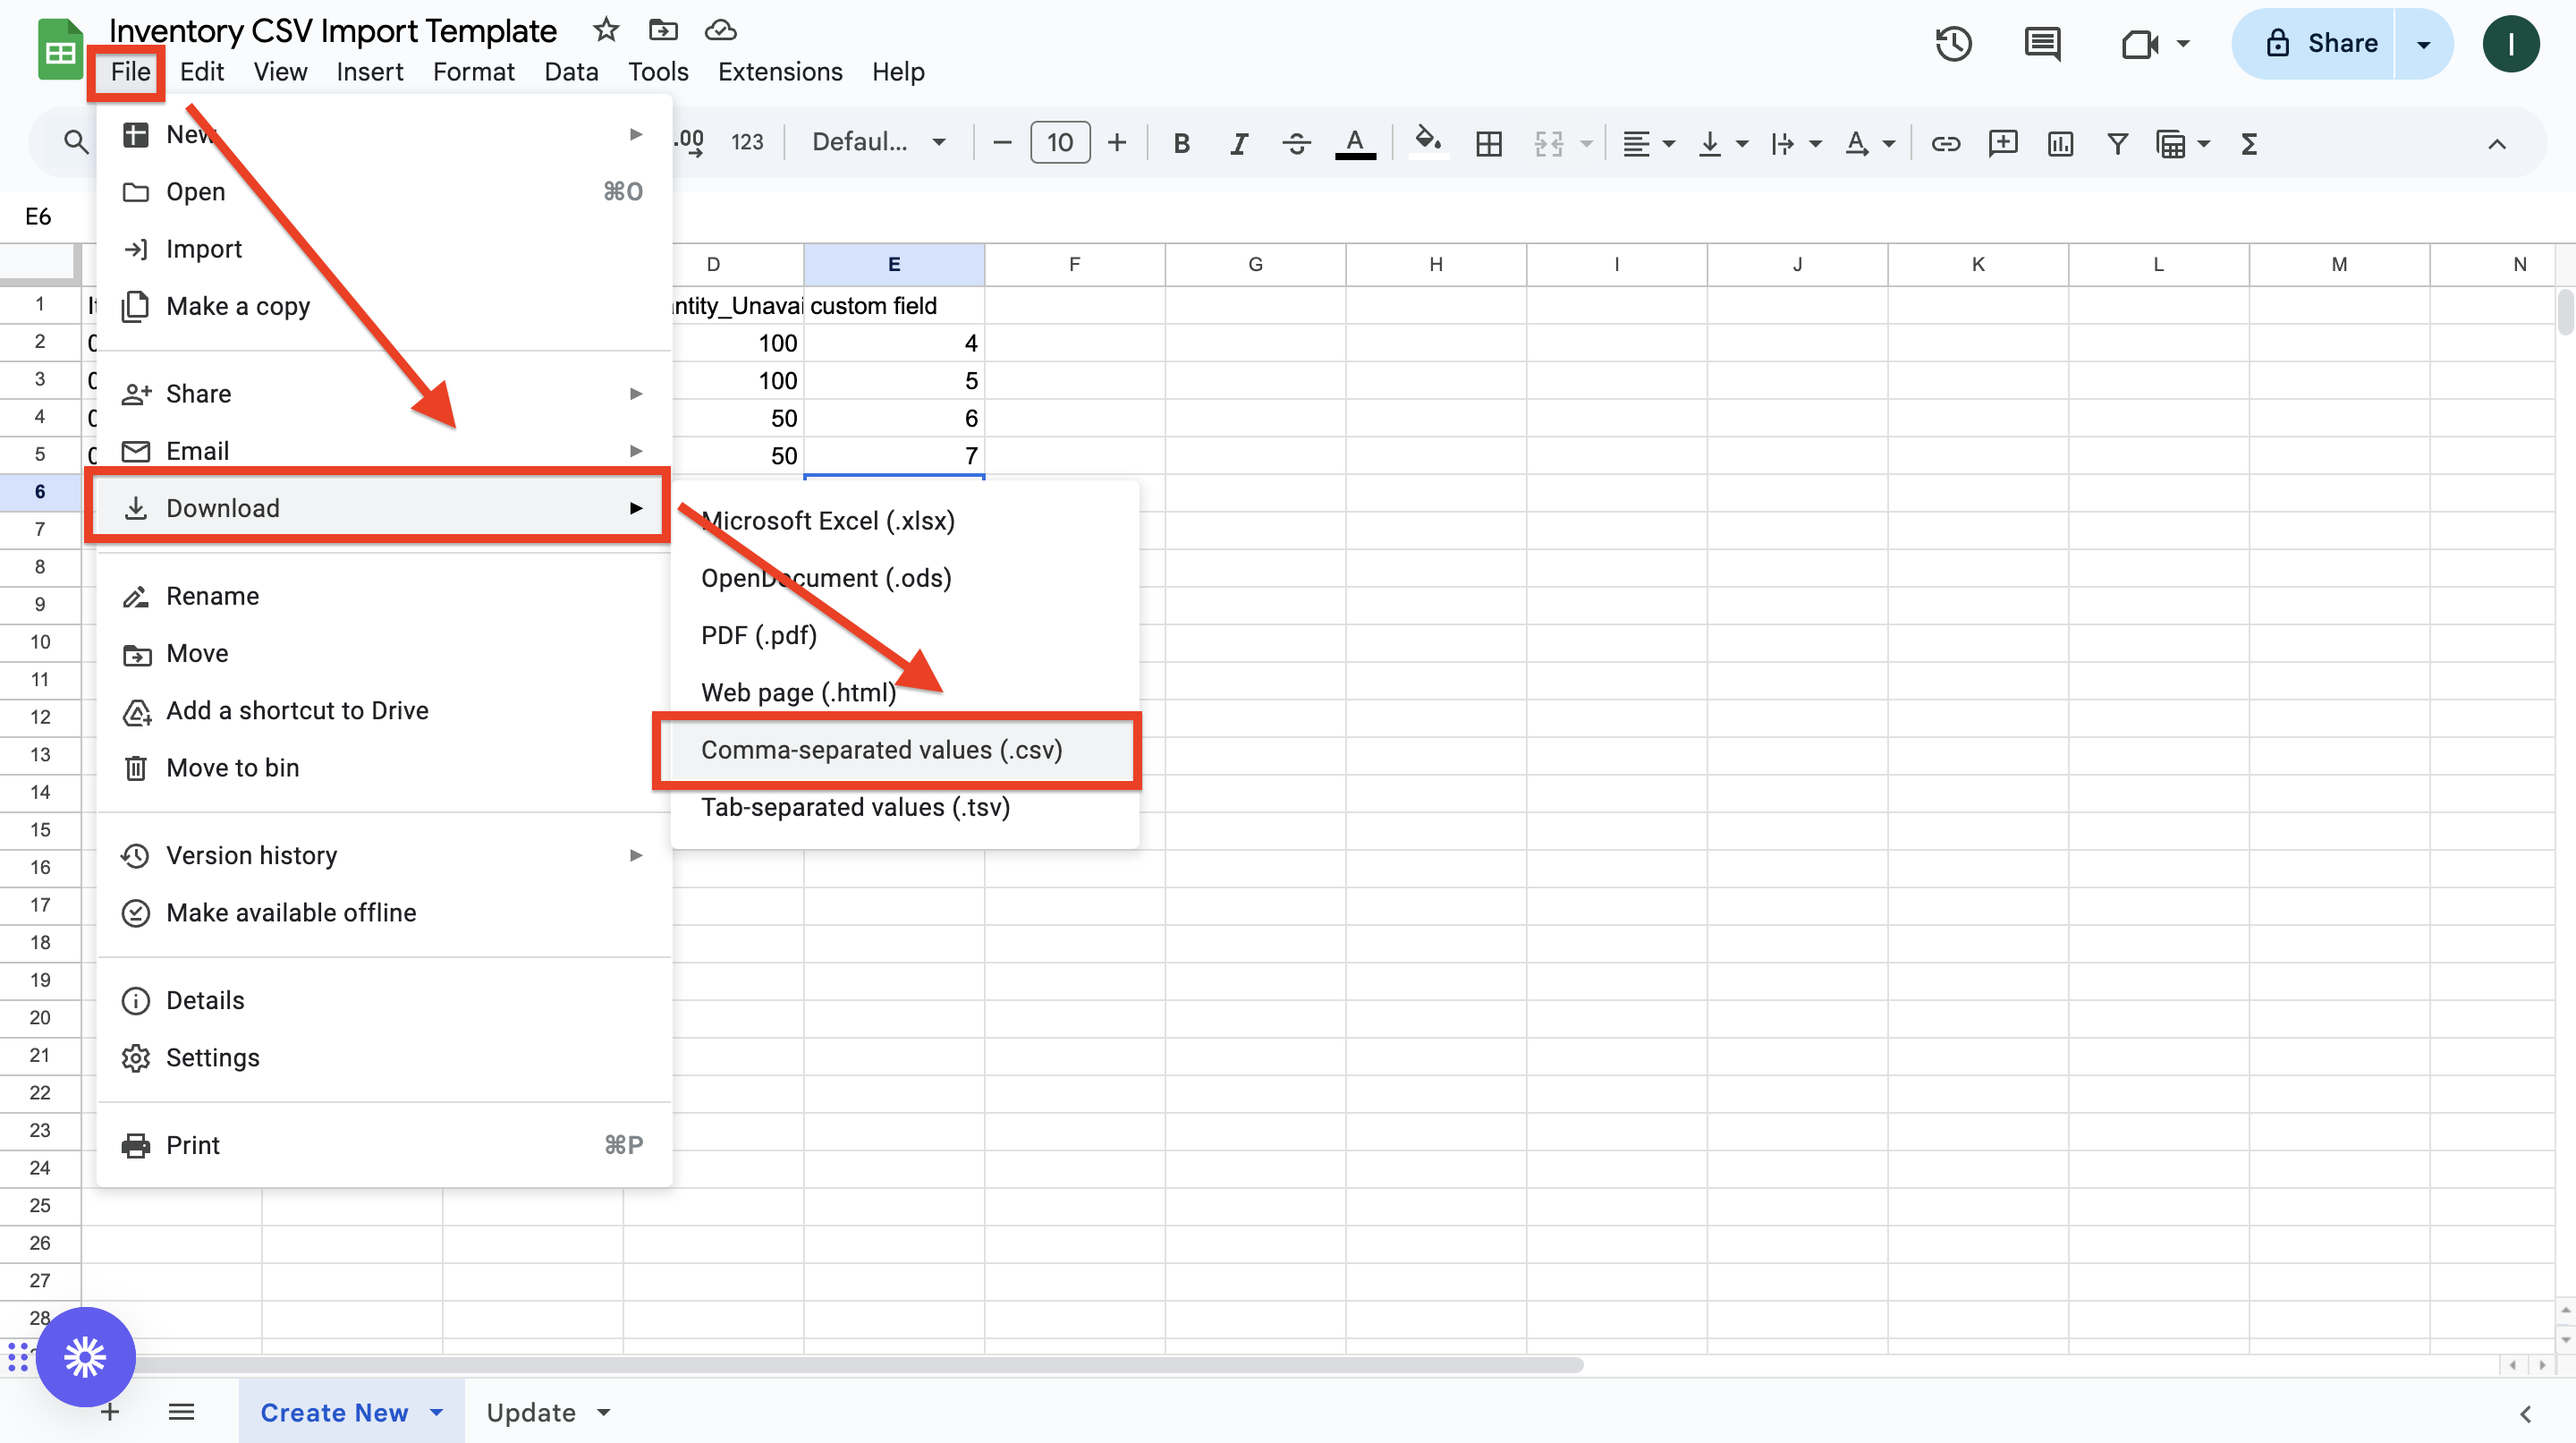
⑦ Fill out the downloaded template with the necessary information:
- Item ID: The item master ID registered in Sanka.
- Available: The available inventory count.
- Committed: Inventory that has been ordered and is unavailable for sale.
- Unavailable: Damaged or unsellable inventory.
- Custom Field: Any additional information for the inventory. We use location ID registered in Sanka for example.

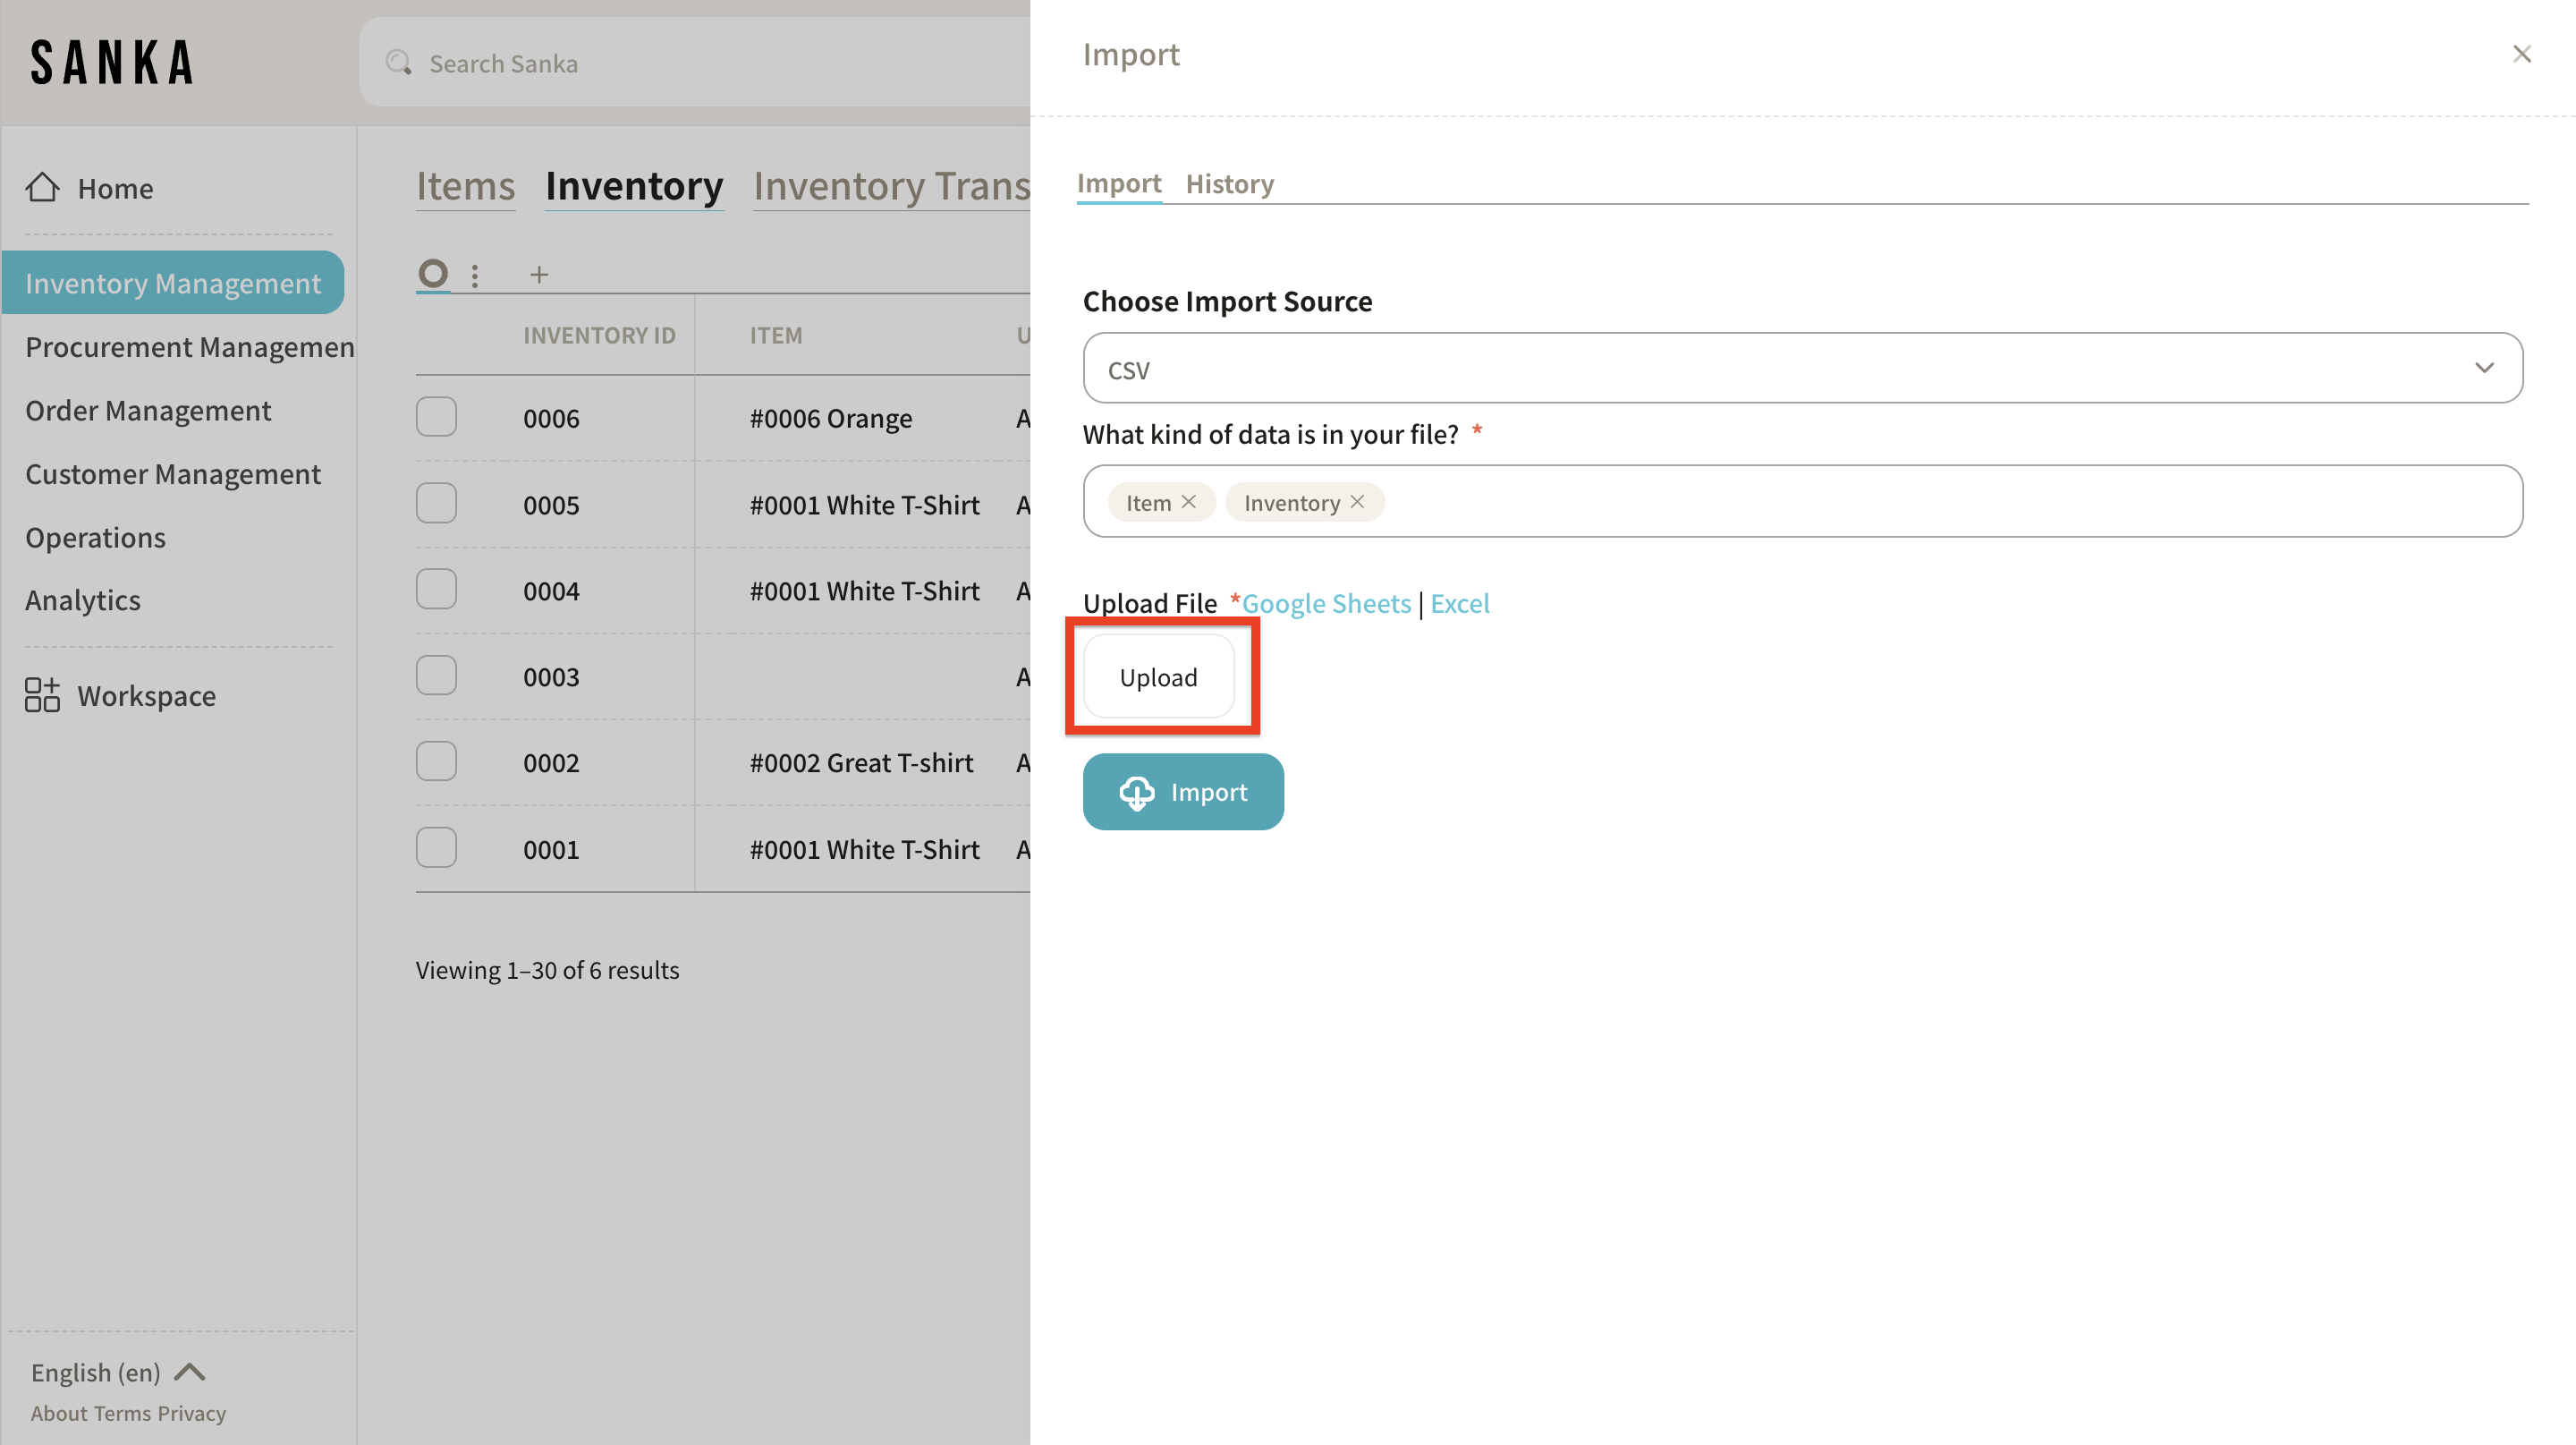
⑧ Return to the Sanka page, select "Upload," and choose the template file.
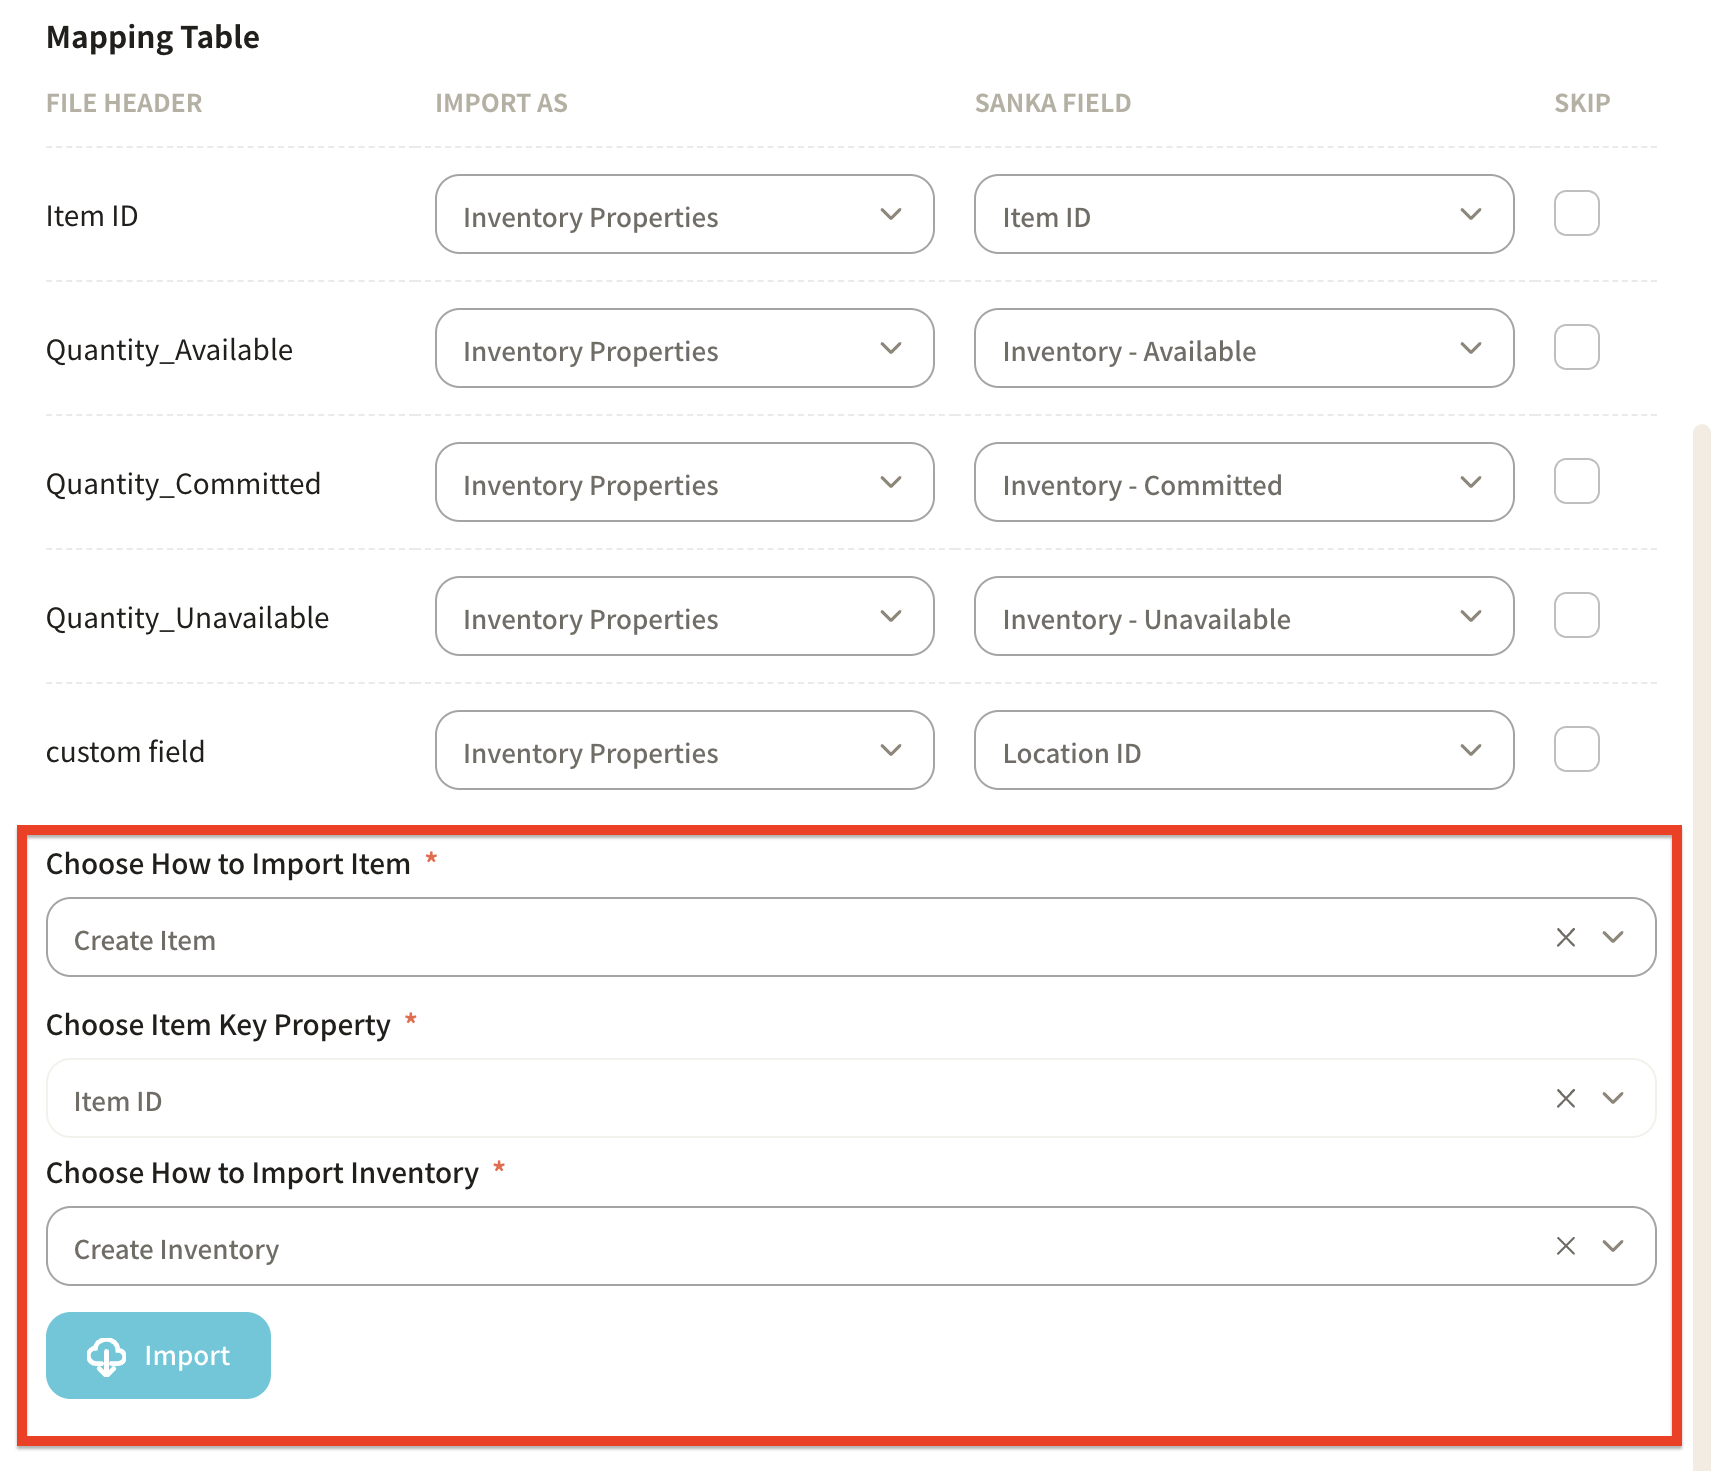
⑨ Adjust the mapping table. - Select "Inventory Properties" for import information. - Match the columns in the template file with Sanka's fields.
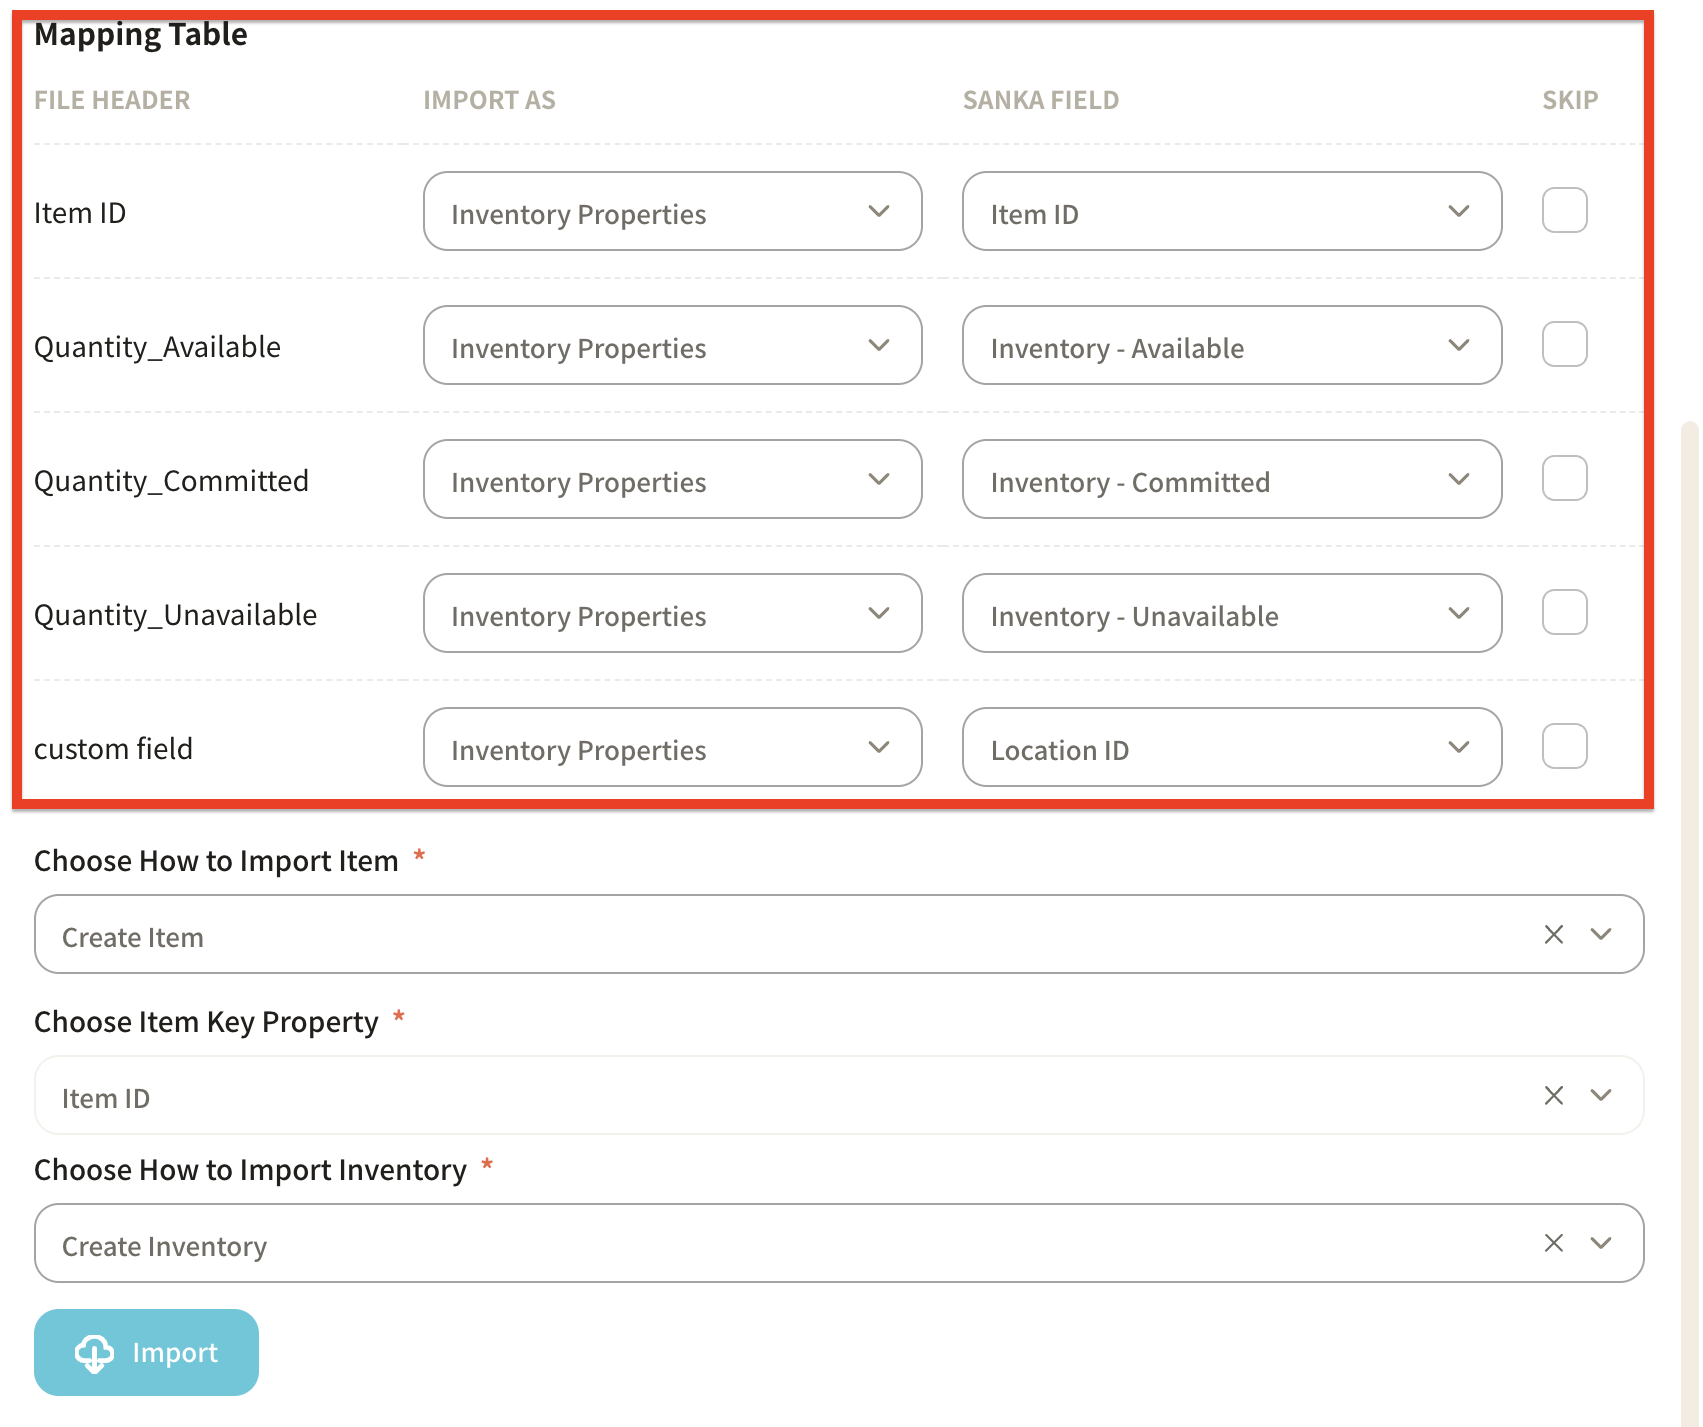
⑩ Select "Item Import Method" and "Inventory Import Method," then click "Import."
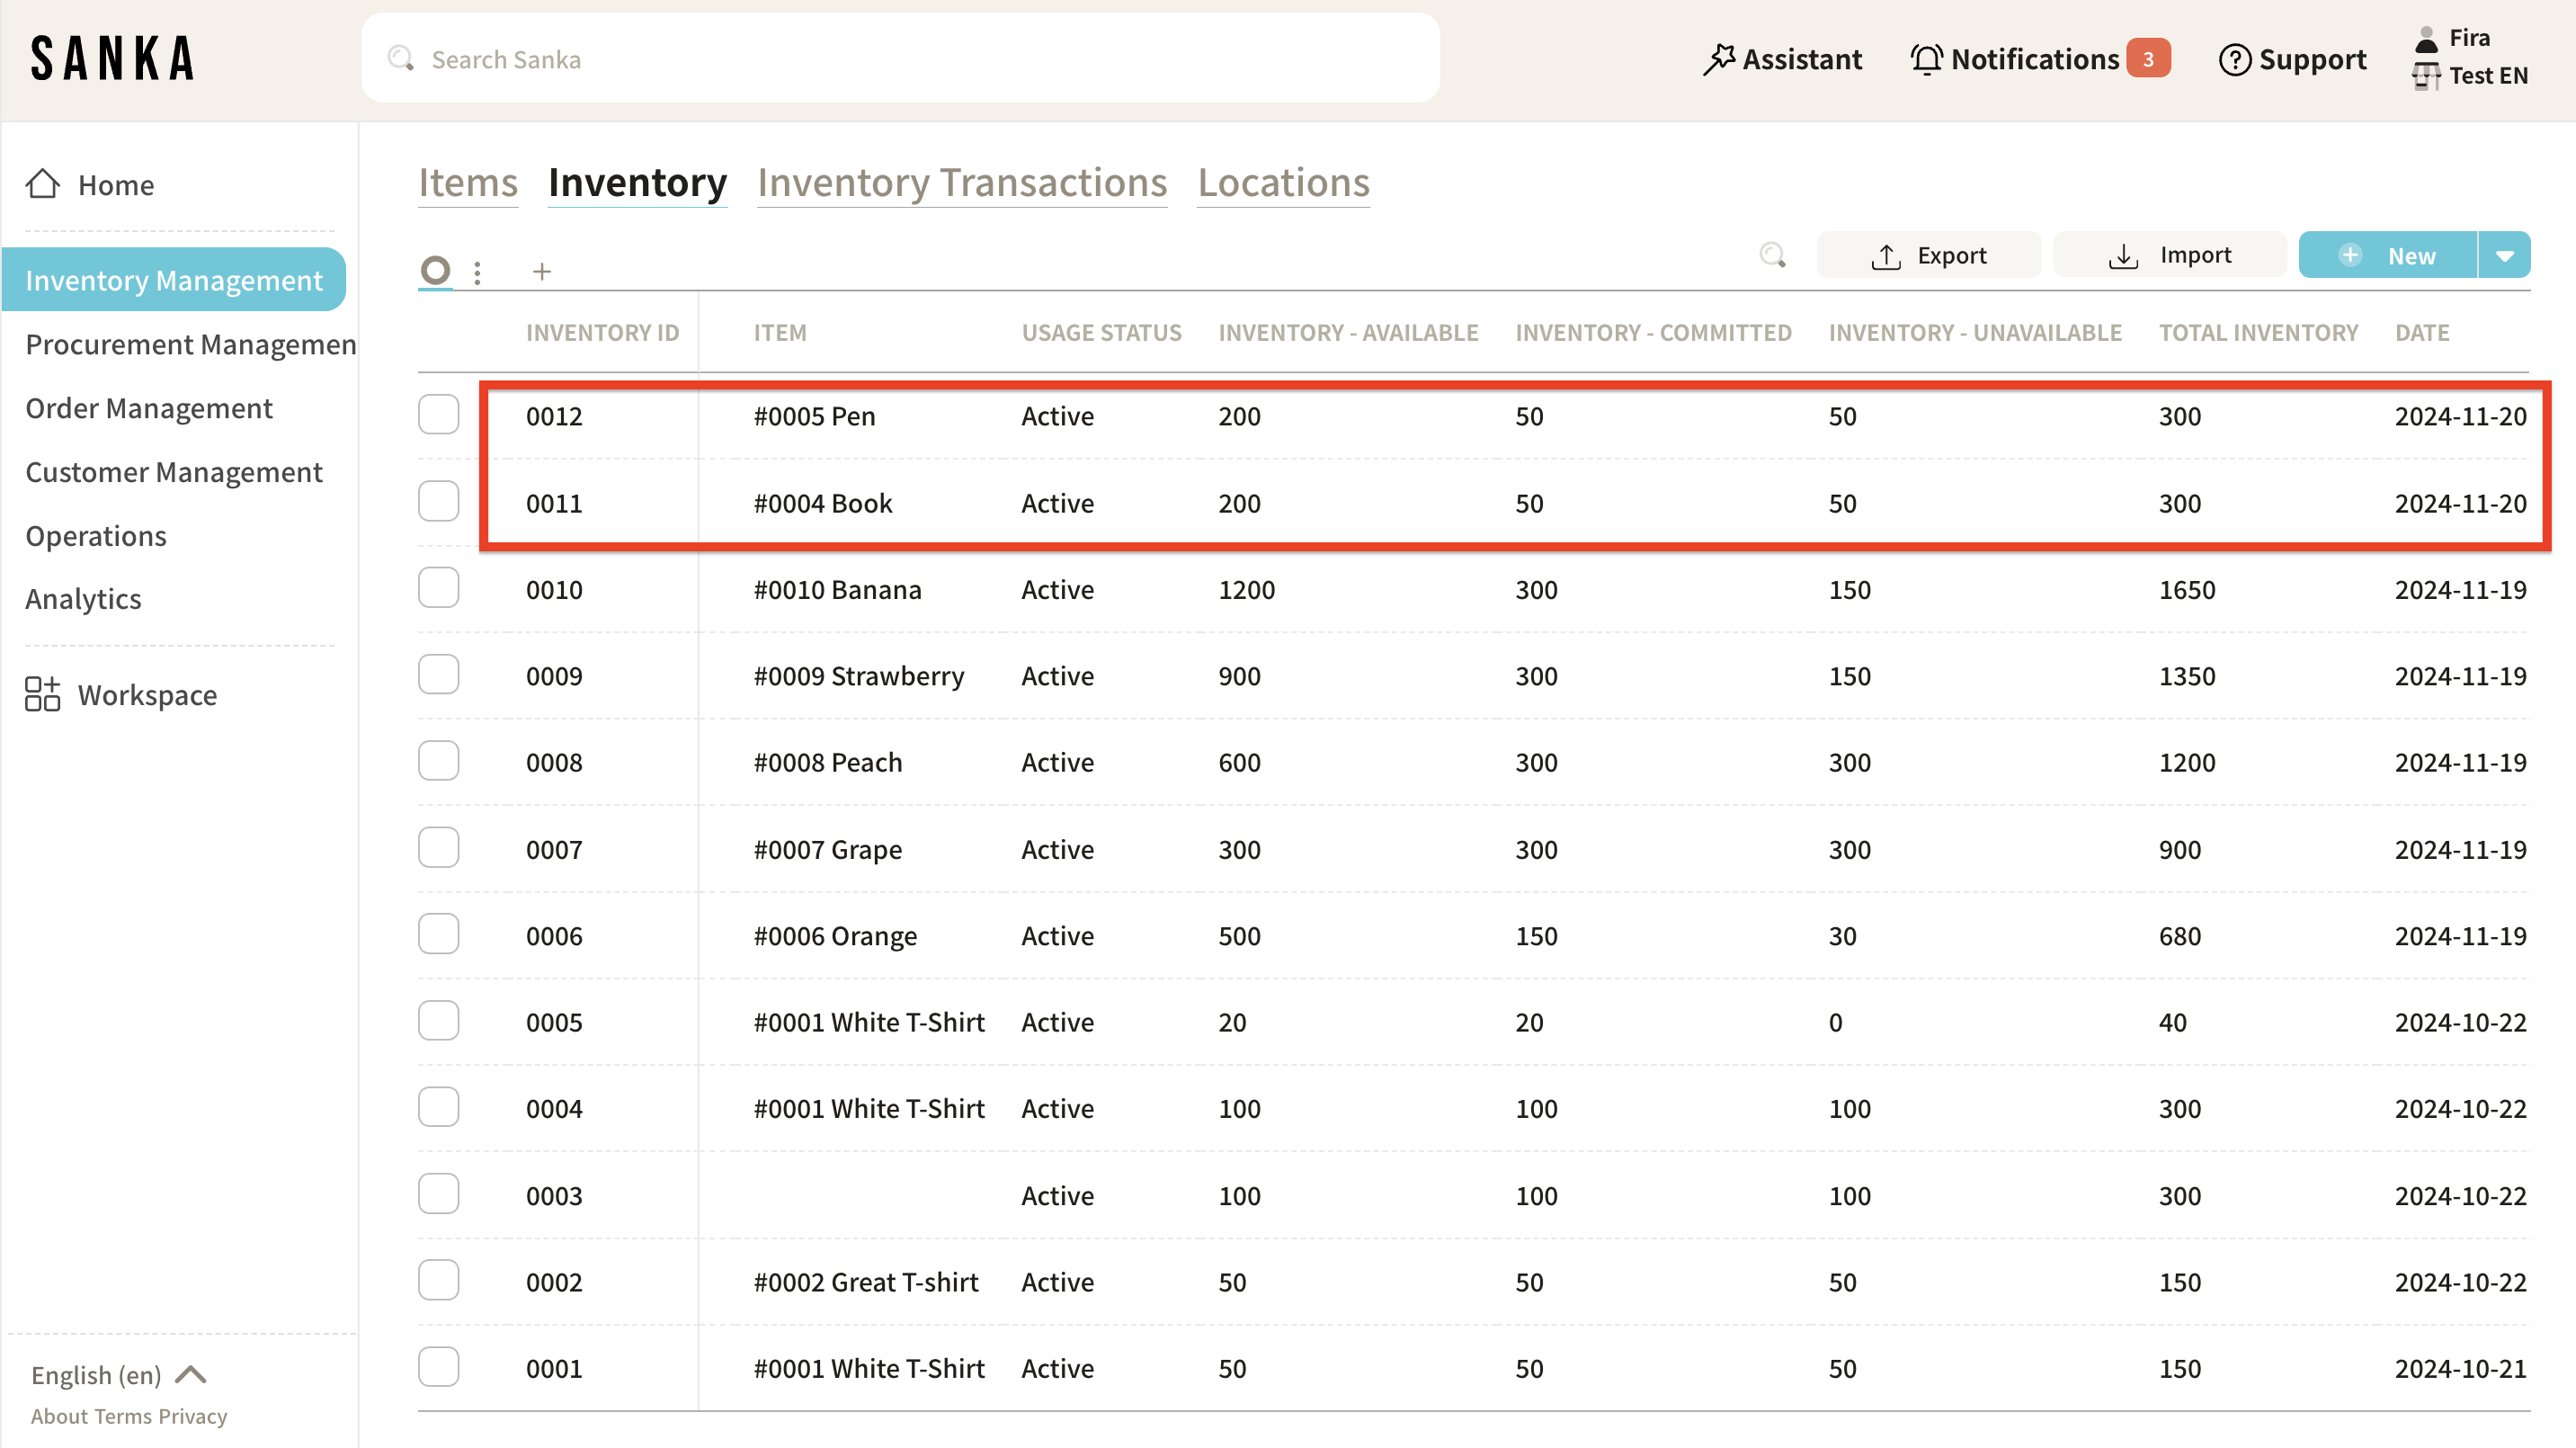
⑩ The inventory data will be updated.
- Note: If the Item ID (item master) is not registered in Sanka, the inventory information will not appear in the table.
Editing registered Inventory information
Sanka is set to prevent accidental deletion of registered information. Instead of deleting, it's essential to learn how to edit the data.
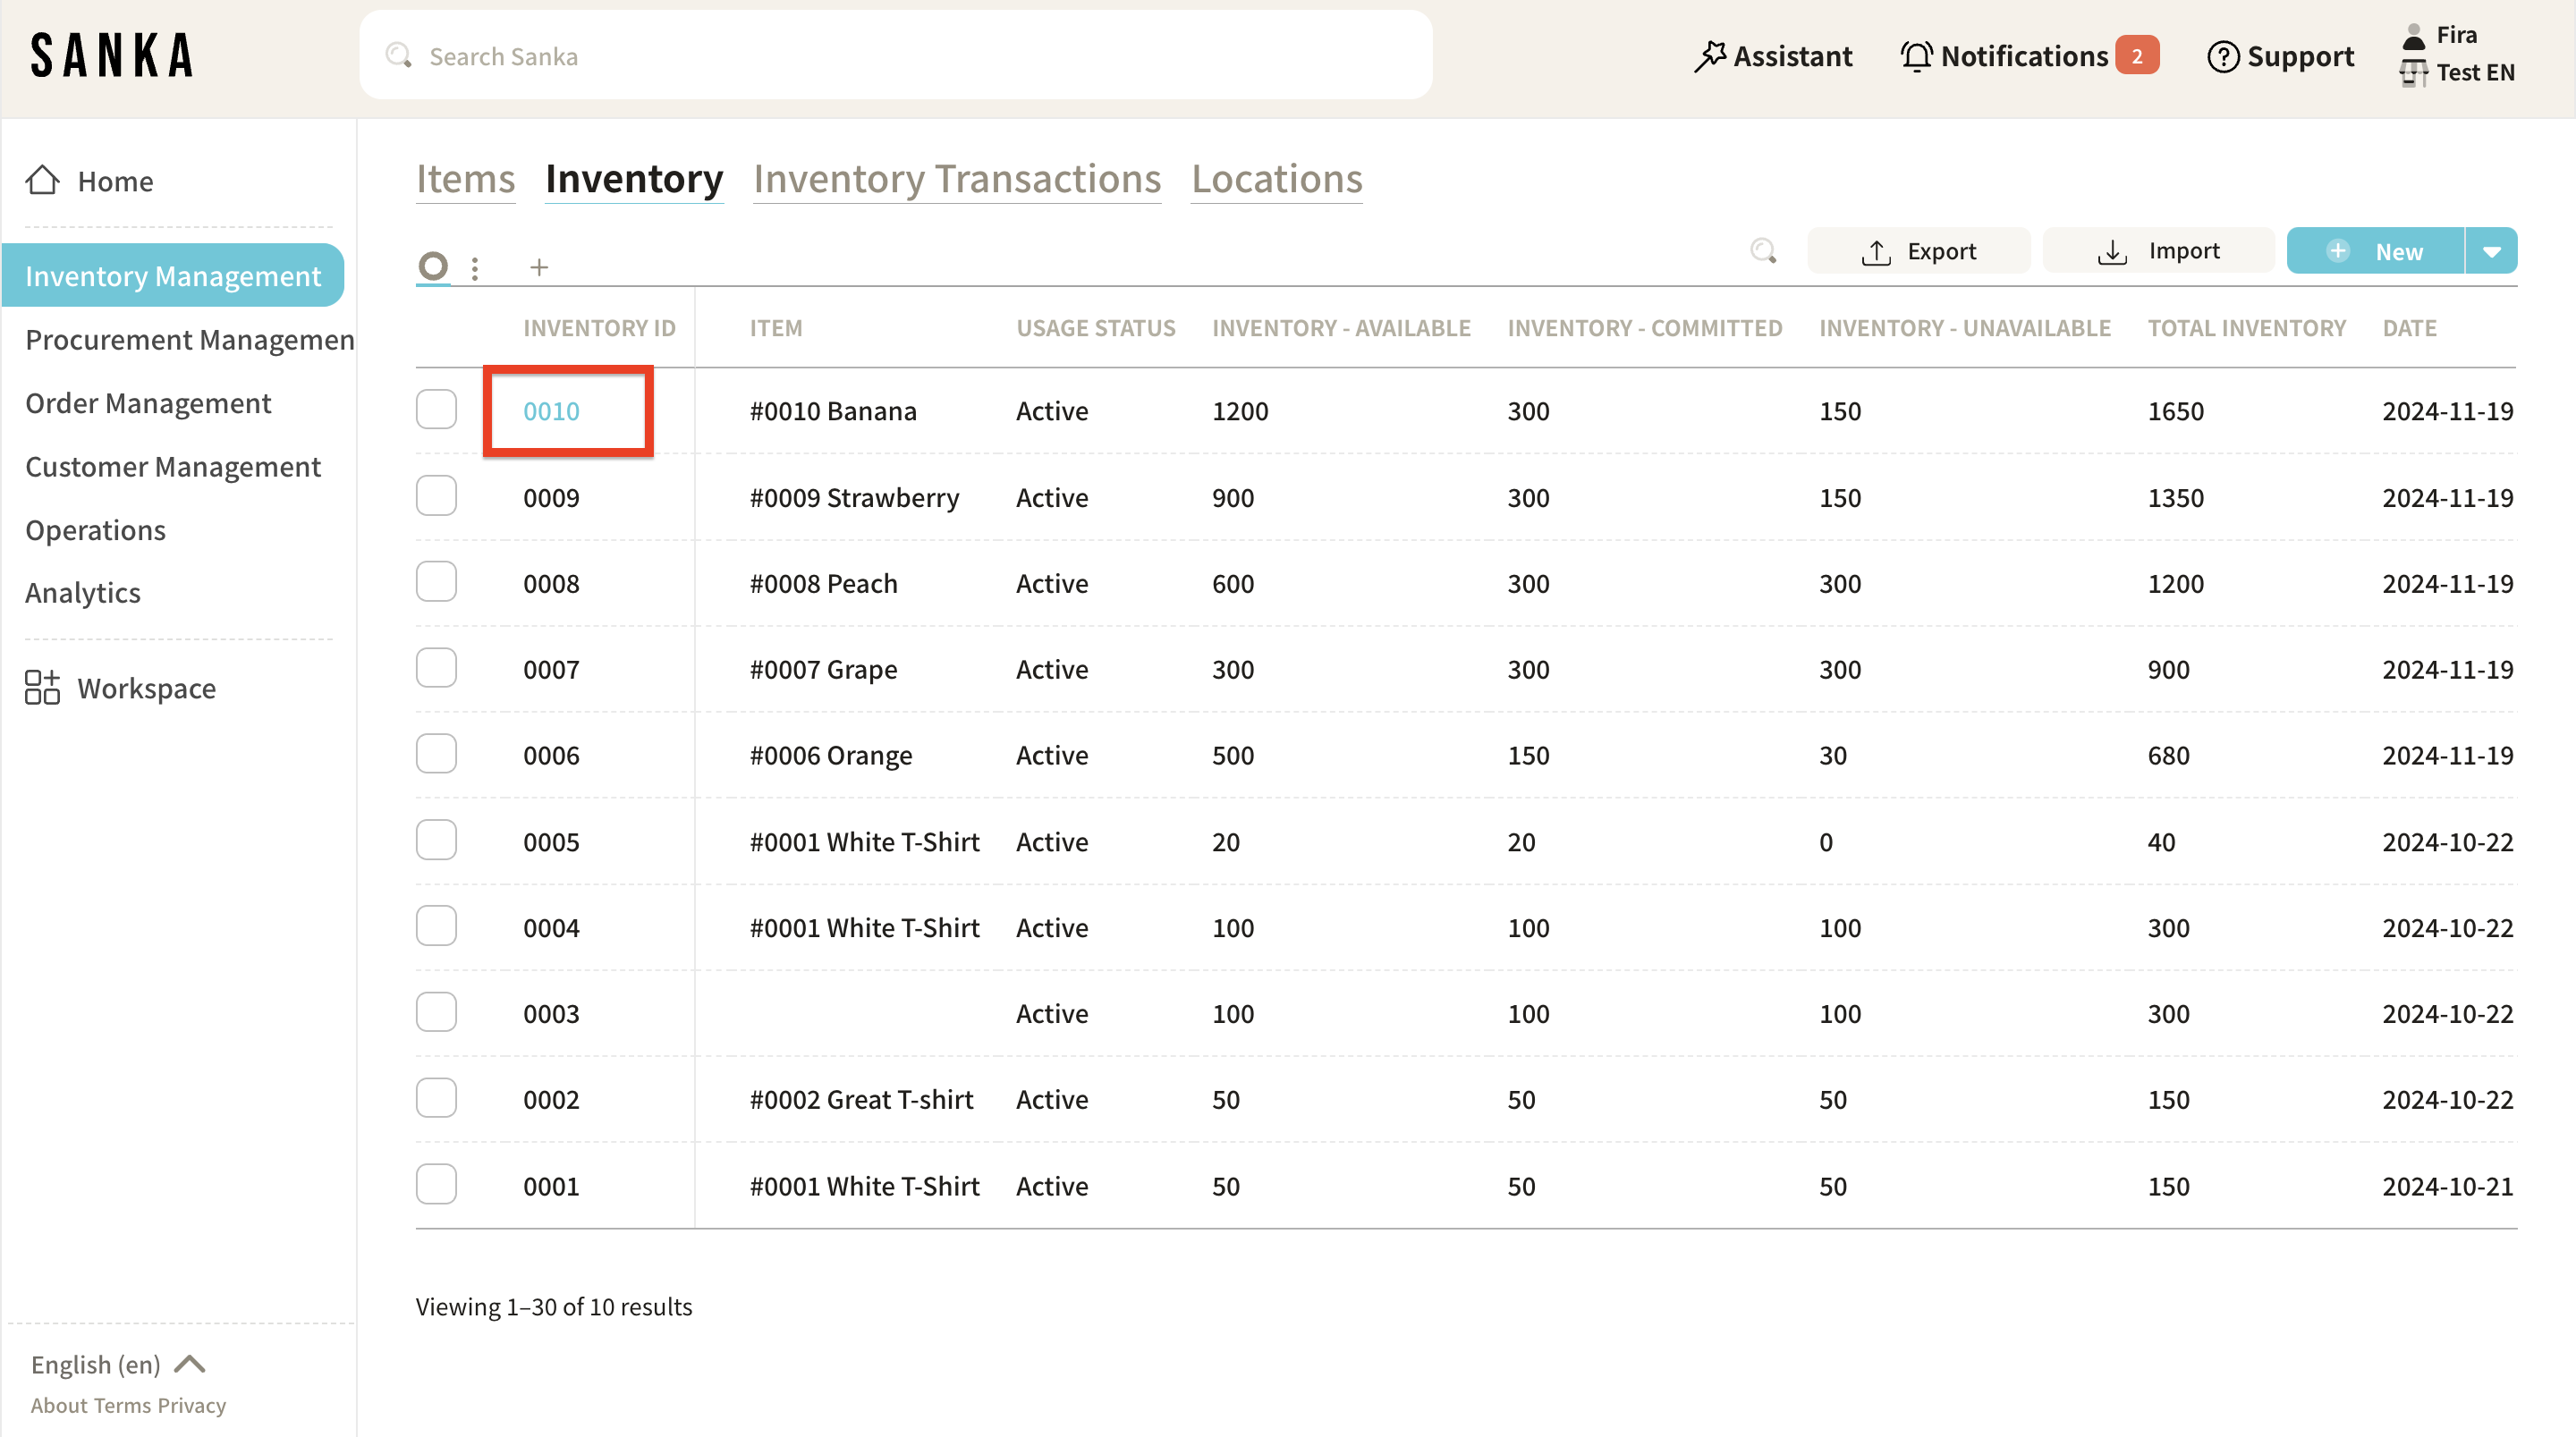
① In the "Inventory Management" module, select the "Inventory" object and you'll see the inventory record displayed. Click on the "Inventory ID" to show detailed information and make any necessary edits.
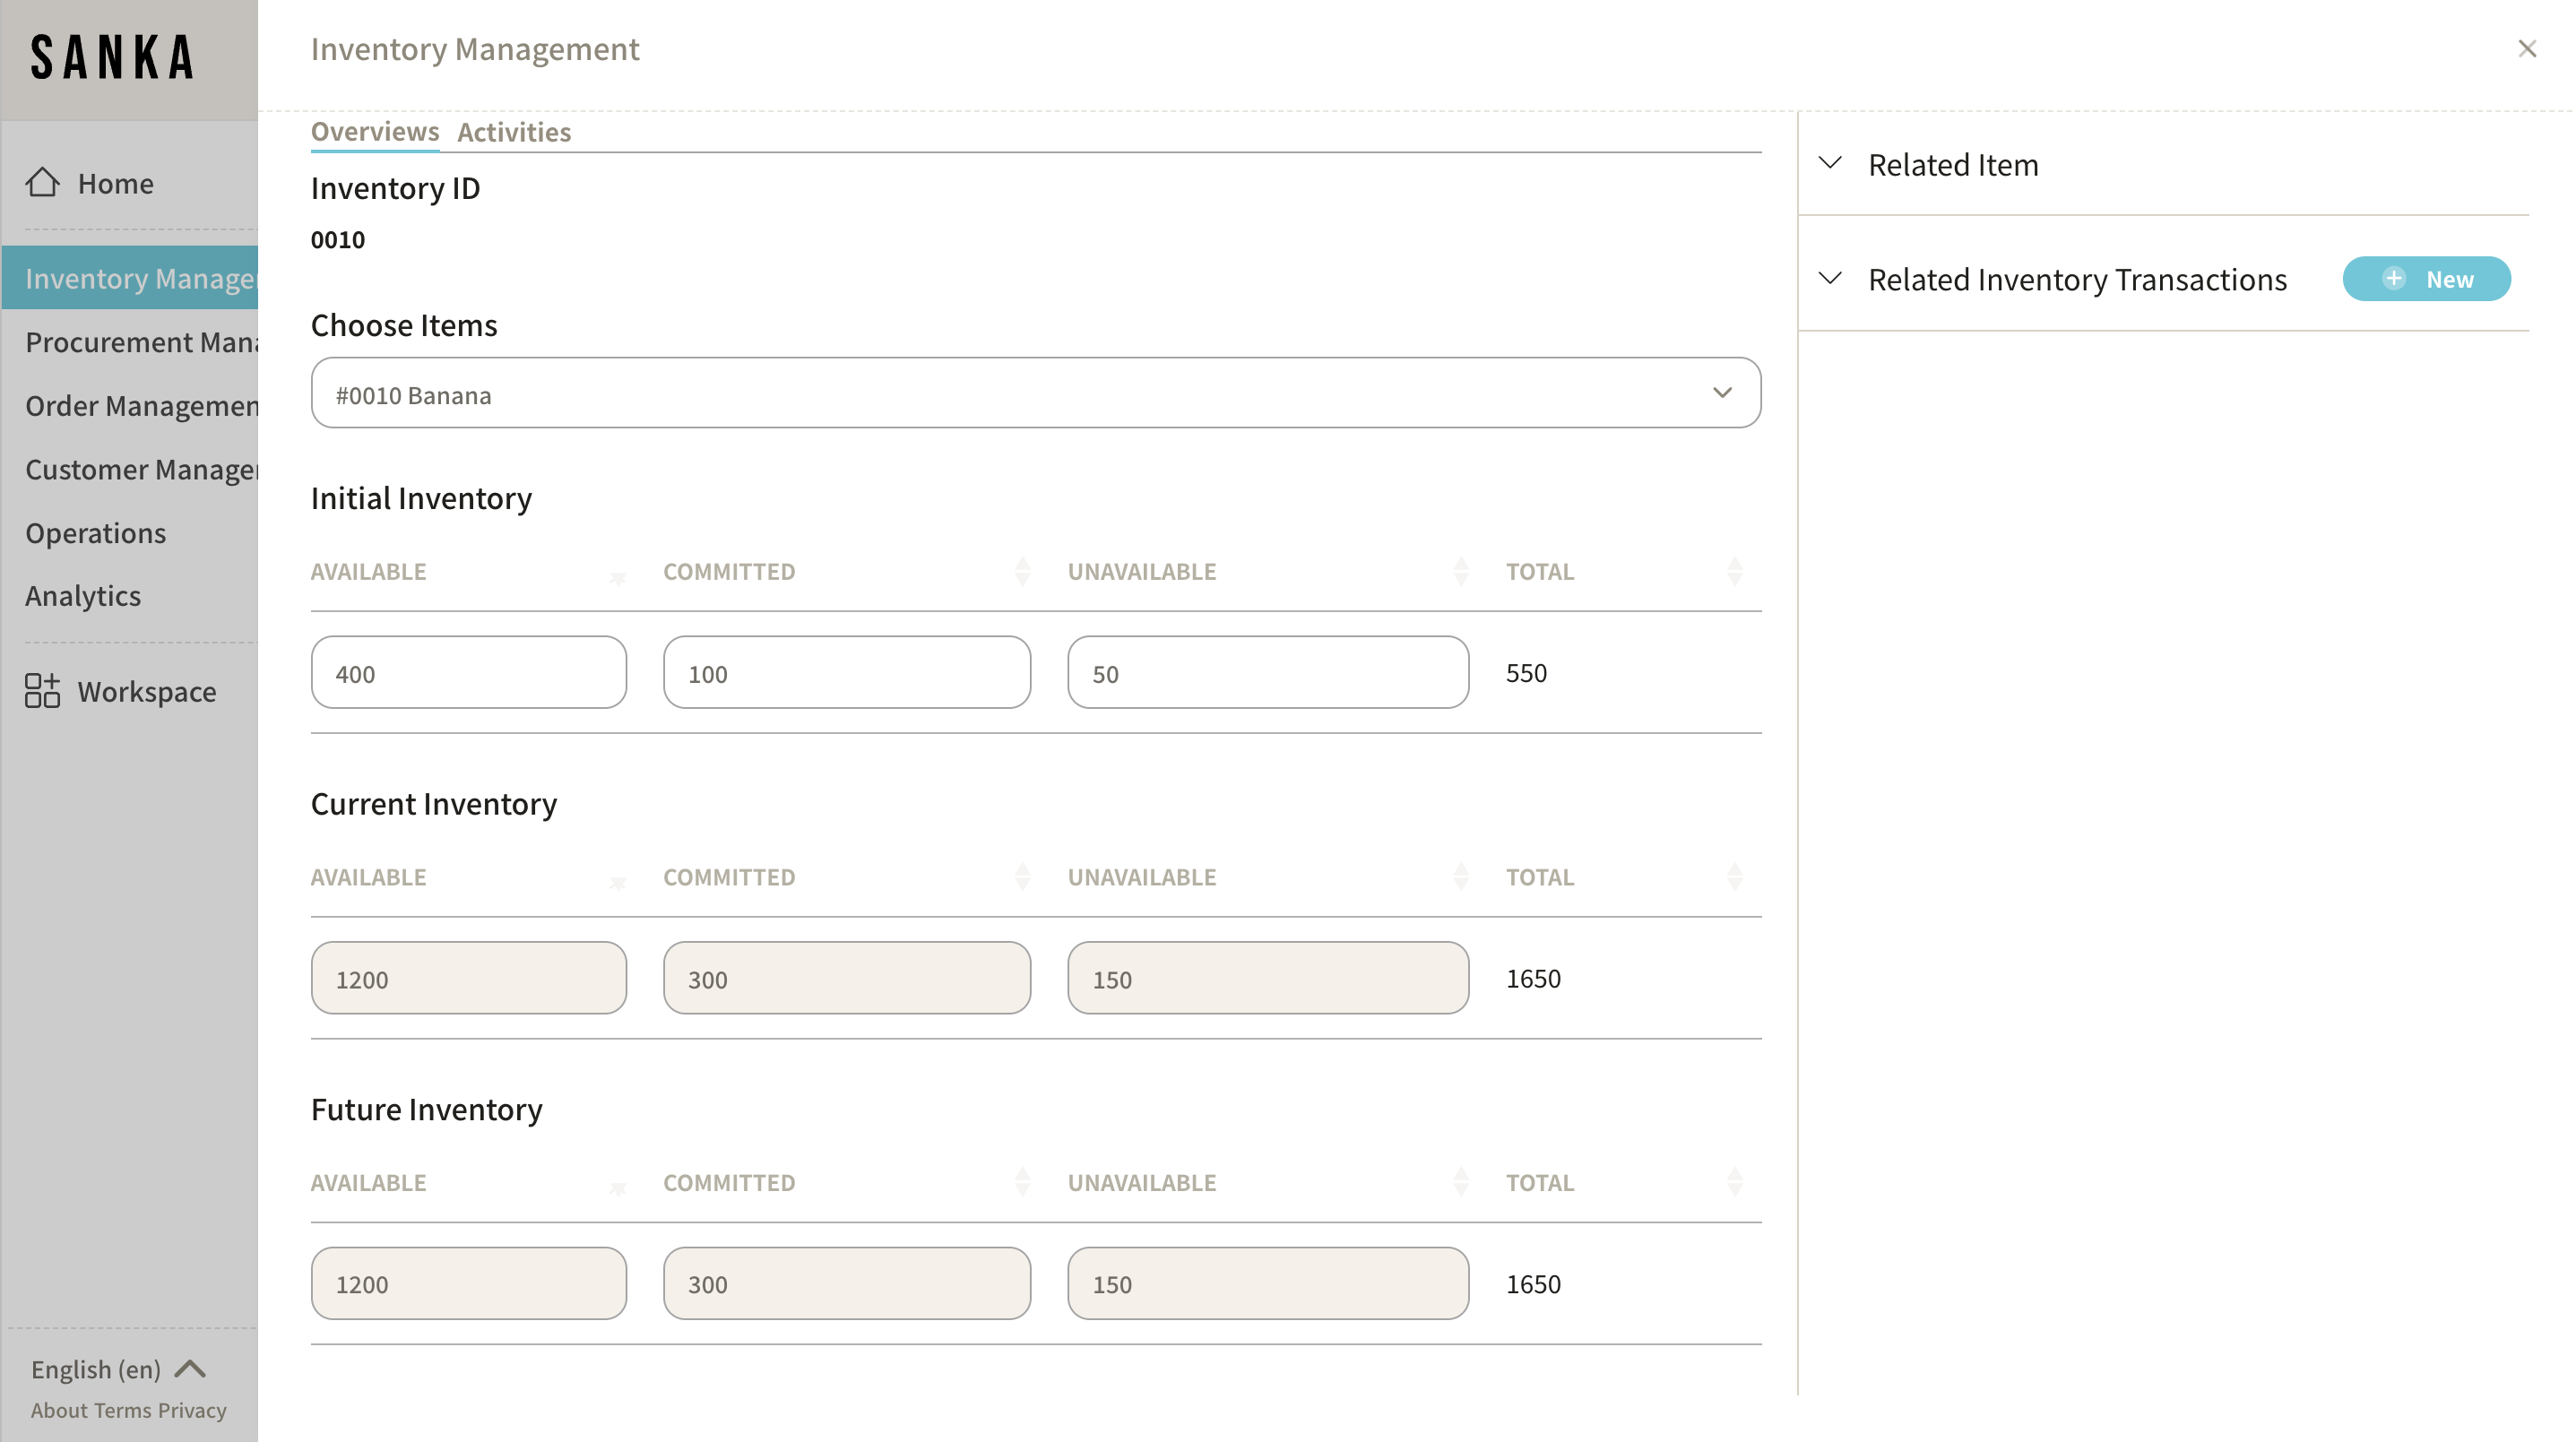
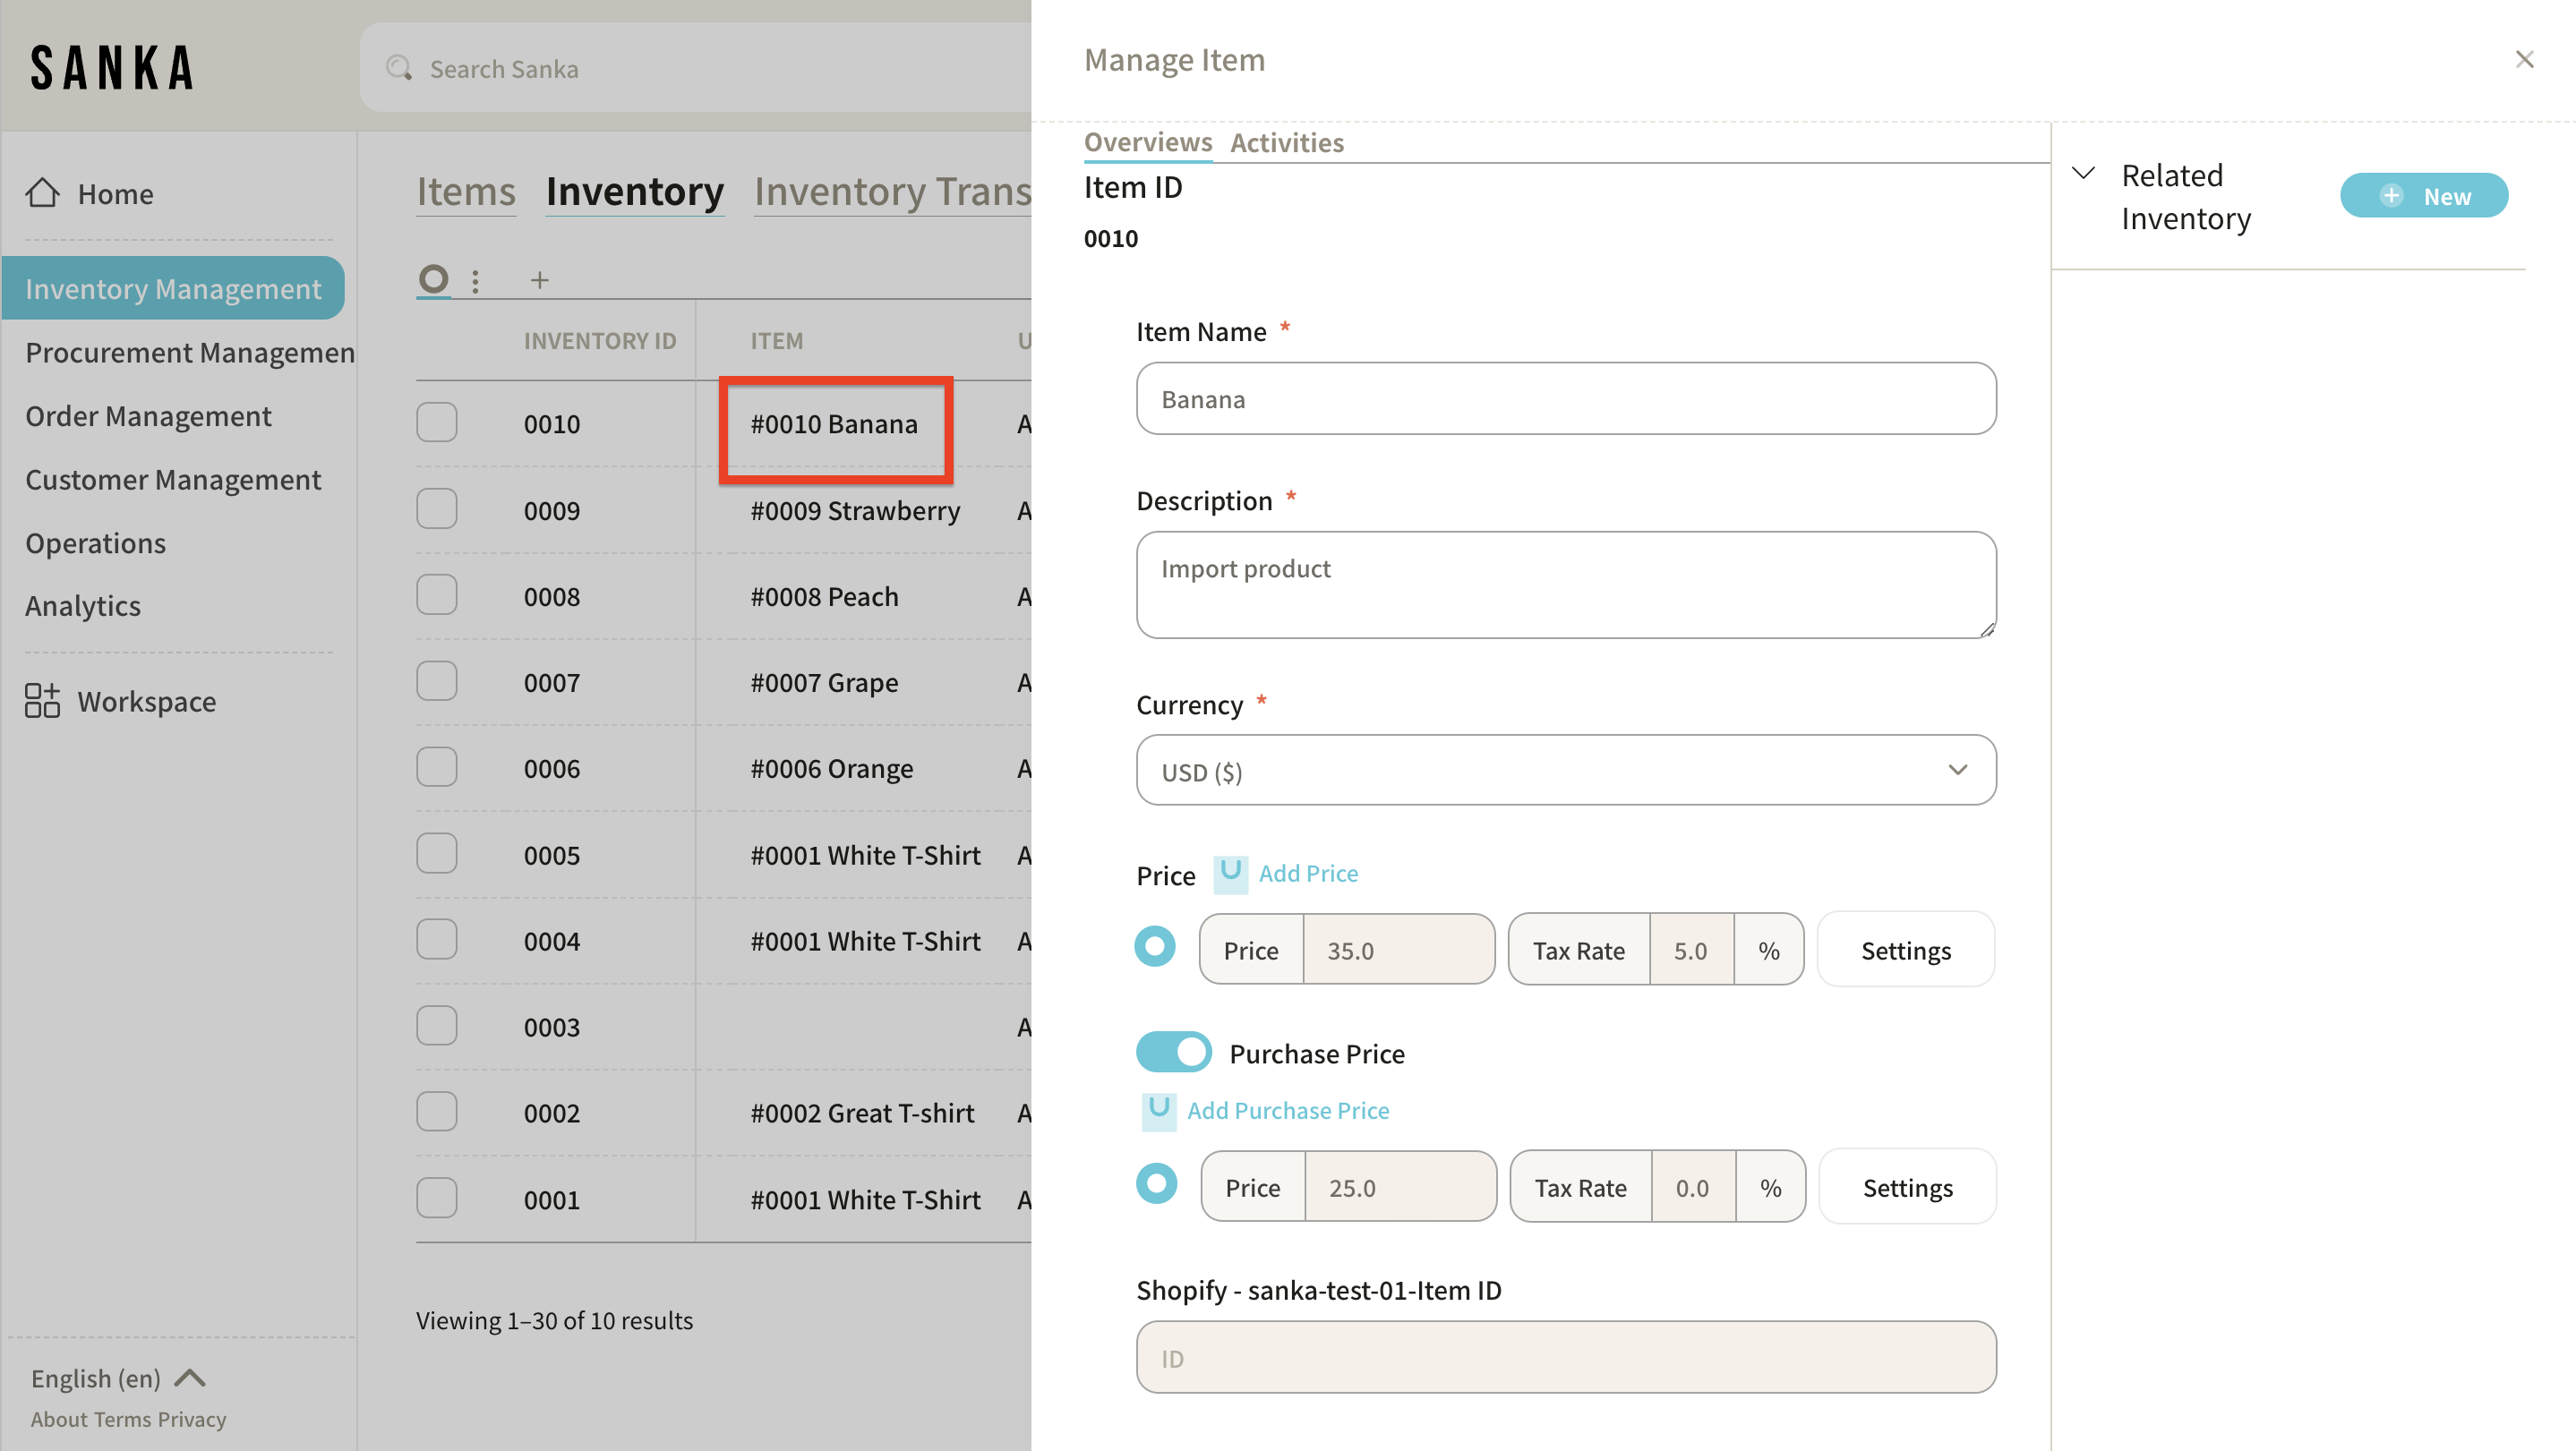
② If you click the "Item" at the record list, it will show a detailed page of item. You can directly edit the item information without going to Items Object.
Archiving Inventory information
The archive function allows you to hide registered inventory information from the table. Archive items that don’t need to show their real-time stock levels.
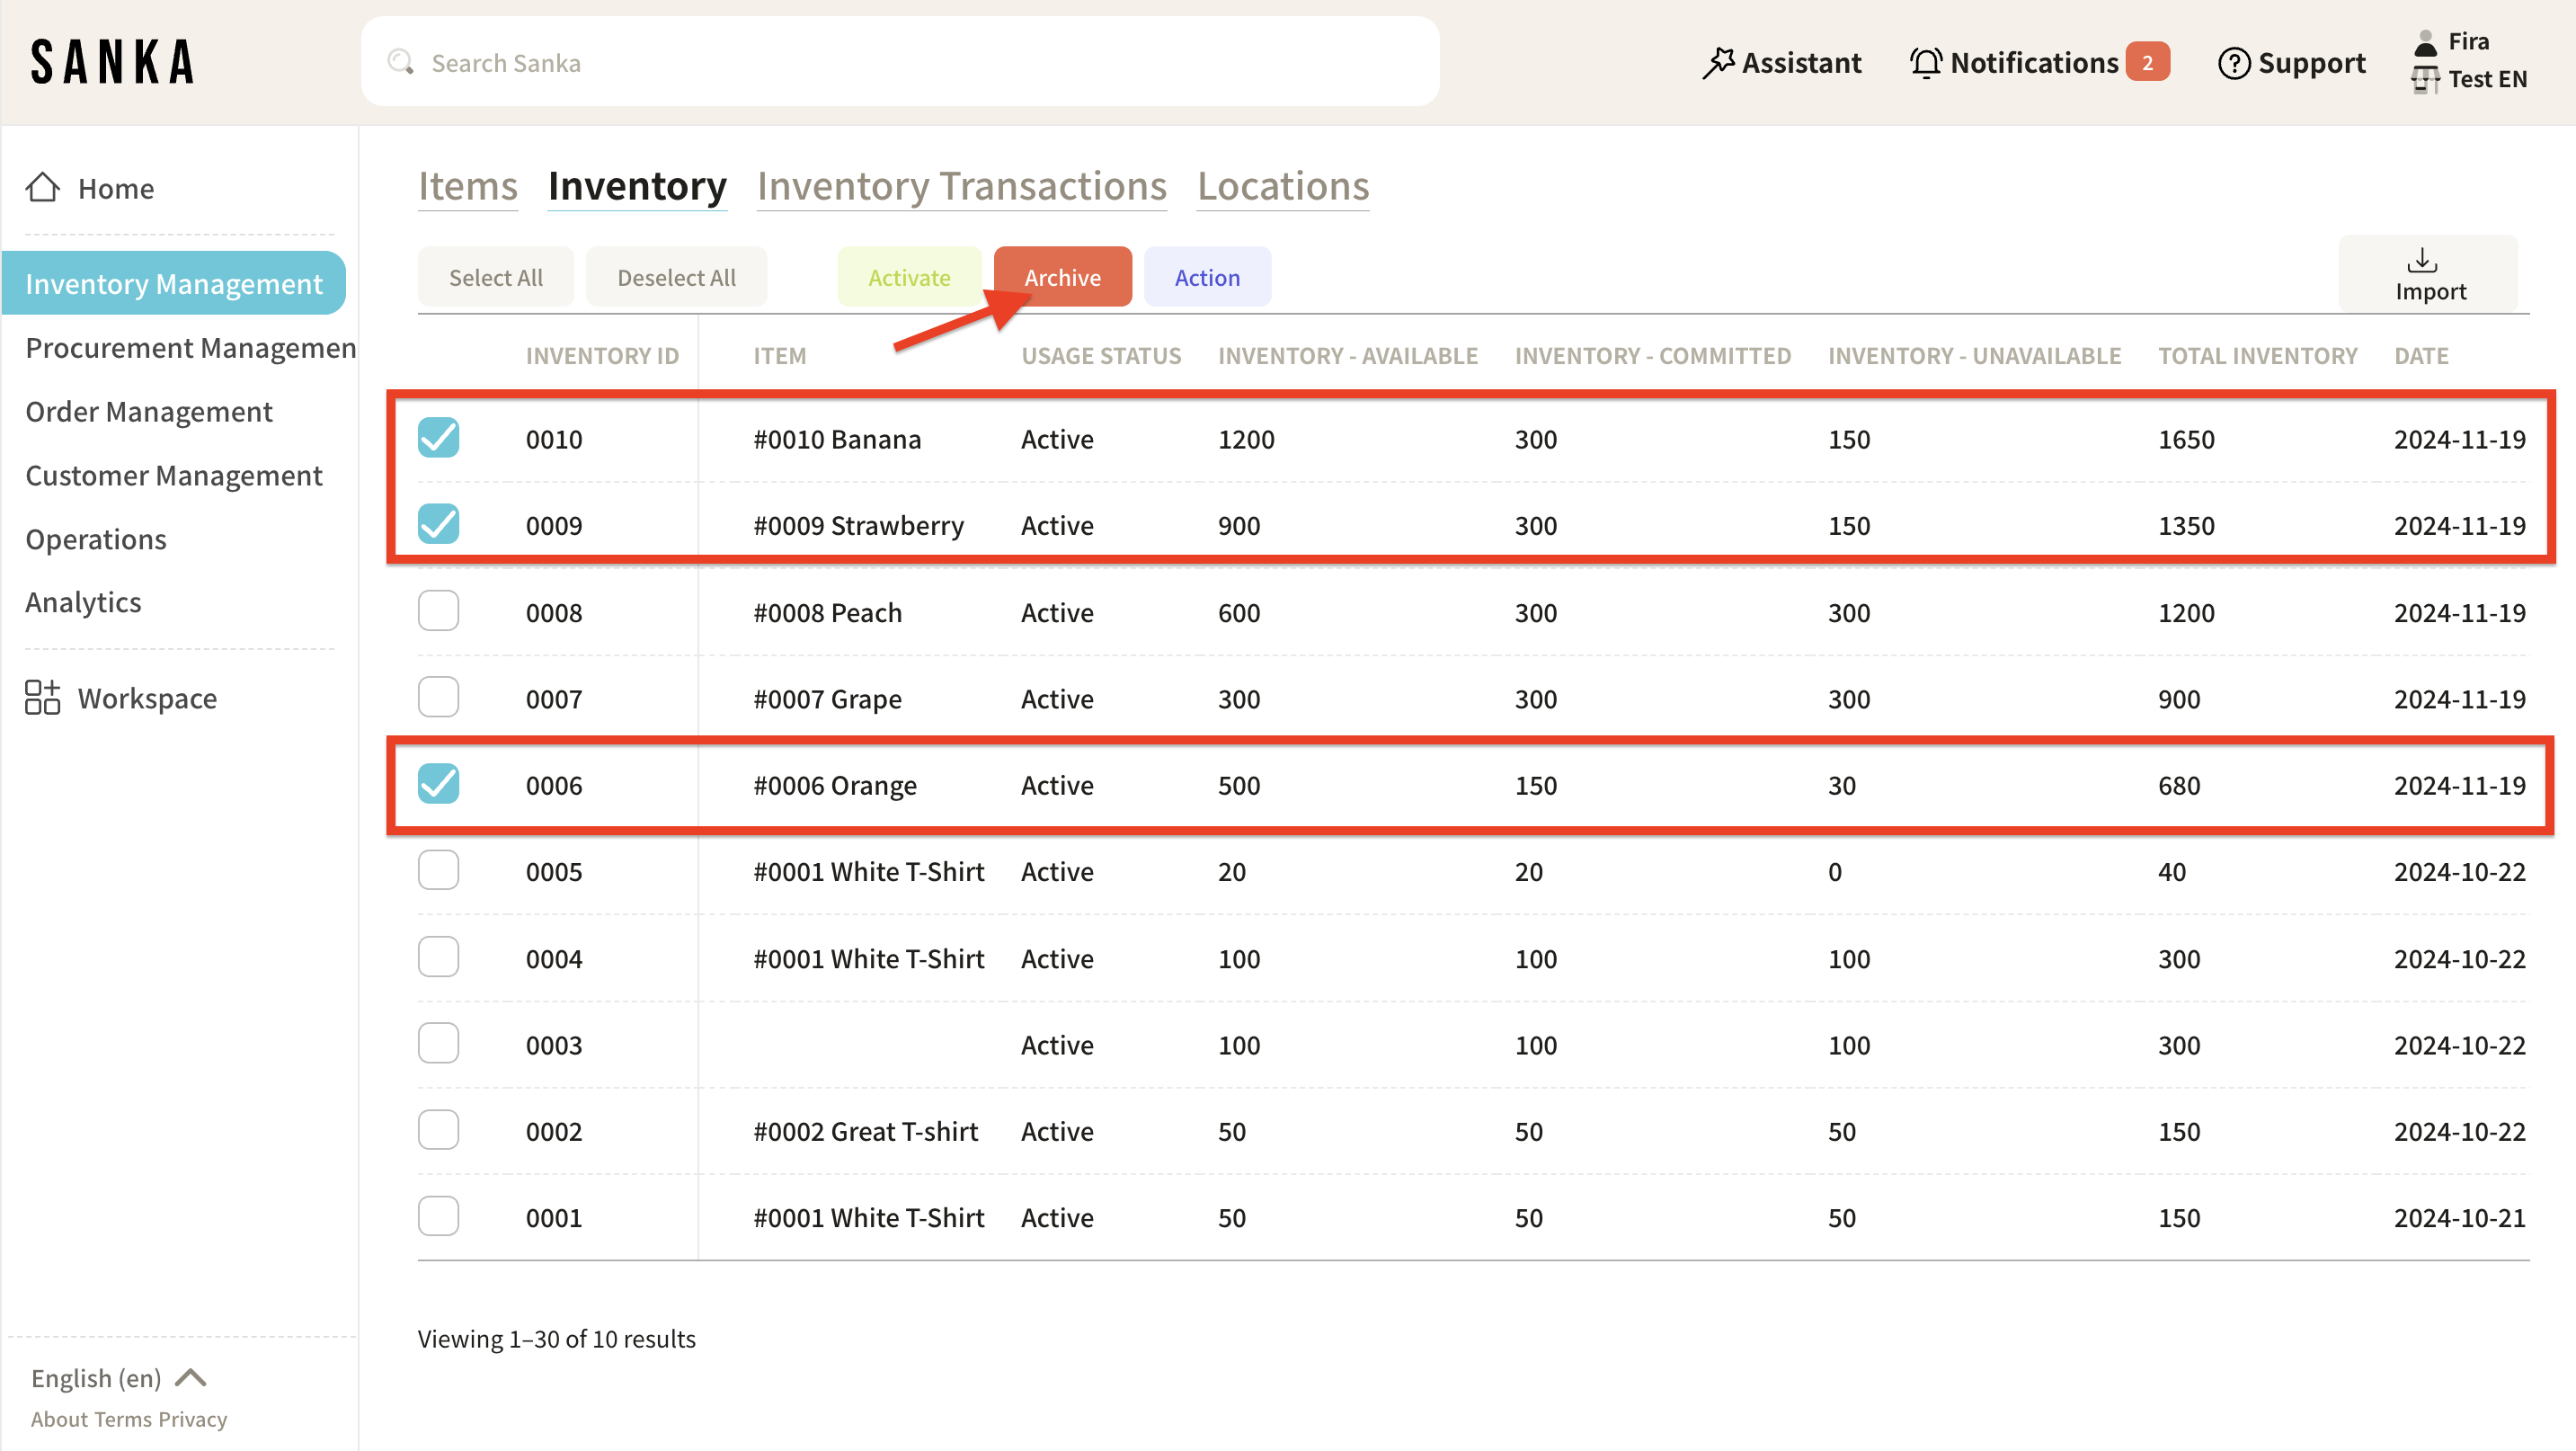
① Click the box next to the item you want to archive and select "Archive."
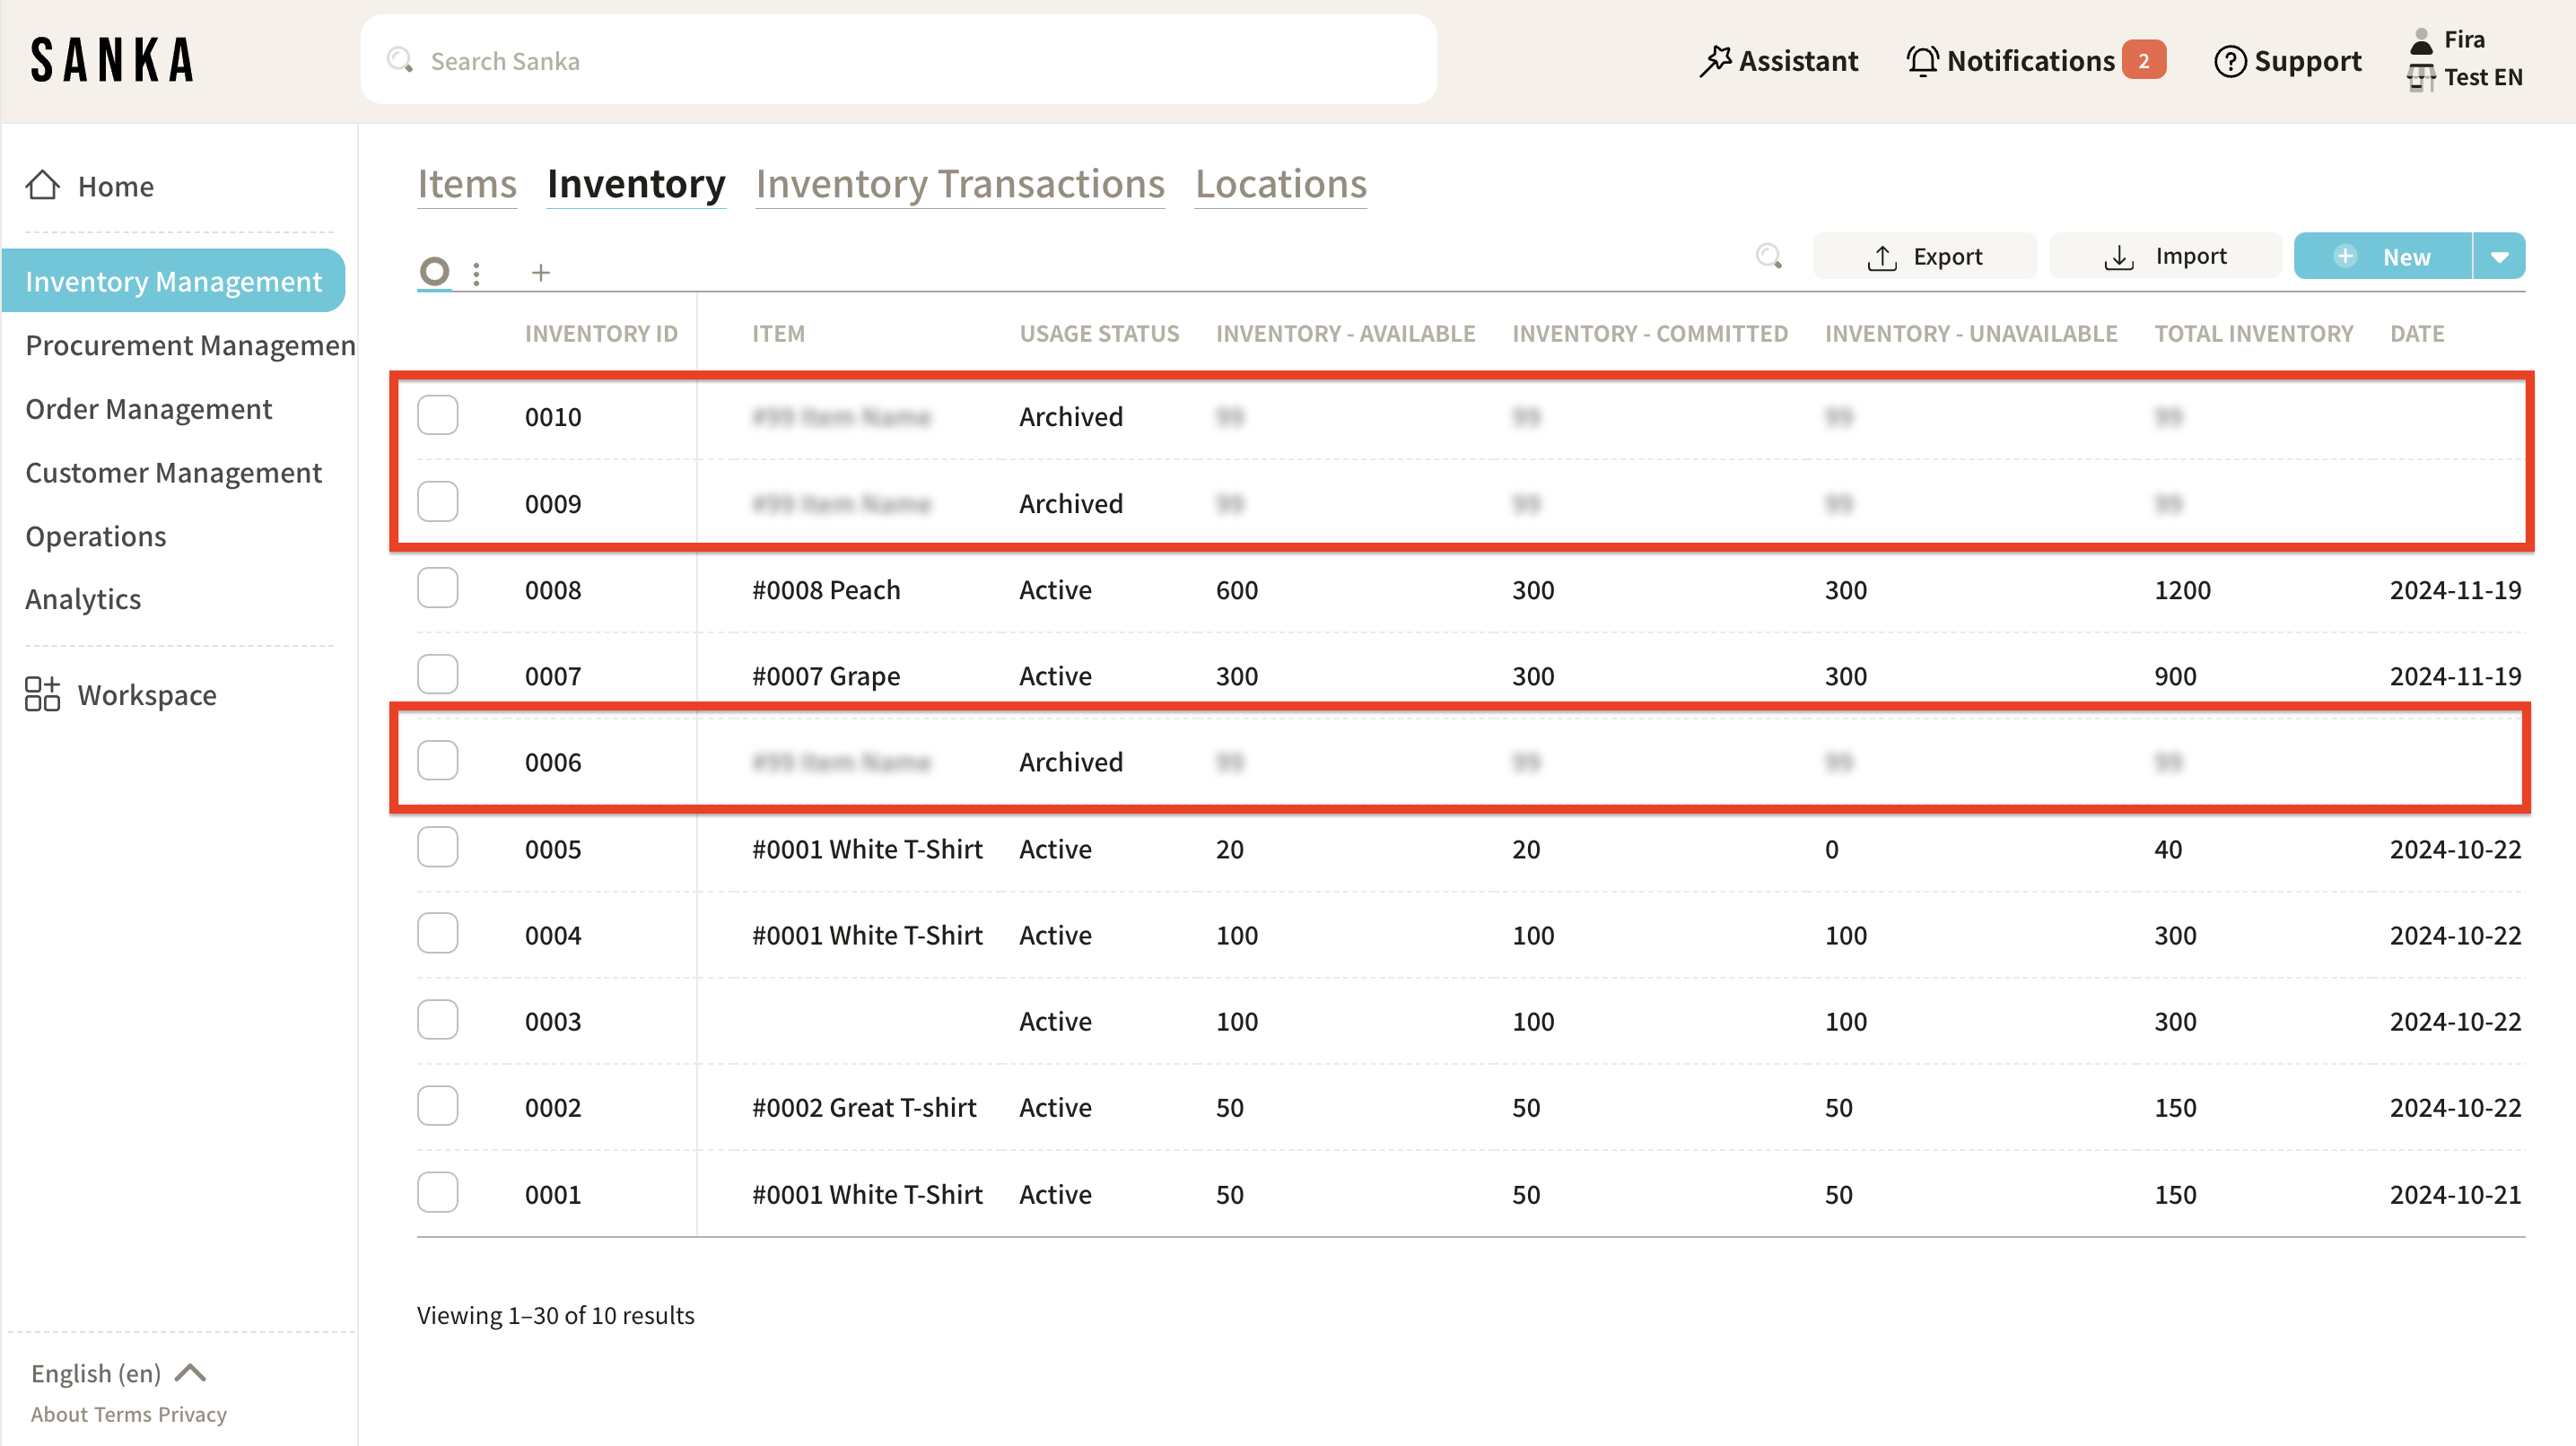
② Archived items will appear blurred out.
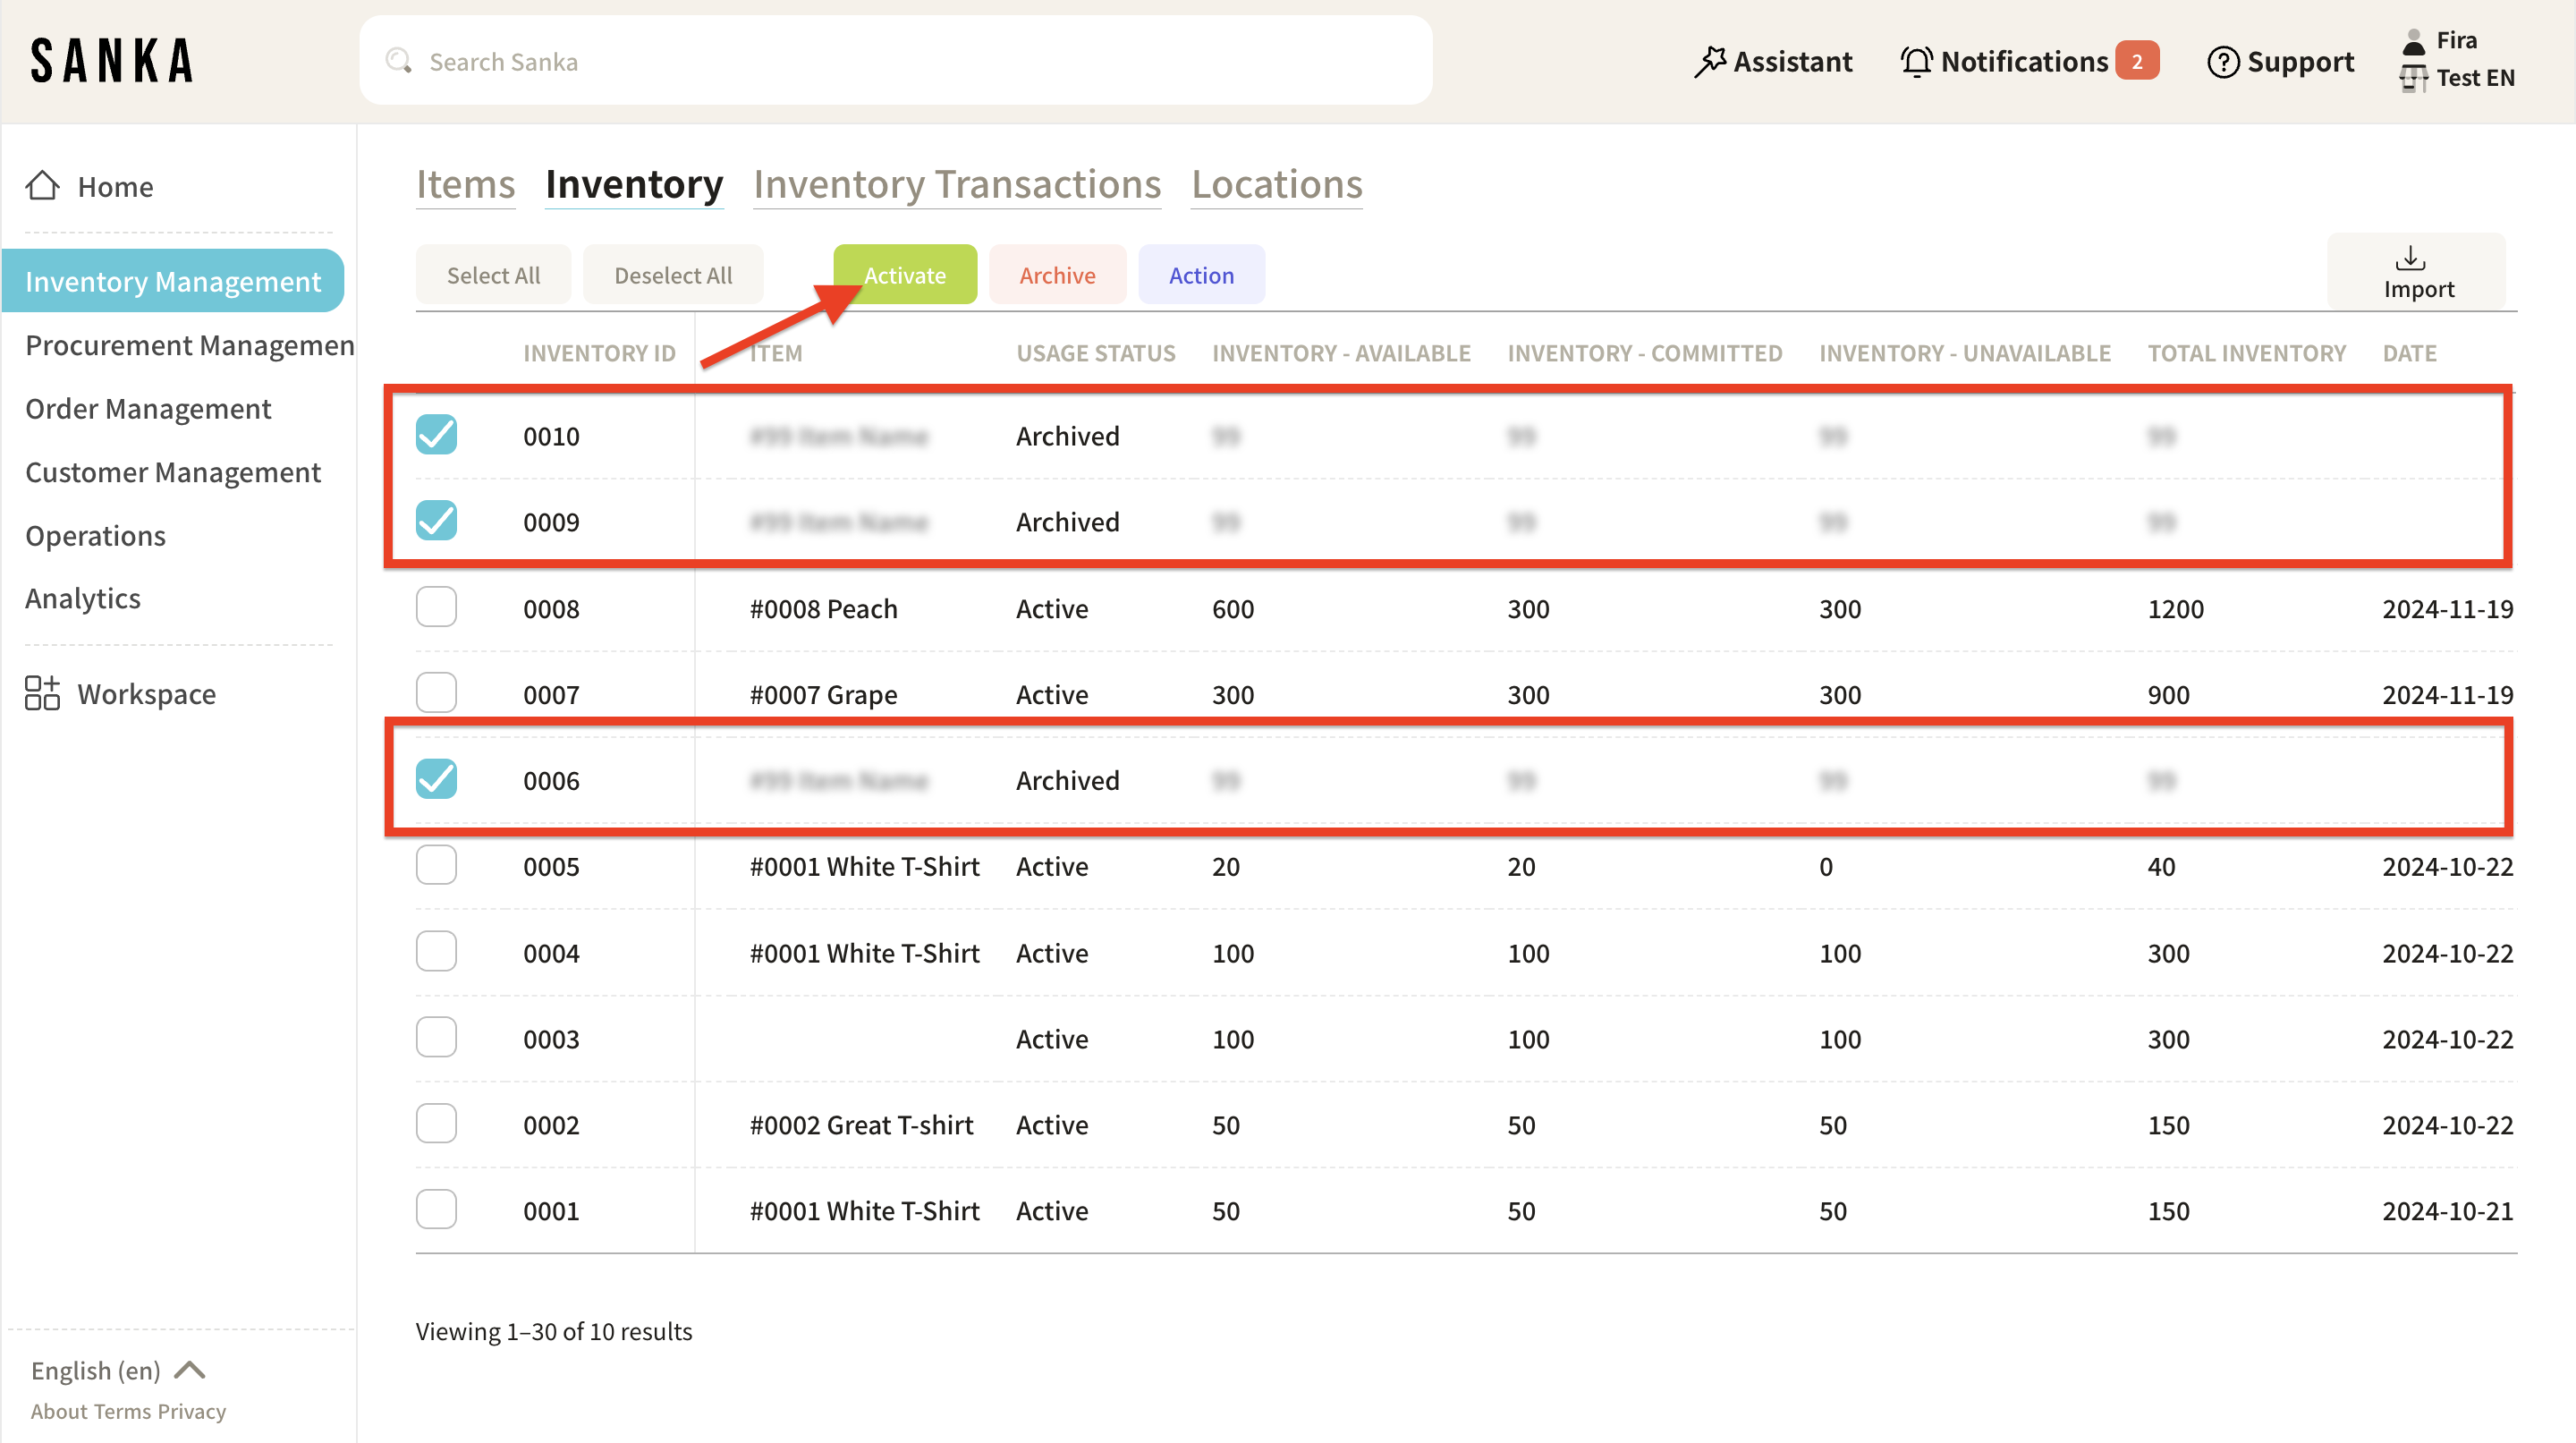
③ To unarchive, click the box for the relevant item and select "Activate."
④ The item will return to its normal display once activated.
Next step
After adding inventory, the next step is to manage inventory transactions. → How to Manage Inventory Transactions.


