In this guide, we will explain how to create item structure by using components in Sanka.
For a review of basic concepts like "objects" and "modules," please refer to Sanka Basics.
What You Will Learn:
- How to create components
- How to register item structures individually
- How to bulk register item structures using CSV files
- How to display linked items together (group table)
- How to edit registered information
How to Create Components
1: Navigate to the Workspace Select Workspace and click Object Manager.
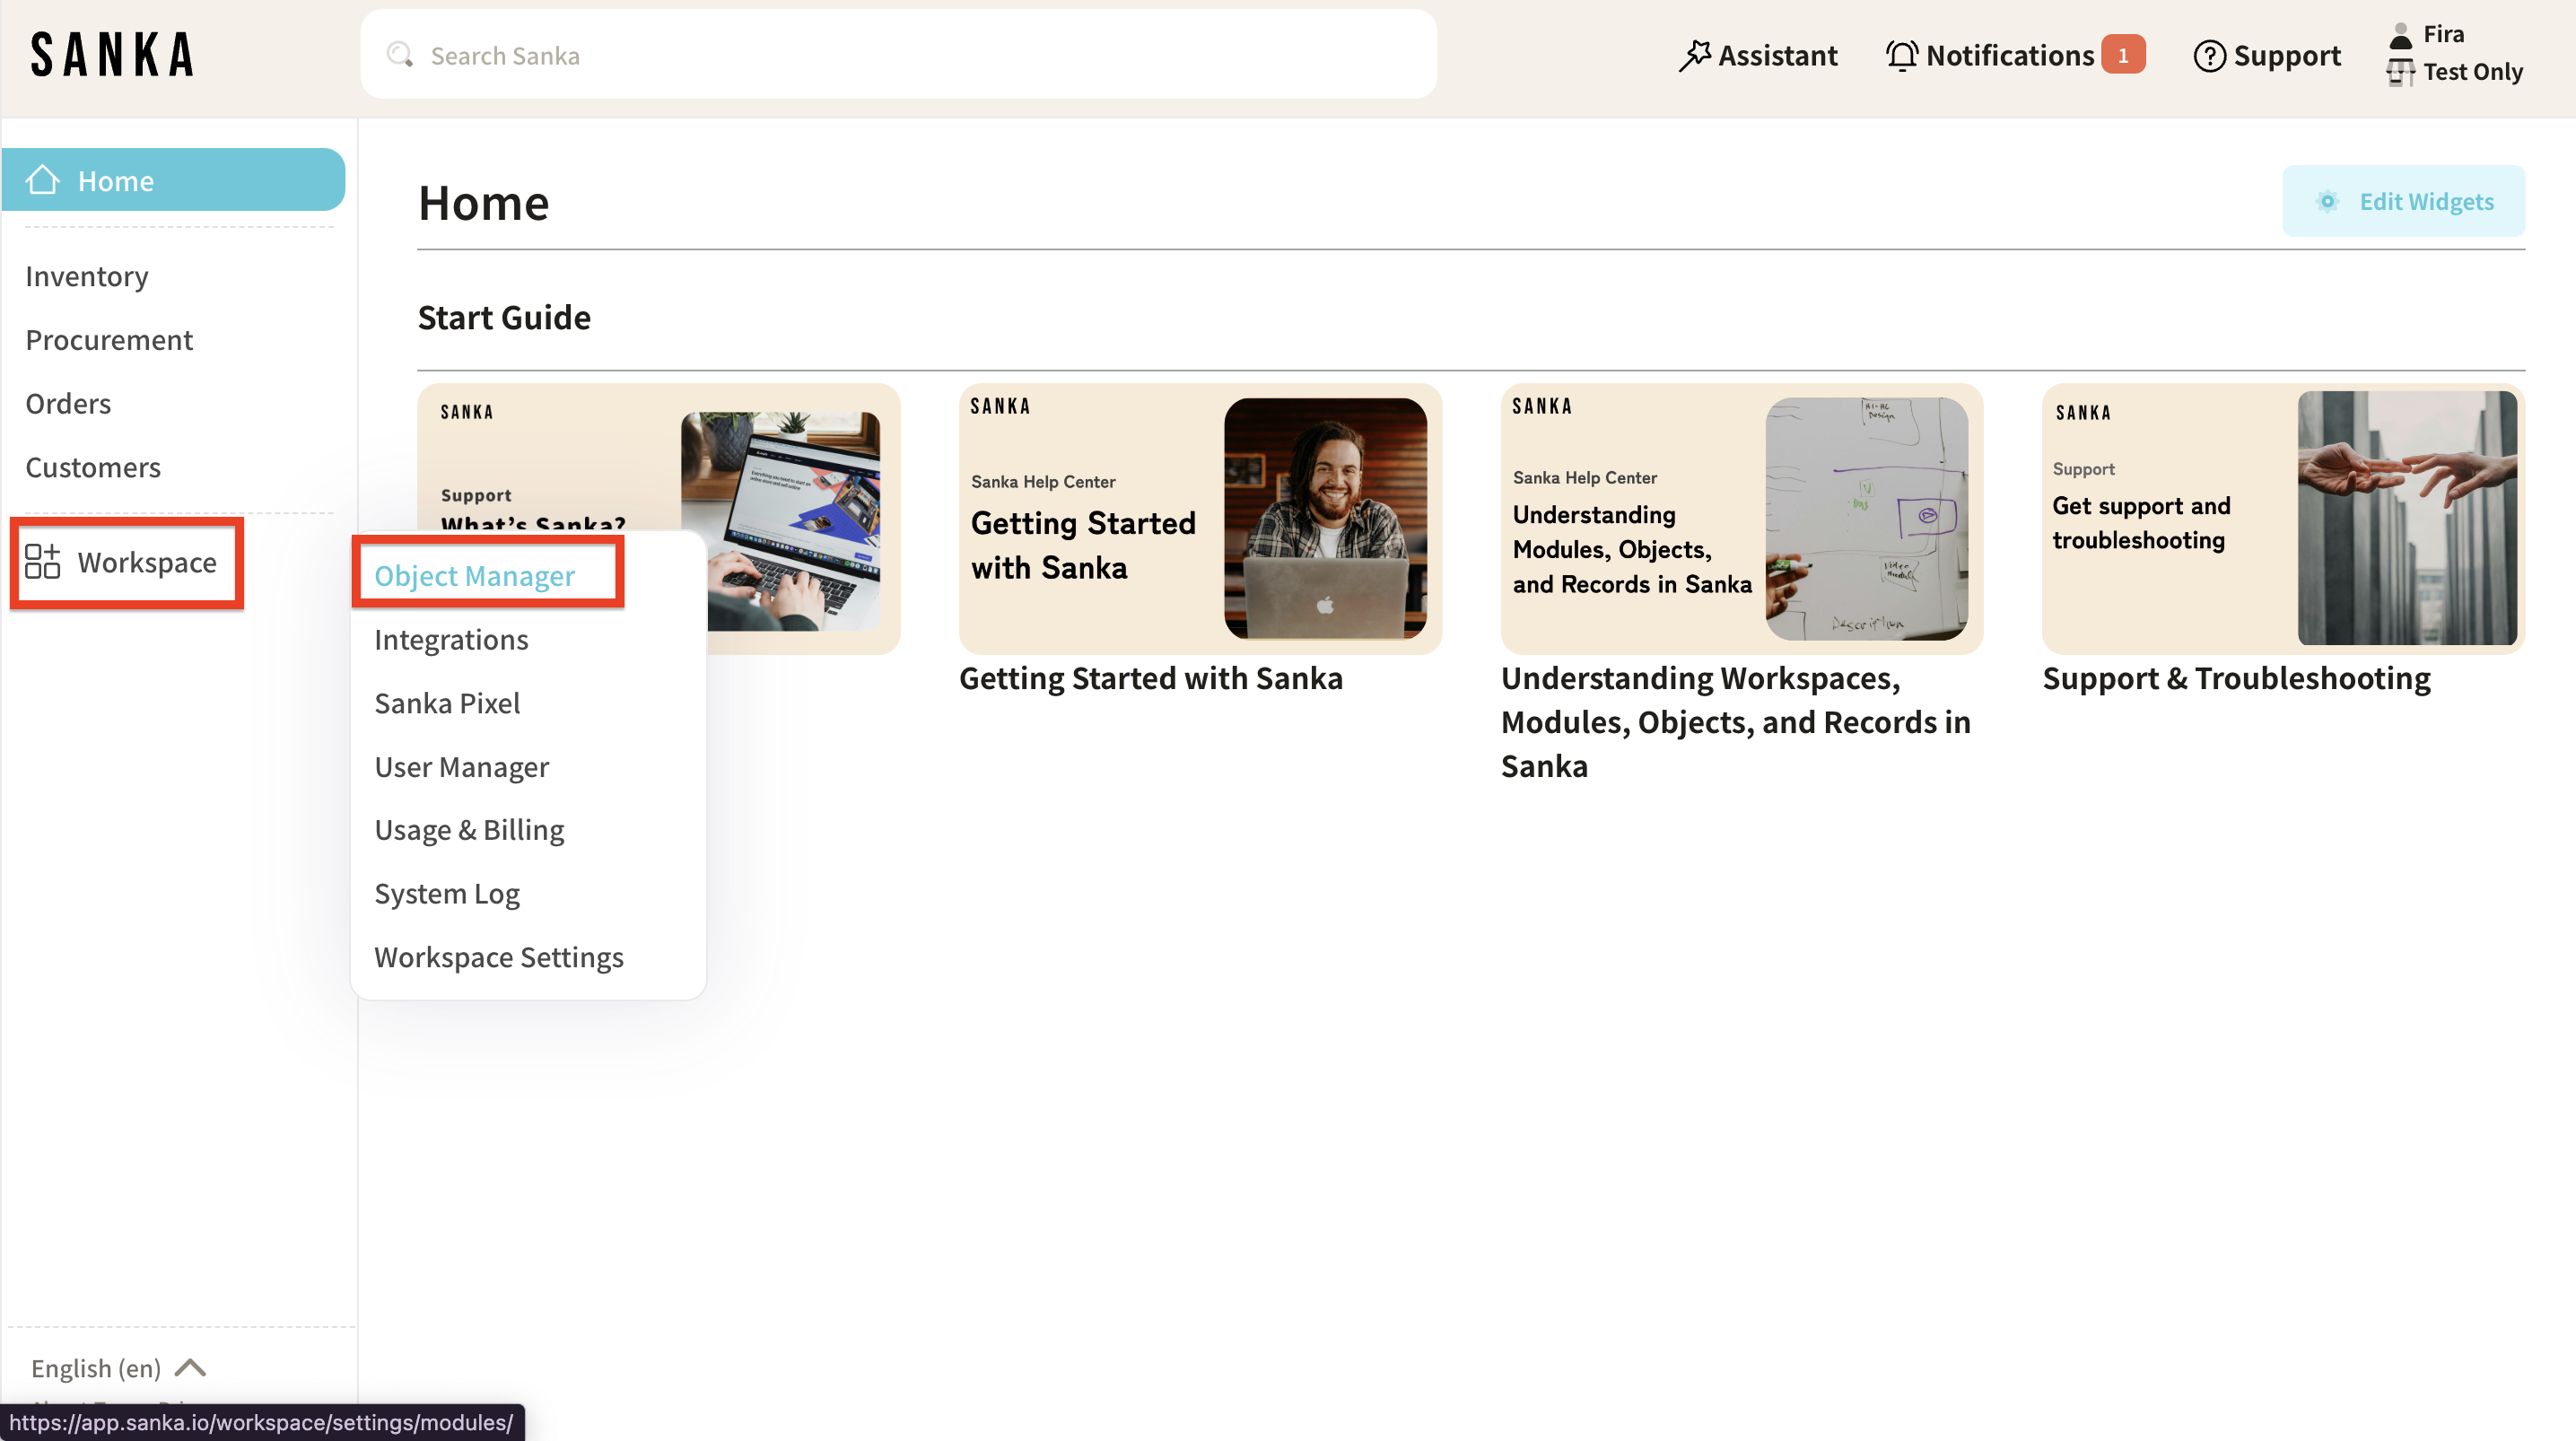
2: Access Items Properties Under Object Manager, select Items from the menu. You will see the current product properties (management items) displayed in the center of the screen. Click New in the top right corner.
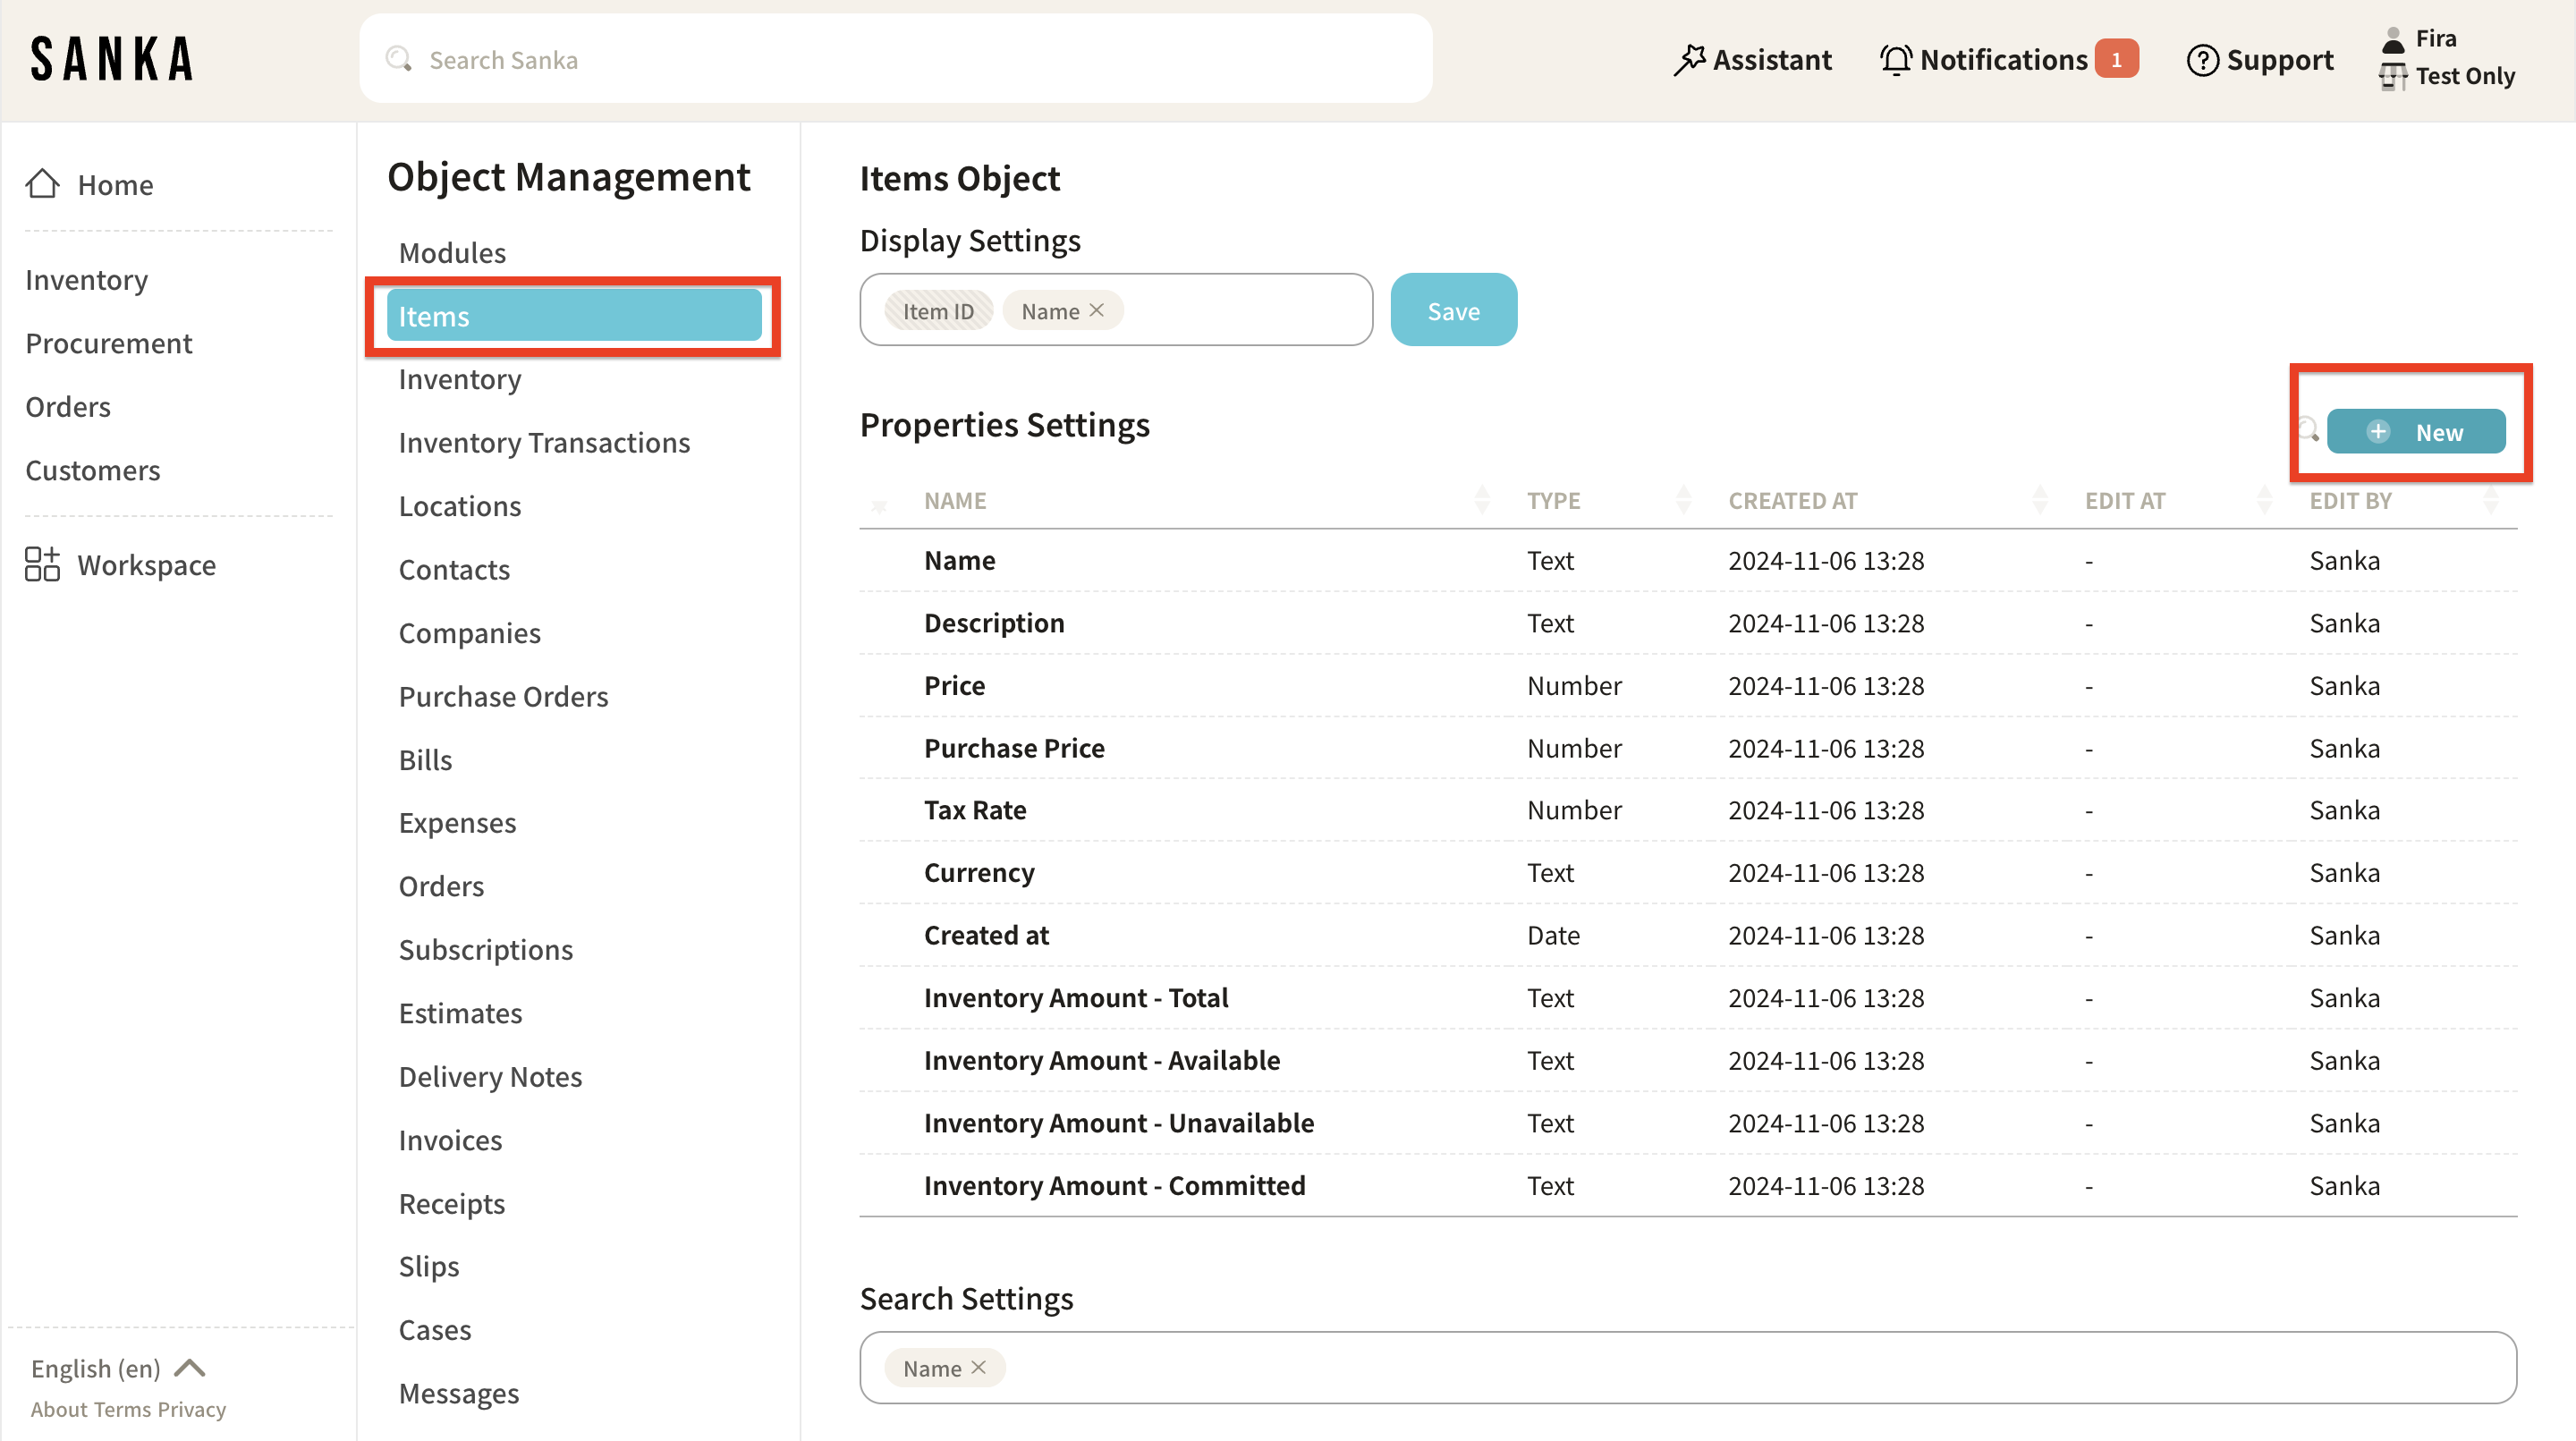
3: Create a New Property The Create Property page will show up. Enter the necessary information: - Name: Enter "Component." - Type: From the options, select "Component."
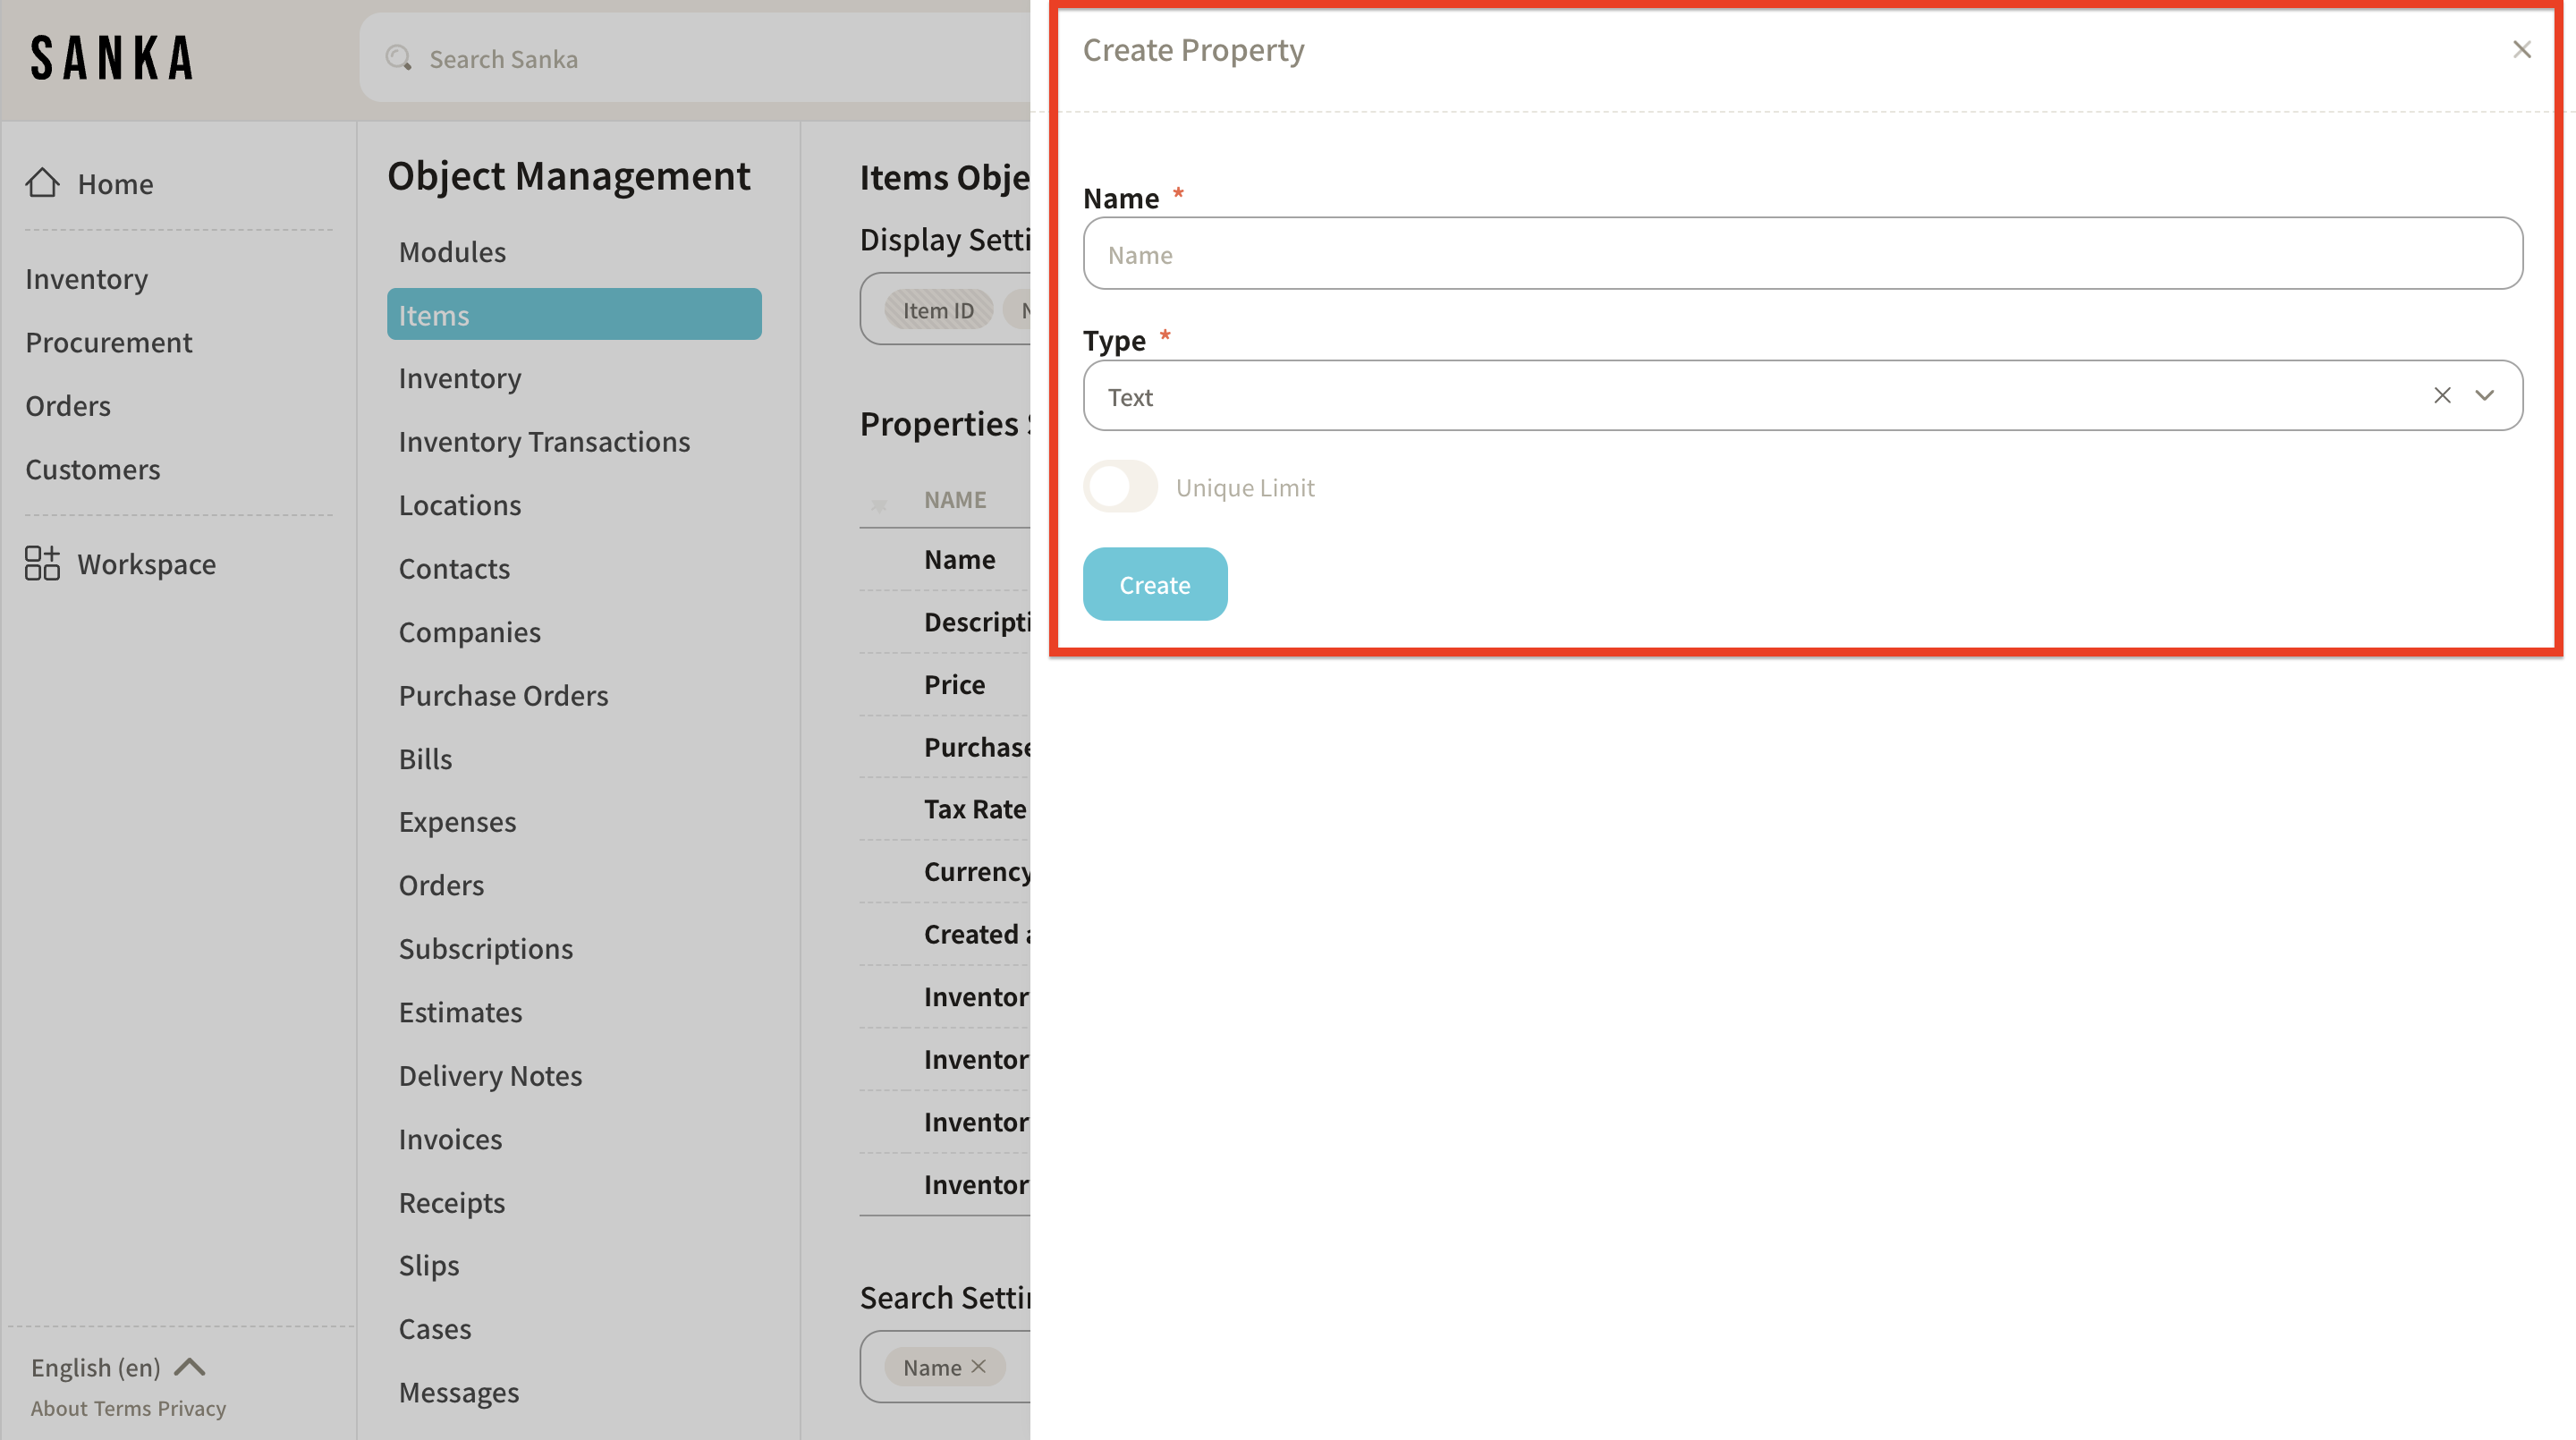
After entering the information, click Create.
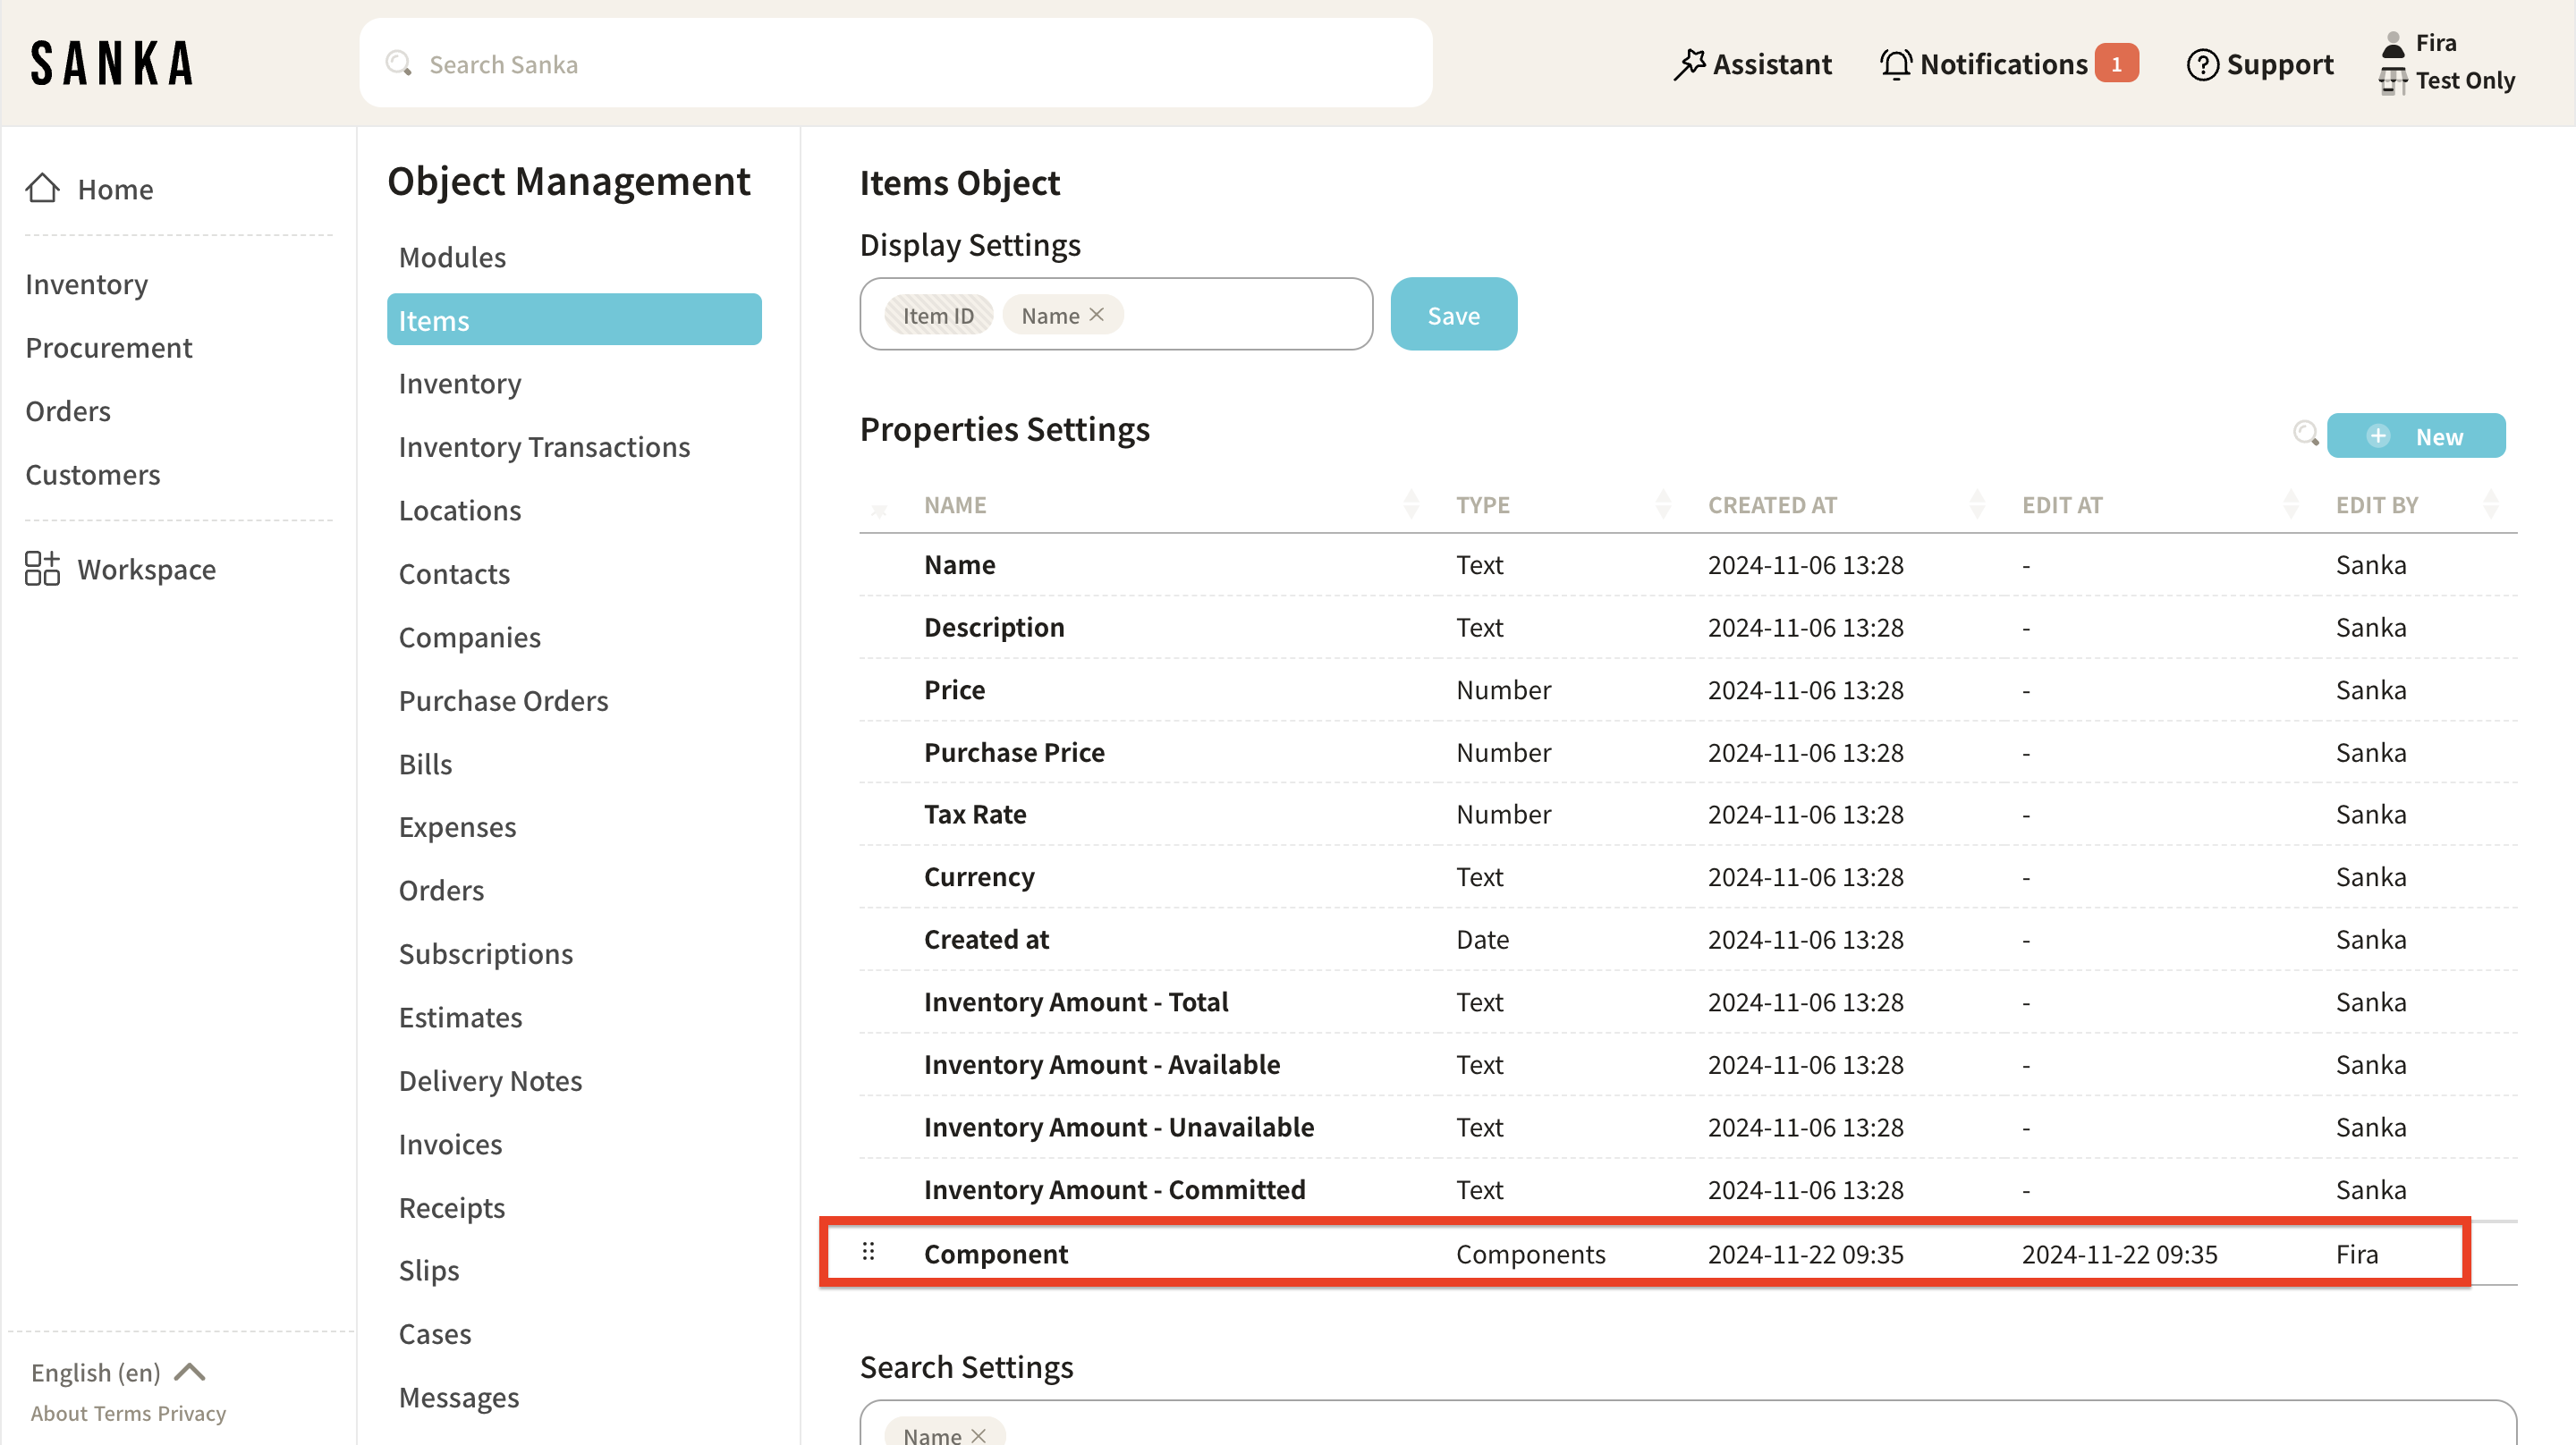
4: Component Added You will now see "Component" added under Item Properties.
How to Register Product Structures Individually
Here, we’ll explain how to link Parts A, B, and C to Product A.
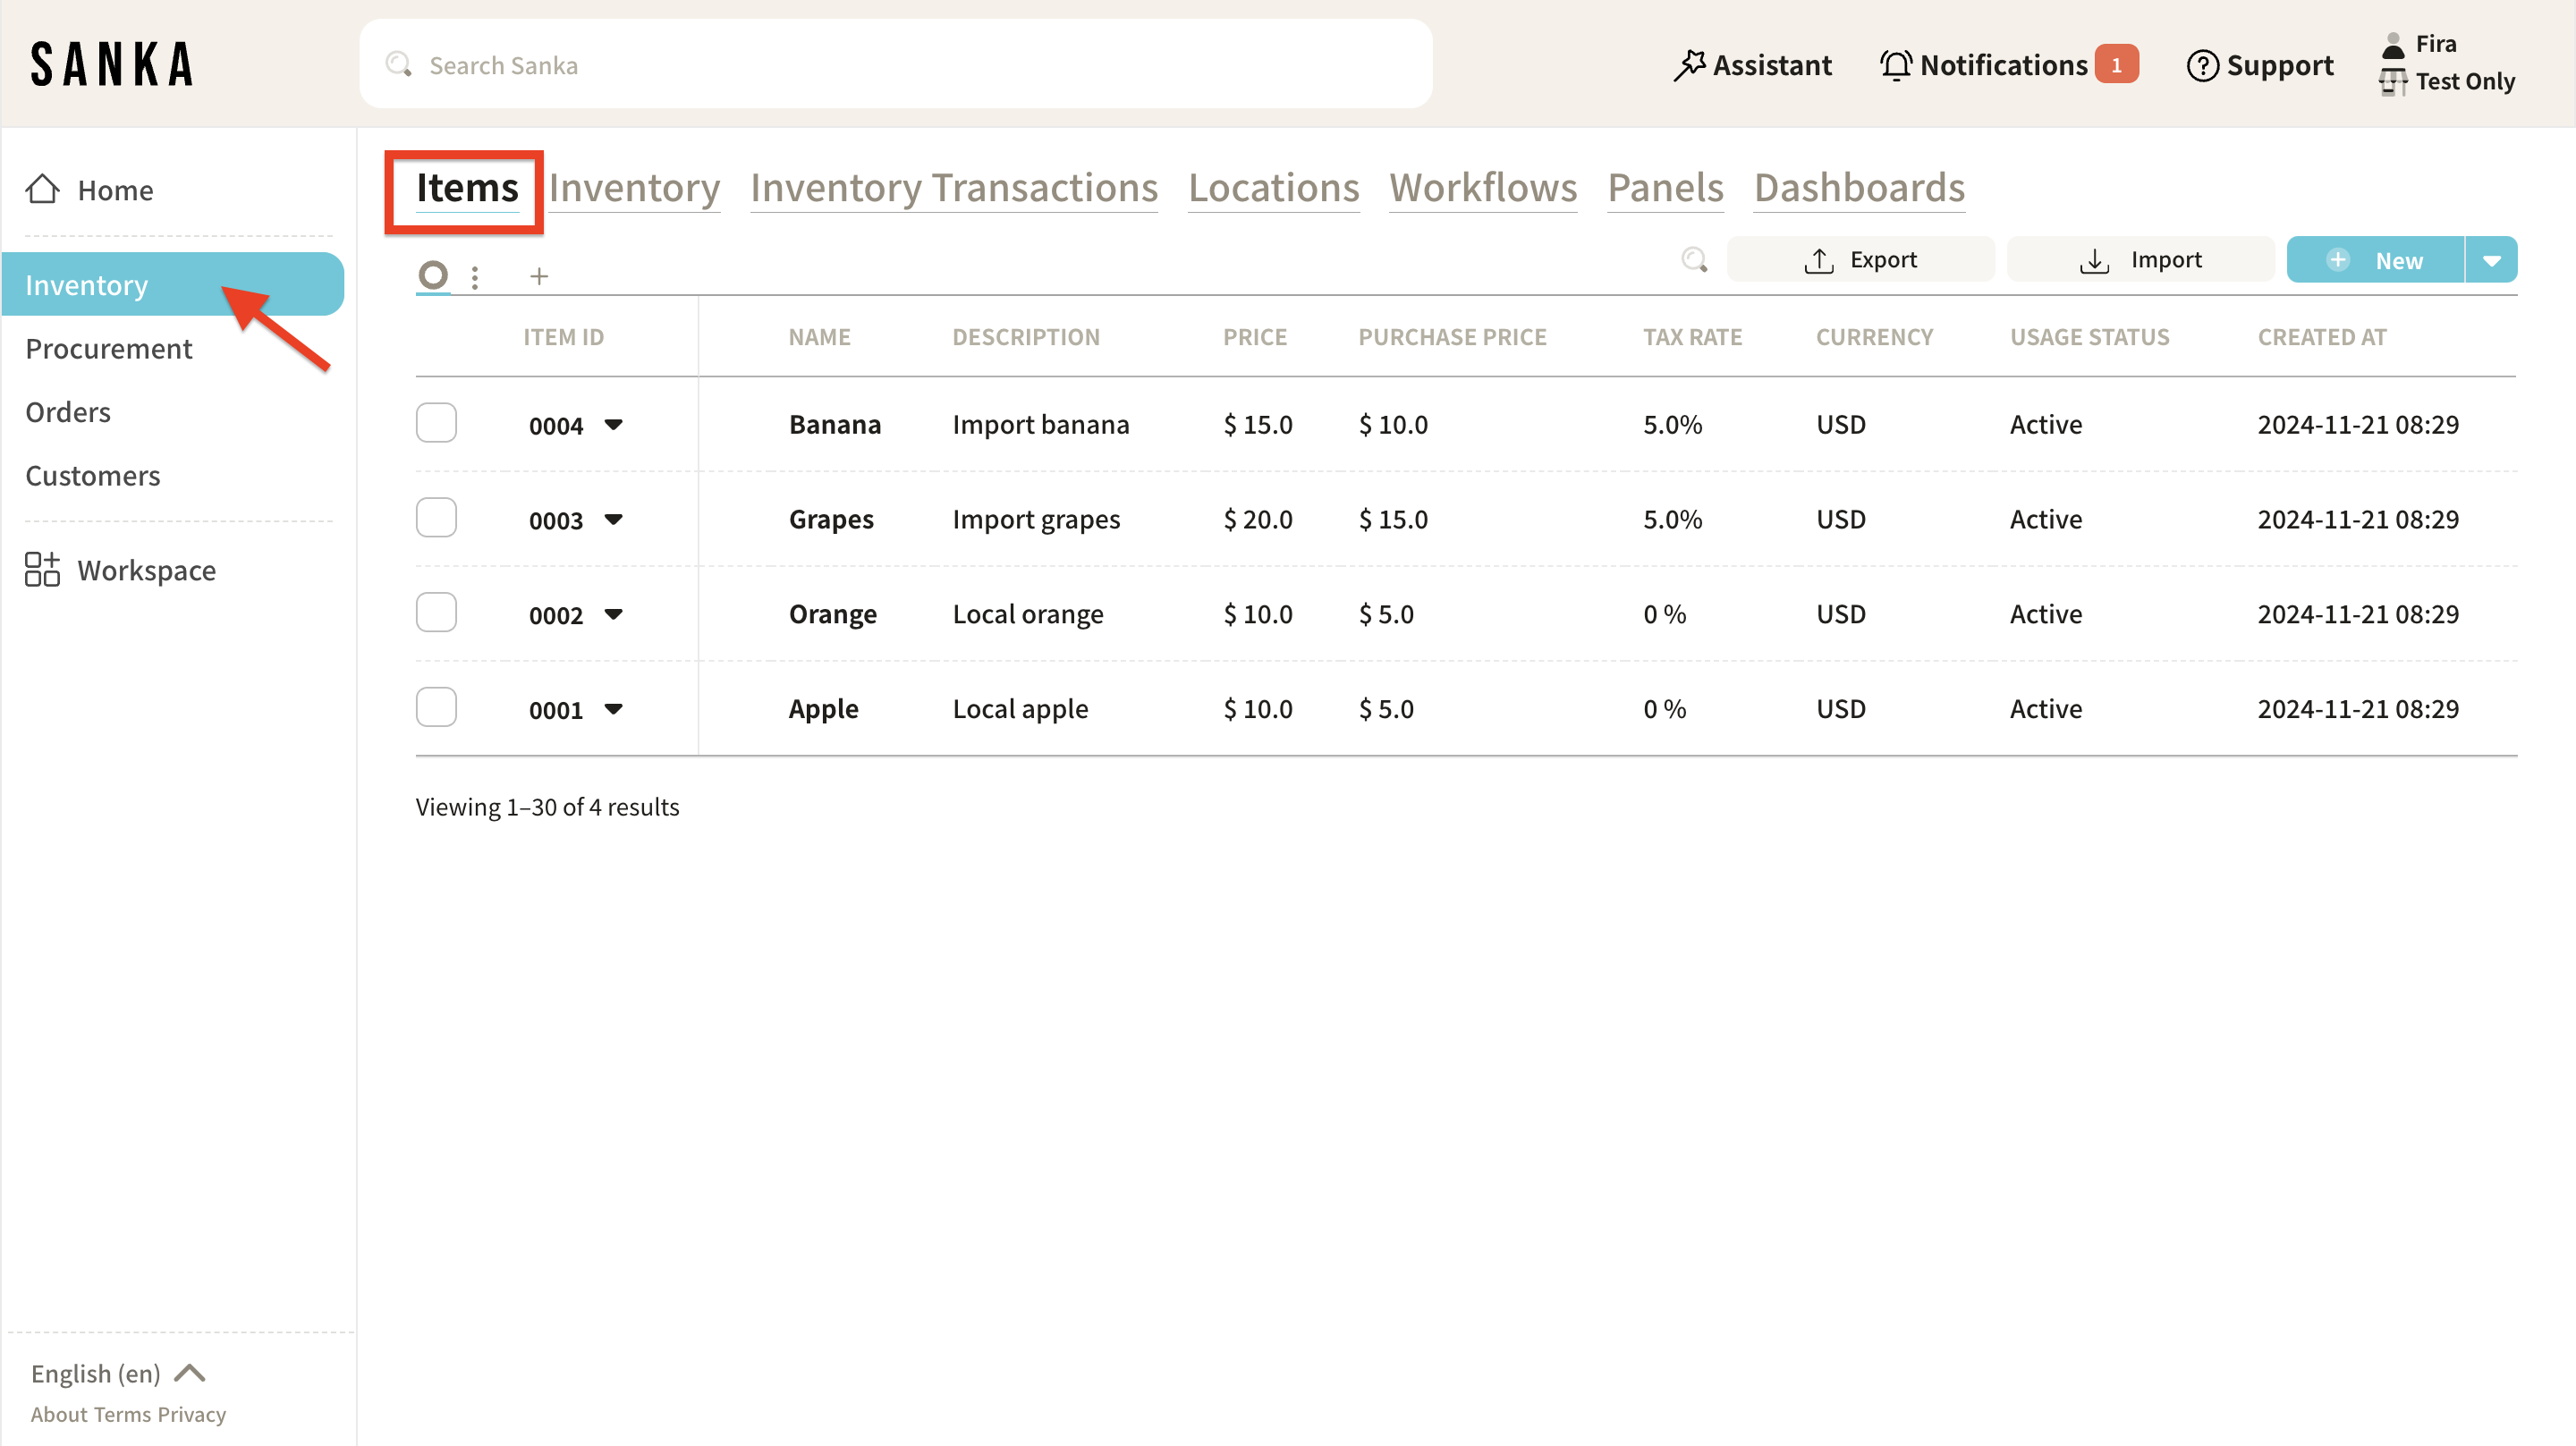
1: Access Inventory Management Click the Inventory Management module on the left side of the screen, then select the Items object.
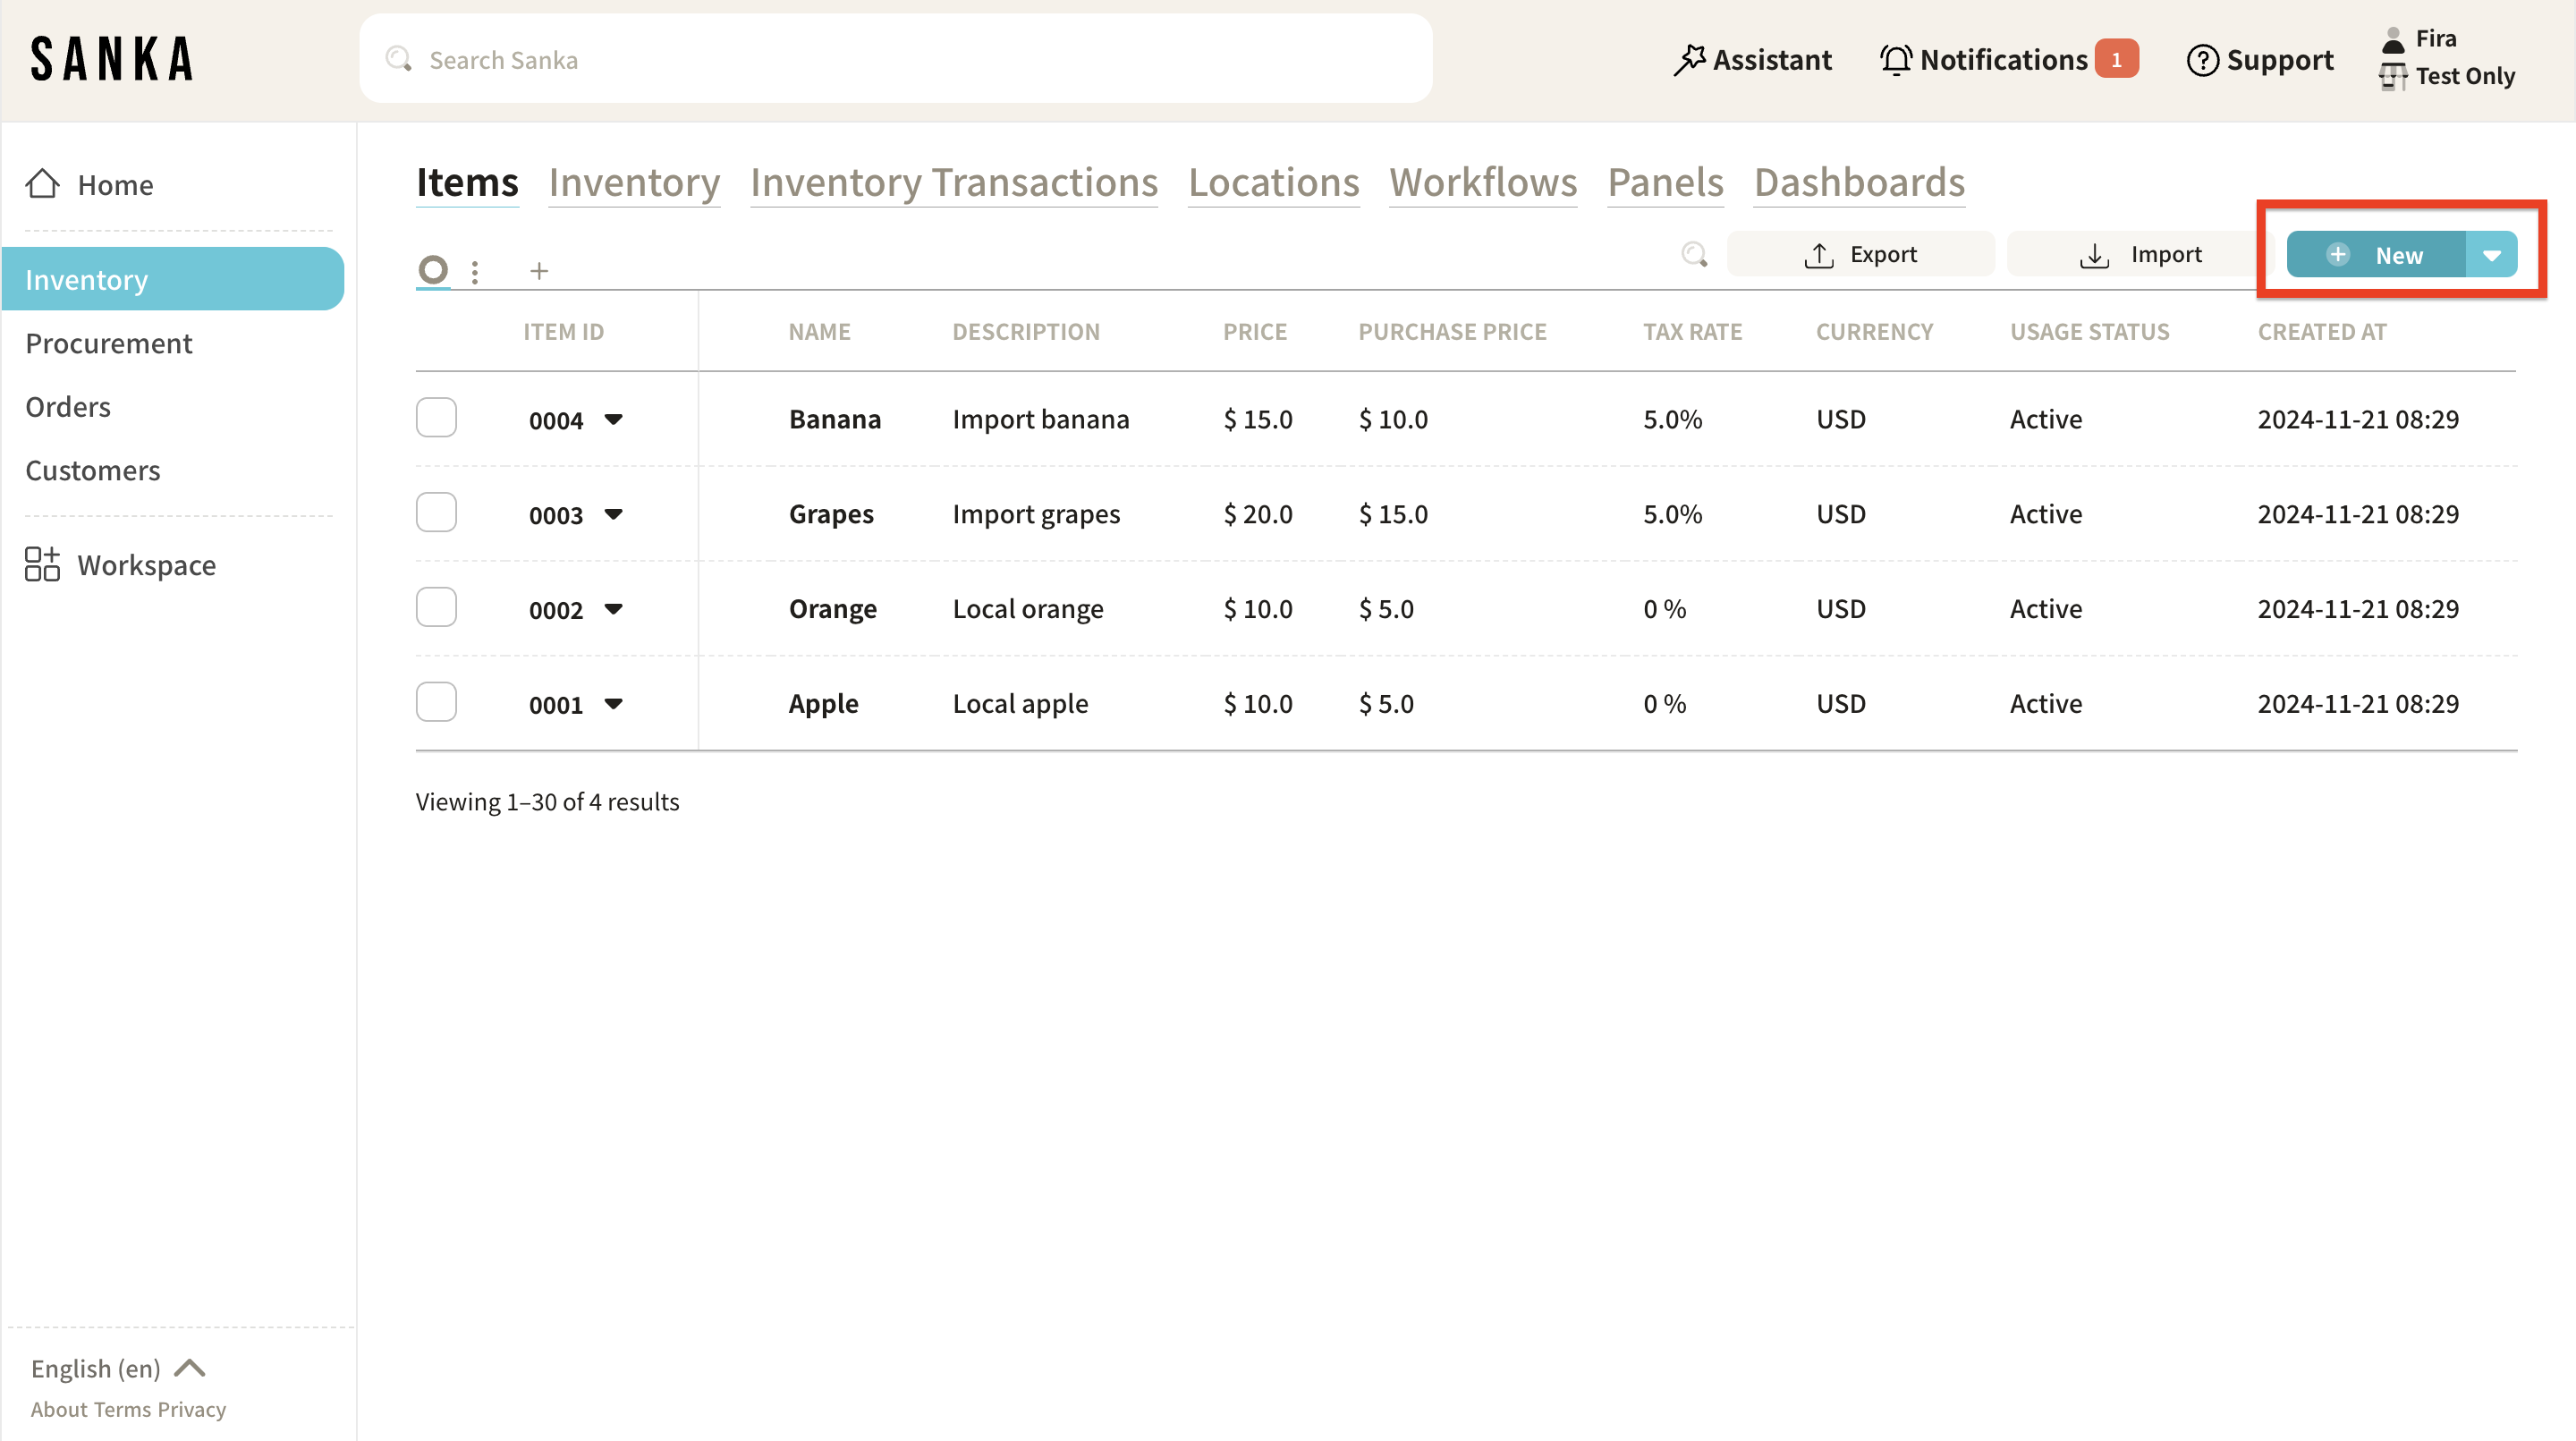
2: Create a New Item Click the New button in the top right corner.
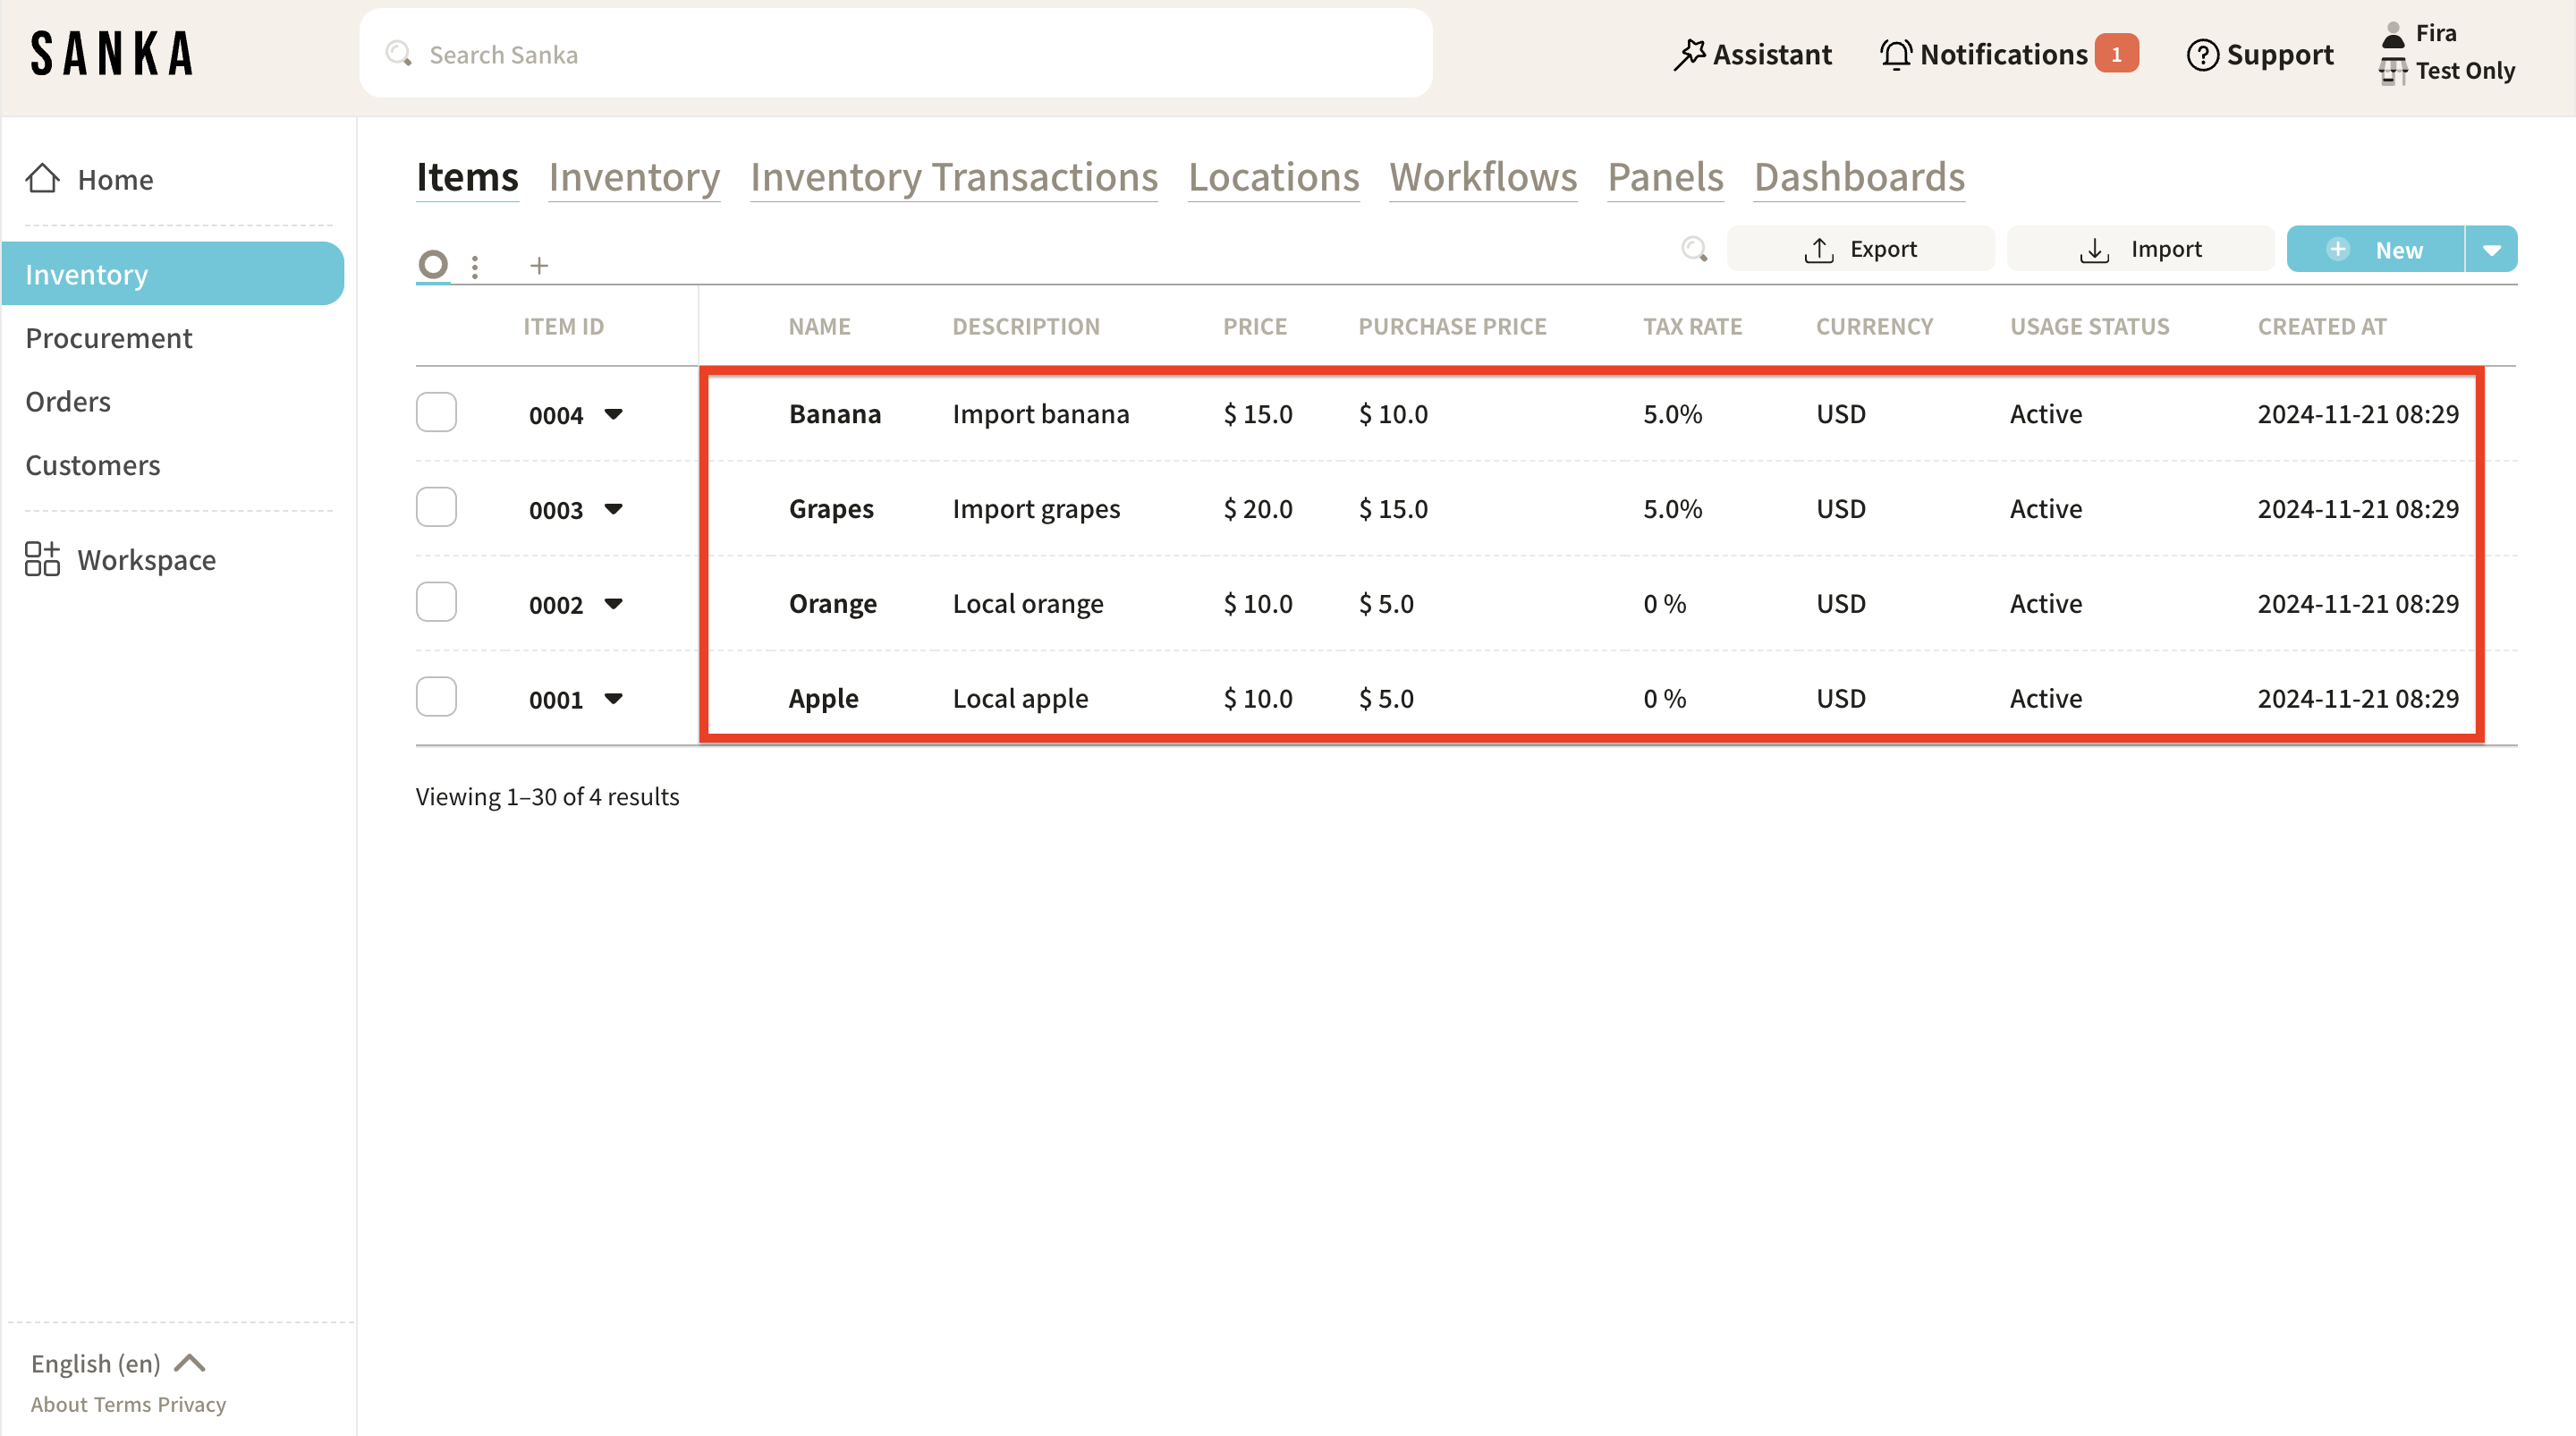
3: Register Items and Components Register Item A, Component A, Component B, and Component C in the item master. You can find the item master registration method here.
4: Link Component to Item A To link the parts to Product A, click on the Item ID or Name for Product A to open the Item Management detailed page.
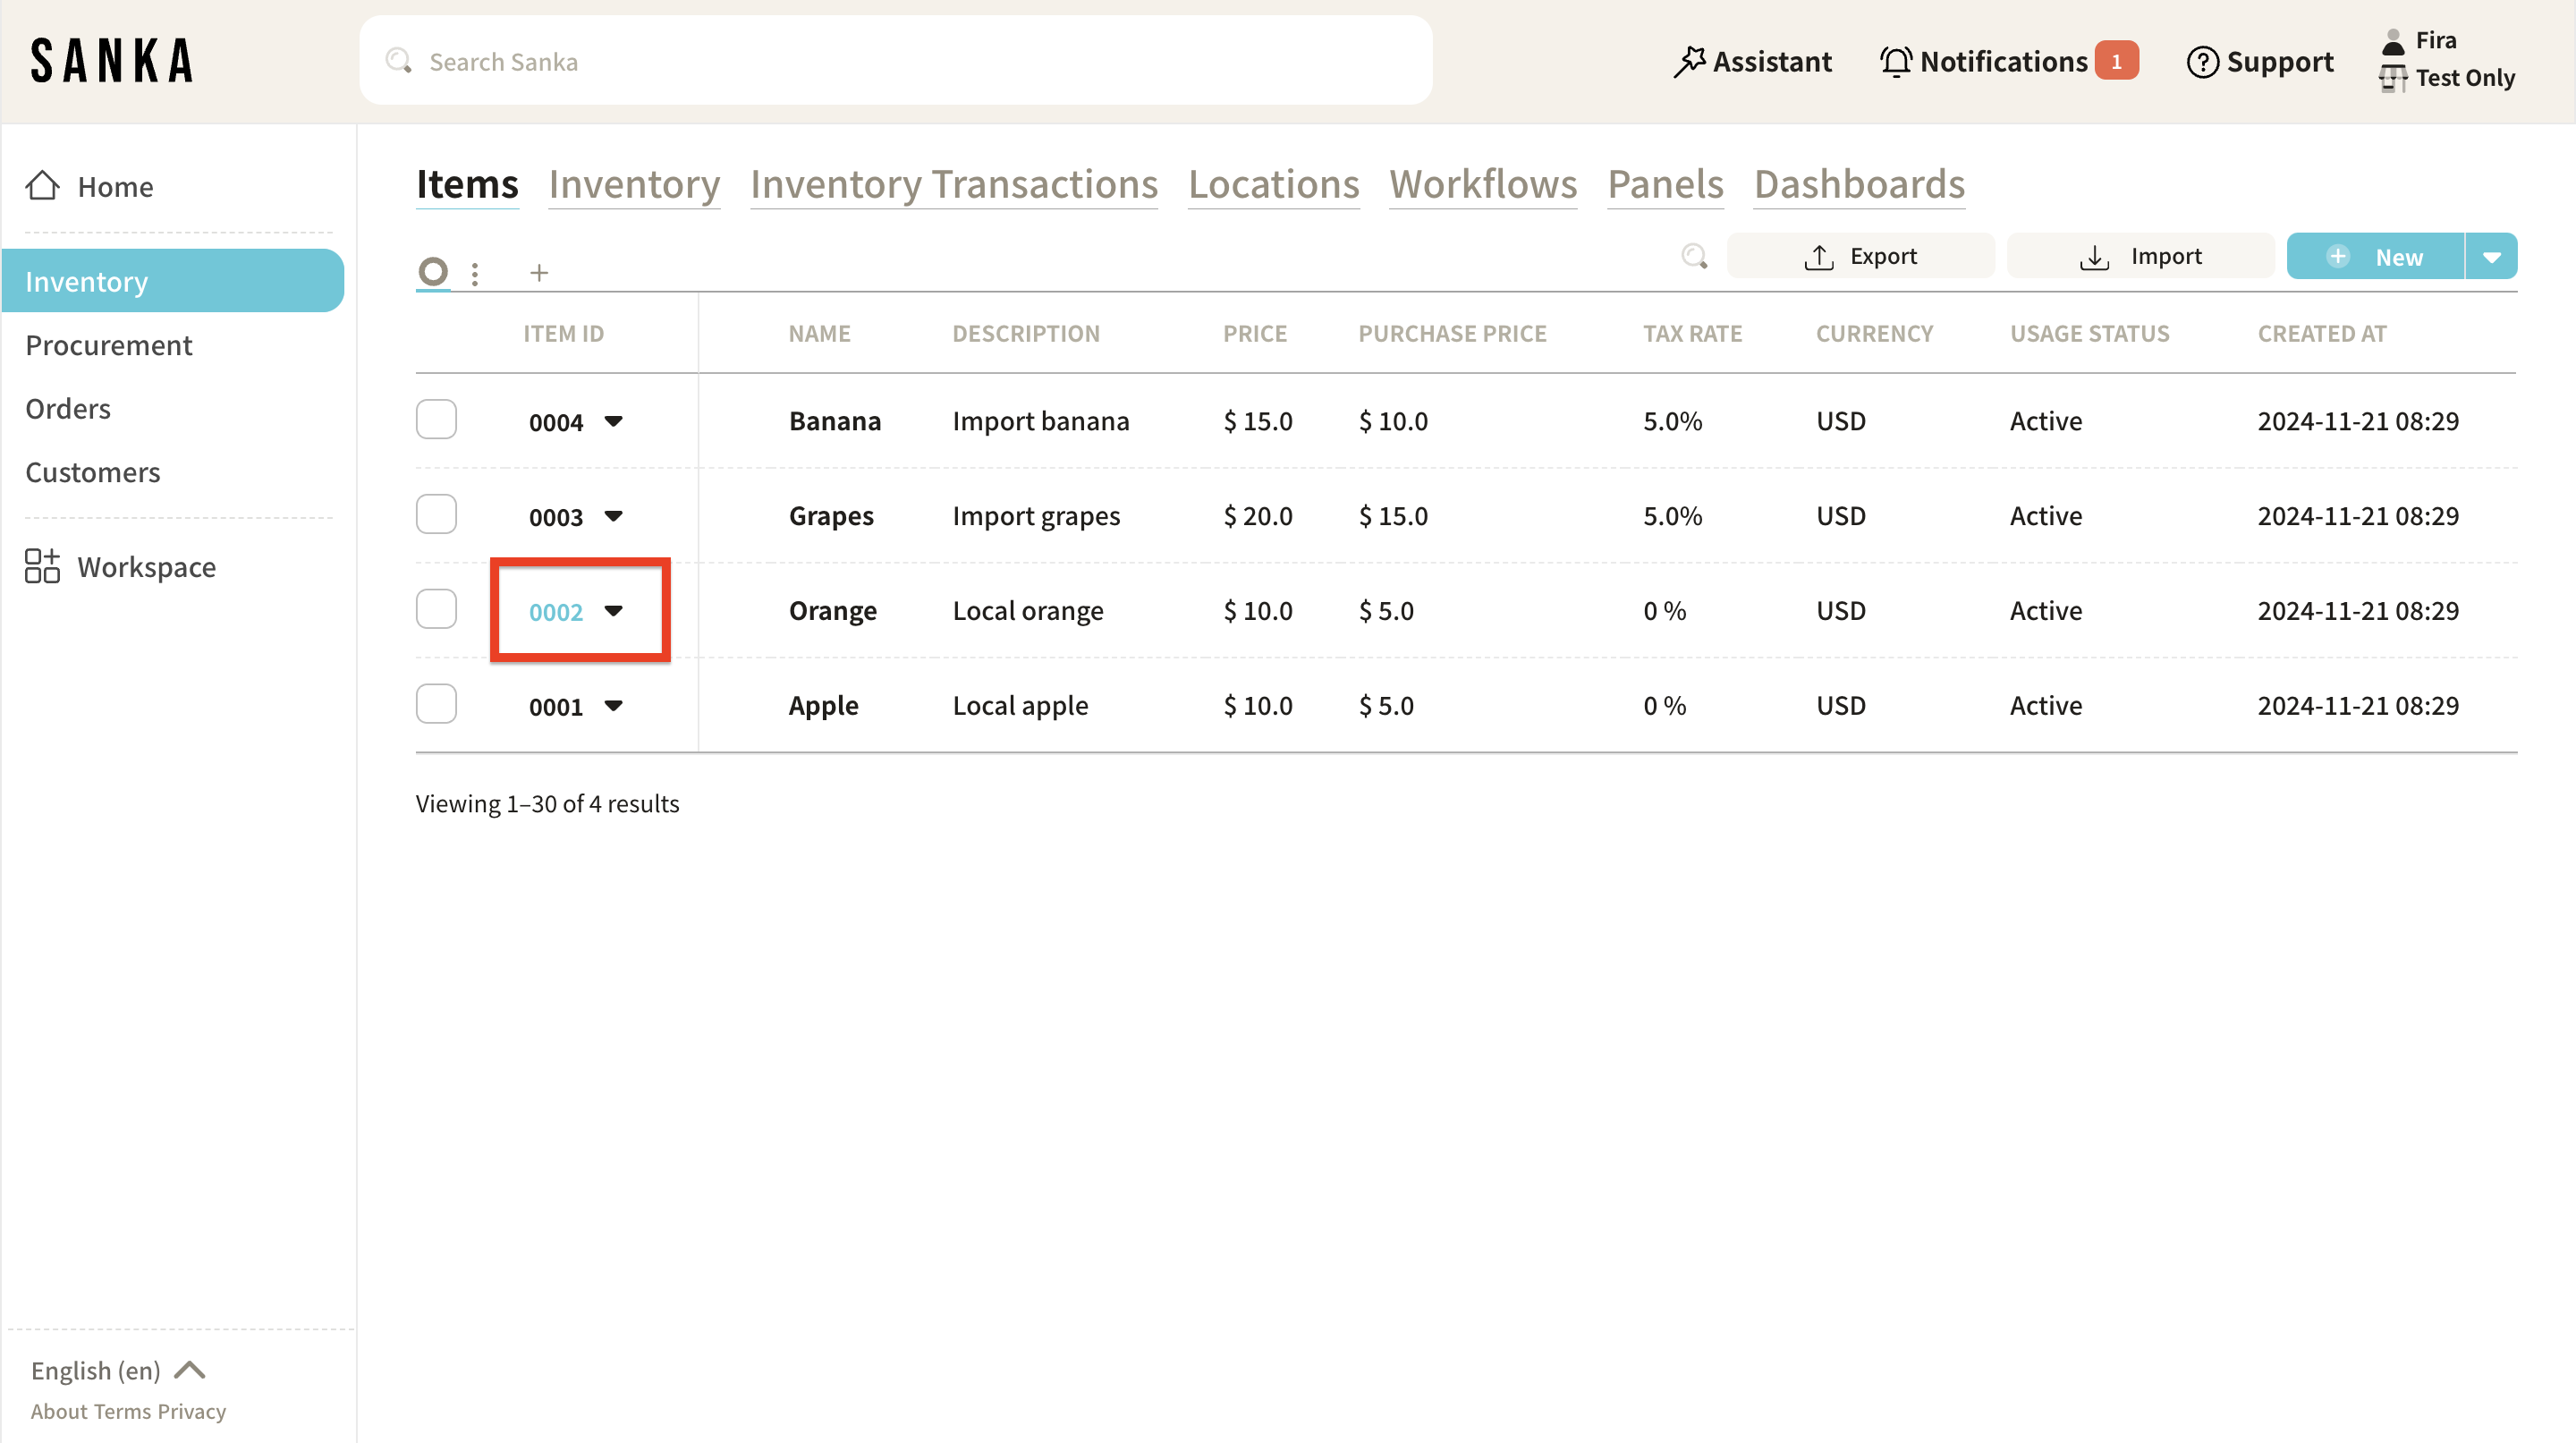
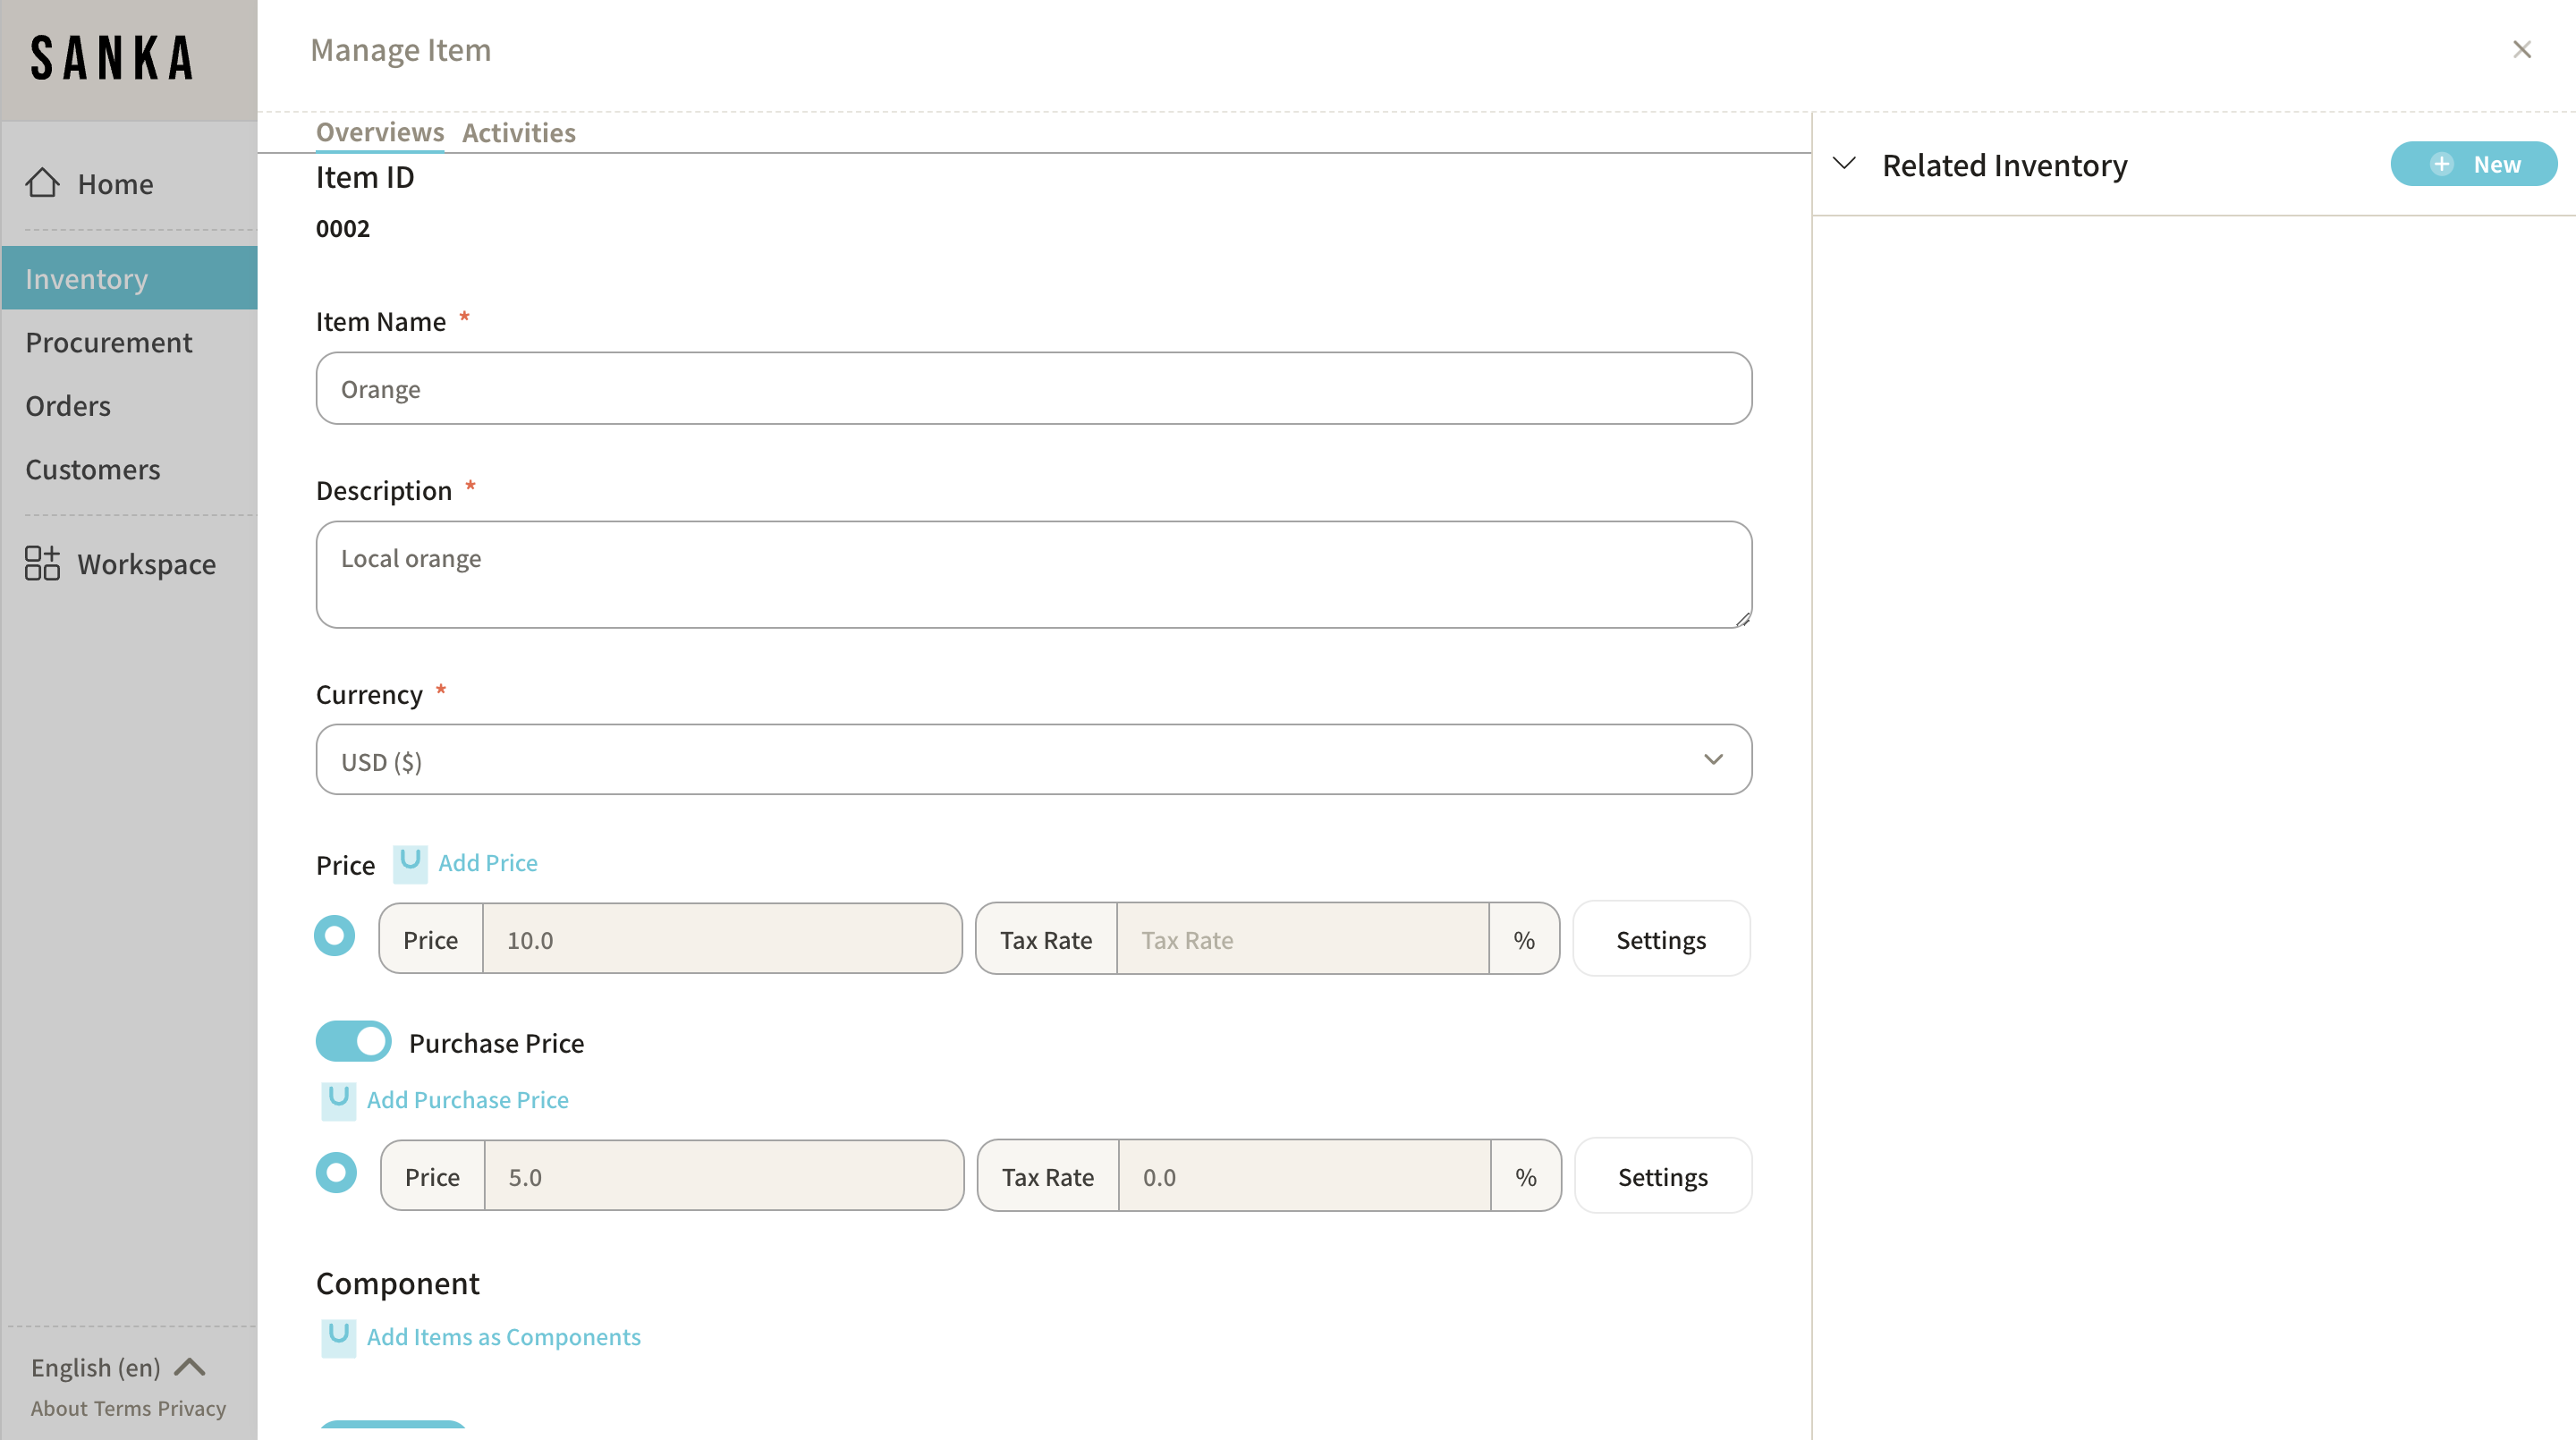
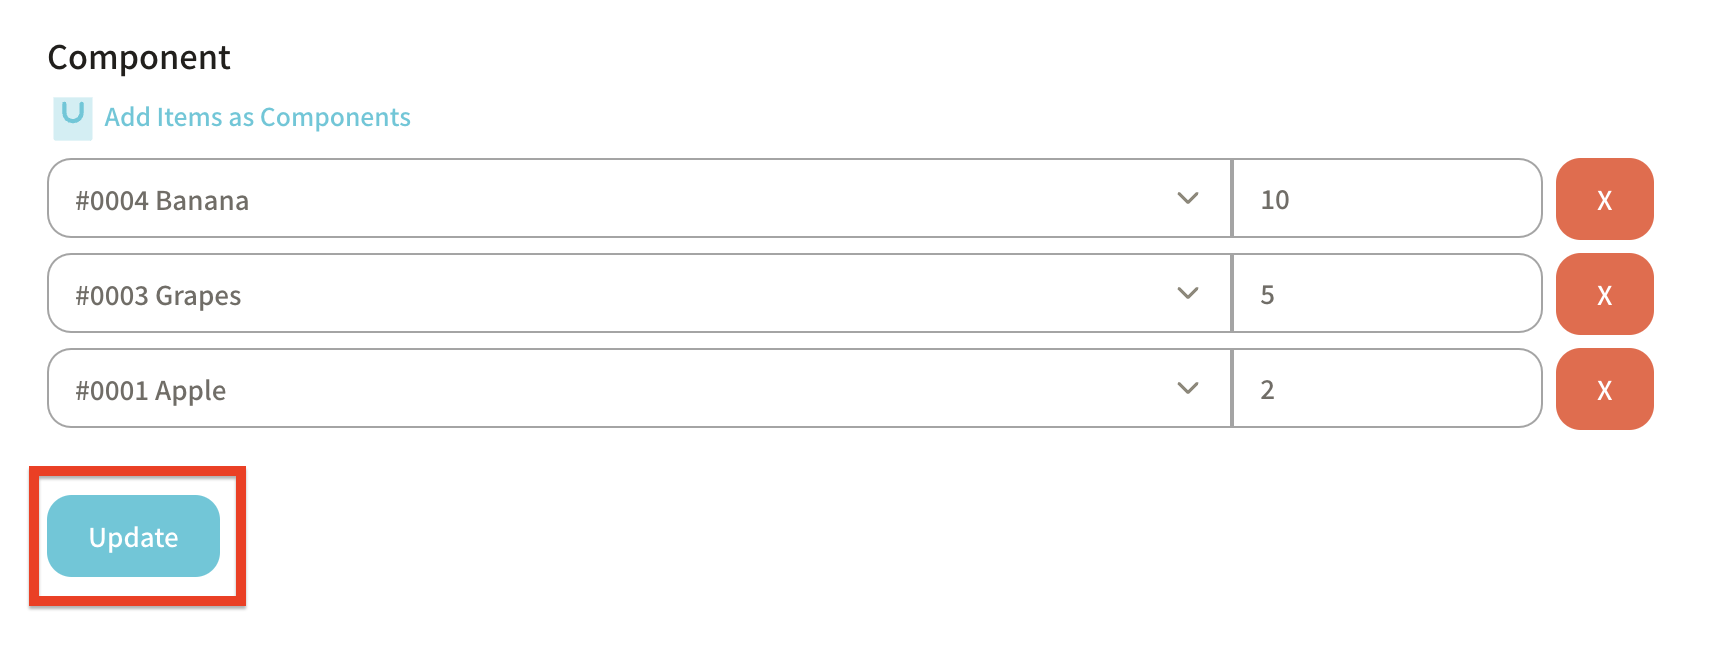
5: Add Component to Item A Scroll down the menu and start adding information under Component by selecting Add as a Component.
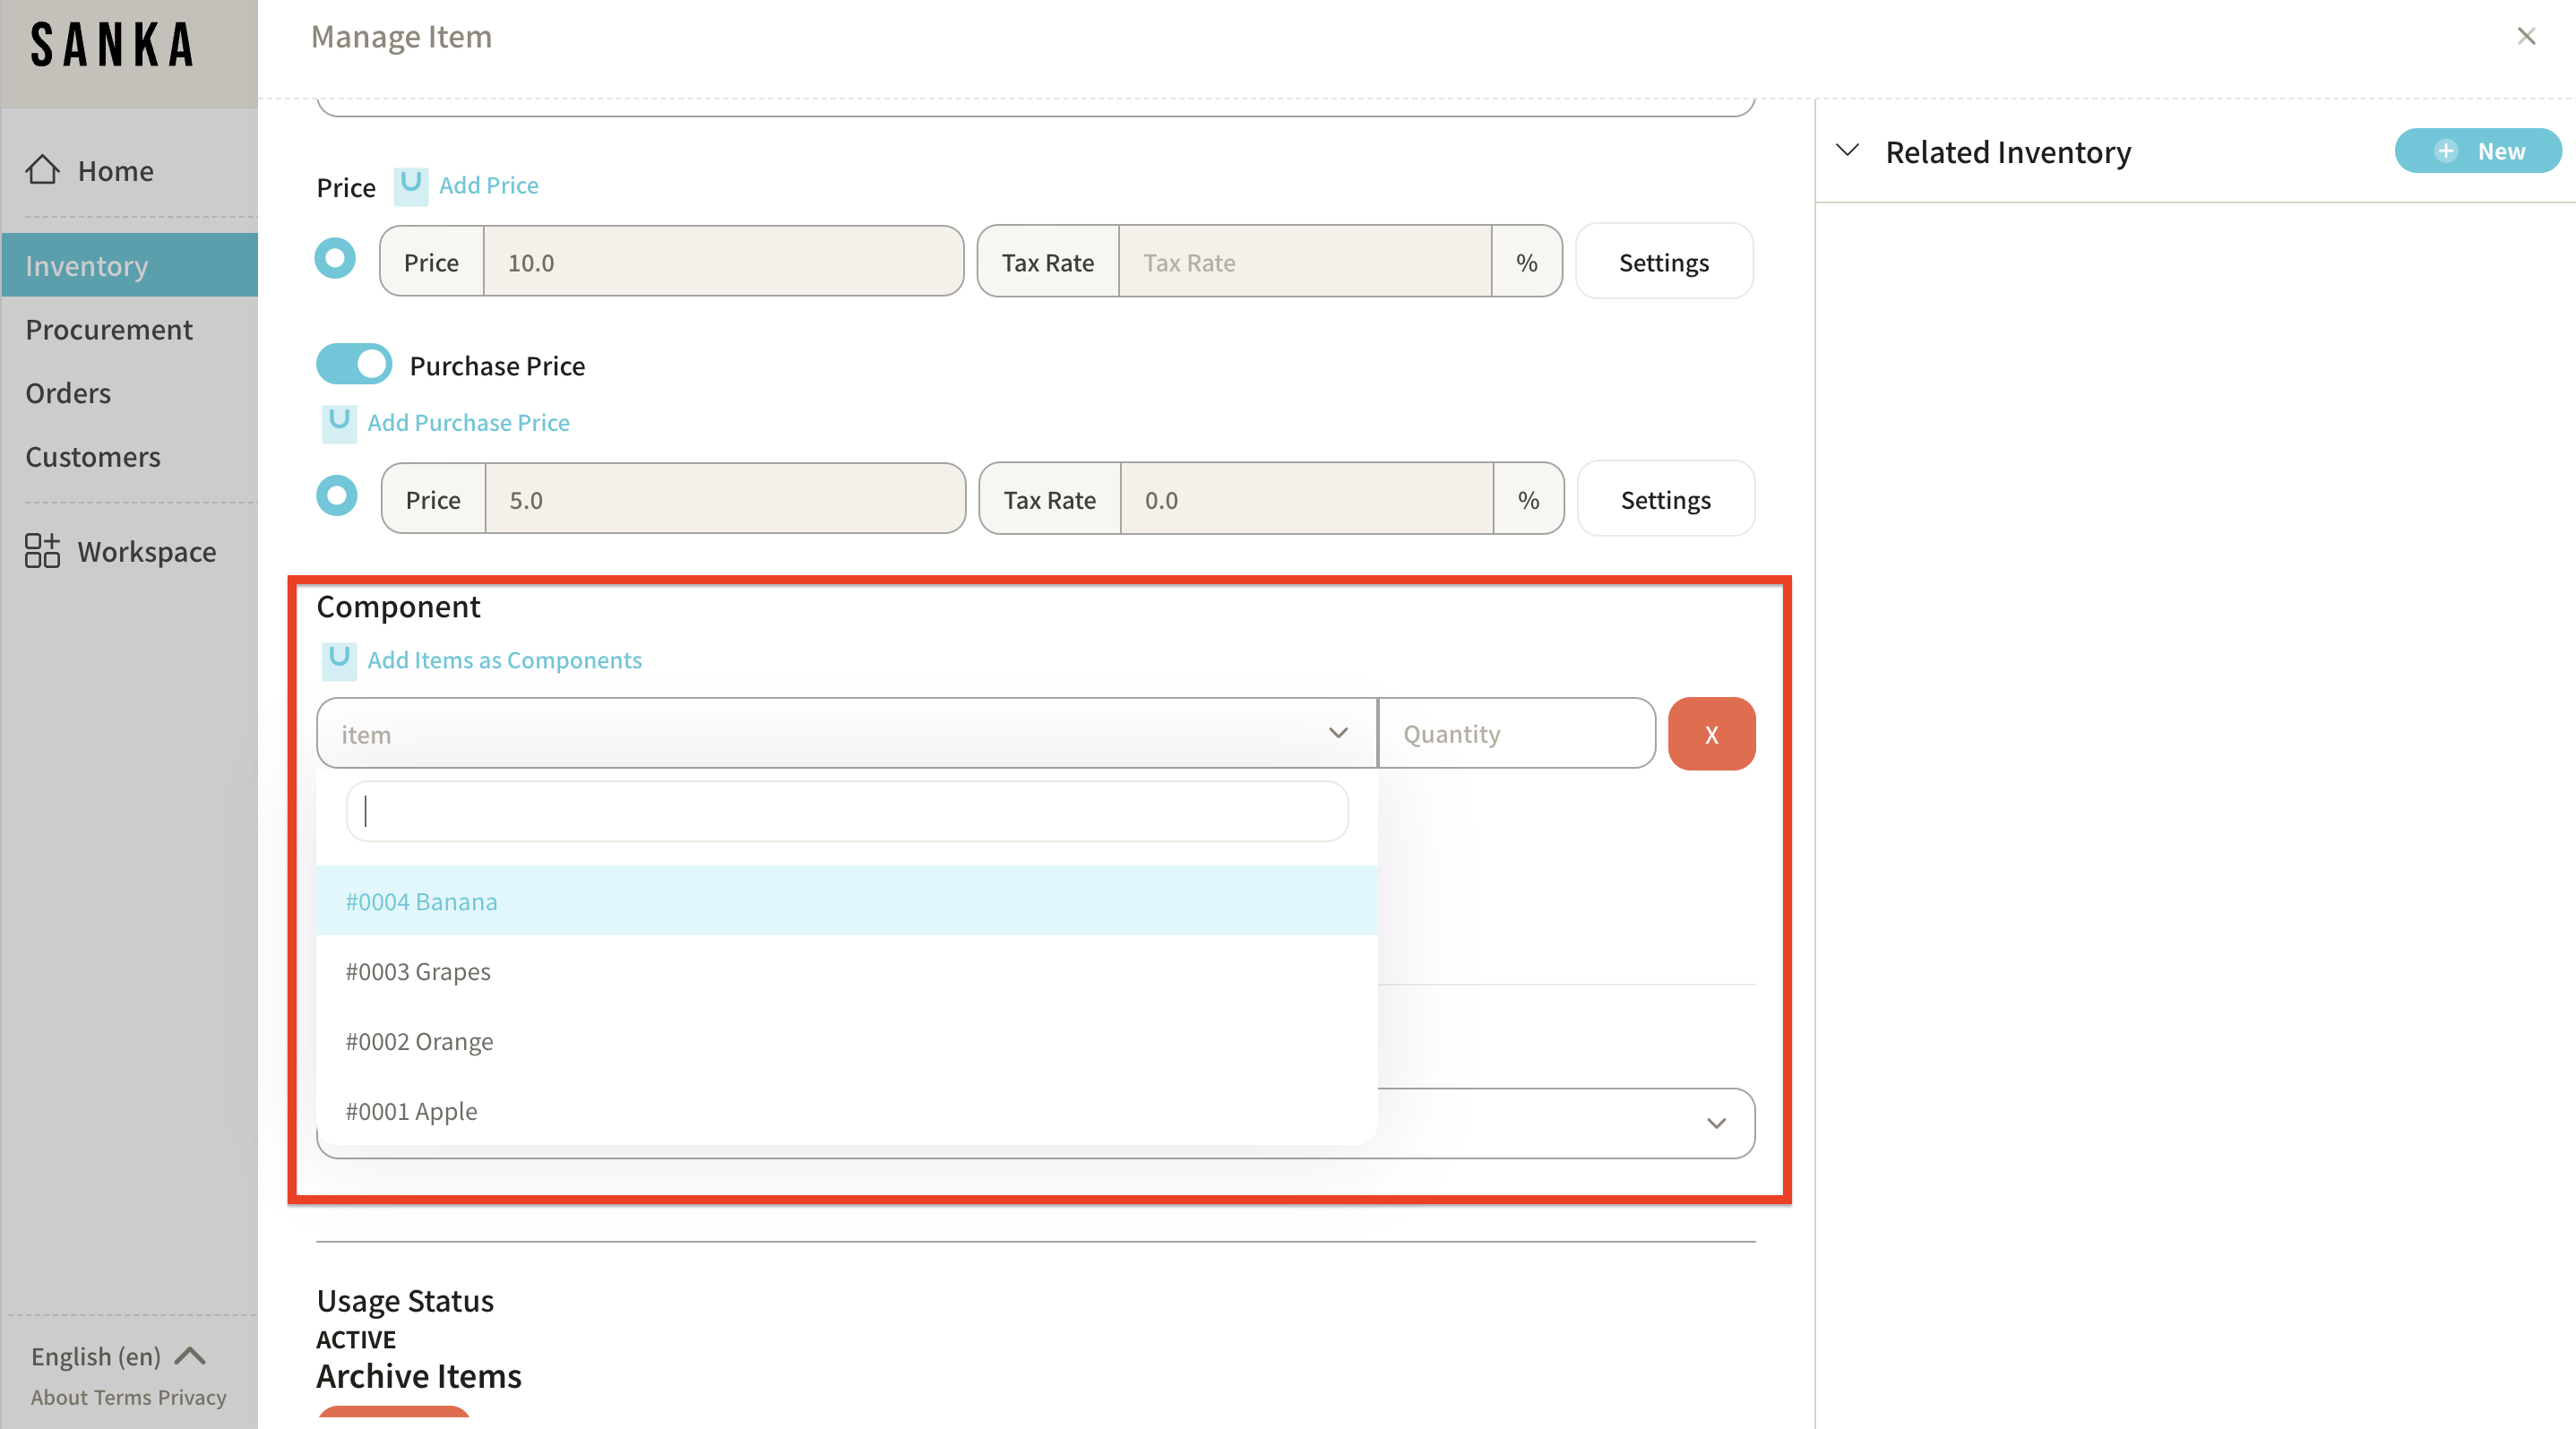
6: Select Parts and Input Quantities Select Component A, then input the quantity.

7: Add More Components To add Component B and Component C, click Add as a Component again for each part.
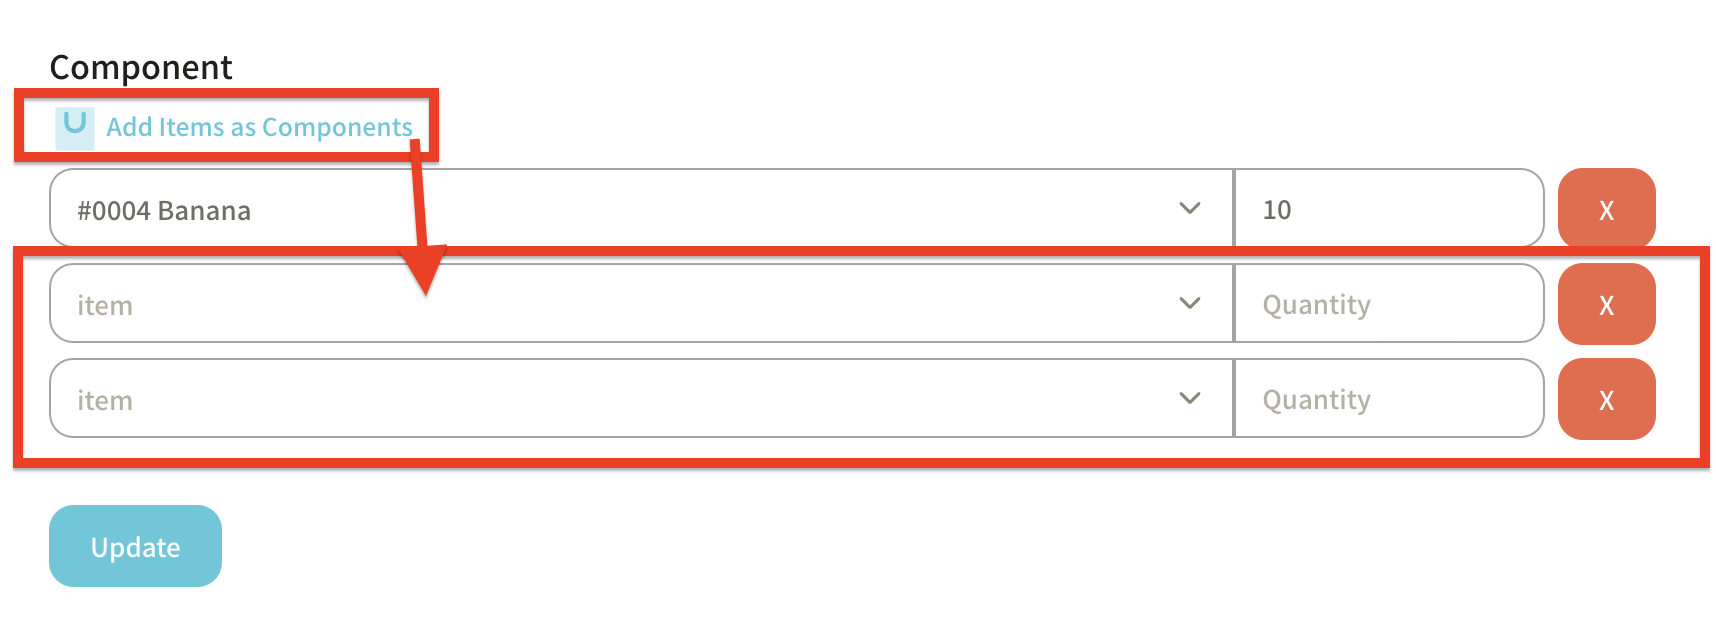
8: Update Once all components are linked, click Update.
How to Bulk Register Product Structures with CSV Files
You can bulk register linked product information using CSV files.
1. Navigate to Inventory Management
Click the Inventory Management module on the left side, then select the Products object.
2. Import CSV File
Click the Import button in the top right corner.
3. Select CSV File
The Import menu will appear. Click Select Source and choose CSV File.
4. Download CSV Template
Click Format to open Sanka’s Product CSV Import Template.
5. Download and Fill Out Template
Download the Product CSV Import Template to your desktop. - Select File → Download → Comma Separated Values (.csv), then save it to your desired location.
6. Enter Information in the Template
- Column A: Enter the Product A ID.
- Column B: Enter the IDs of Parts A, B, and C that you want to link to Product A.
- Column C: Enter the quantities of Parts A, B, and C.
Use the product master information in Sanka to get the necessary IDs.
7. Upload the File
Go back to Sanka, click Upload, and select the template file.
8. Adjust Mapping
The mapping table will appear, allowing you to adjust the information. - Import Information: Select Product Properties. - Sanka Fields: Align the fields in your template with the fields displayed in Sanka.
Once the mapping is complete, click Import.
9. Confirm Updates
To confirm that the information has been updated, click Product A in the Products object view.
10. Check Component Details
You will see the information for Parts A, B, and C under Component, which completes the process.
How to Display Linked Products Together (Group Table)
You can create a group table to display linked products together in the Products object view.
1. Navigate to Inventory Management
Click the Inventory Management module on the left side, then select the Products object.
2. Create a New View
Click the + button to open the Create View menu.
3. Set Group Table Information
Enter the following details: - Name: Enter "Group." - Type: Select Group Table. - Group: Select Component.
Click Create.
4. Grouped Components Displayed
Parts A, B, and C linked to Product A are now grouped and displayed together.
How to Edit Registered Information
In Sanka, information cannot be deleted to prevent accidental data loss. Instead, you can edit the registered information.
1. Navigate to Inventory Management
Click the Inventory Management module on the left side, then select the Products object.
2. Edit Details
Click the Product ID or Name to display the detailed information, where you can make necessary edits.
