In Sanka, adding location allows you to effectively manage inventory across various storage facilities.
Whether you're managing a single store or a network of distribution centers, tracking your inventory by location ensures accurate stock levels and efficient order fulfillment.
This guide will show you the process on how to add locations in Sanka.
※ For basic concepts like "objects" or "modules," please refer to Sanka Basics.
What you will learn from this guide
- How to individually register a location
- How to bulk register locations using Sanka's template
- How to edit registered information
- Next steps
How to Register a Location Individually
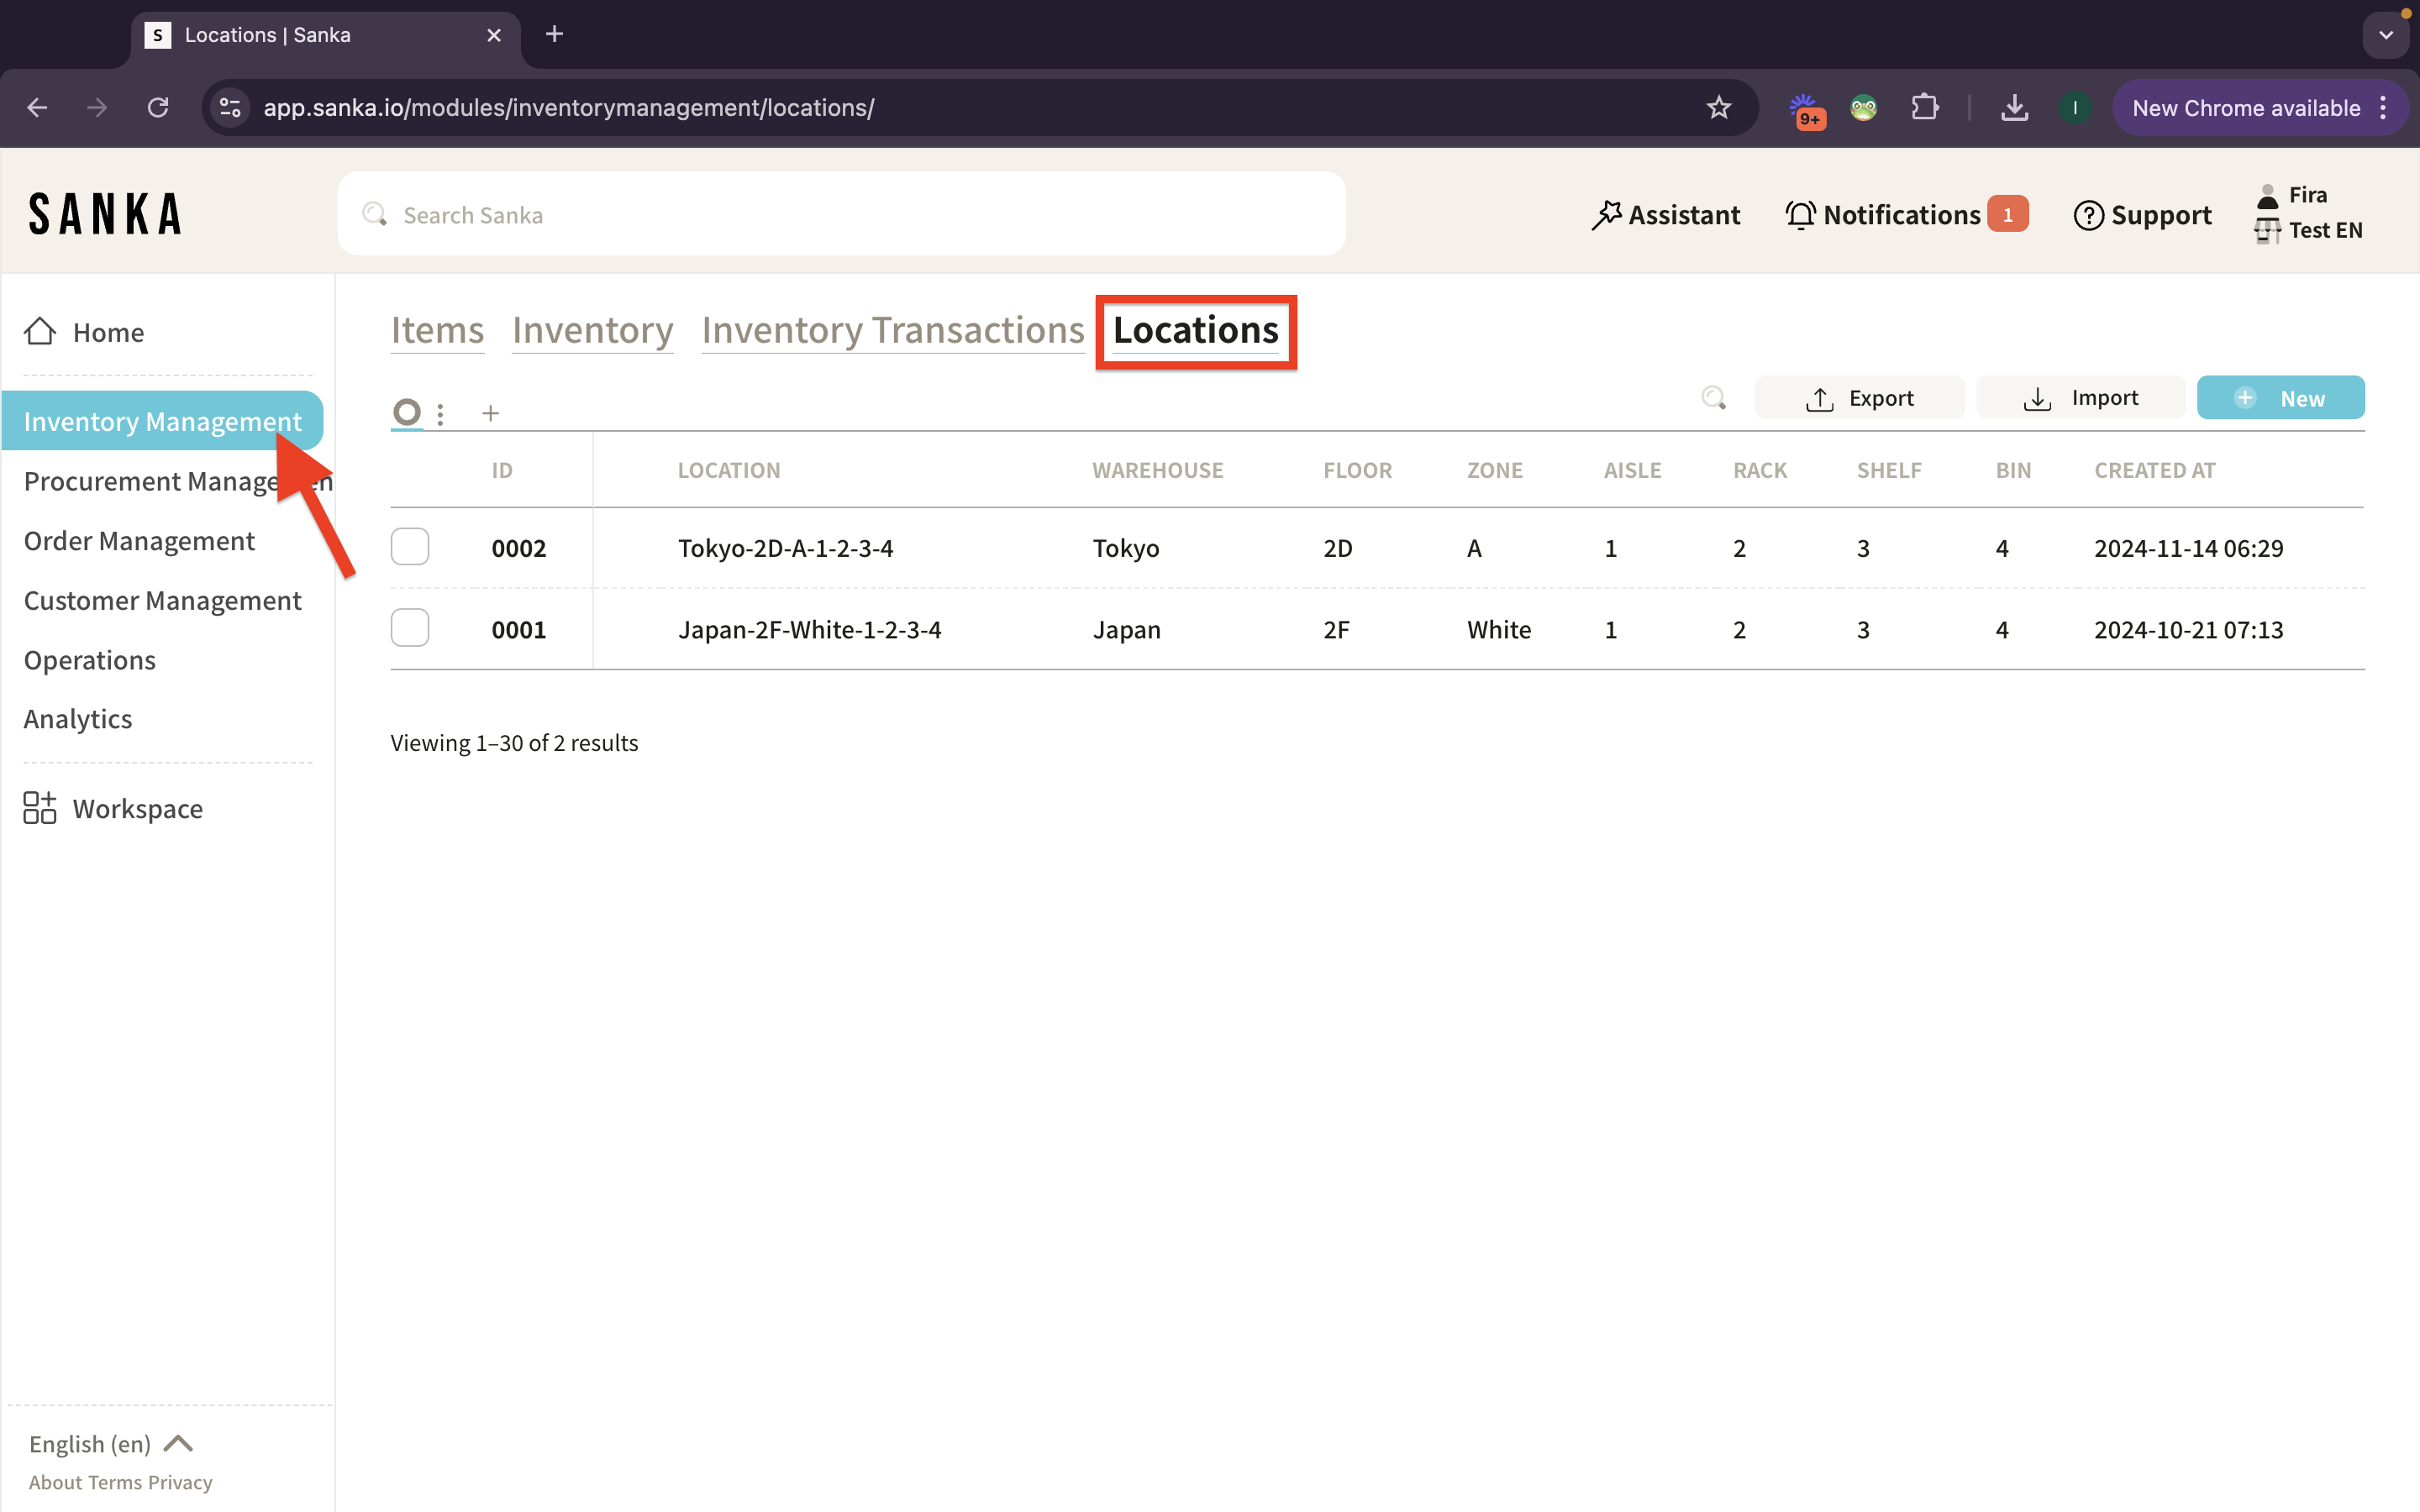
① Click the "Inventory Management" module on the left side of the page, and then select the "Location" object.
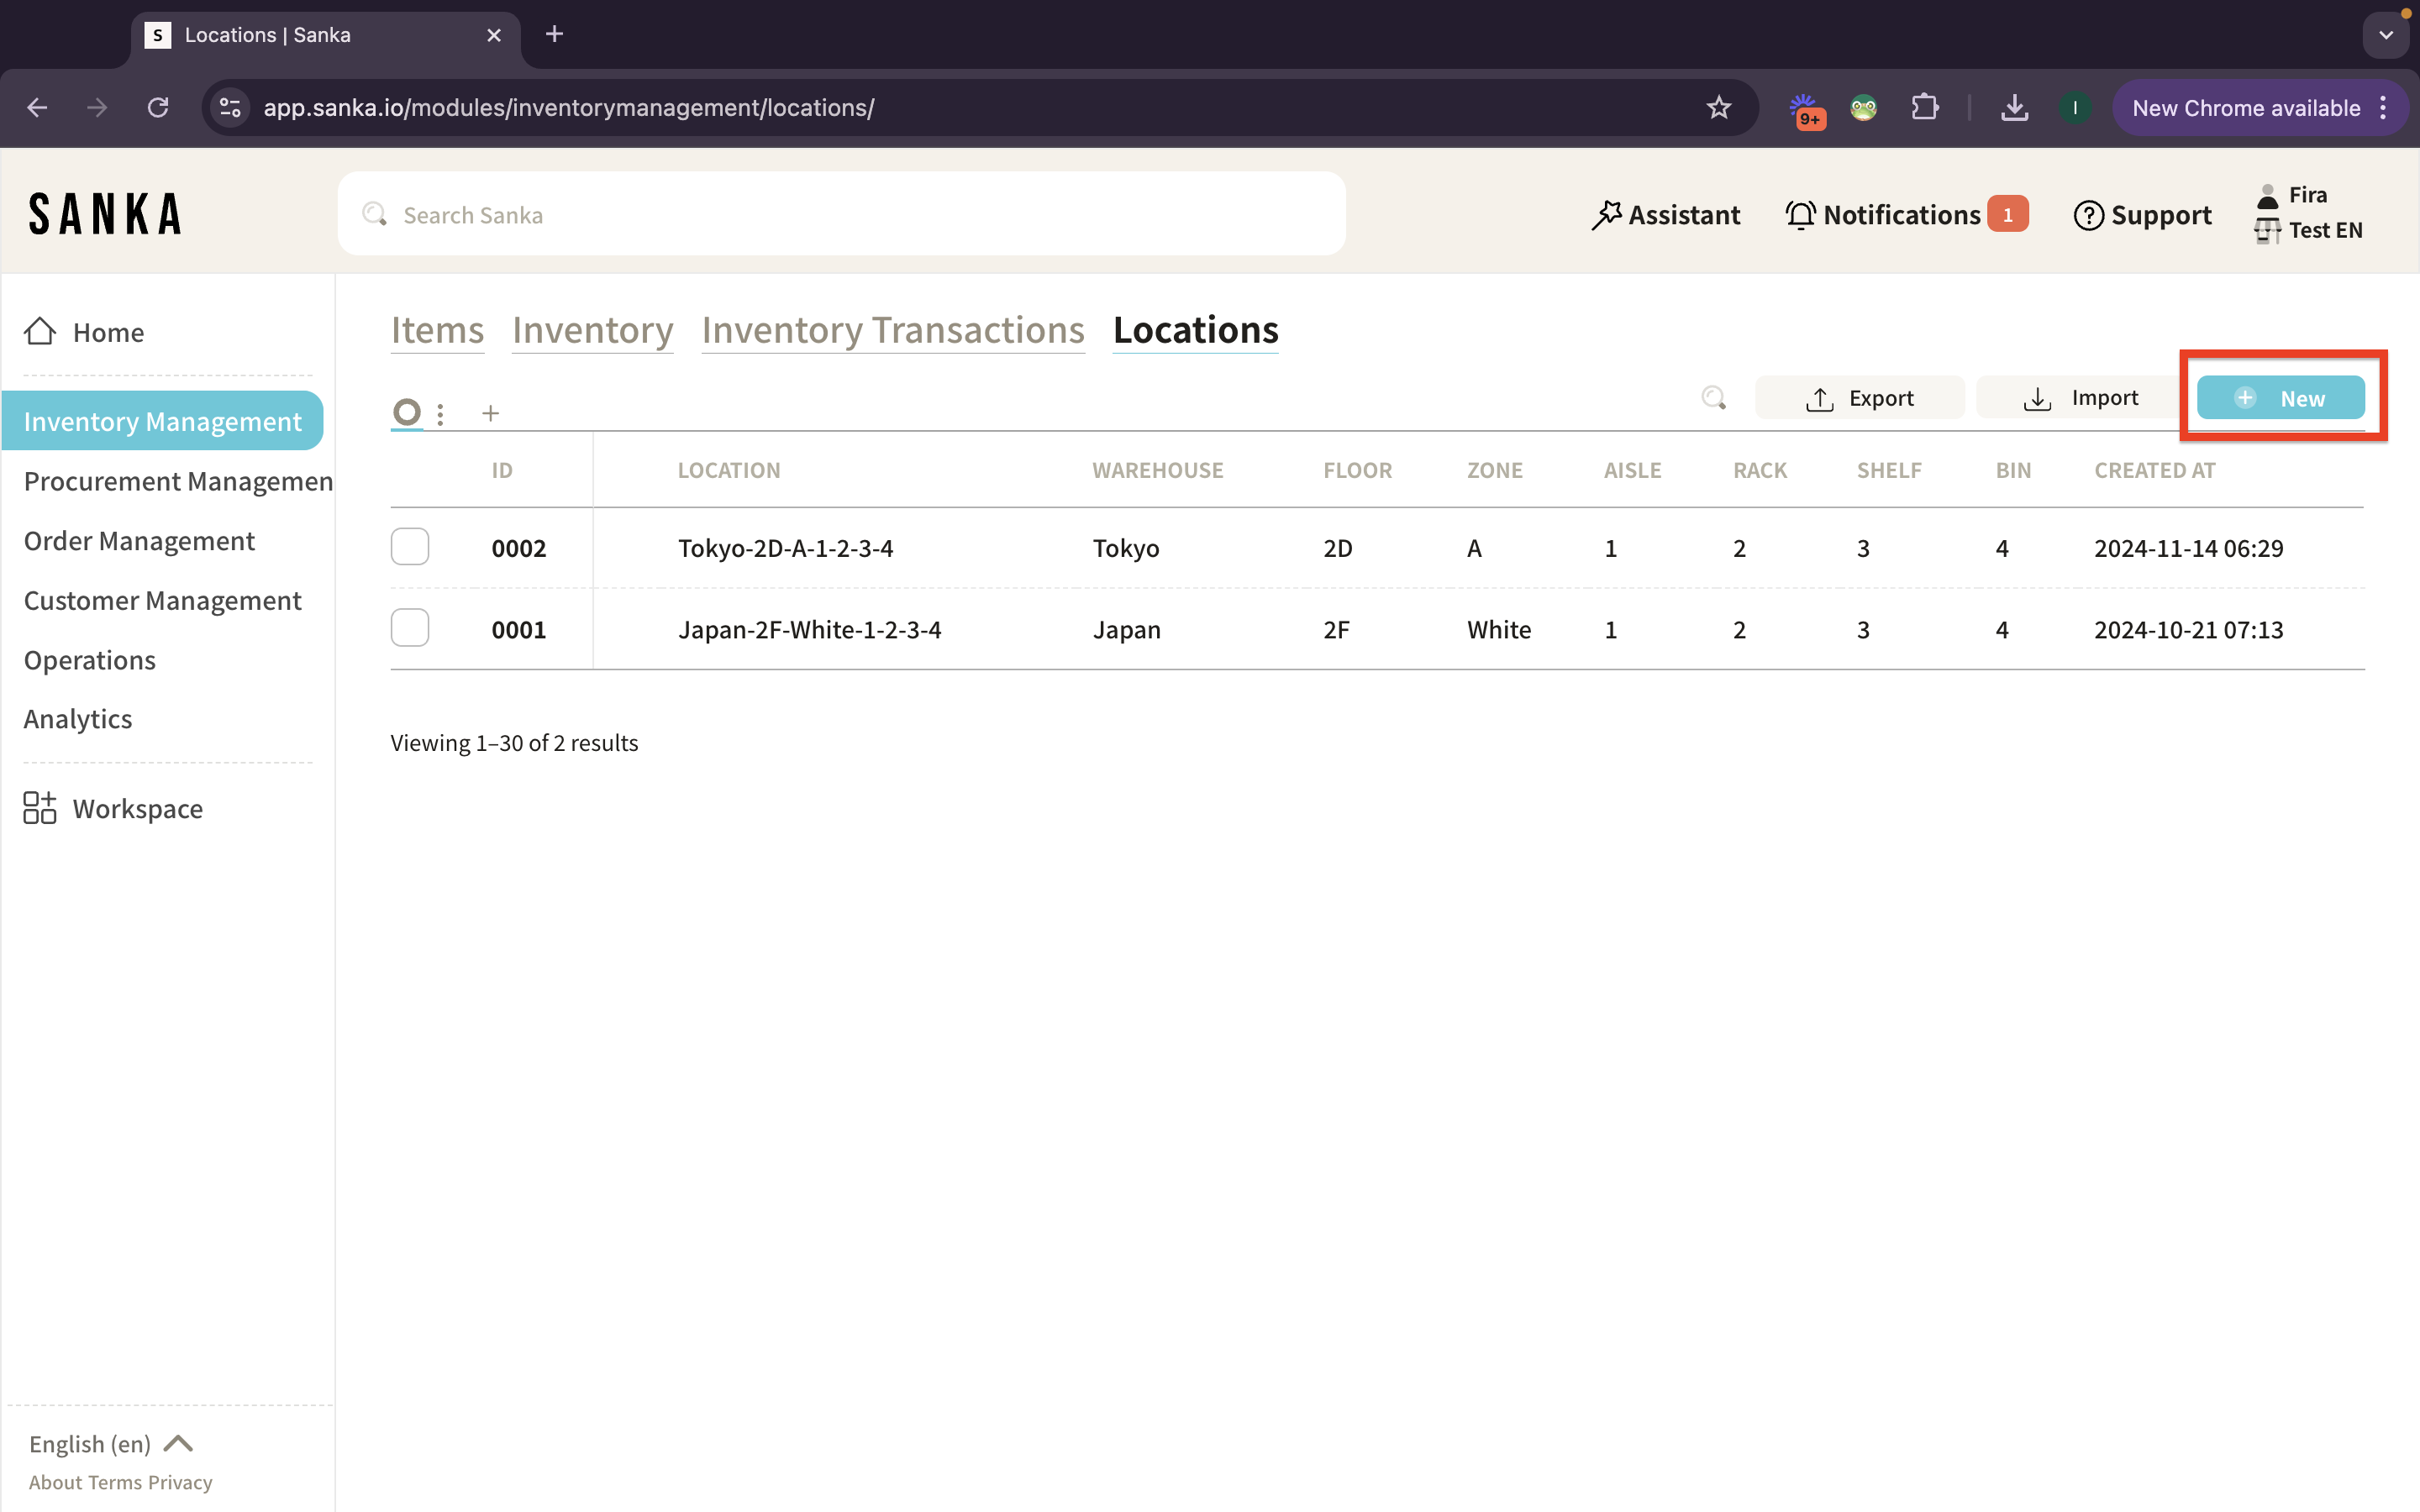
② Click the "New" button at the top right of the page.
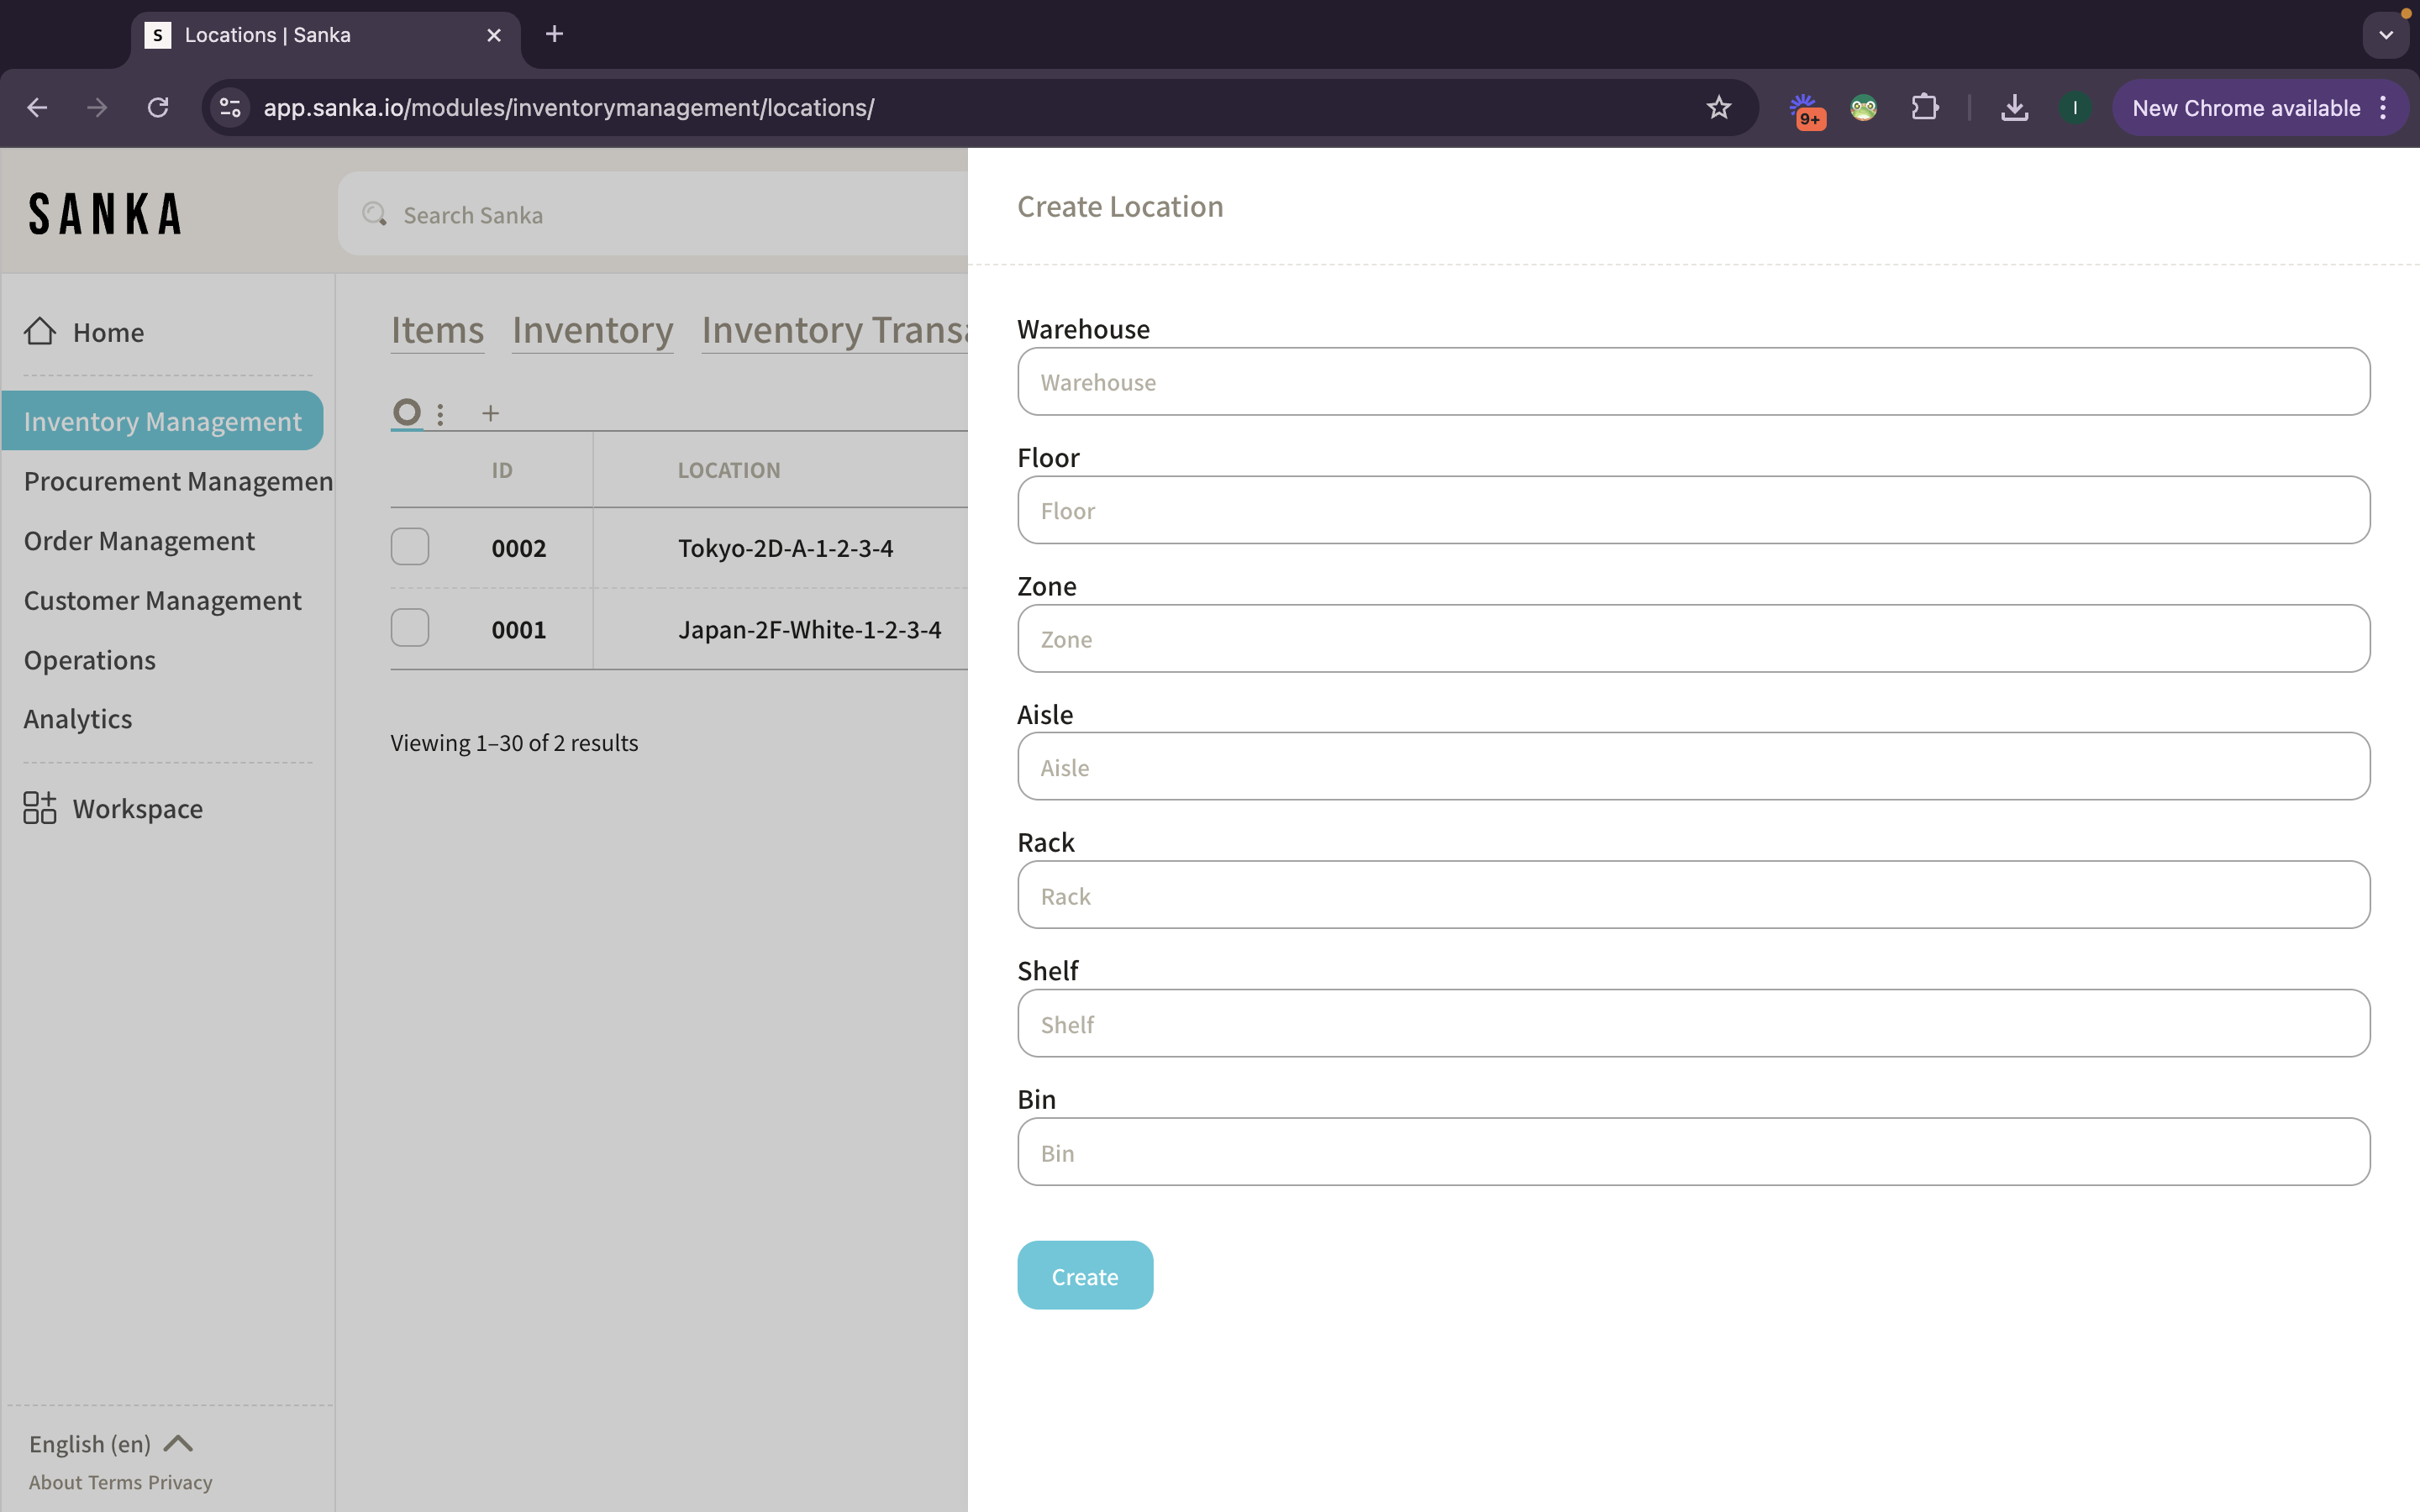
③ The "Create Location" page will appear. Input the necessary information. - You can register information such as warehouse, floor, zone, aisle, rack, shelf, or bin. Leaving unnecessary fields blank is fine. - Example: Enter "Warehouse A, Floor B". - After entering the details, click "Create".
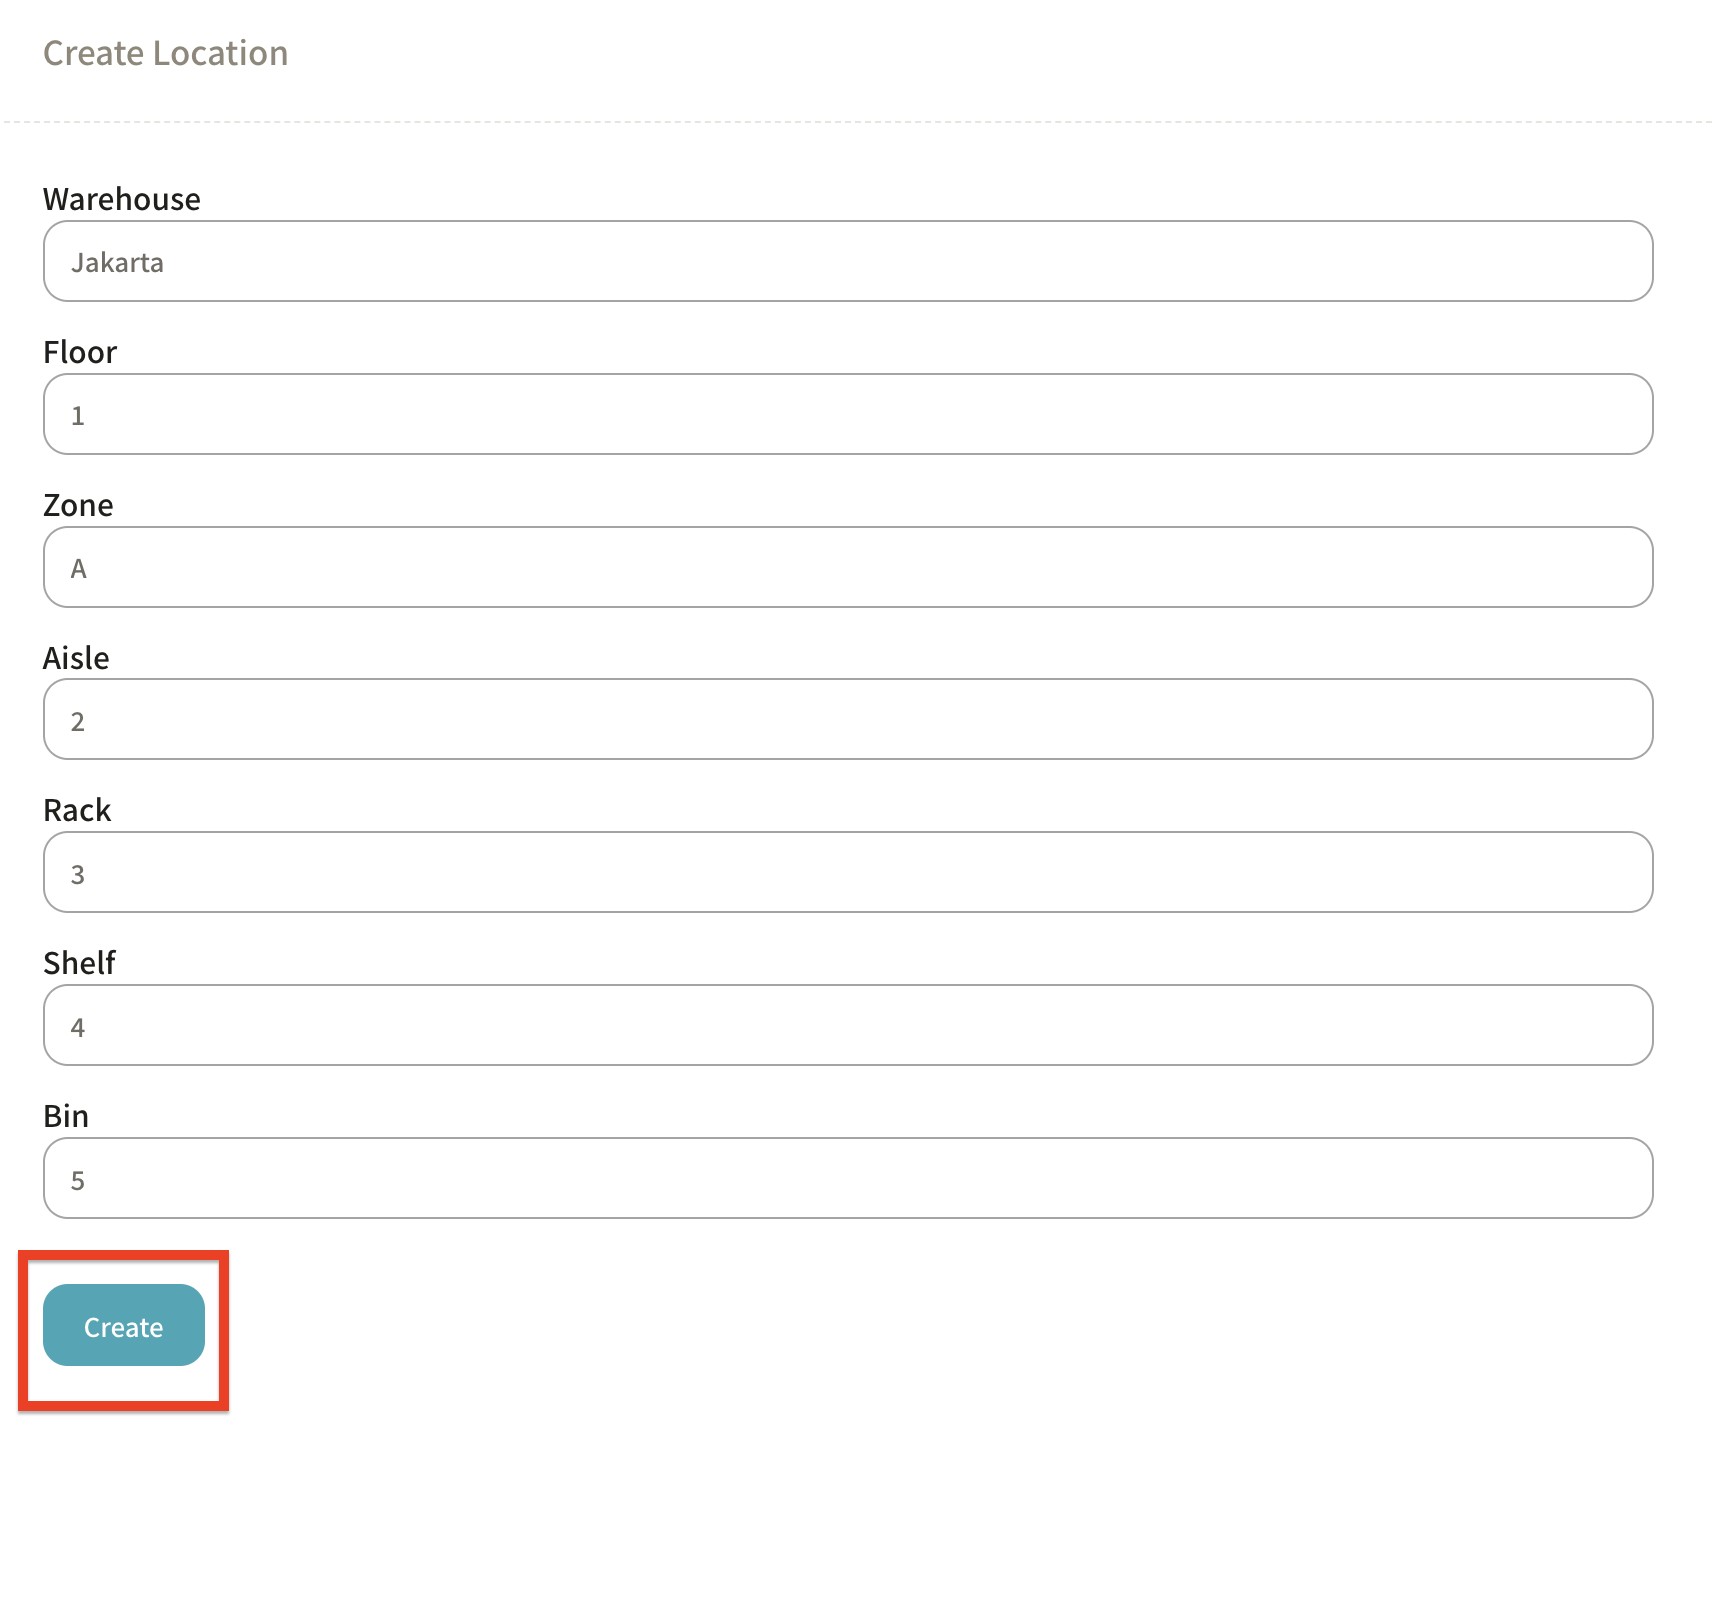
④ The registered location information will now be displayed in the record page.
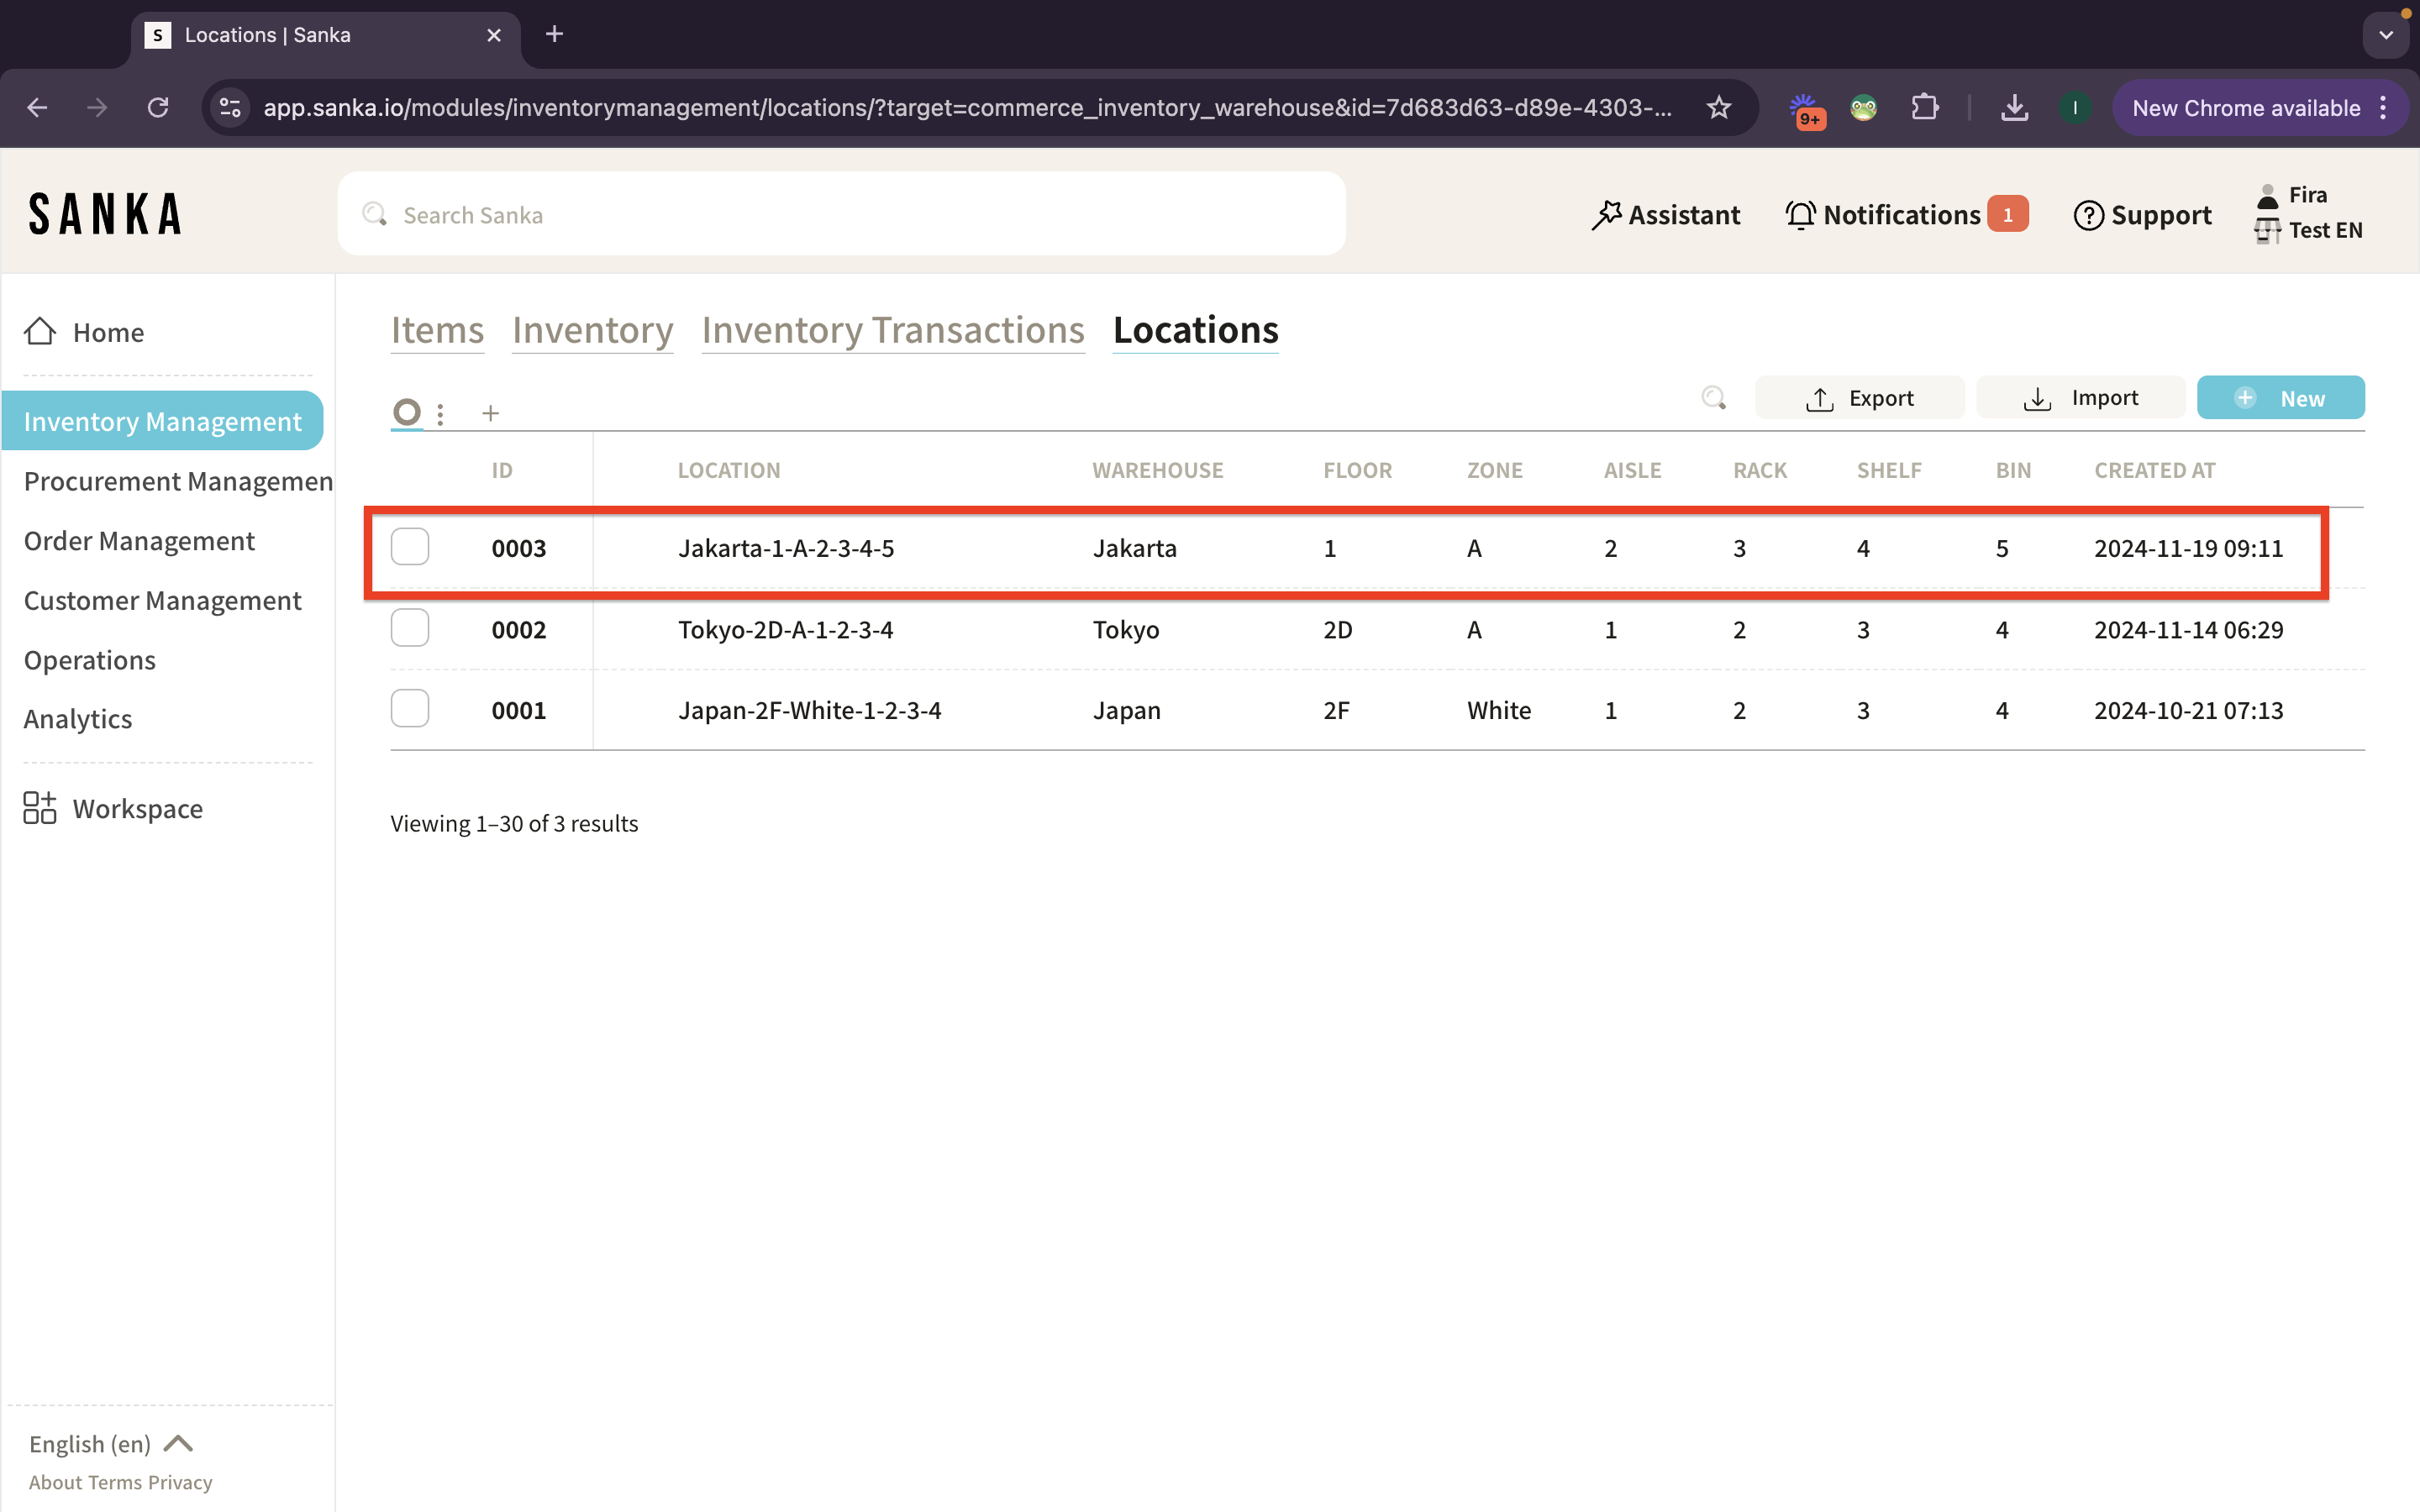
How to Bulk Register Locations Using Sanka's Template
Similar to bulk registering items, you can bulk register location information using Sanka's Location CSV Import Template.
① Click the "Inventory Management" module on the left side of the screen, then select the "Location" object.

② Click the "Import" button at the top right of the screen.
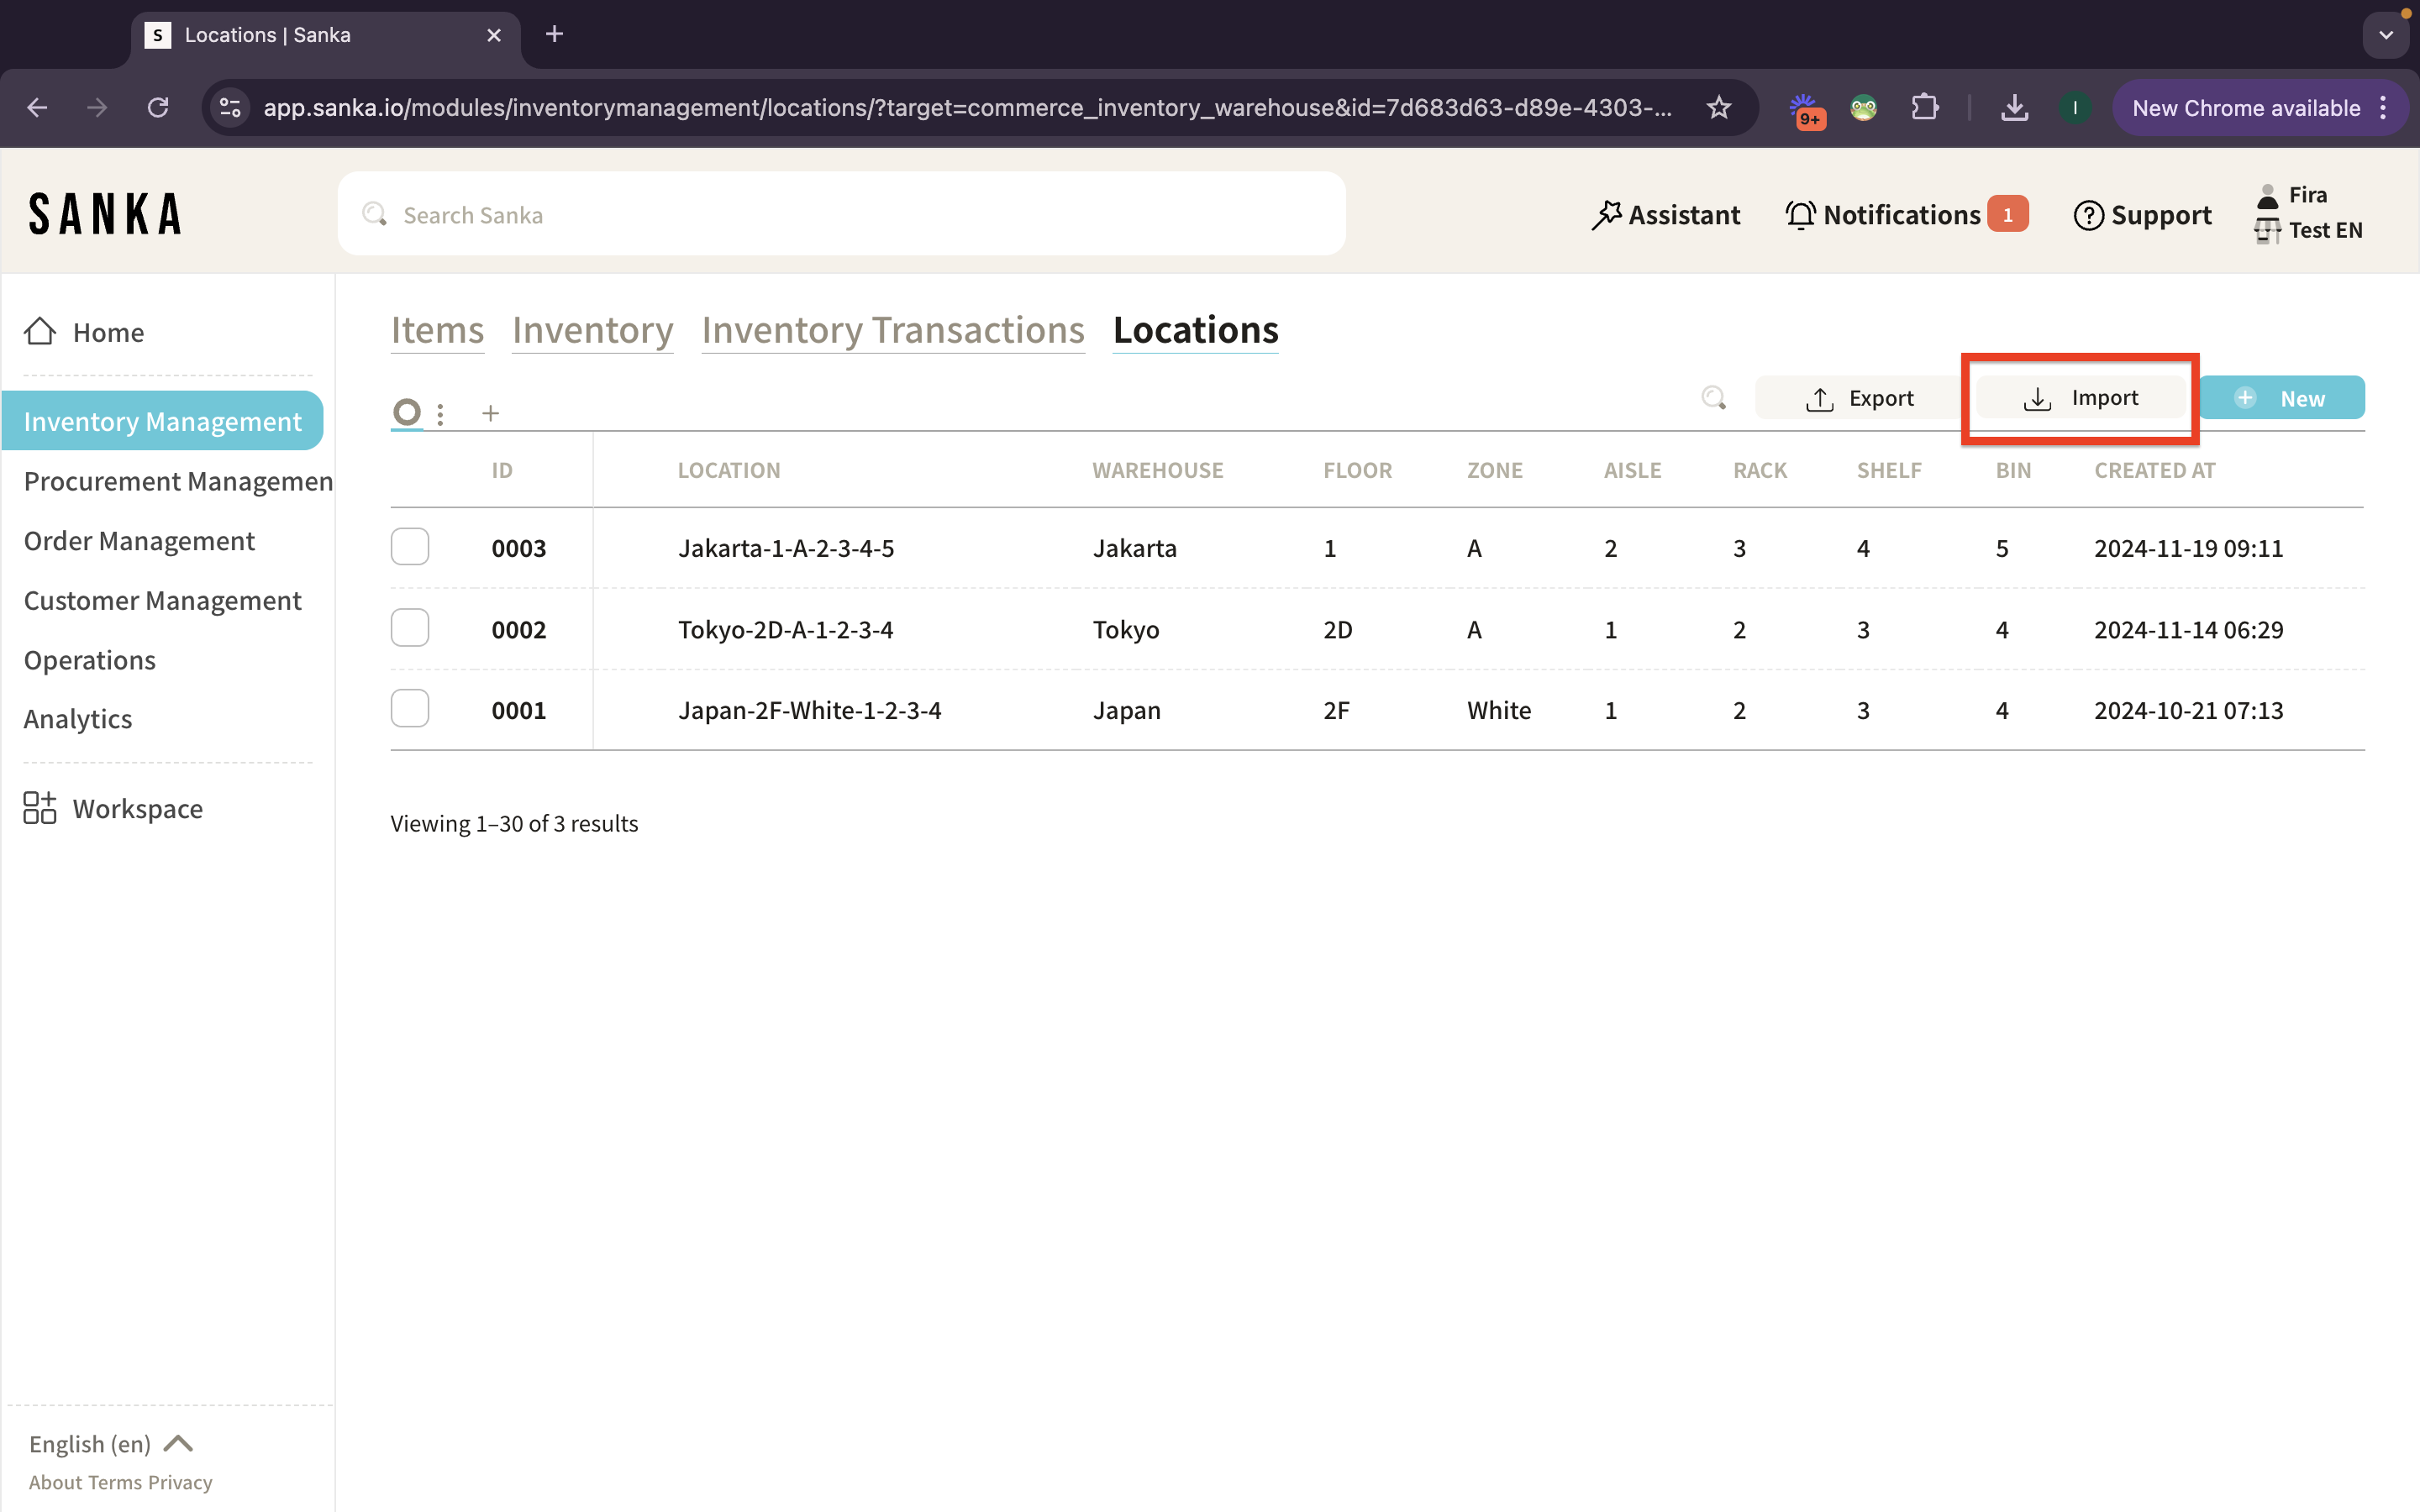
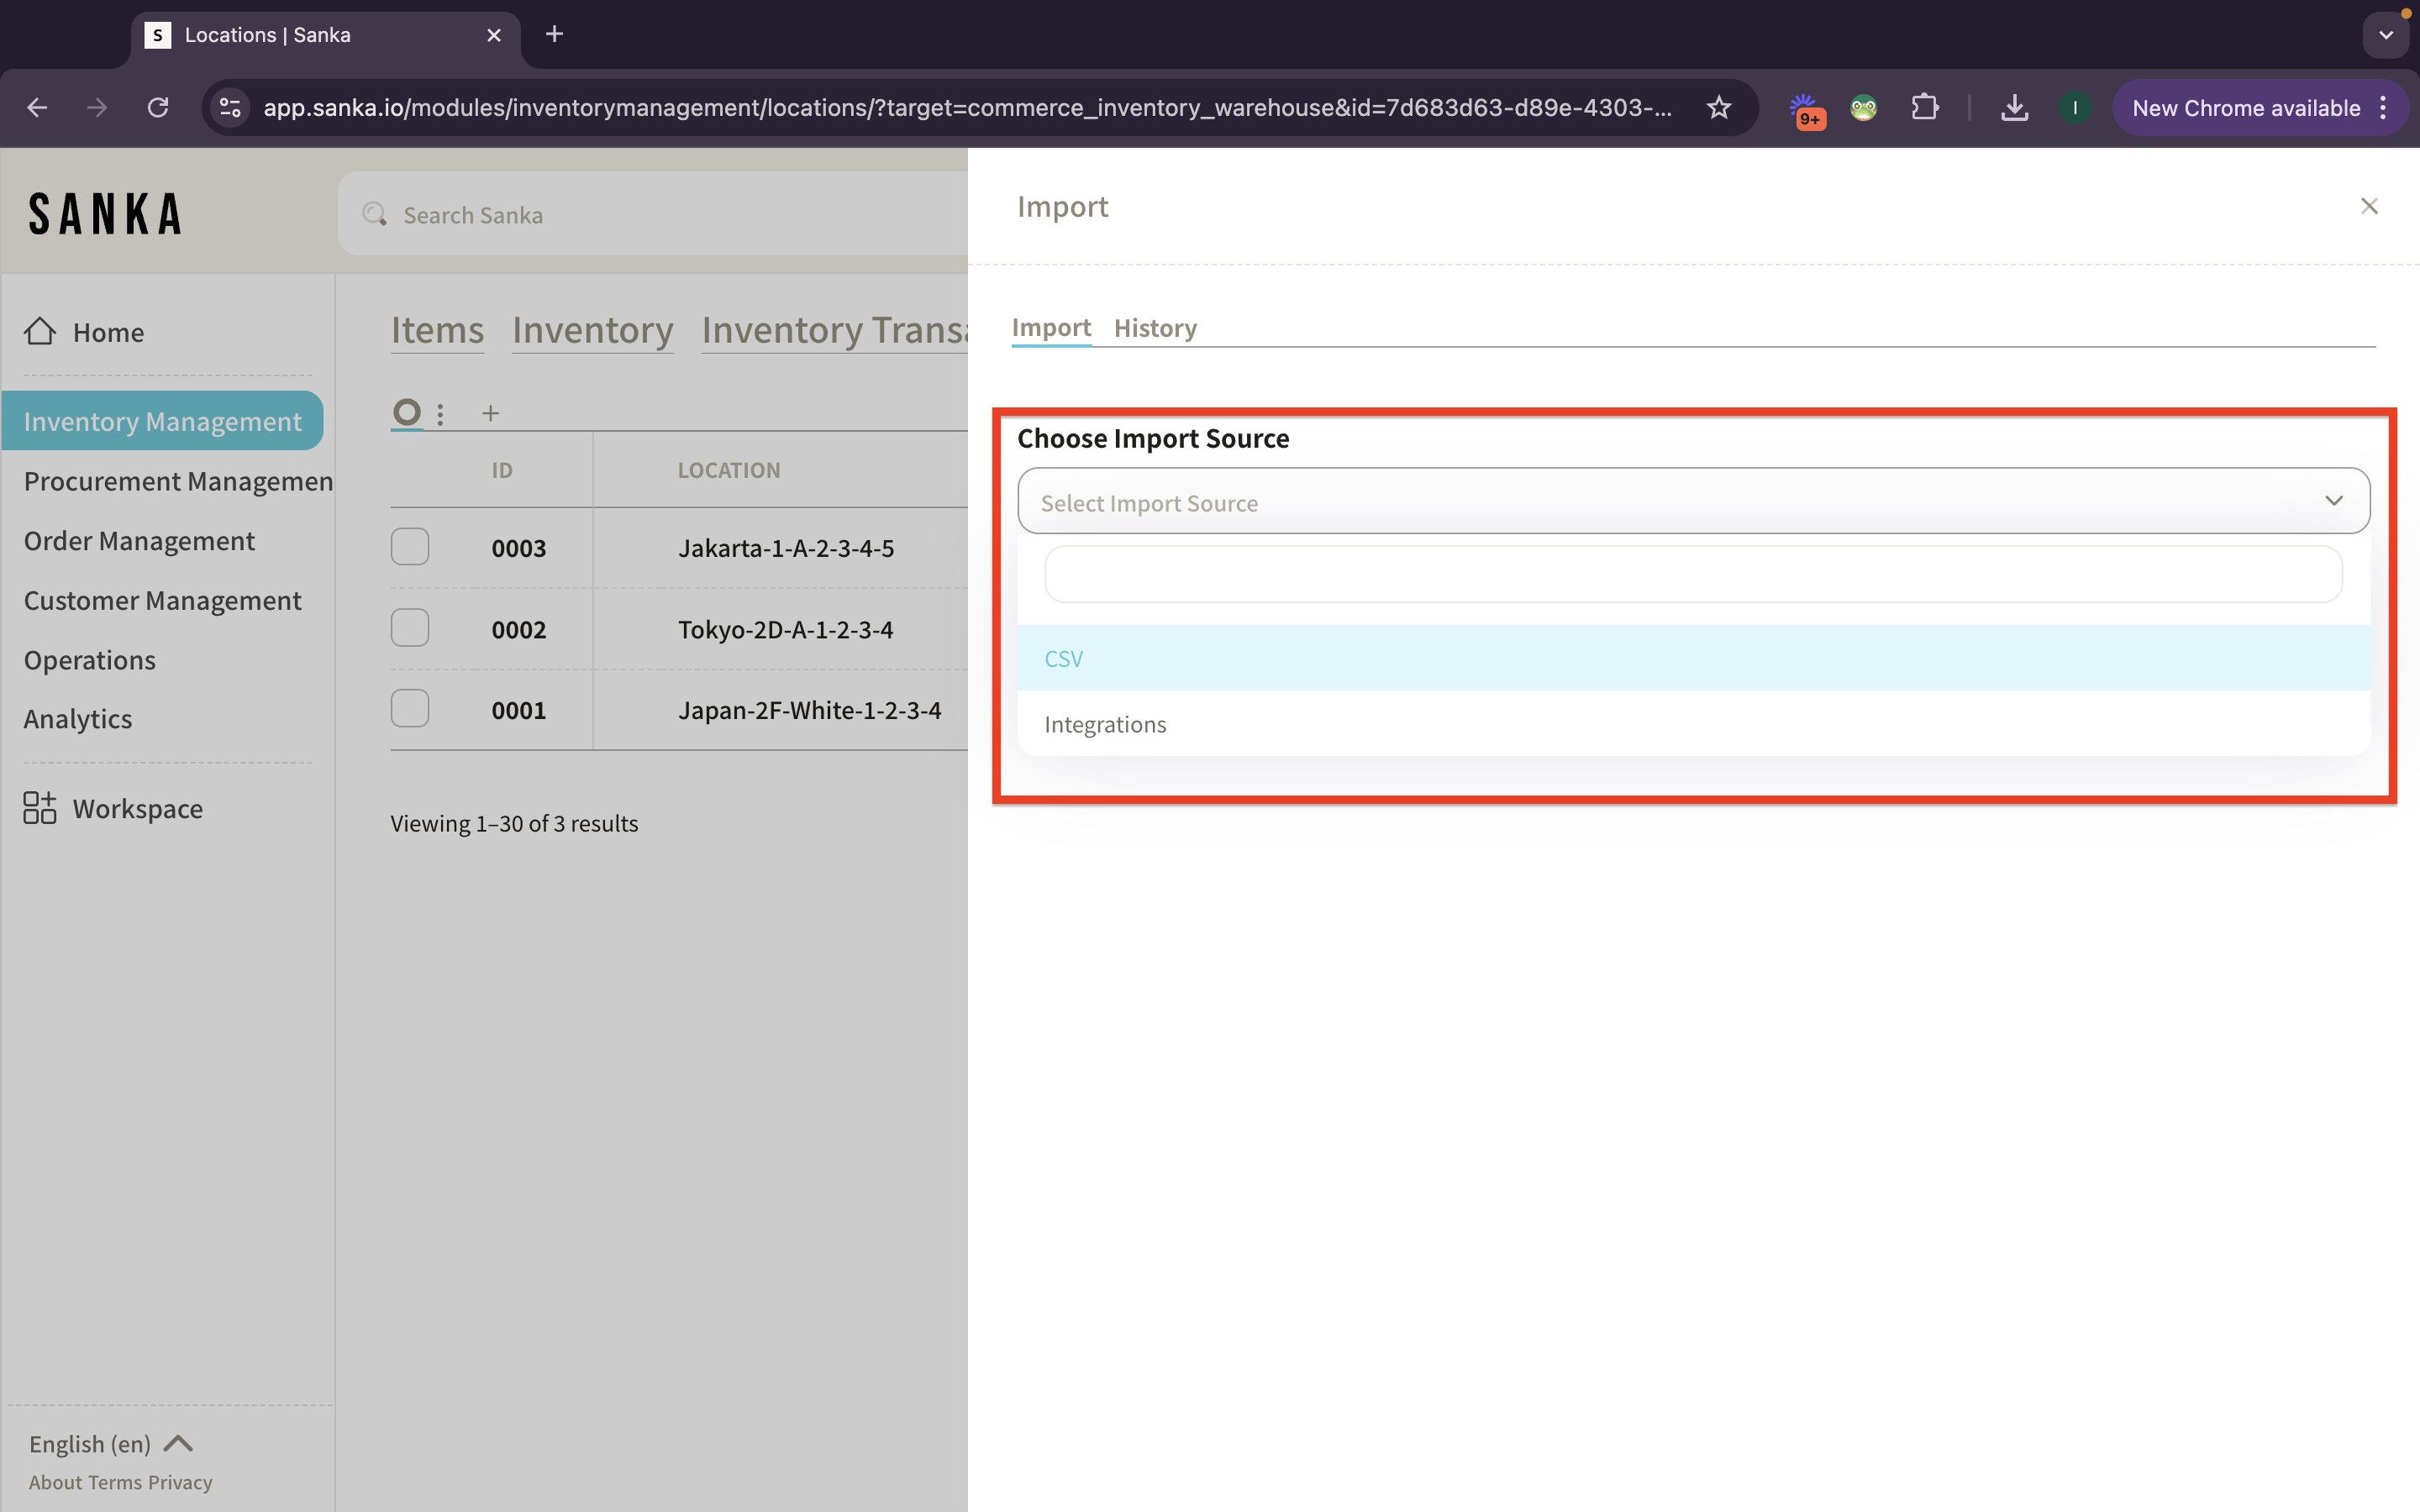
③ The "Import" menu will appear. Click "Select Source" and choose "CSV File".
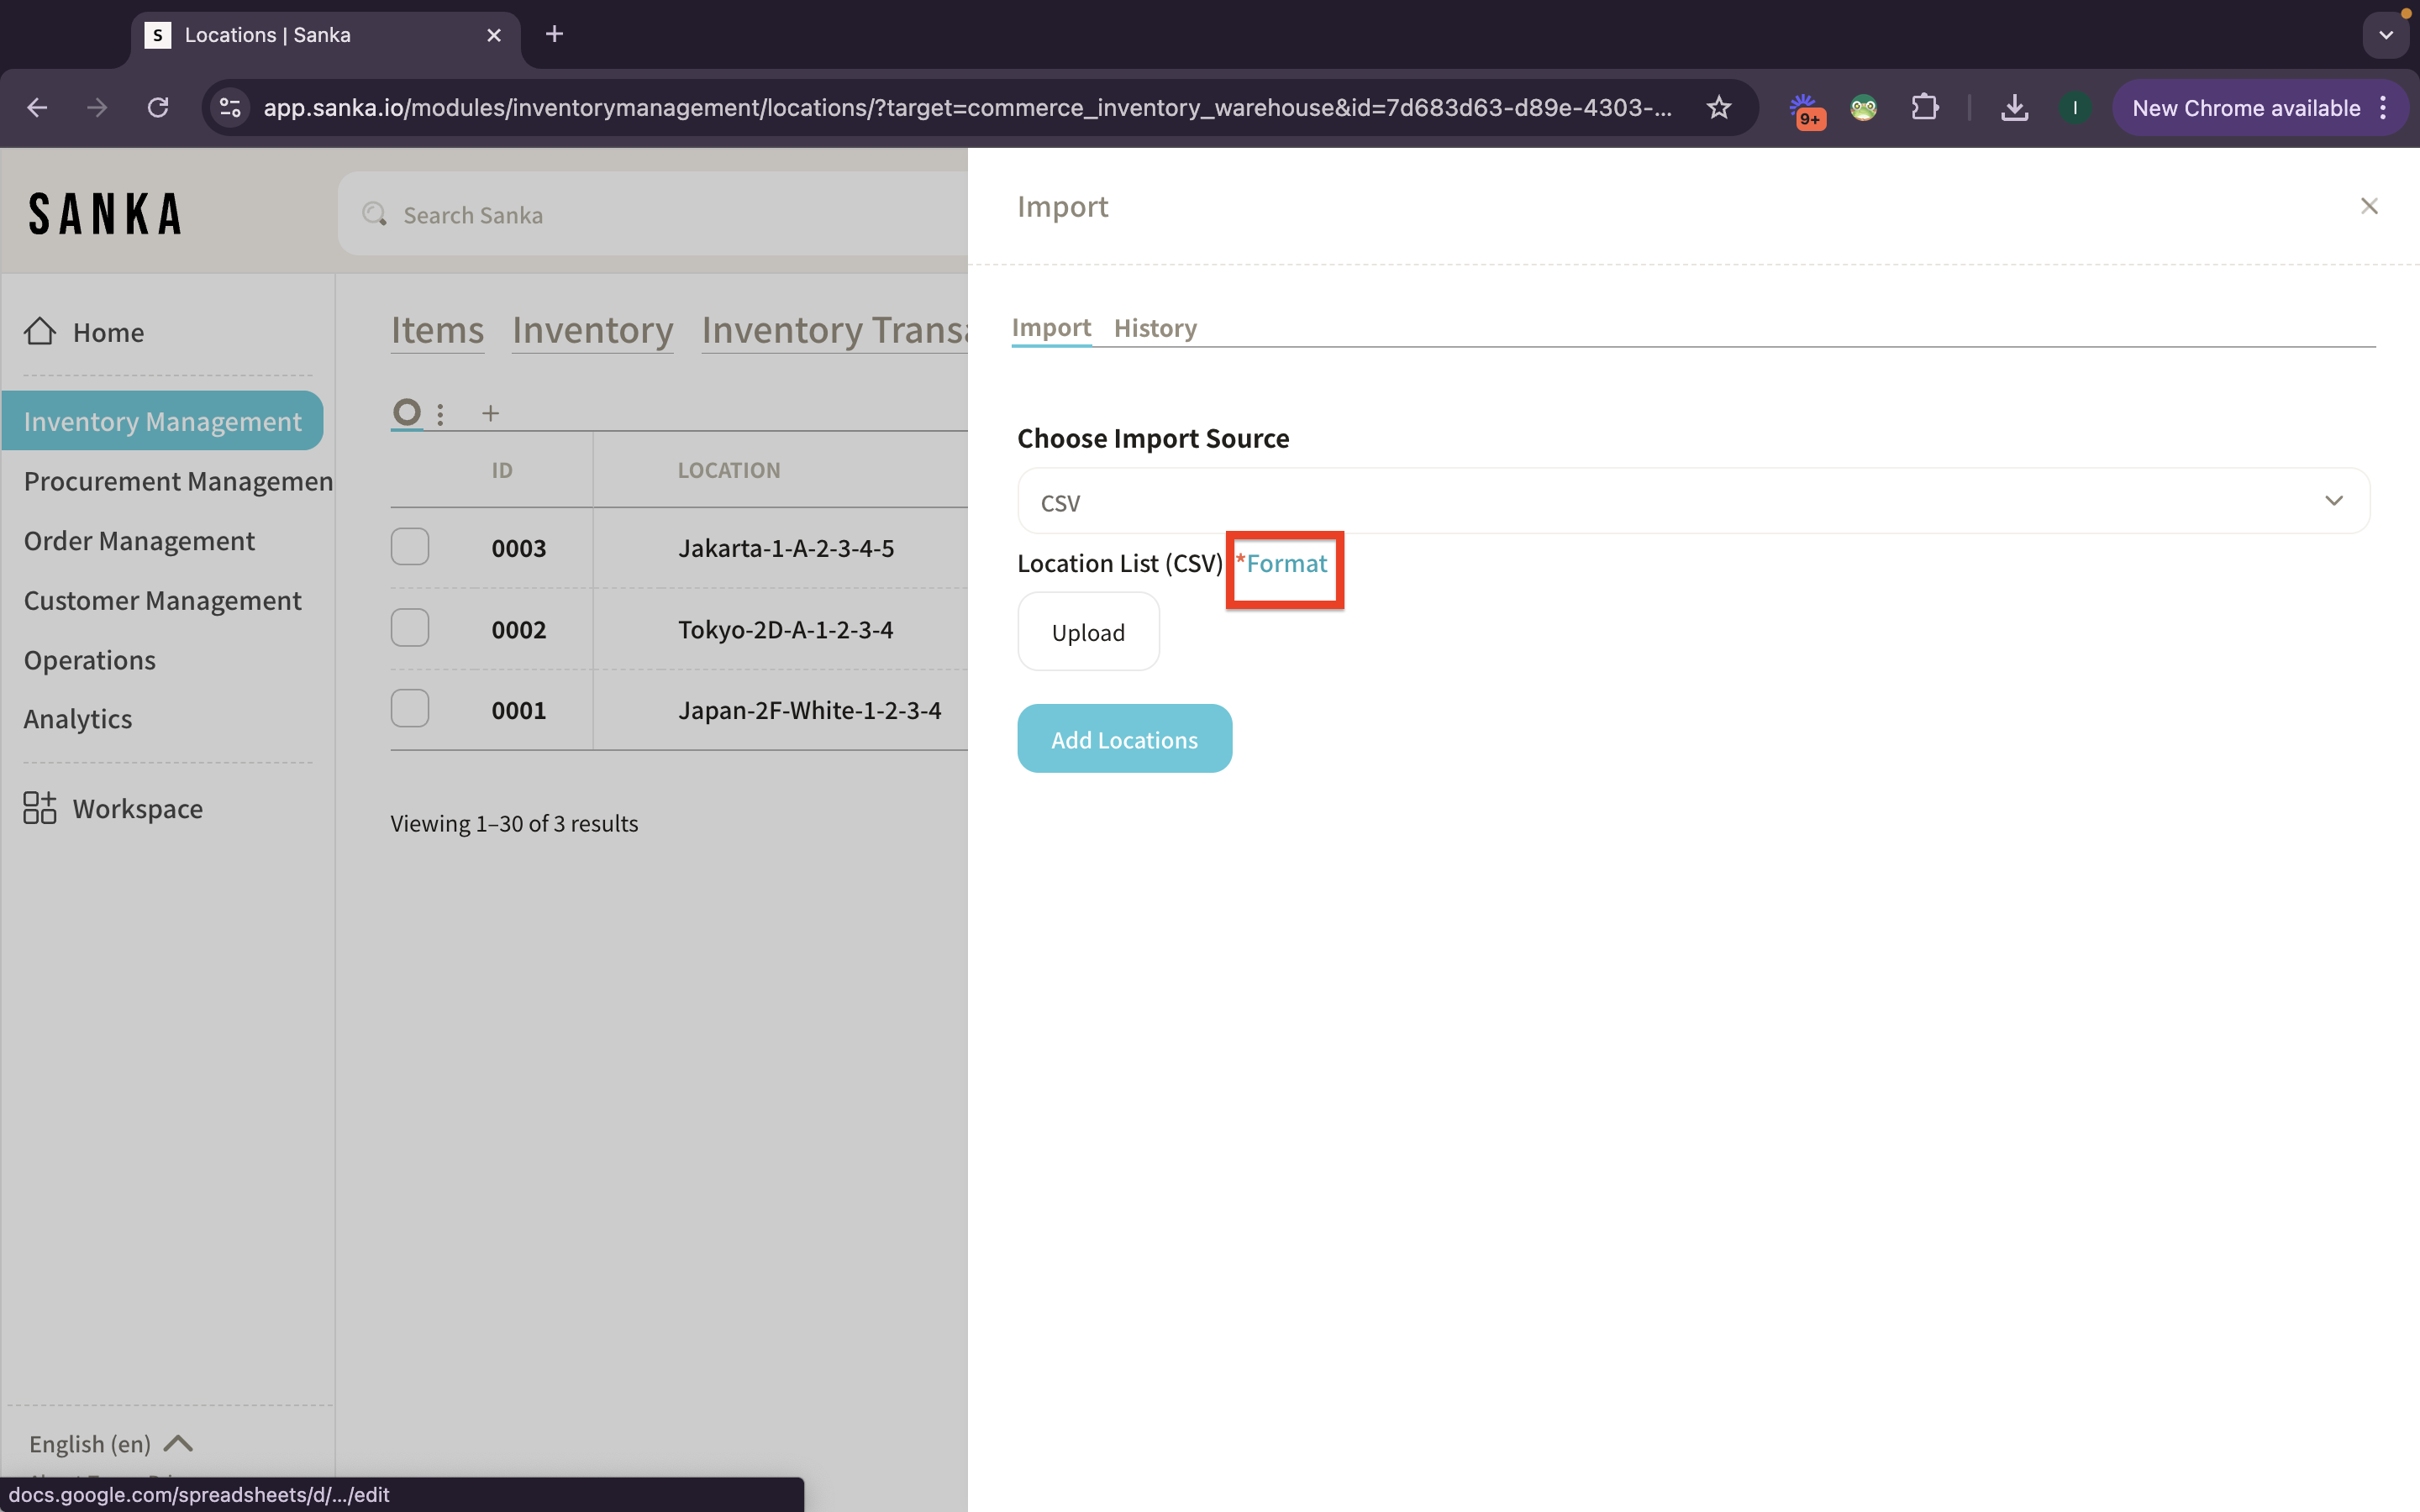
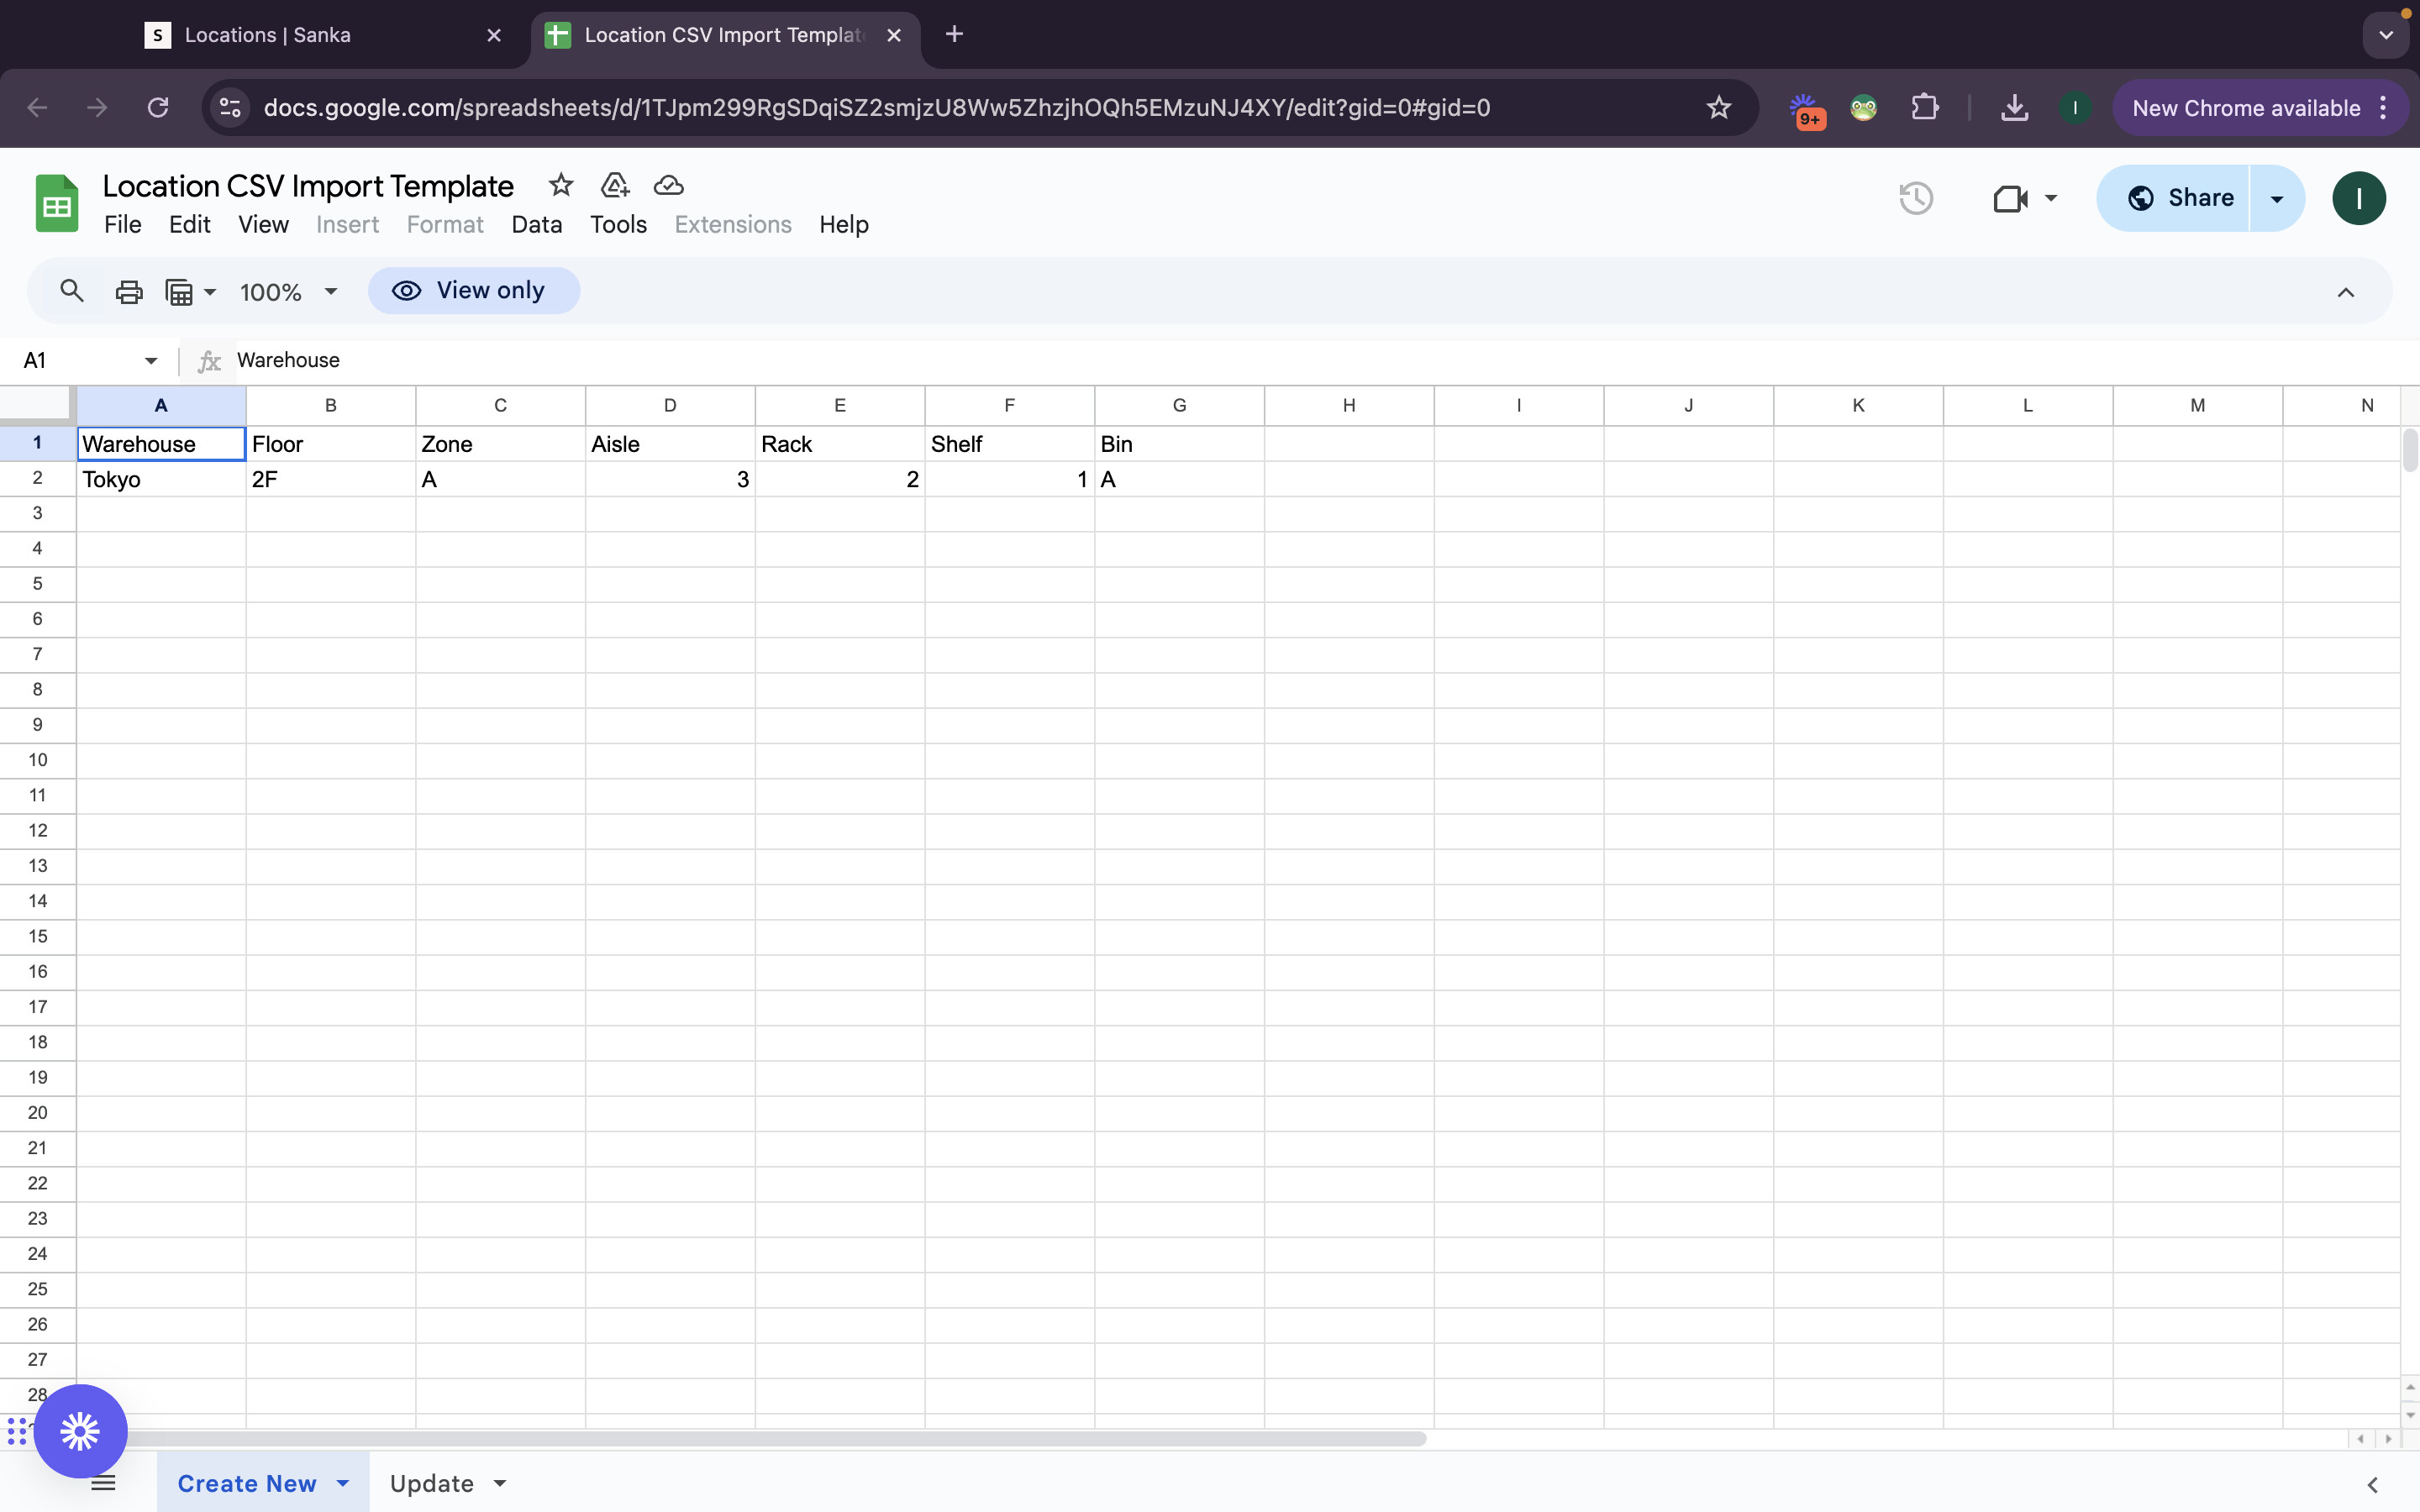
④ Click "Format" to open Sanka's "Location CSV Import Template".
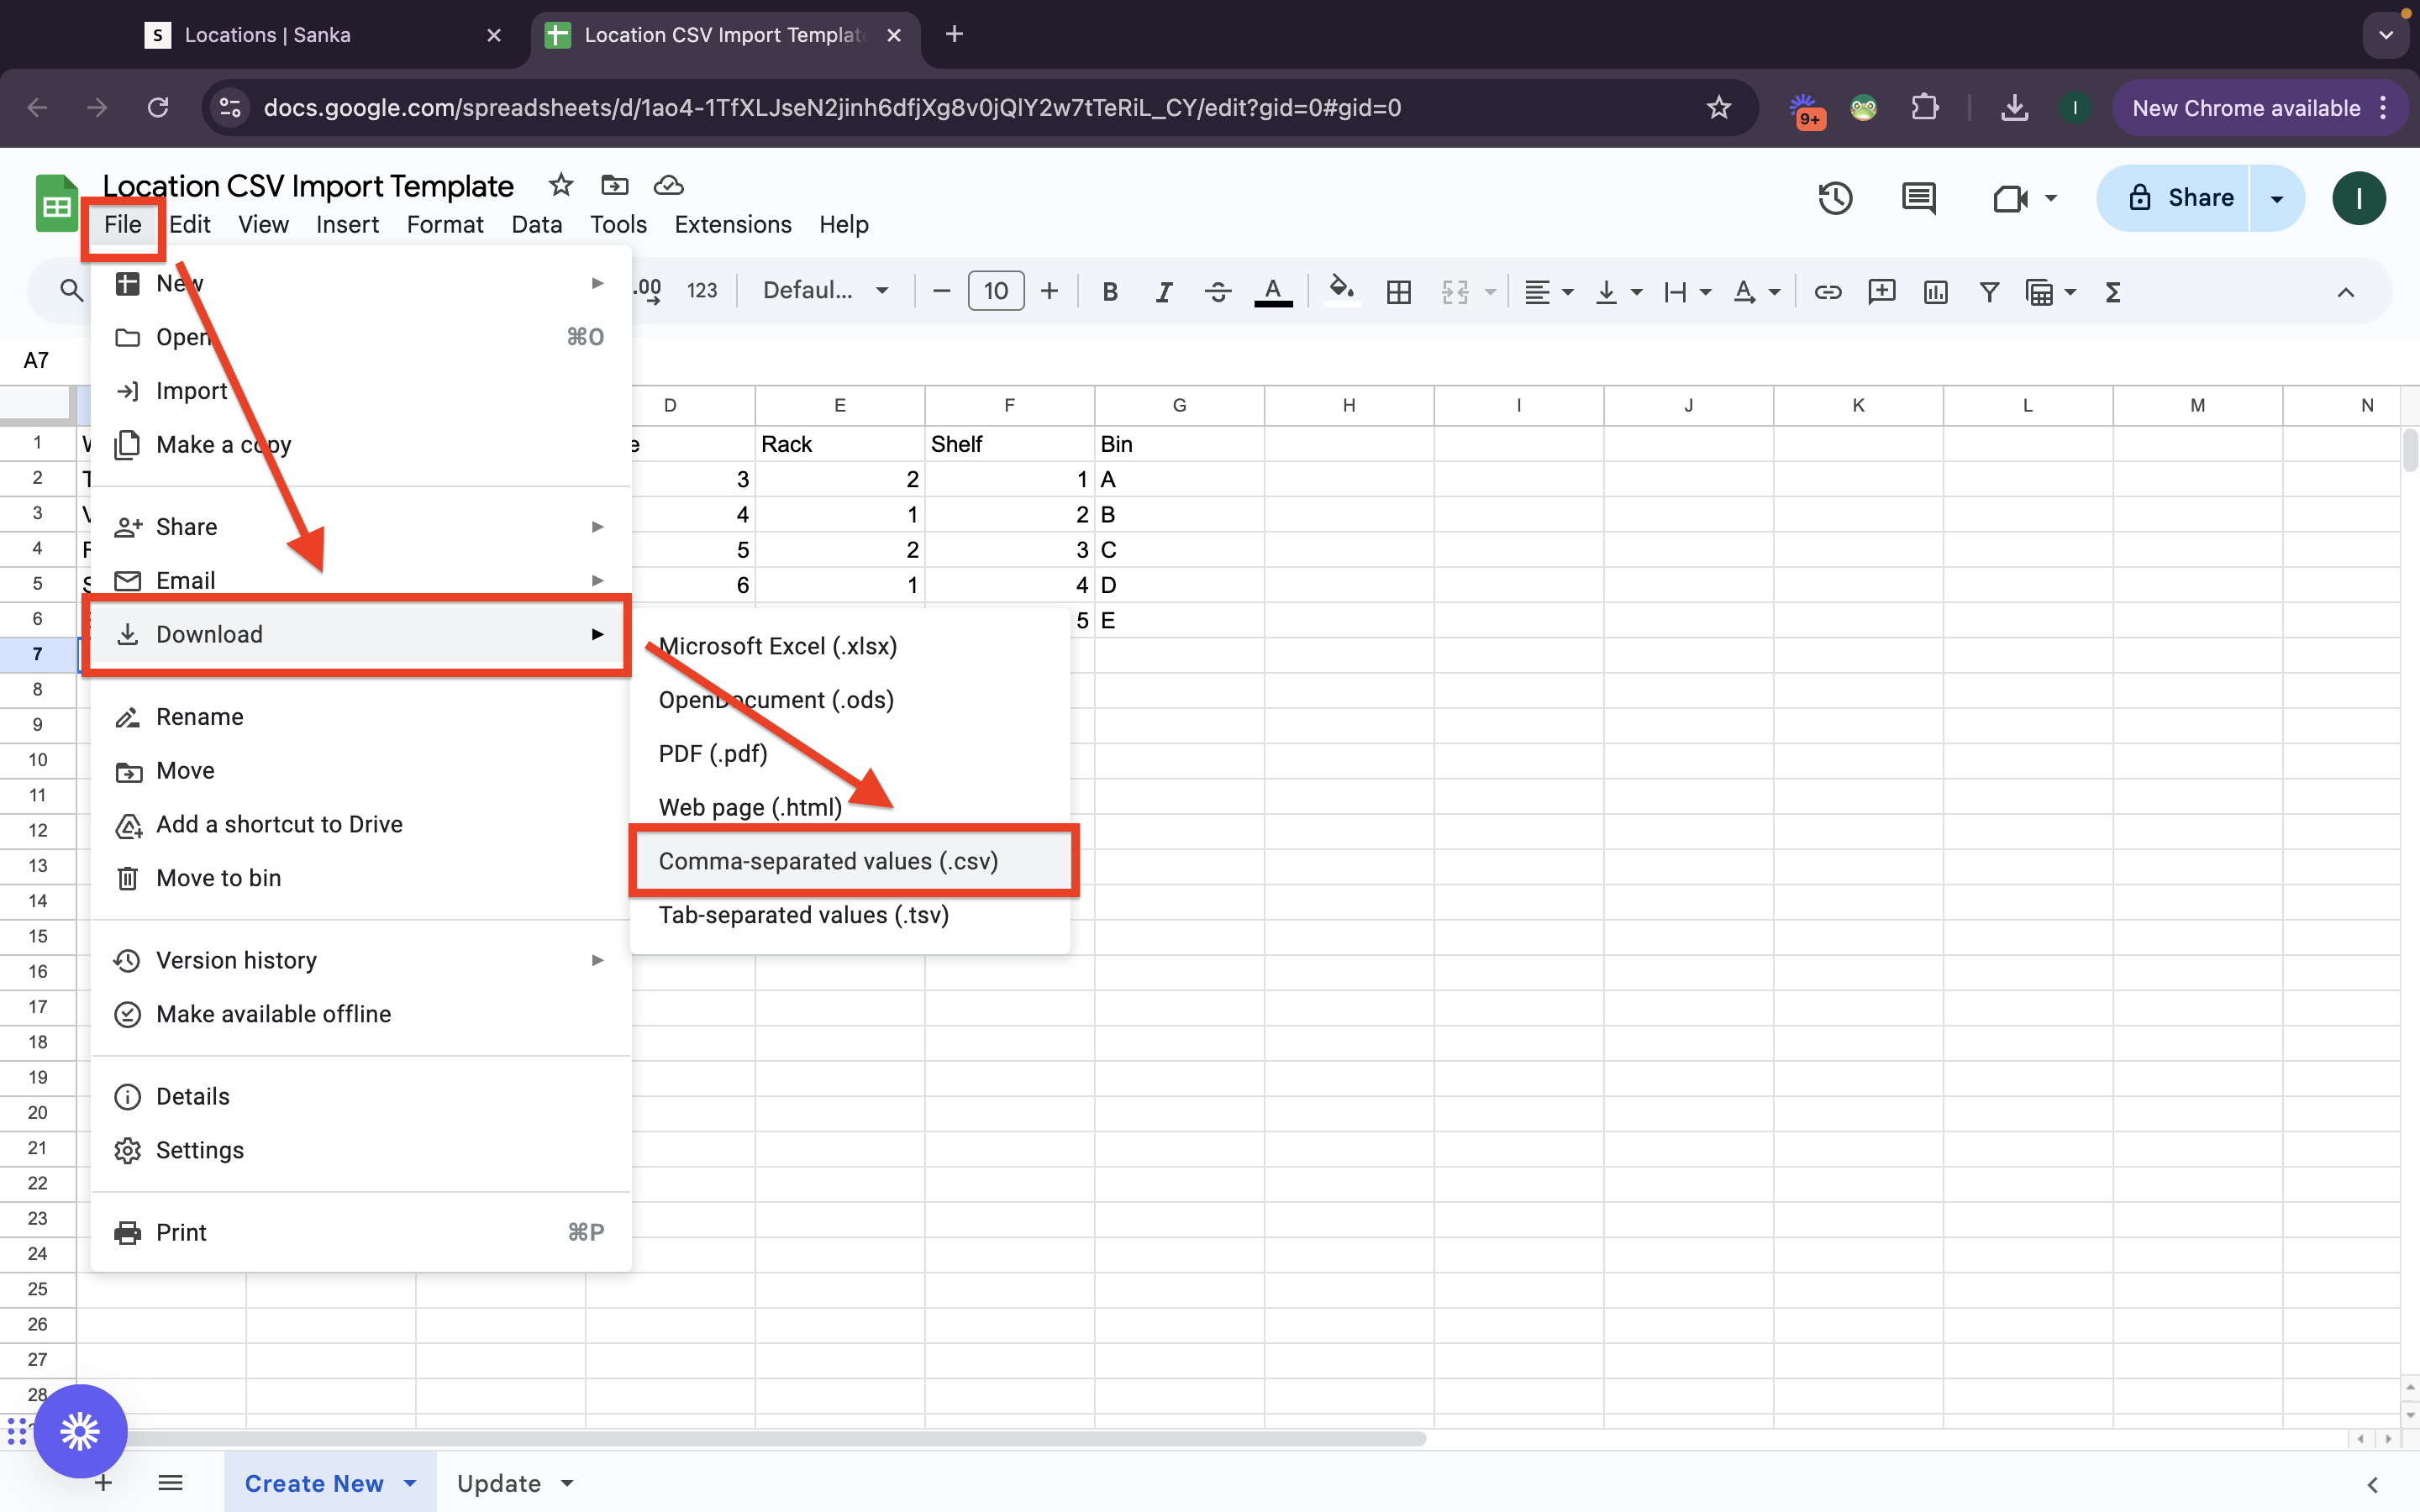
⑤ Download the "Location CSV Import Template" to your desktop. - Select "File" → "Download" → "Comma-separated values (.csv)" and save it to your desired location.
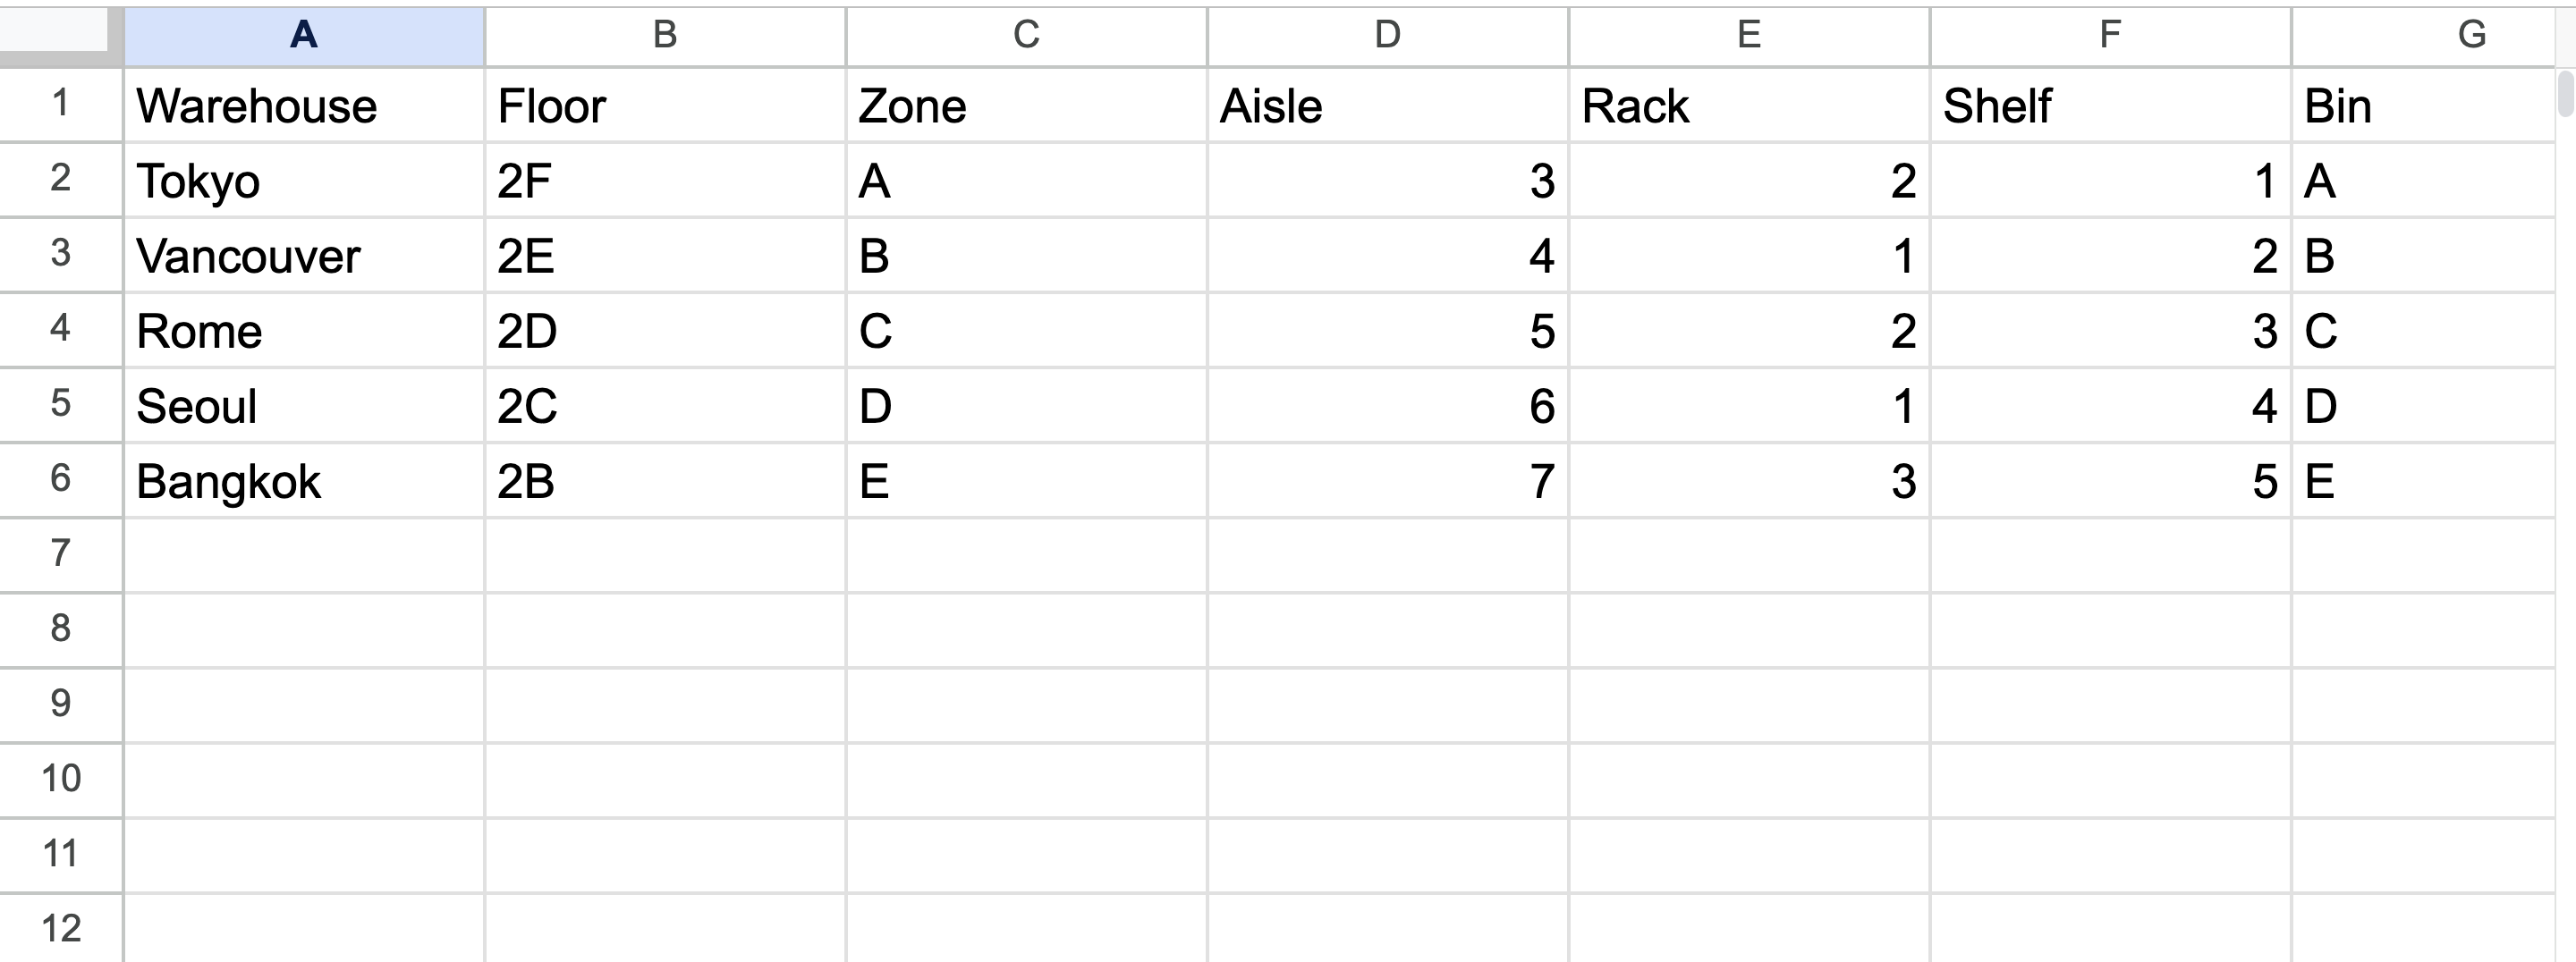
⑥ Fill in the necessary information in the downloaded template.
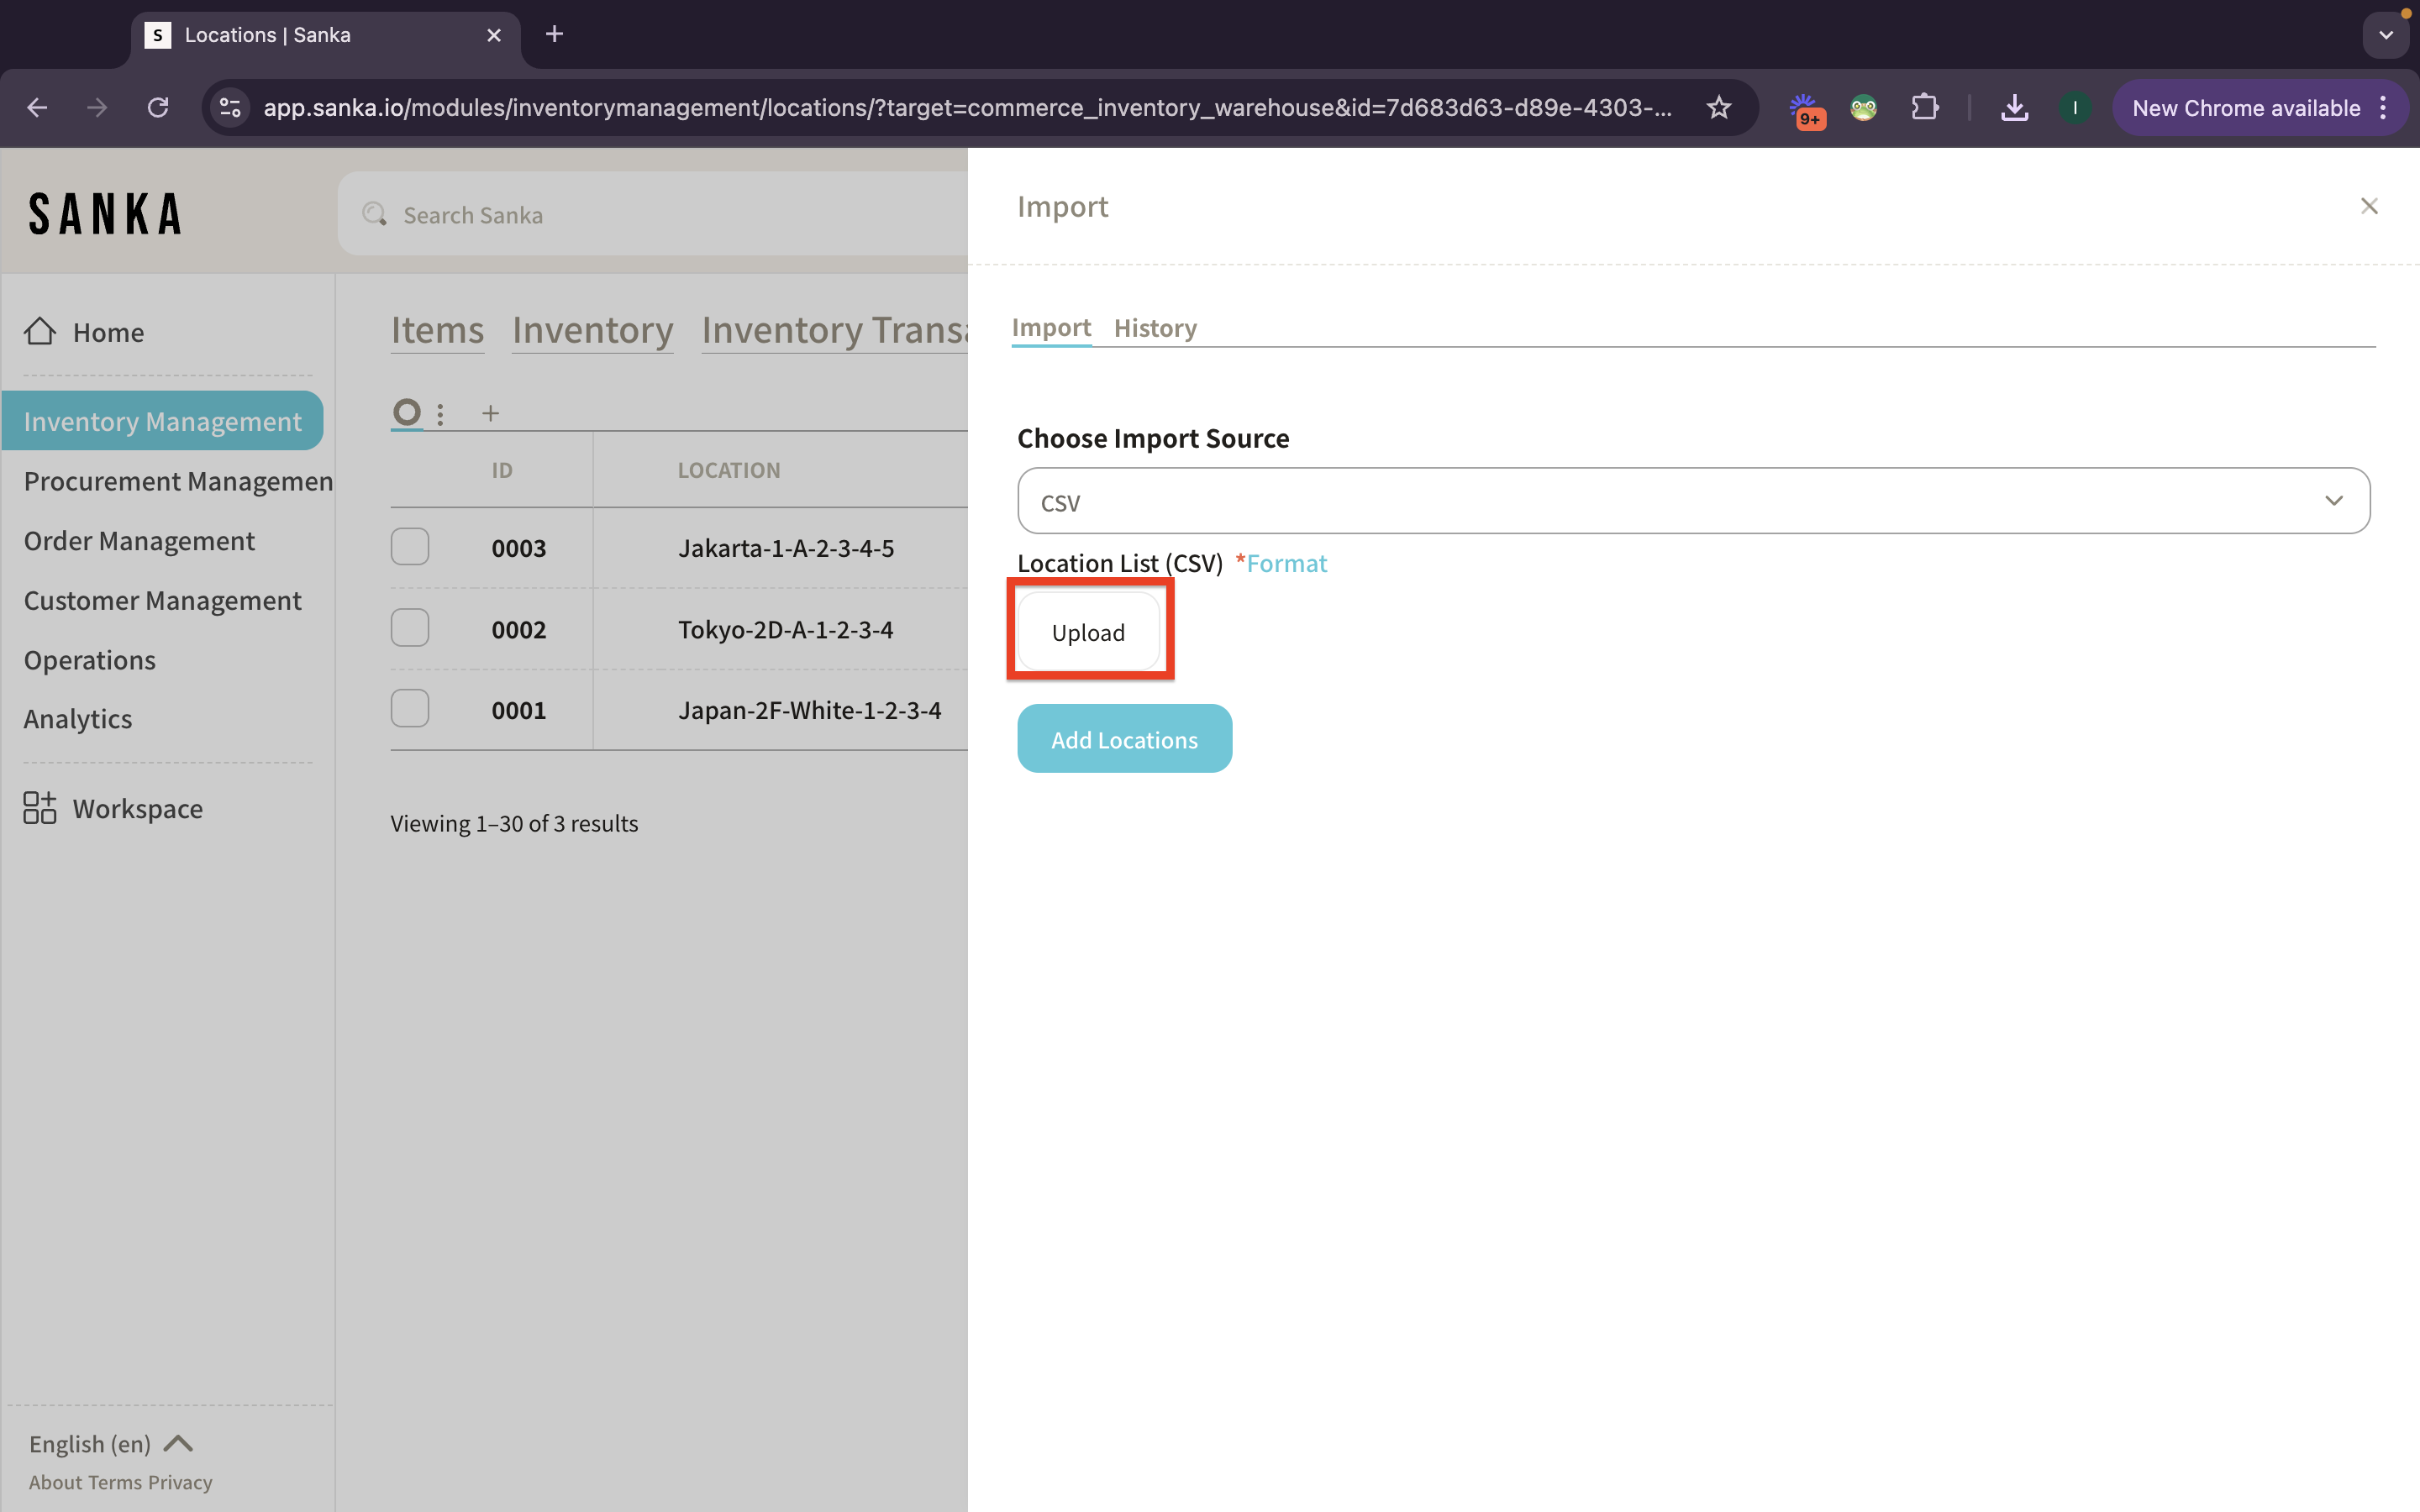
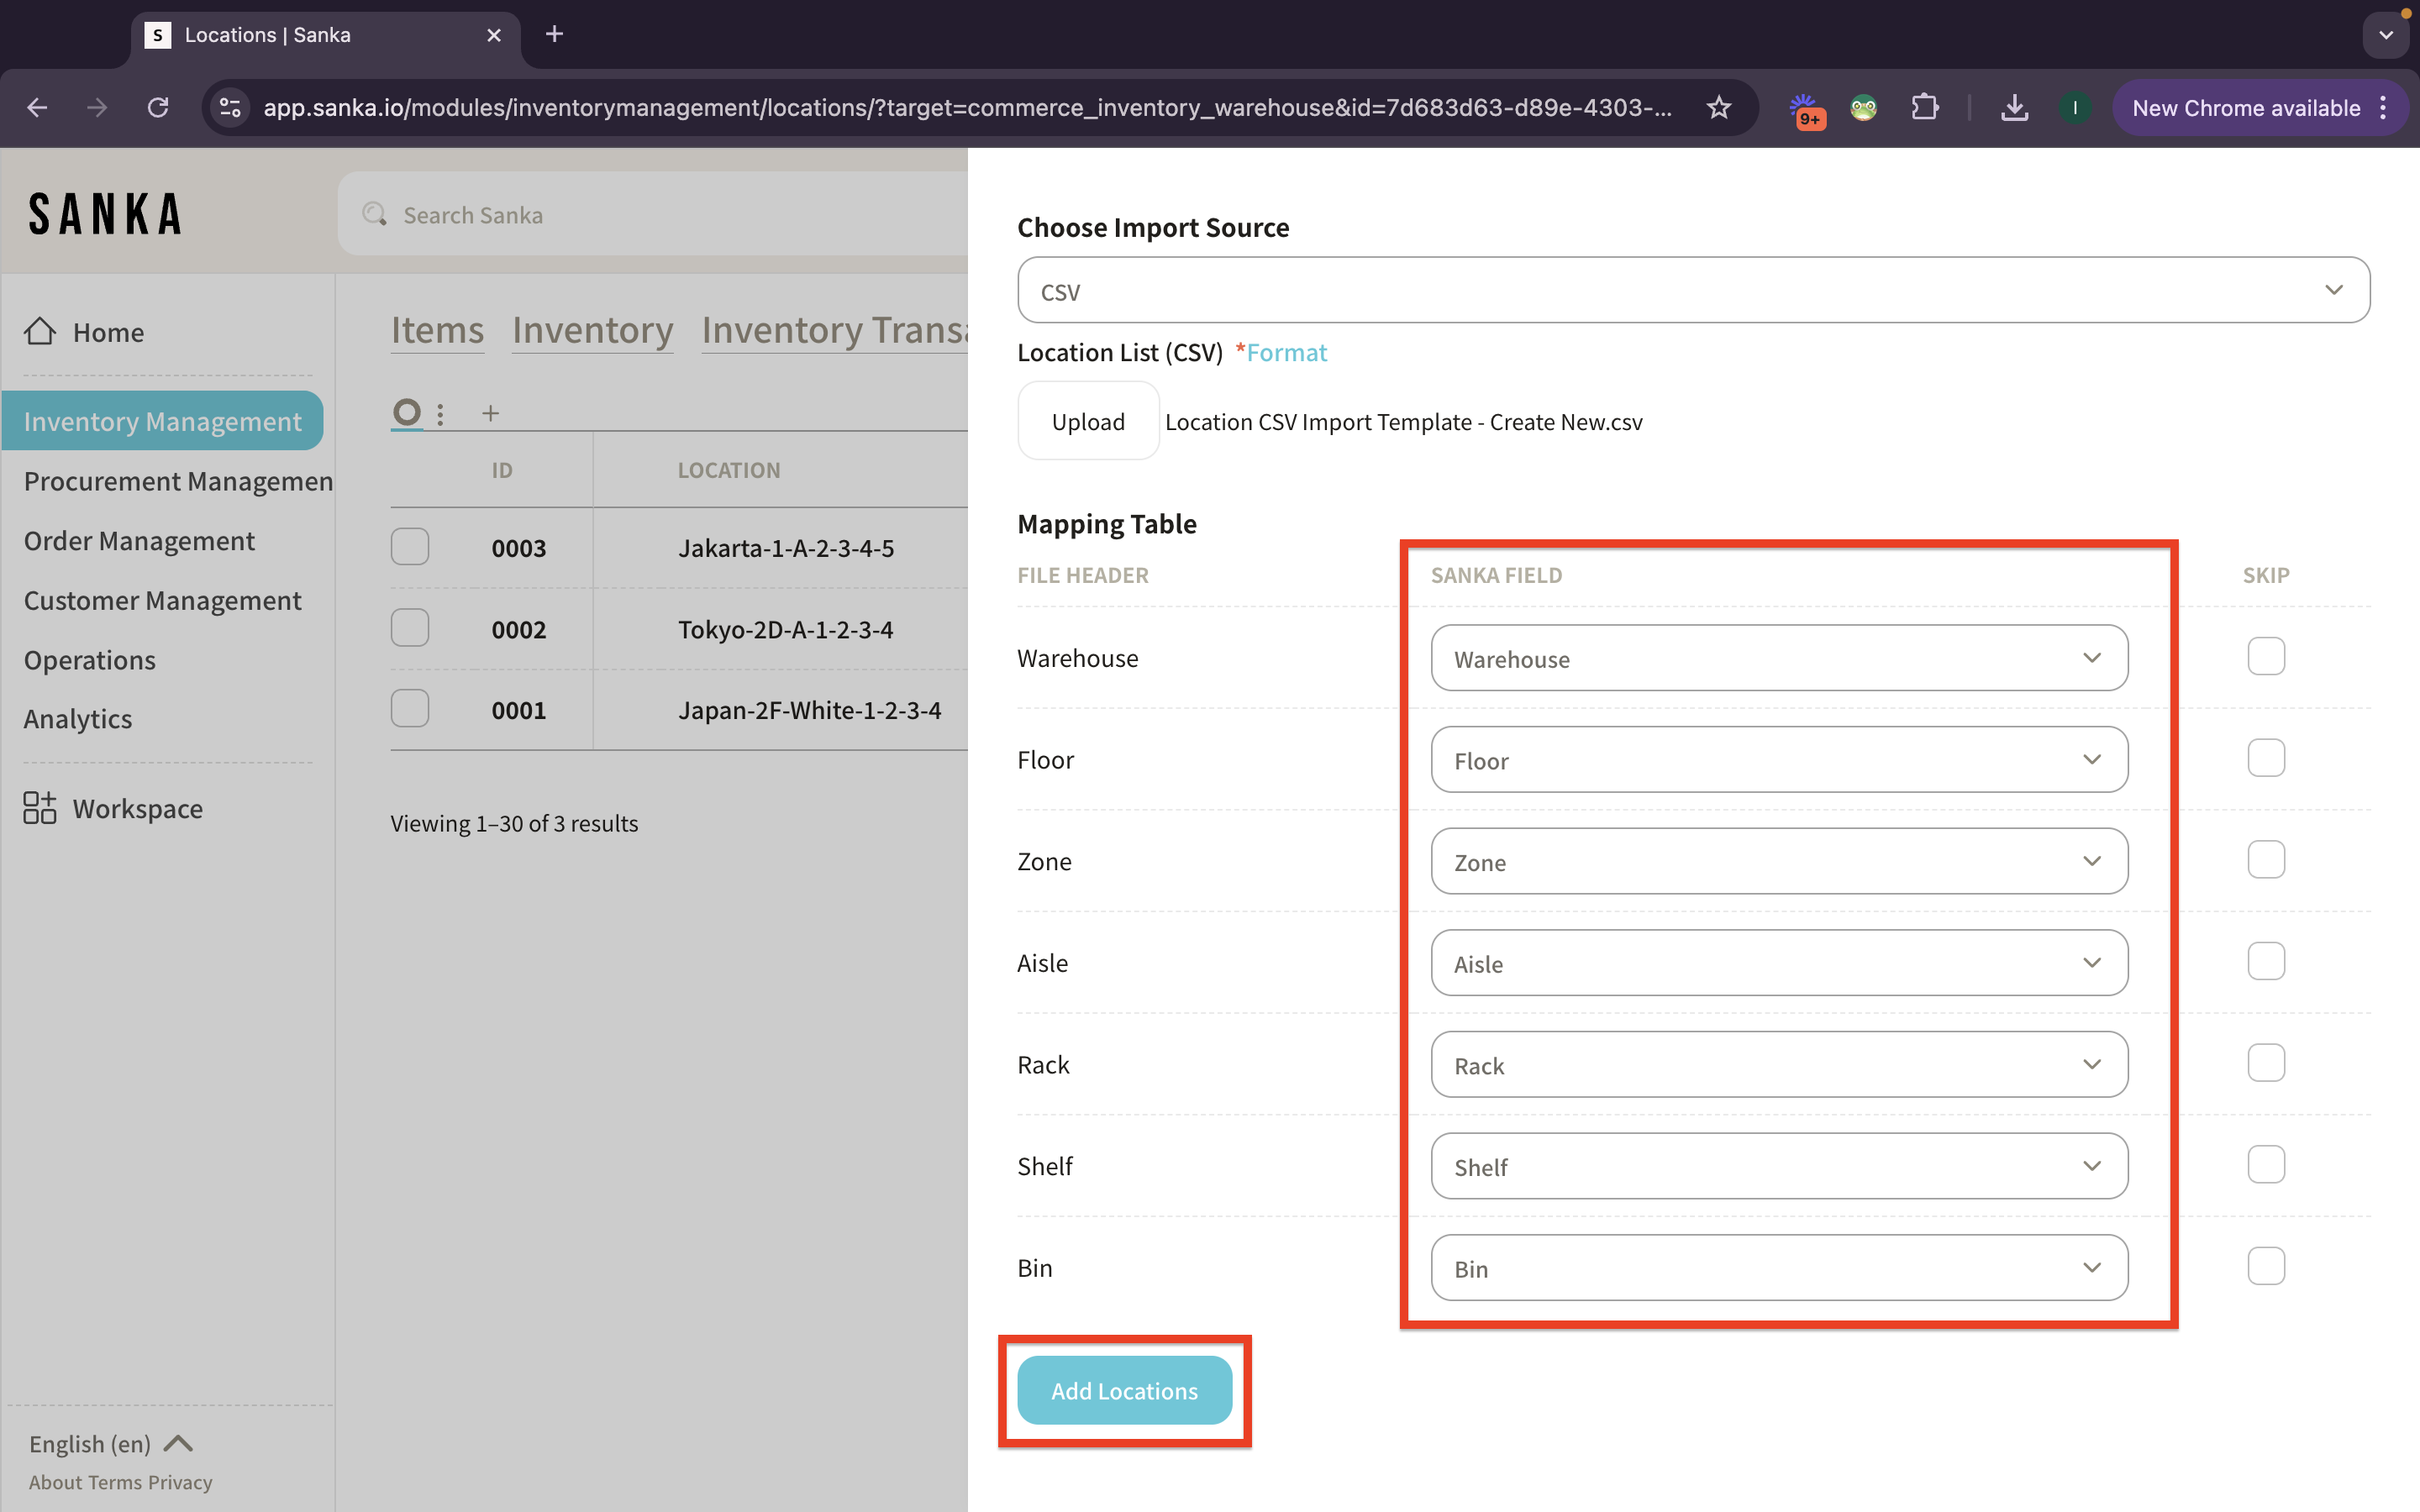
⑦ Return to the Sanka page and select "Upload", then choose the file.
⑧ The mapping table will be displayed, allowing you to adjust the information. - Match the "CSV File Header" fields with the "Sanka Properties" fields, and then click "Add Location".
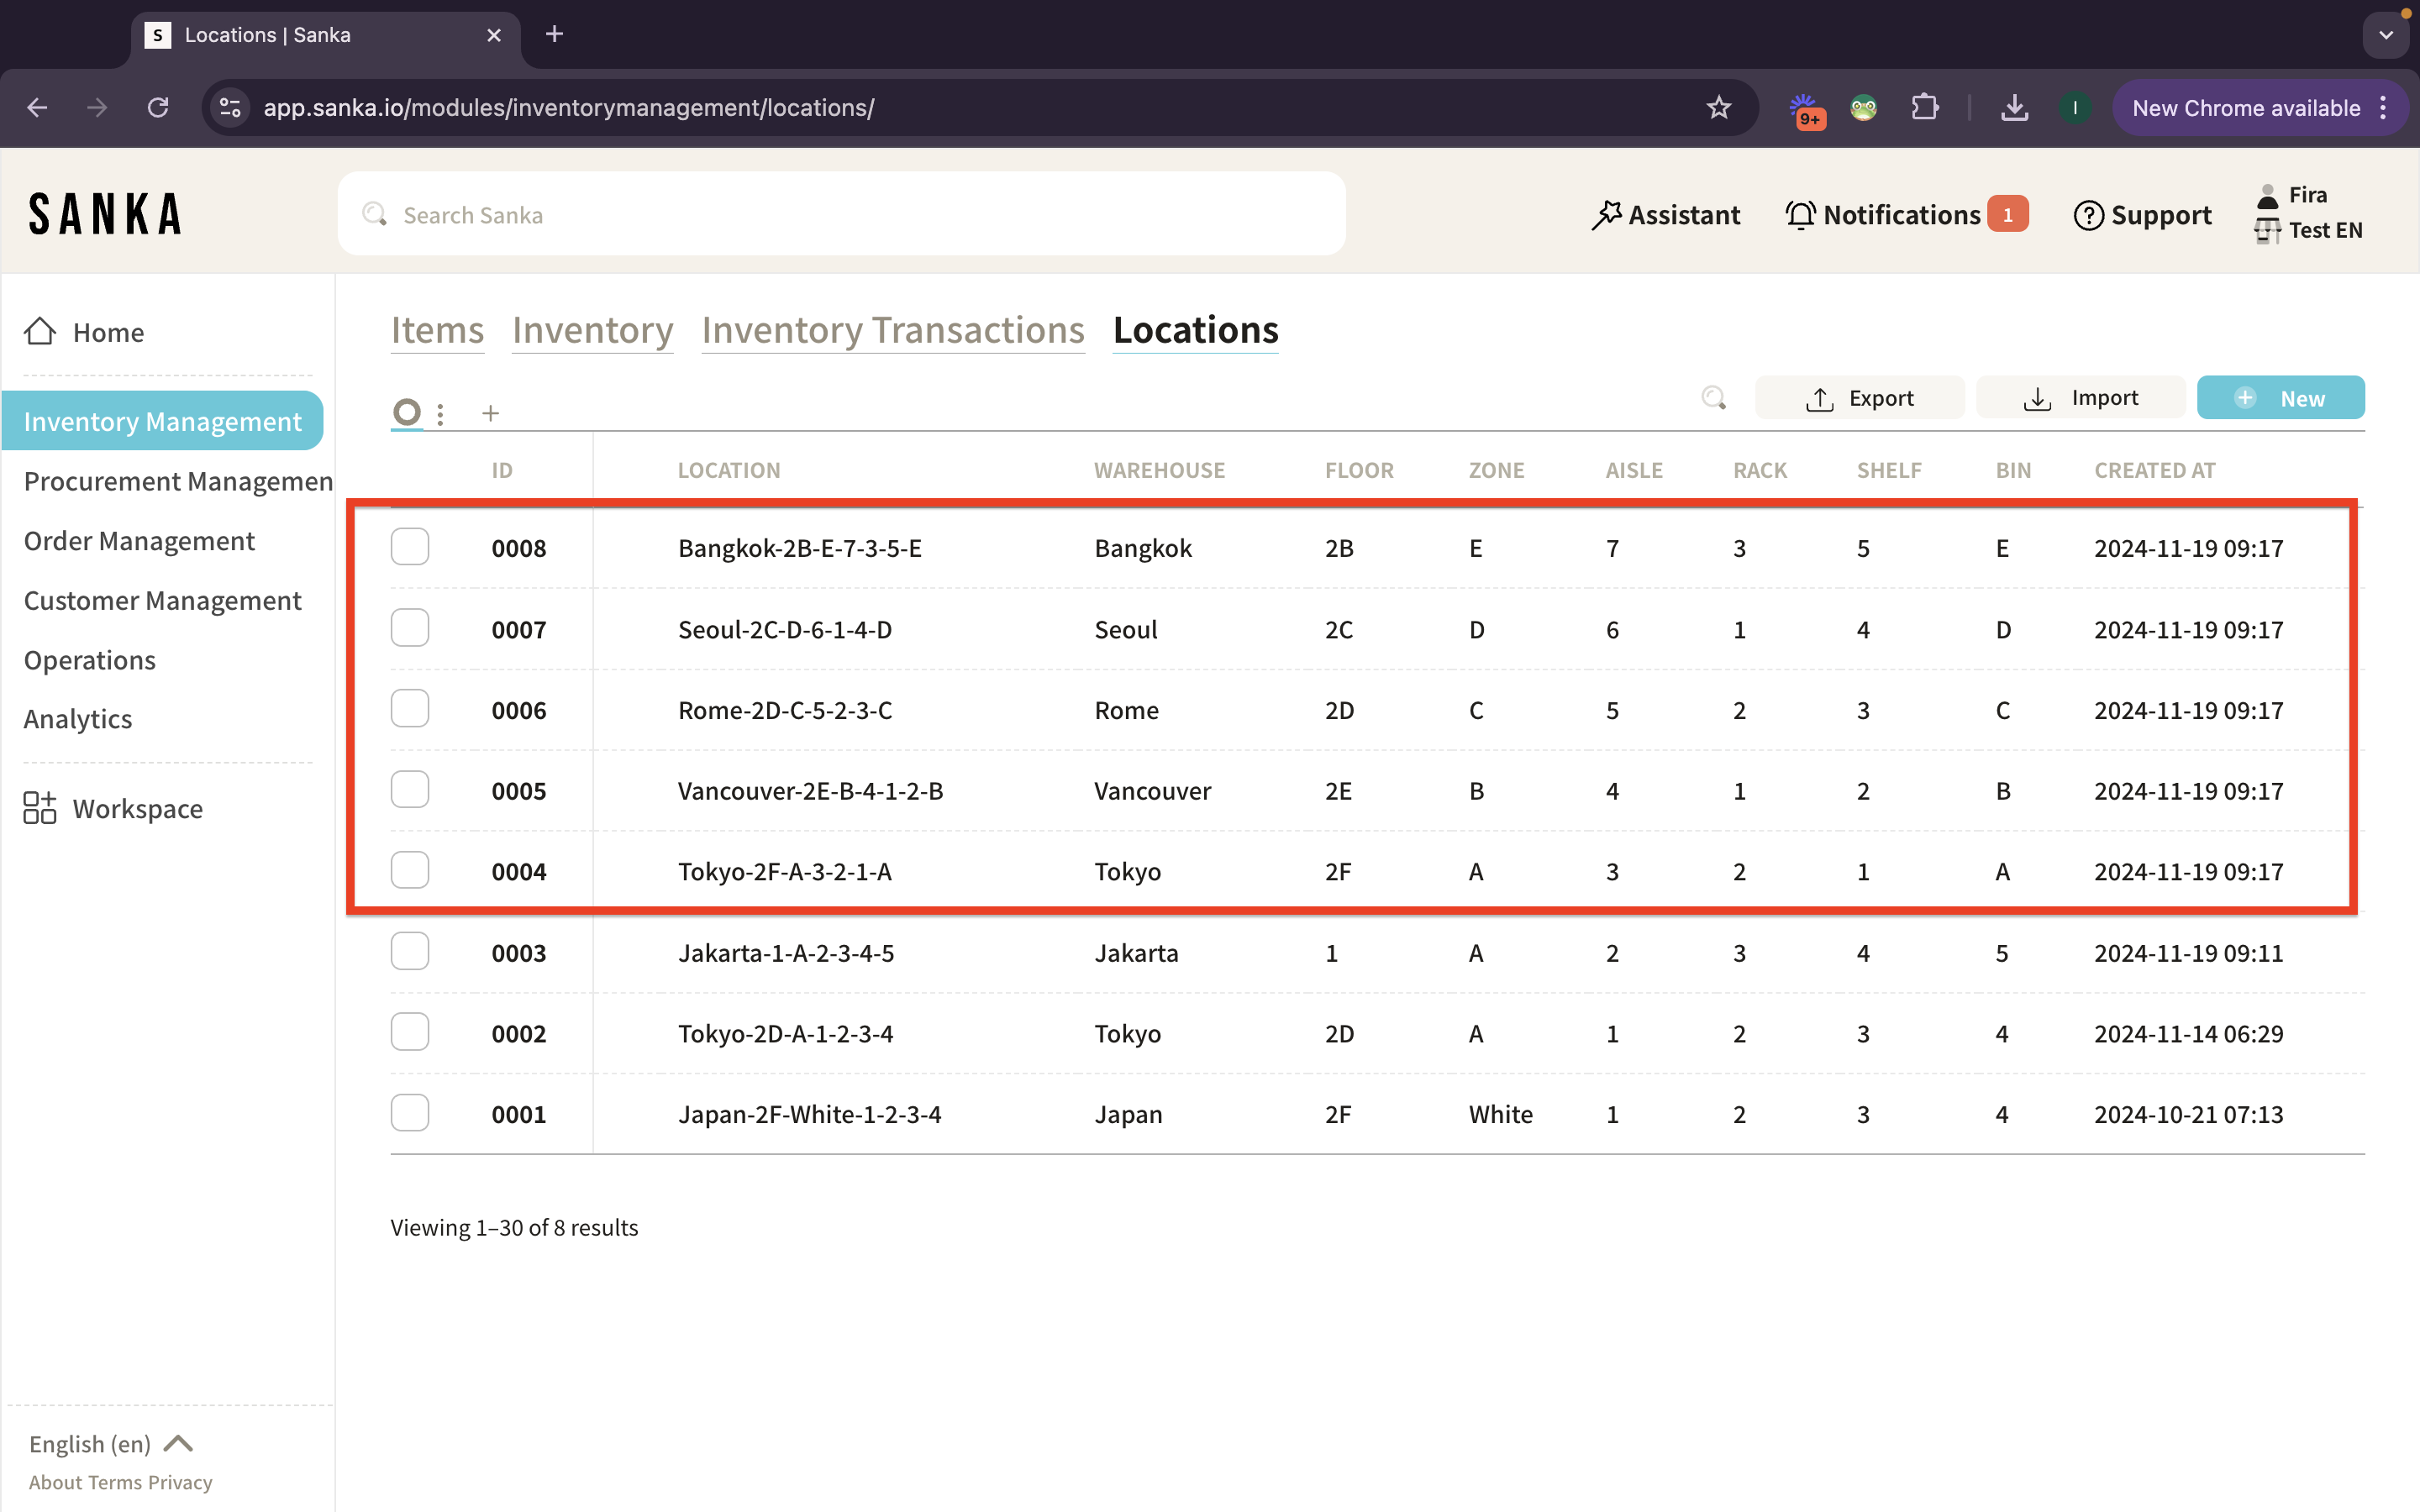
⑨ The contents of the CSV file will now be registered in the "Location" object page.
How to Edit Registered Information
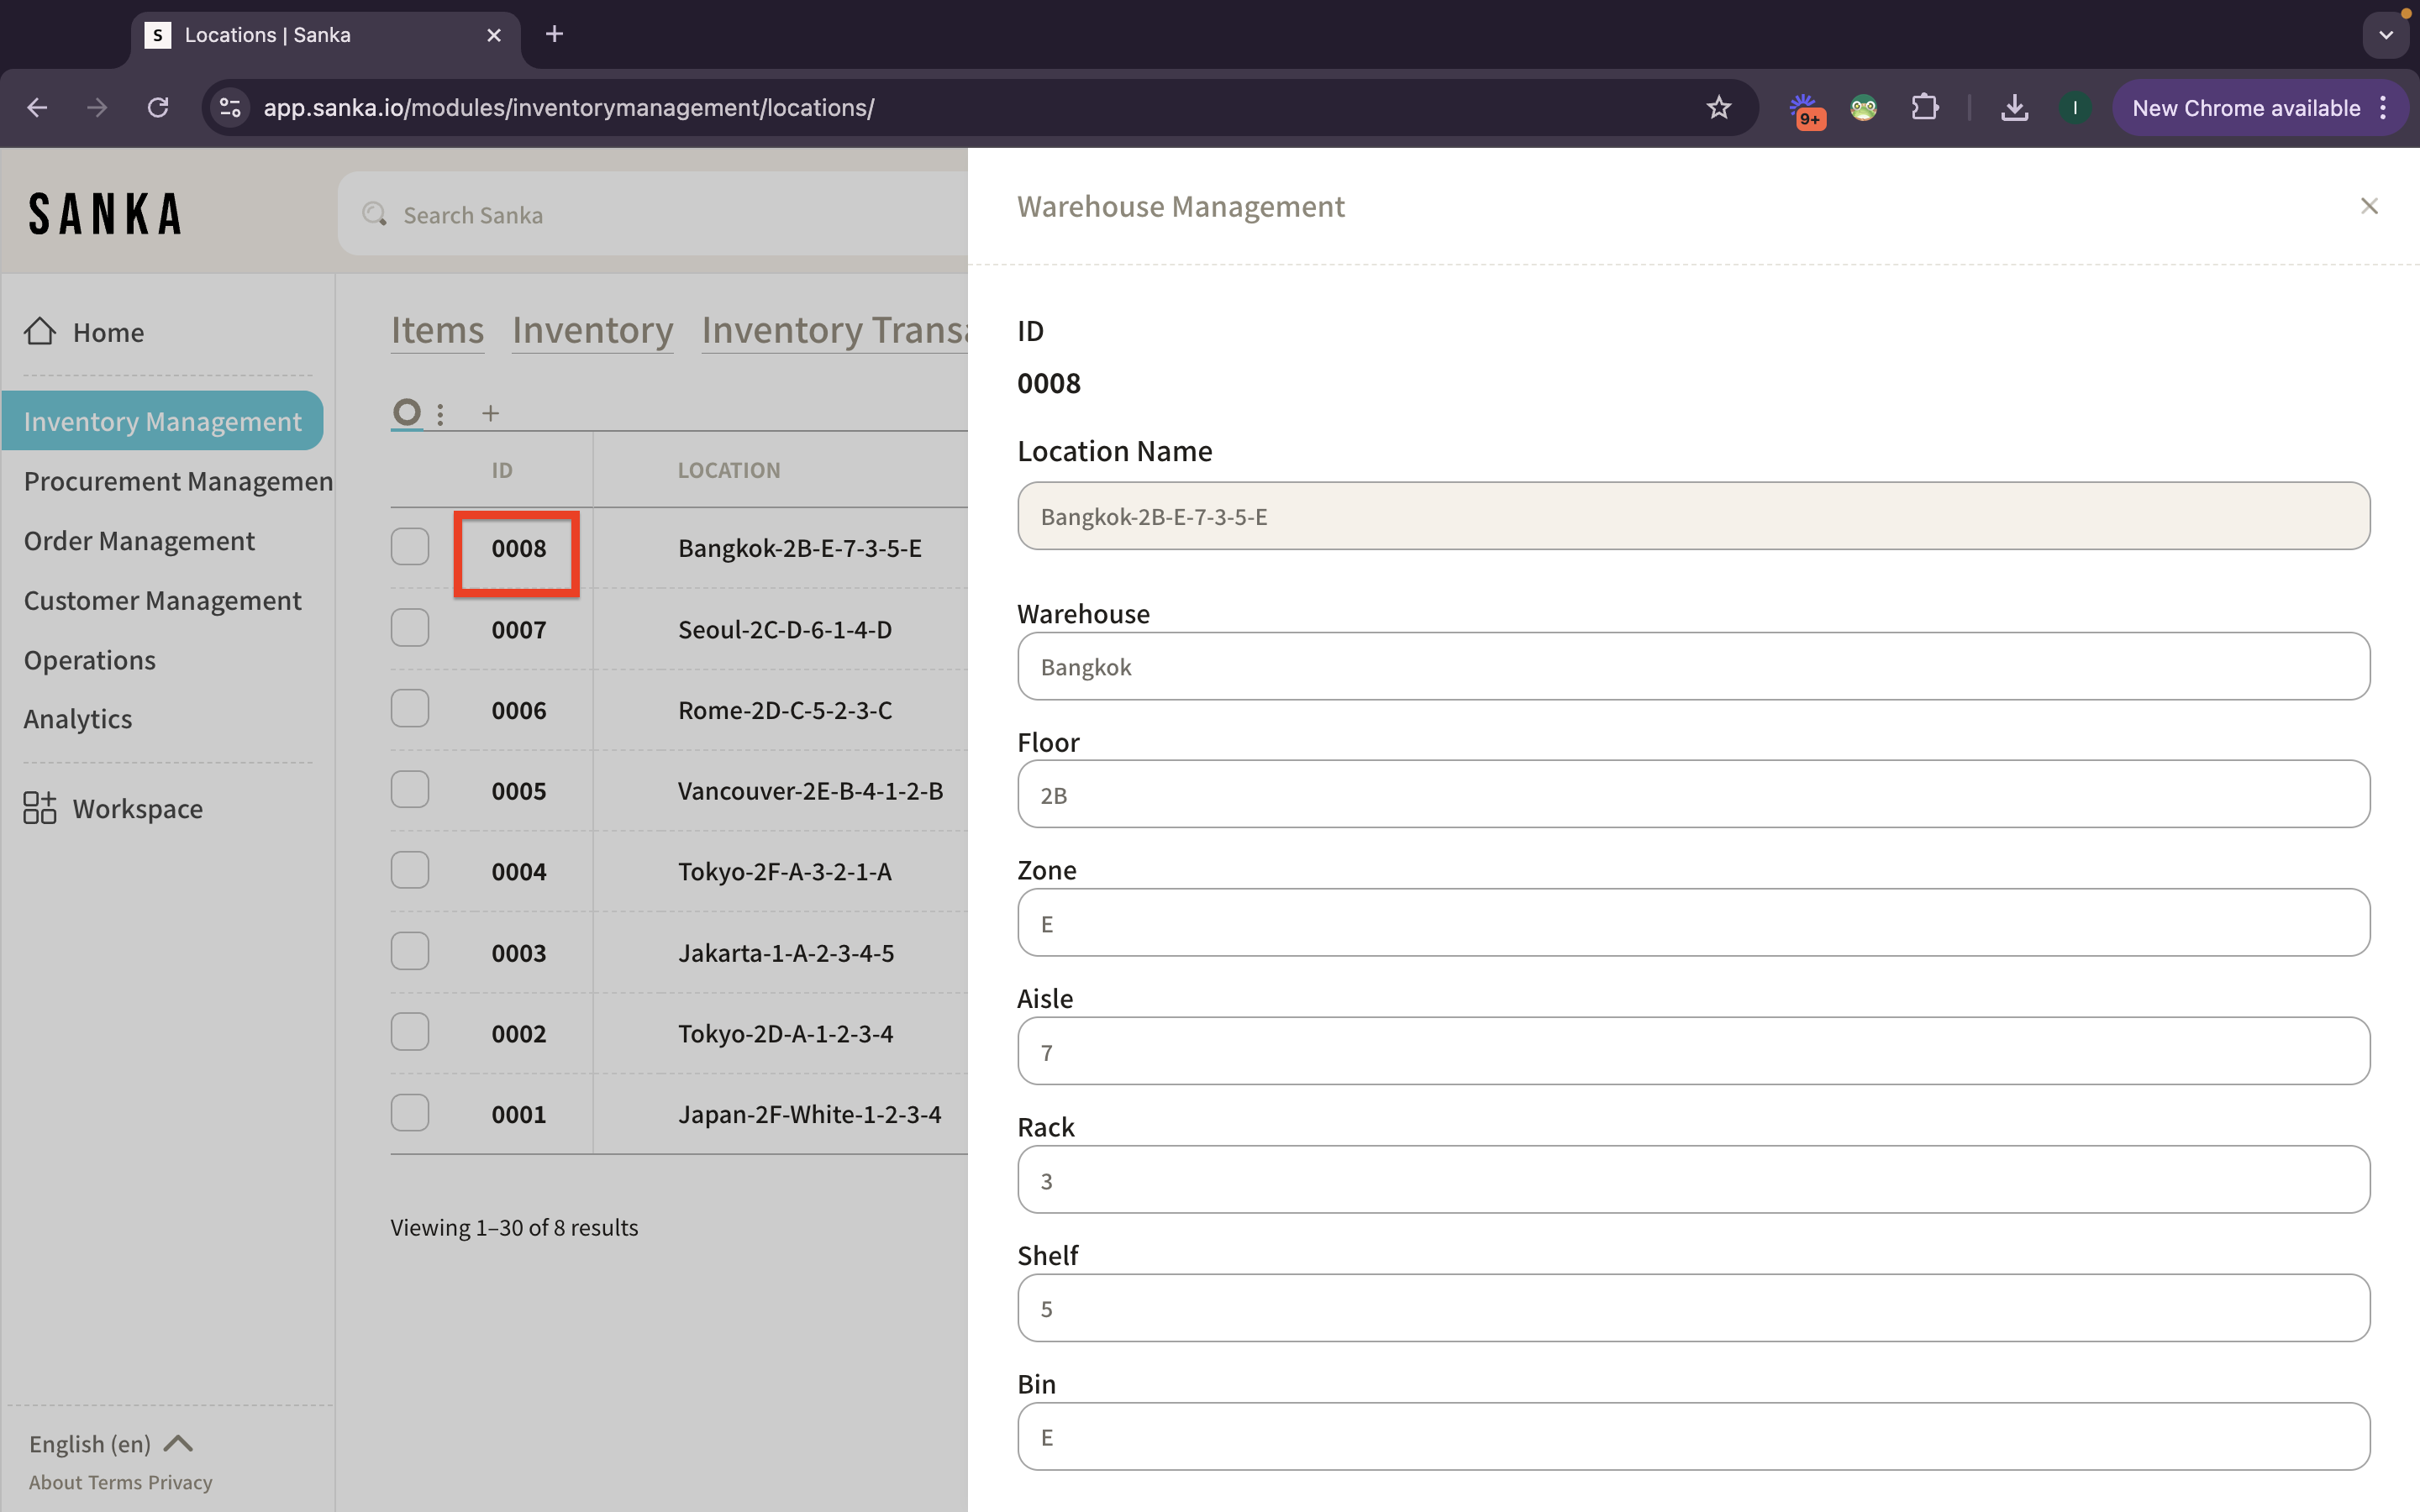
① Click on the "ID" of any location record to show detailed information, where you can make necessary edits or updates.
Next Step
After registering the location, the next step is to add inventory. → How to Add Inventory.


