Welcome to the Sanka Order and Invoice Management Guide!
This guide provides an overview of Sanka’s order and invoice management features.
If you're wondering, "Where do I start with order and invoice management?" "What features does Sanka offer for this?" or "What do these menu options mean?"—this guide is the best place to begin.
For more information on basic concepts like "objects" and "modules," check out Sanka Basics.
What You Will Learn
- What you can do with Sanka's order and invoice management
- How to navigate the Sanka order and invoice management screen
- Next steps
- Advanced order and invoice management features available in Sanka
Basic Flow of Order and Invoice Management
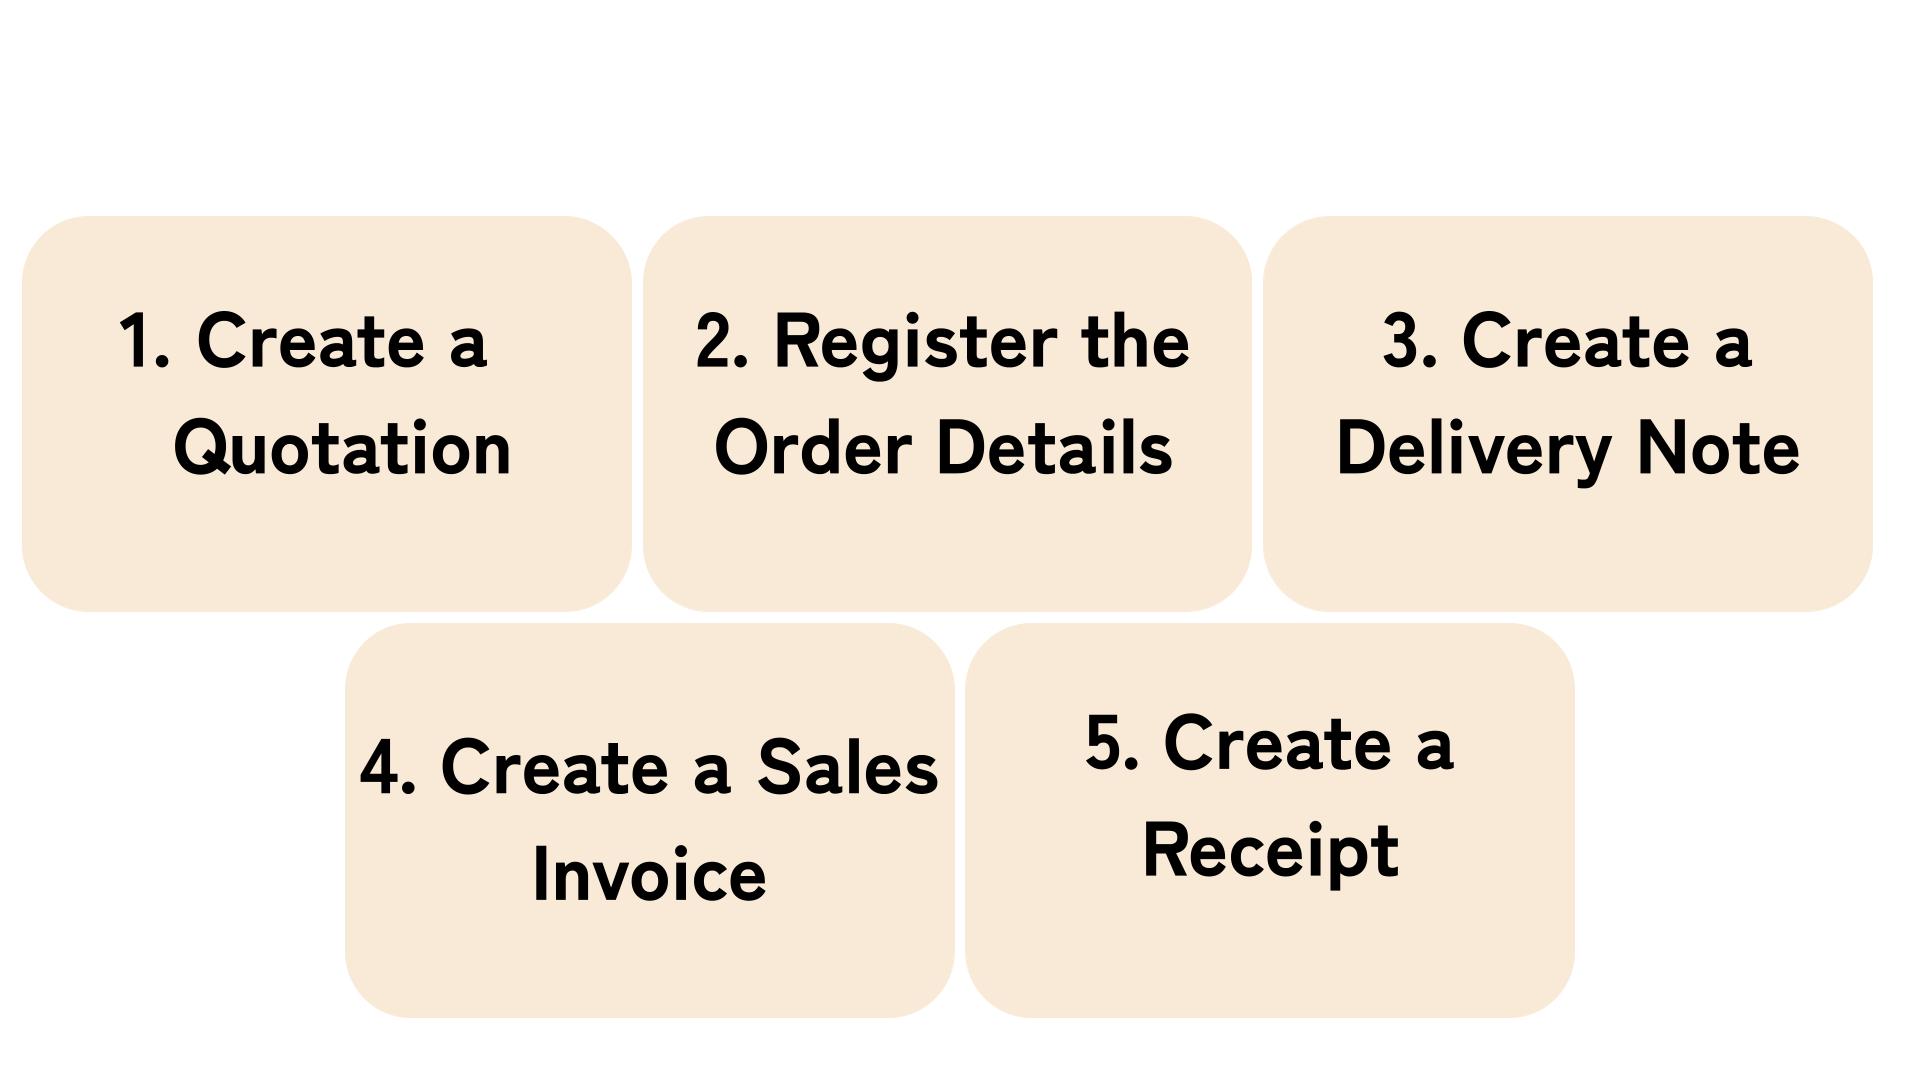
The basic flow of order and invoice management in Sanka is as follows:

Step 1: Create a Quotation
By inputting customer and product information in advance, you can easily create a quotation in just a few steps.
Each quotation can be assigned a status (draft, sent, scheduled, paid, etc.), making it easy to track the progress.
Step 2: Register the Order Details
You can manage the products or services purchased by your customers.
This step allows integration with other objects such as products, customer information, invoices, and receipts.
You can also set statuses (draft, sent, ordered, paid, etc.) to track the current stage of the order.
Additionally, Sanka supports subscription features to automate recurring payments for long-term customers.
Step 3: Create a Delivery Note
You can create delivery notes that include details like product names, quantities, prices, and issue dates.
If you’ve already registered supplier and product information, you can create the delivery notes effortlessly.
This method simplifies managing delivery notes compared to paper or Excel-based systems.
Step 4: Create a Sales Invoice
You can easily generate sales invoices from completed orders or subscriptions in Sanka.
Sales invoices can also have statuses (draft, sent, scheduled, paid), making tracking easy.
Additionally, Sanka offers an automatic reminder feature for overdue payments, so you don’t need to worry about missed collections.
Step 5: Create a Receipt
You can easily generate receipts from completed orders or subscriptions.
Sanka allows for detailed settings such as discounts and tax rates.
You can link receipts to their corresponding orders, making it easy to verify information.
Navigating the Sanka Order and Invoice Management Screen
This section explains how to navigate the order and invoice management screen in Sanka.
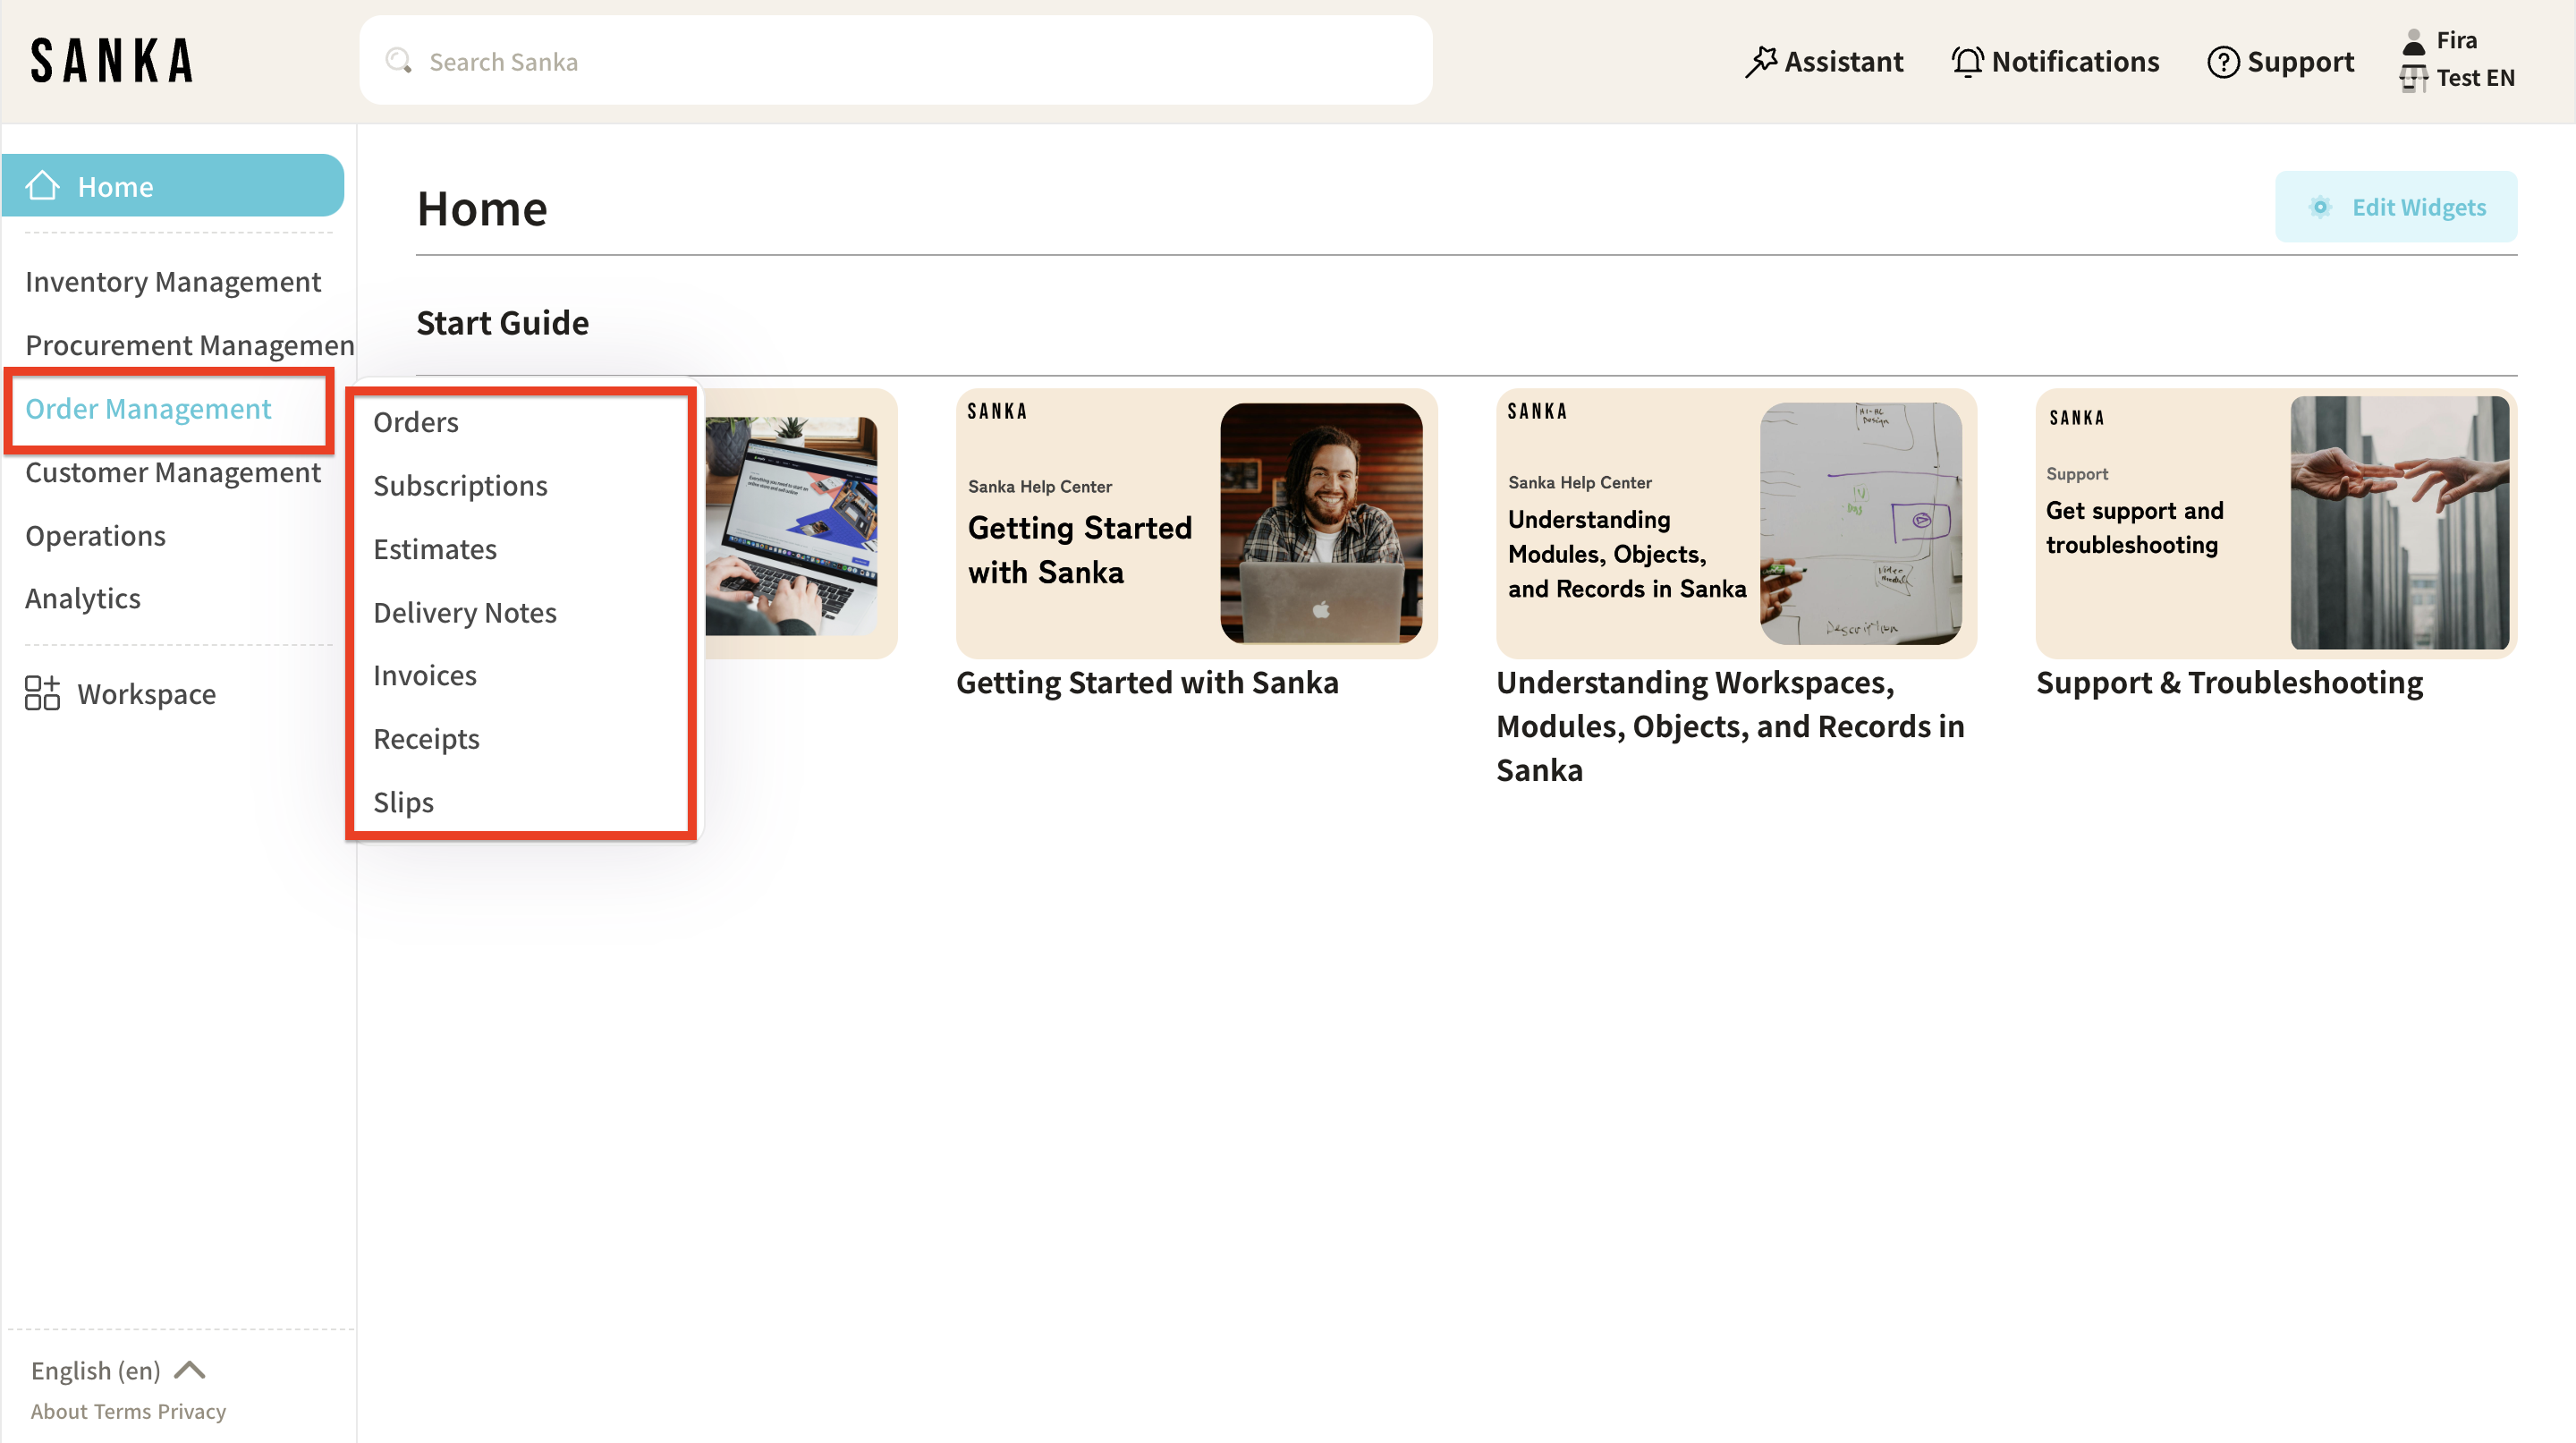
After launching Sanka, click on the "Order & Invoice Management" module to display the object menus.

When you click on each object, the following menu options will appear:

1. Quotation Object
This menu is for creating quotations.
You can manage various information such as product details, quantities, customer information, tax rates, and discounts.
2. Order Object
This menu is for registering order details.
The information you input here can be linked with other objects like invoices and receipts.
3. Delivery Note Object
This menu is for creating delivery notes.
4. Sales Slips Object
This menu is for creating sales invoices.
5. Receipt Object
This menu is for creating receipts.
Next Steps
Now that you understand what you can do with order and invoice management, it’s time to start working.
We’ve created help guides for each step, so be sure to check them out.
-
- Create a Quotation
For detailed instructions, click here
- Create a Quotation
-
- Register Order Details
For detailed instructions, click here
- Register Order Details
-
- Create a Delivery Note
For detailed instructions, click here
- Create a Delivery Note
-
- Create a Sales Invoice
For detailed instructions, click here
- Create a Sales Invoice
-
- Create a Receipt
For detailed instructions, click here
- Create a Receipt
Advanced Order and Invoice Management Features in Sanka
Once you’ve mastered the basics of order and invoice management, try incorporating advanced features.
These can help reduce the time and effort needed for order and invoice management.
For more information, please refer to the help guides below.
- How to Register Order and Inventory Data Using Barcodes or QR Codes
- How to Create a Picking List (Shipping Instruction)
If you need more detailed information or support, feel free to contact our support team.


