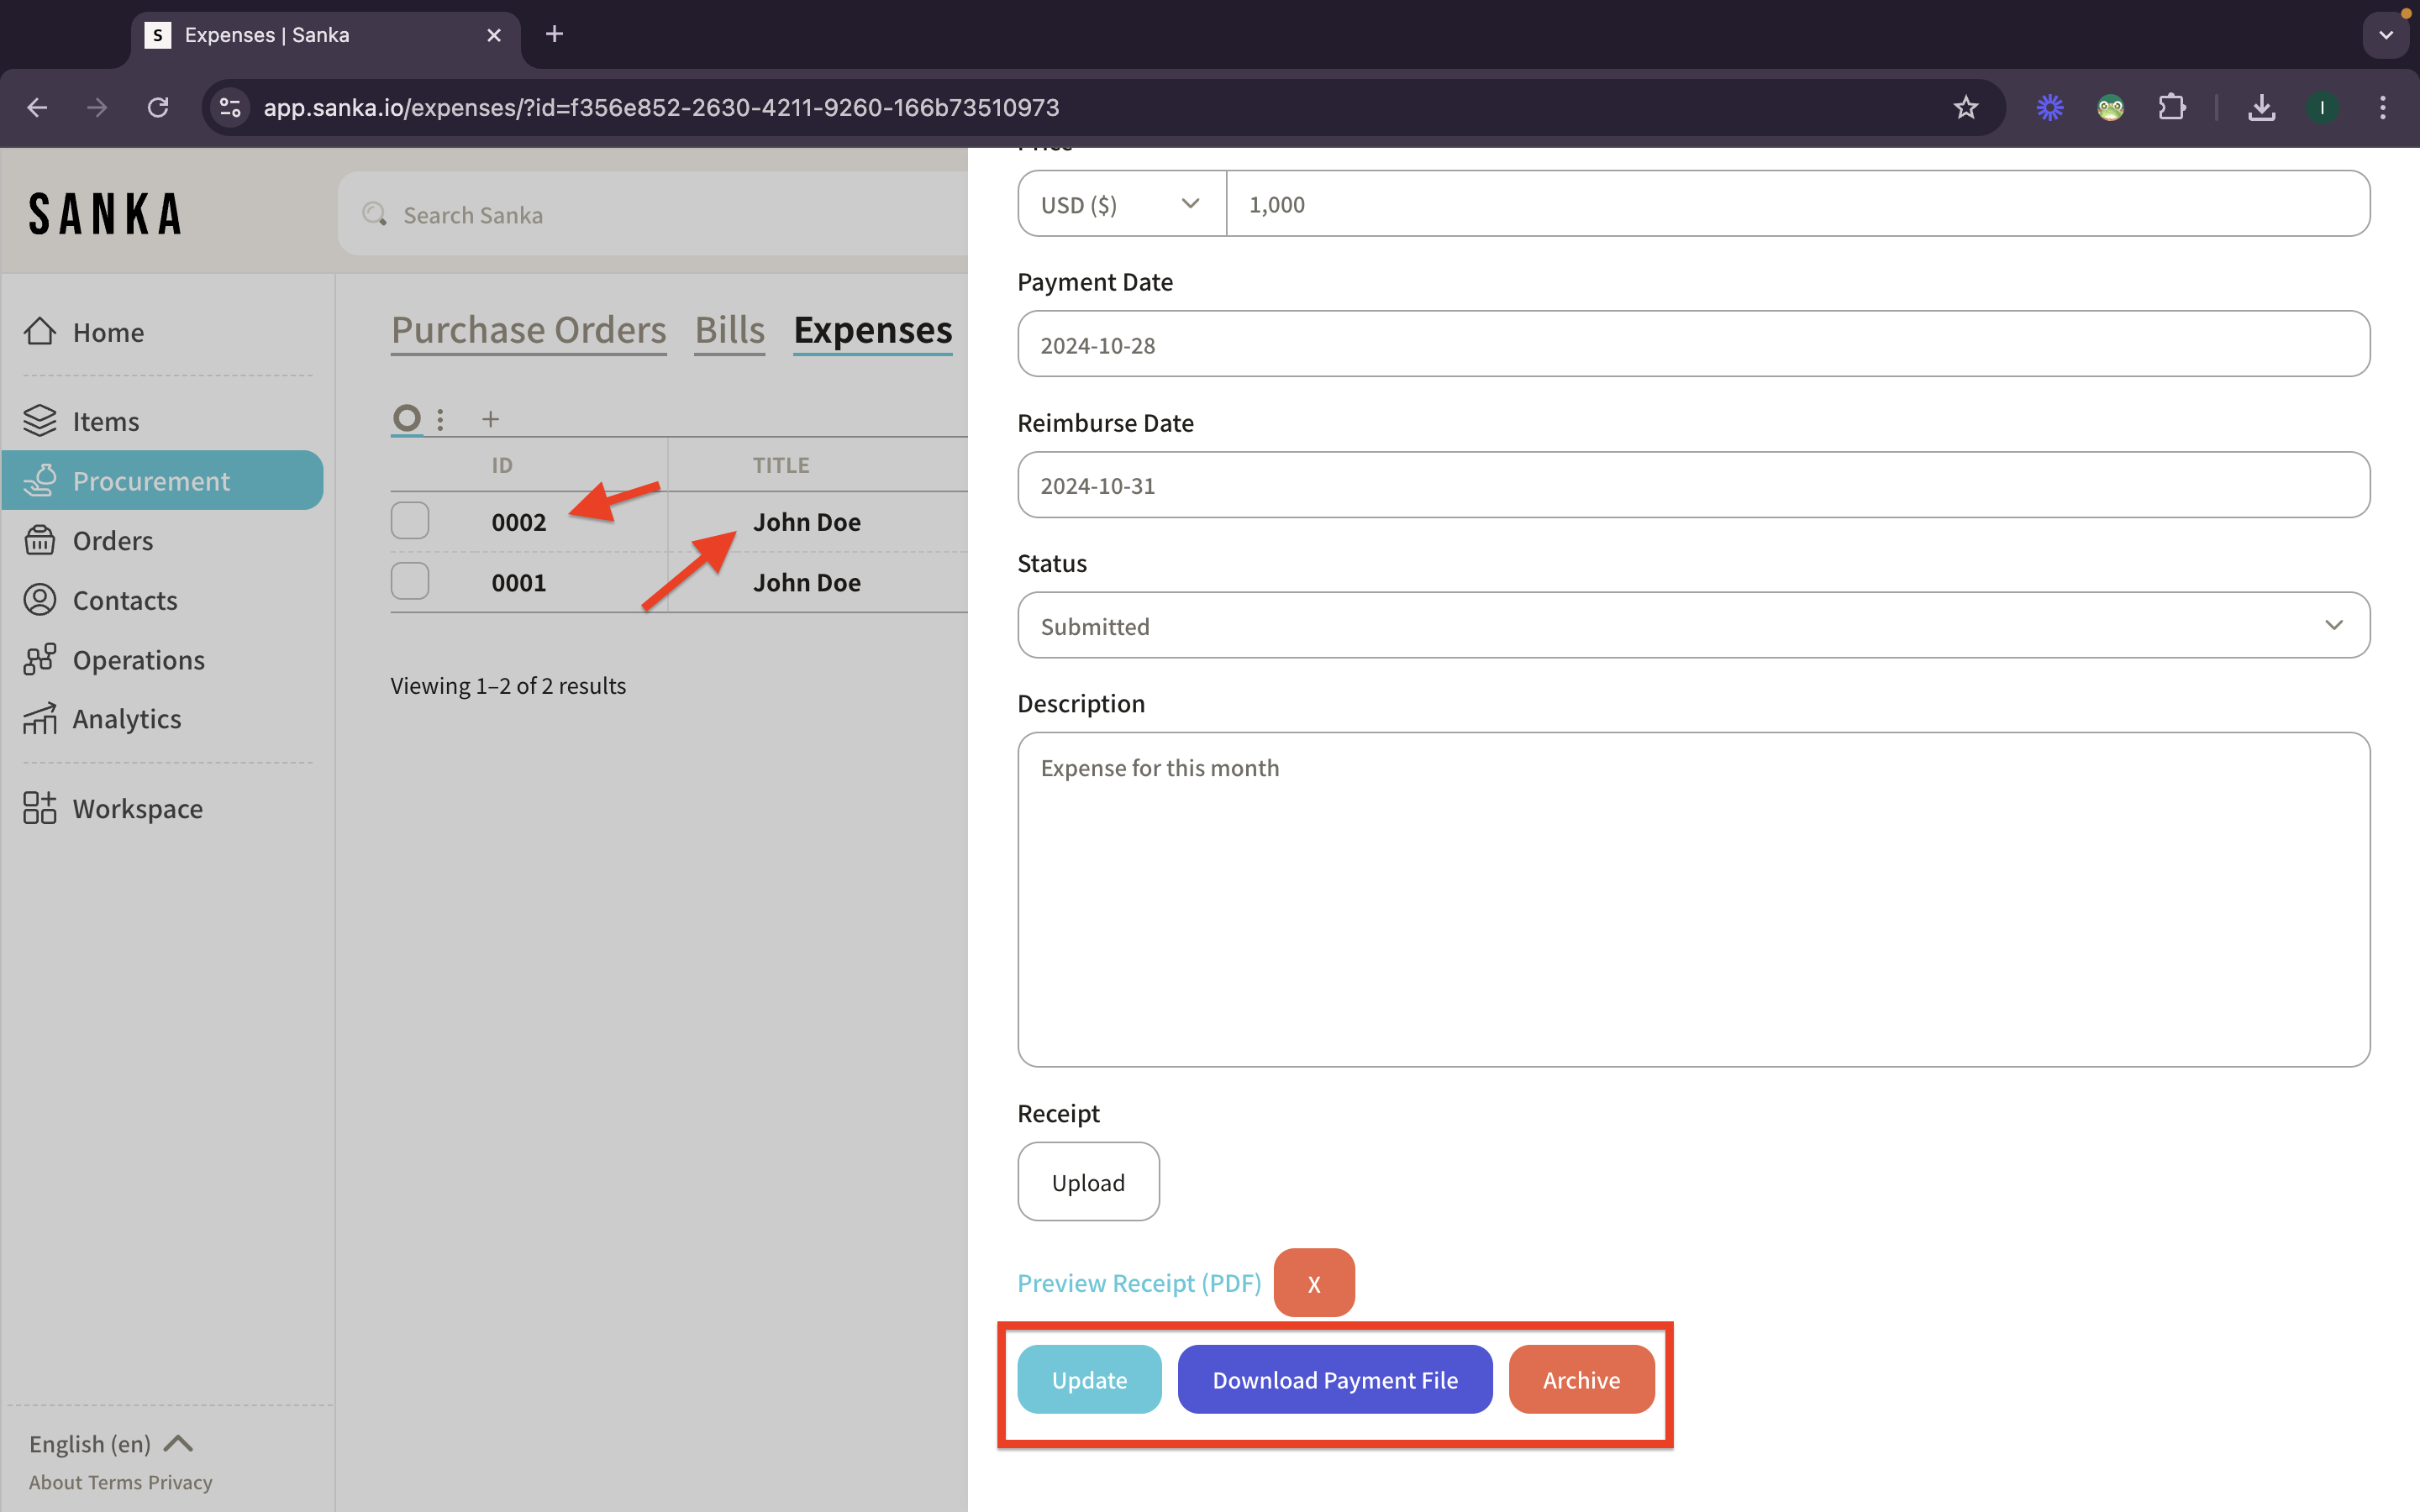
Process to create “Expenses” in Sanka:
Log In to Sanka
1: Navigate to Sanka and sign in to access your dashboard.
2: Ensure that you are in the correct workspace for bill creation and management.
Access the Expenses
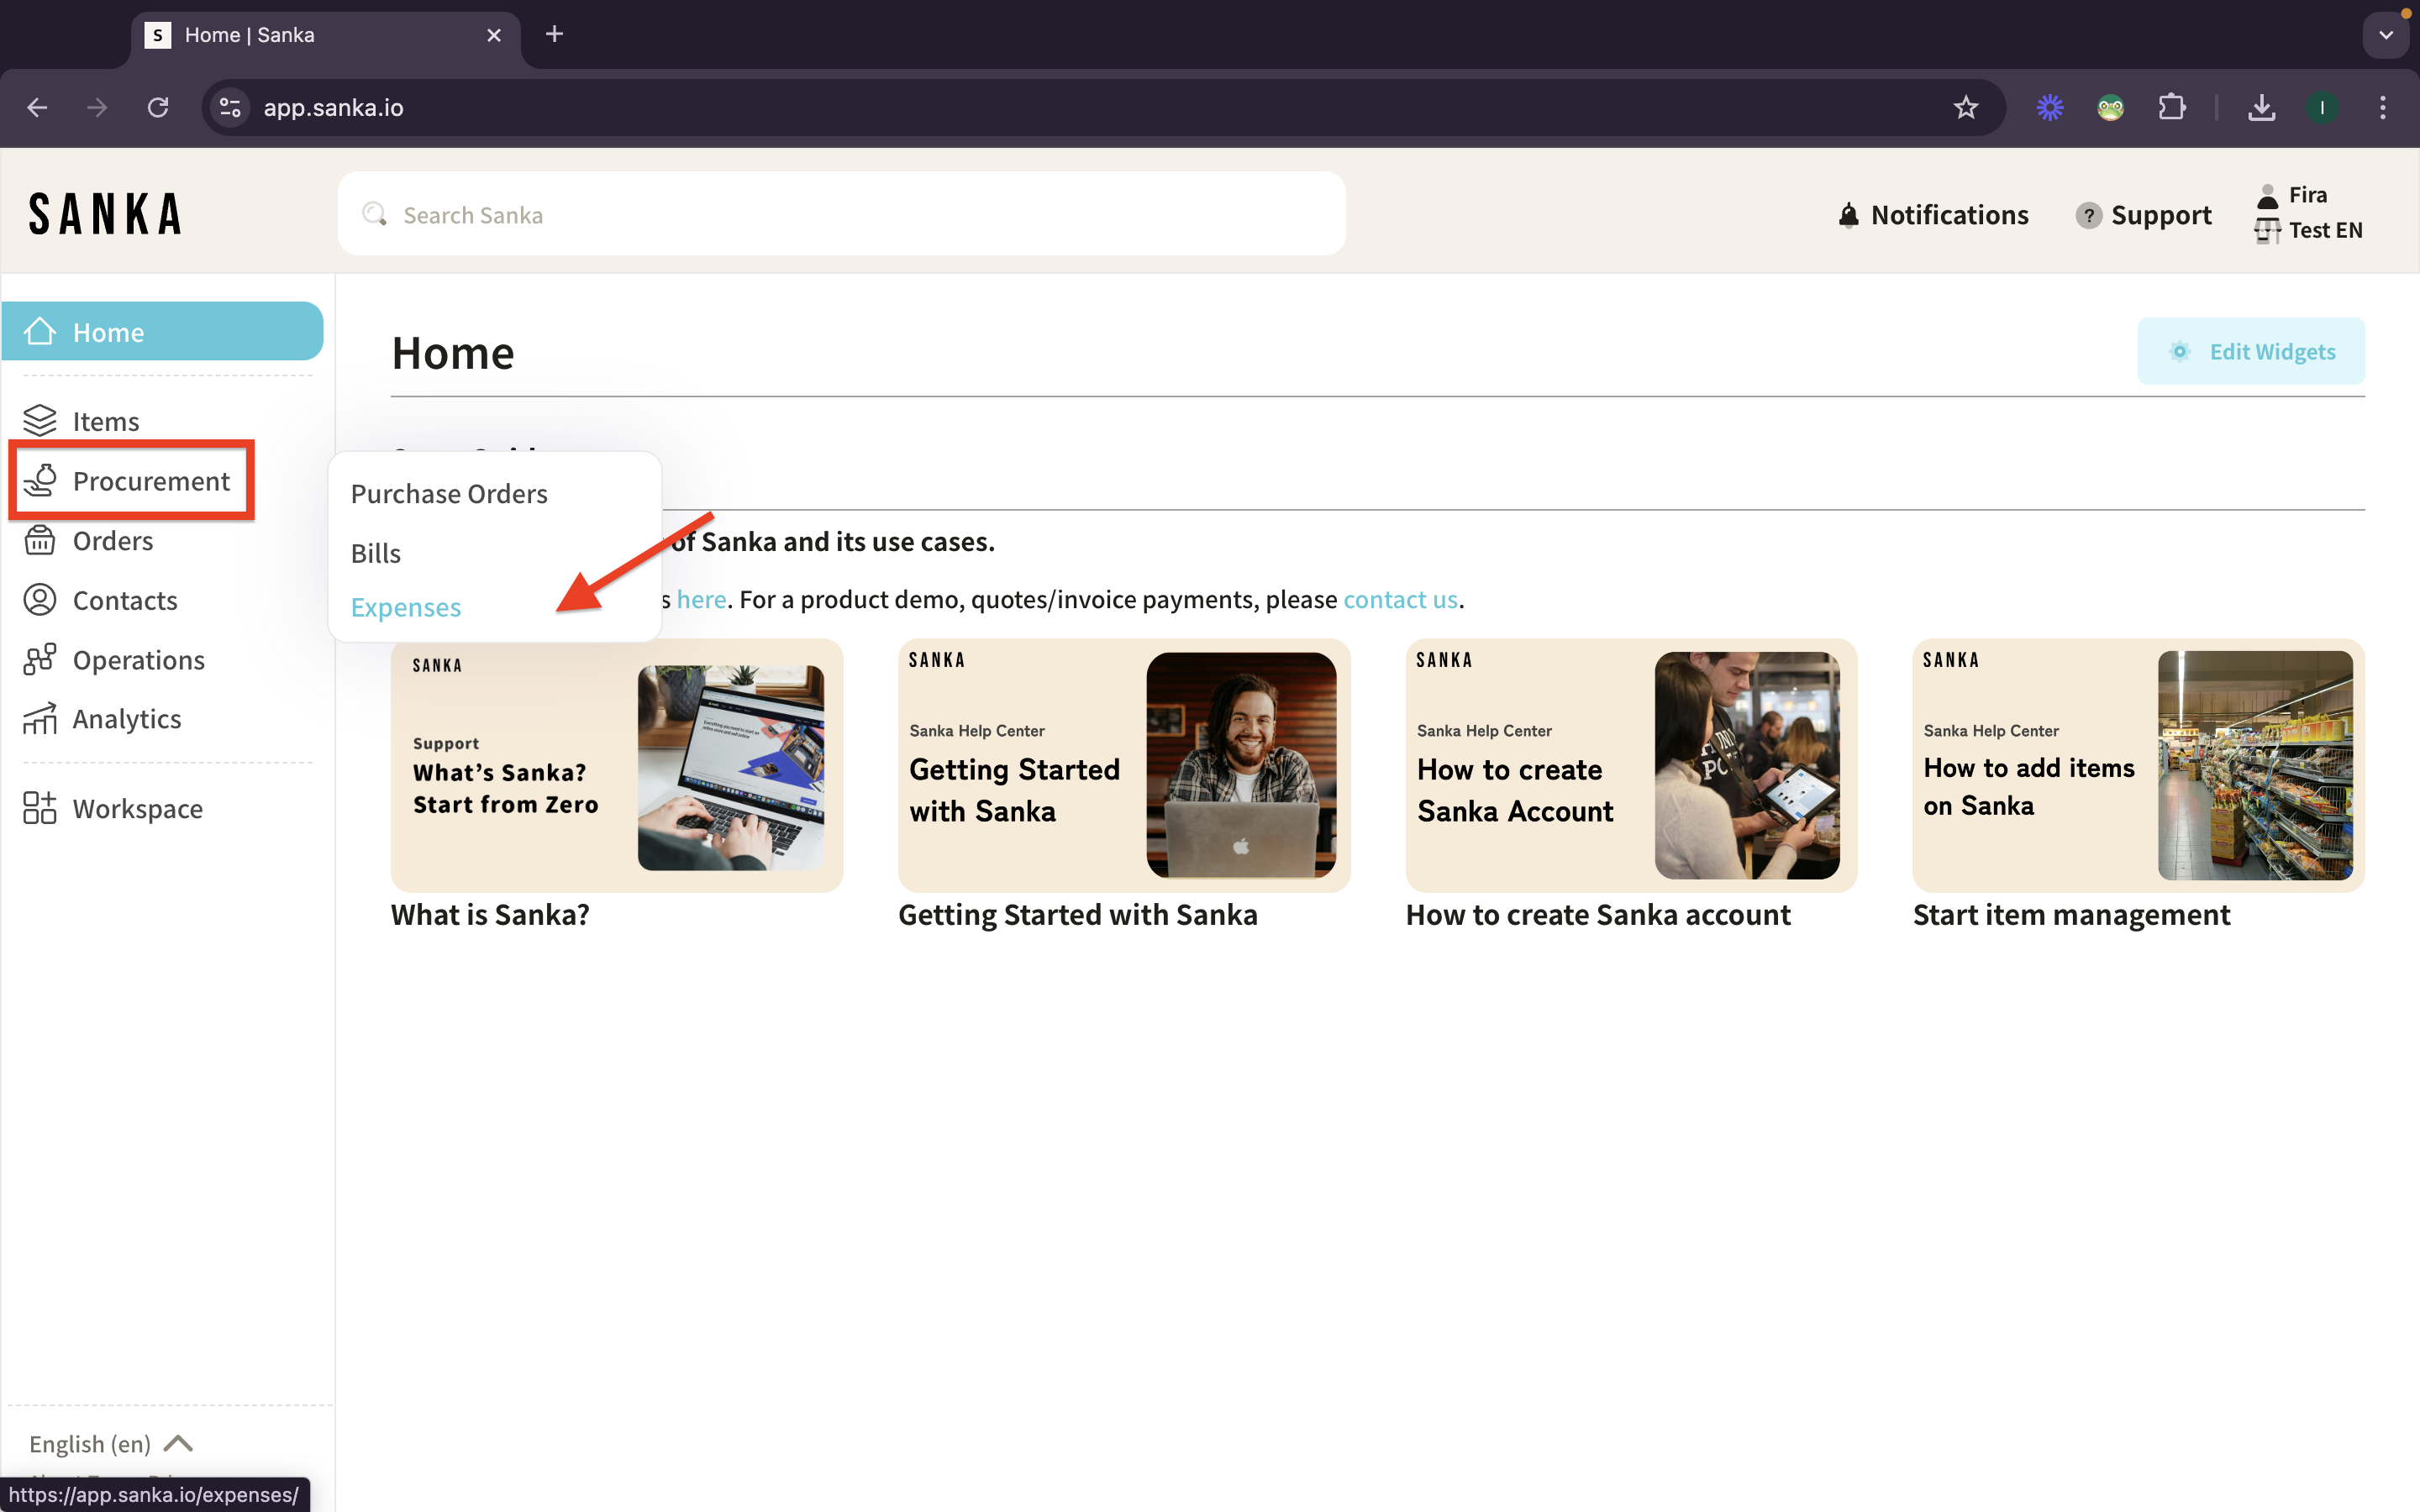
1: Go to Procurement and select Expenses Objects
Create a new expense
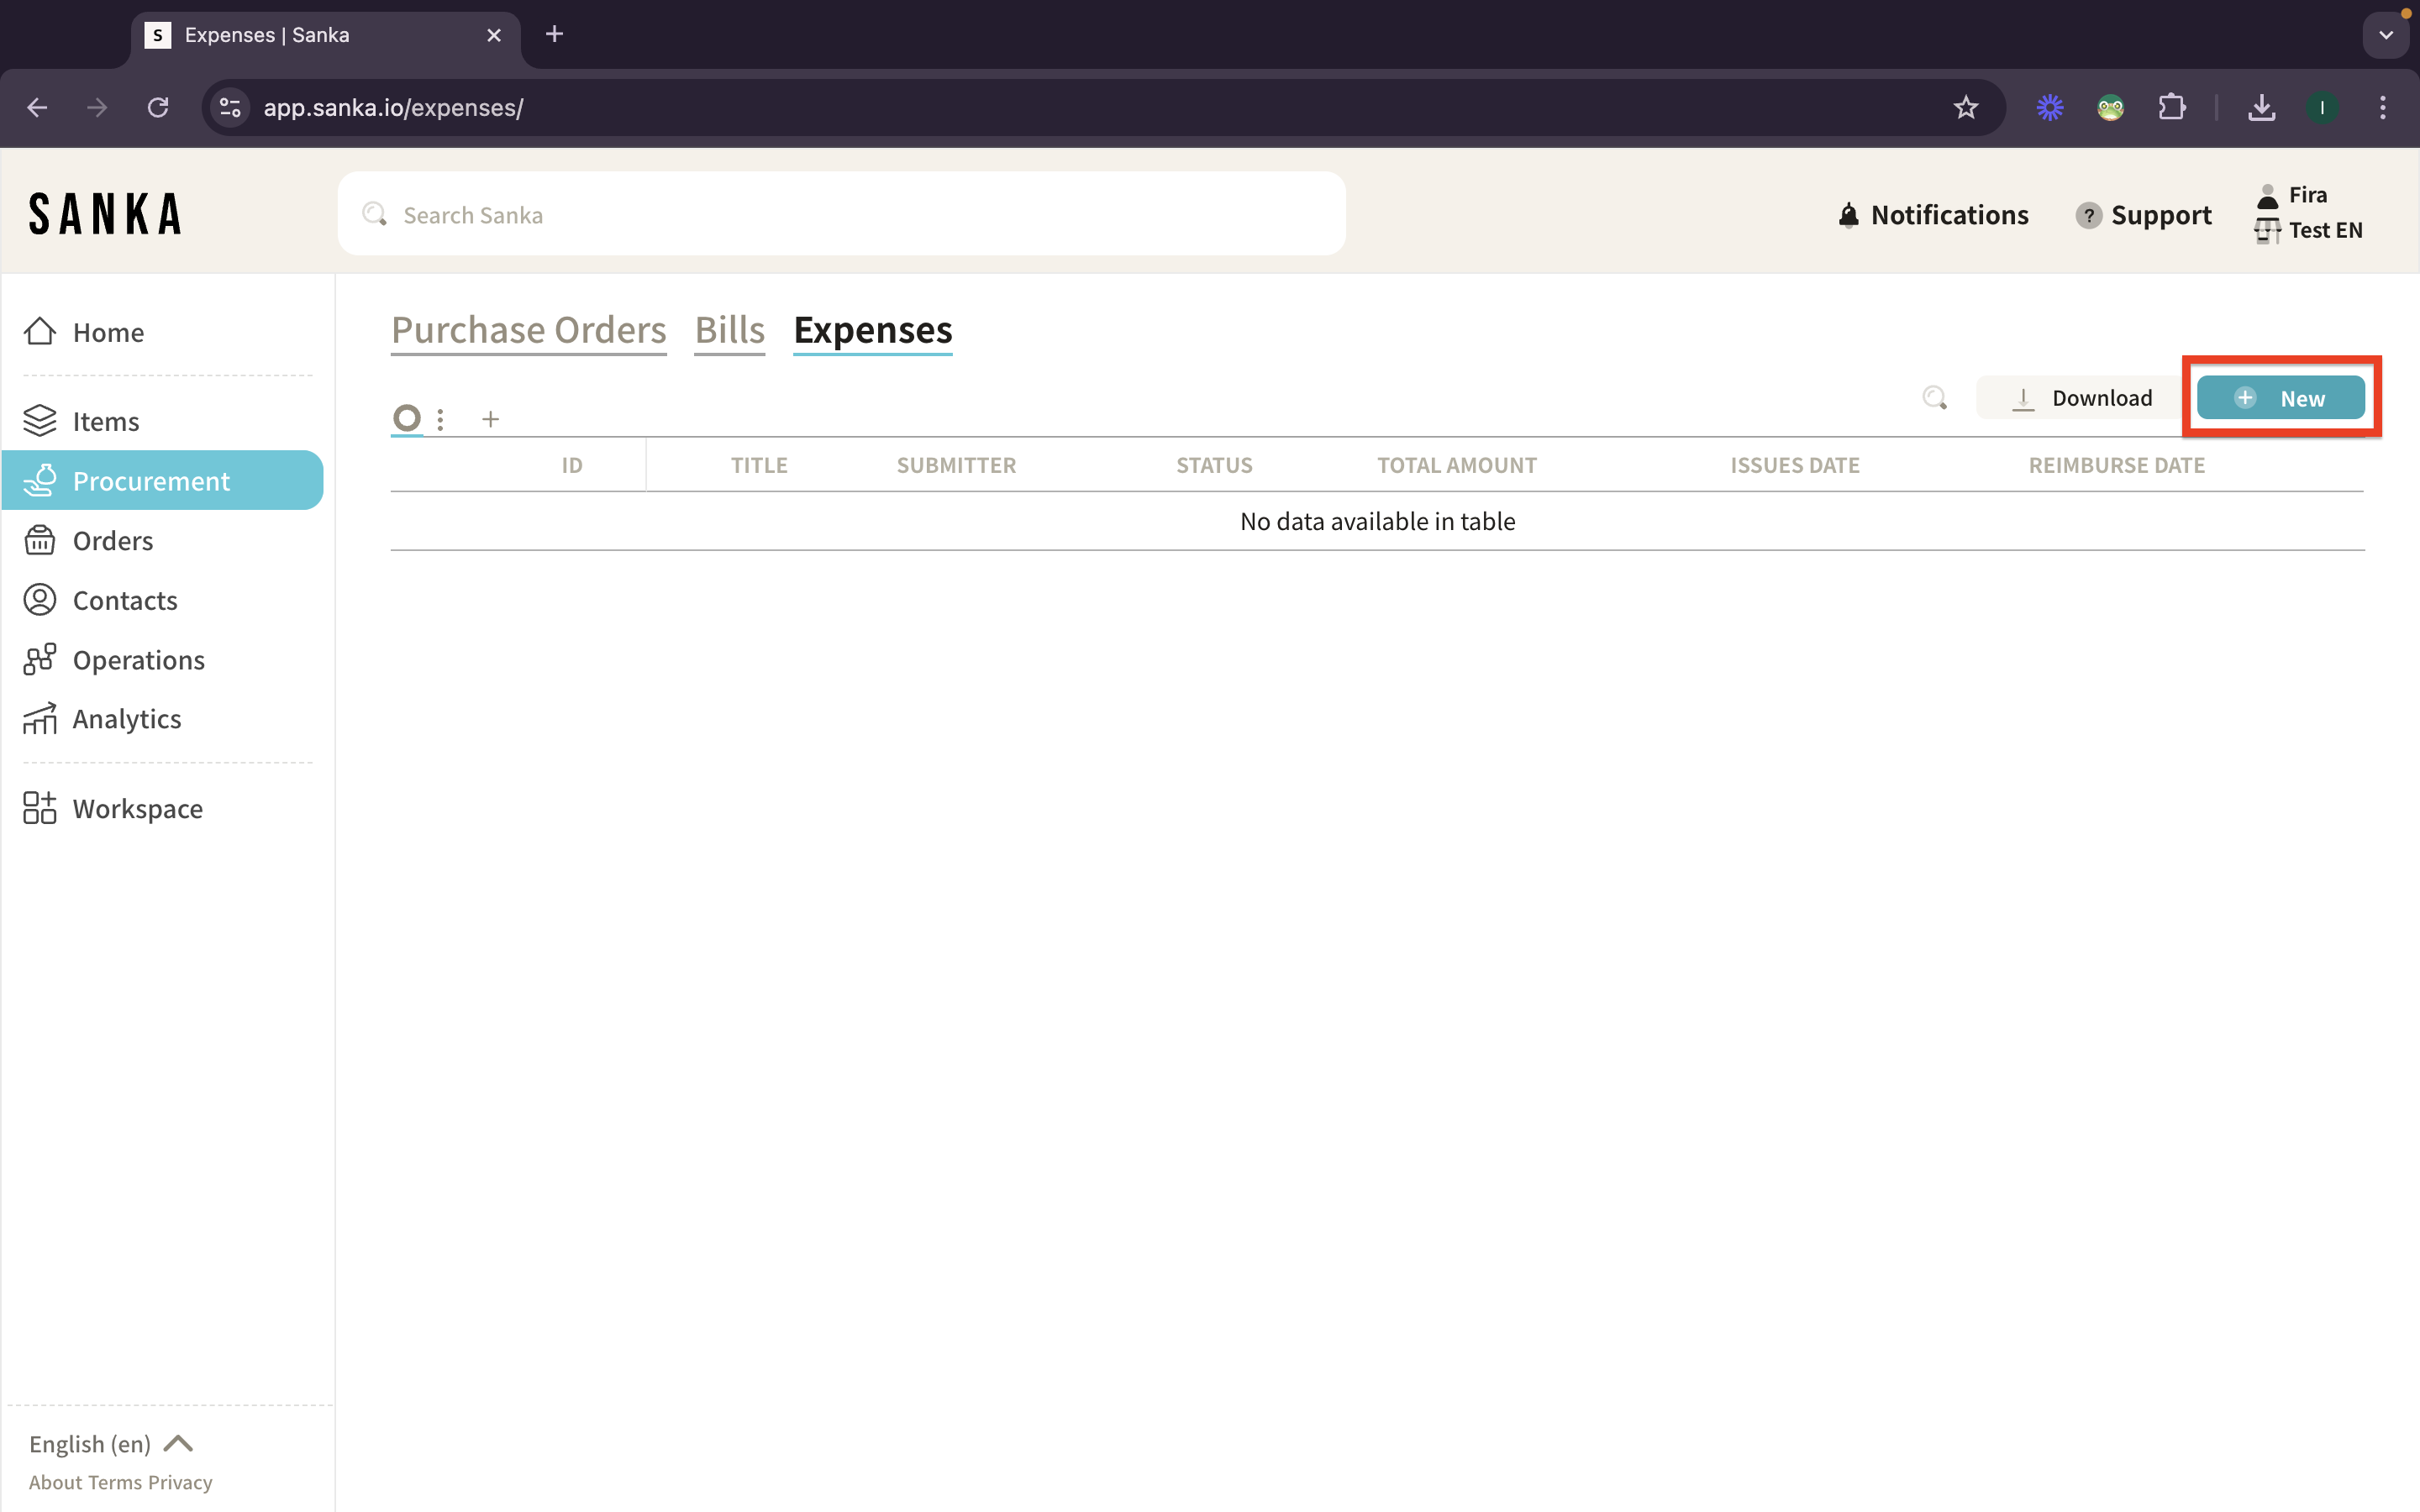
1: Click the “New” button at the top-right of the Expenses page.
3: Single Entry will be selected as default if you create new. Fill the information of your Expense. Payment Date will set “Today” as default, but you can change it if necessary.
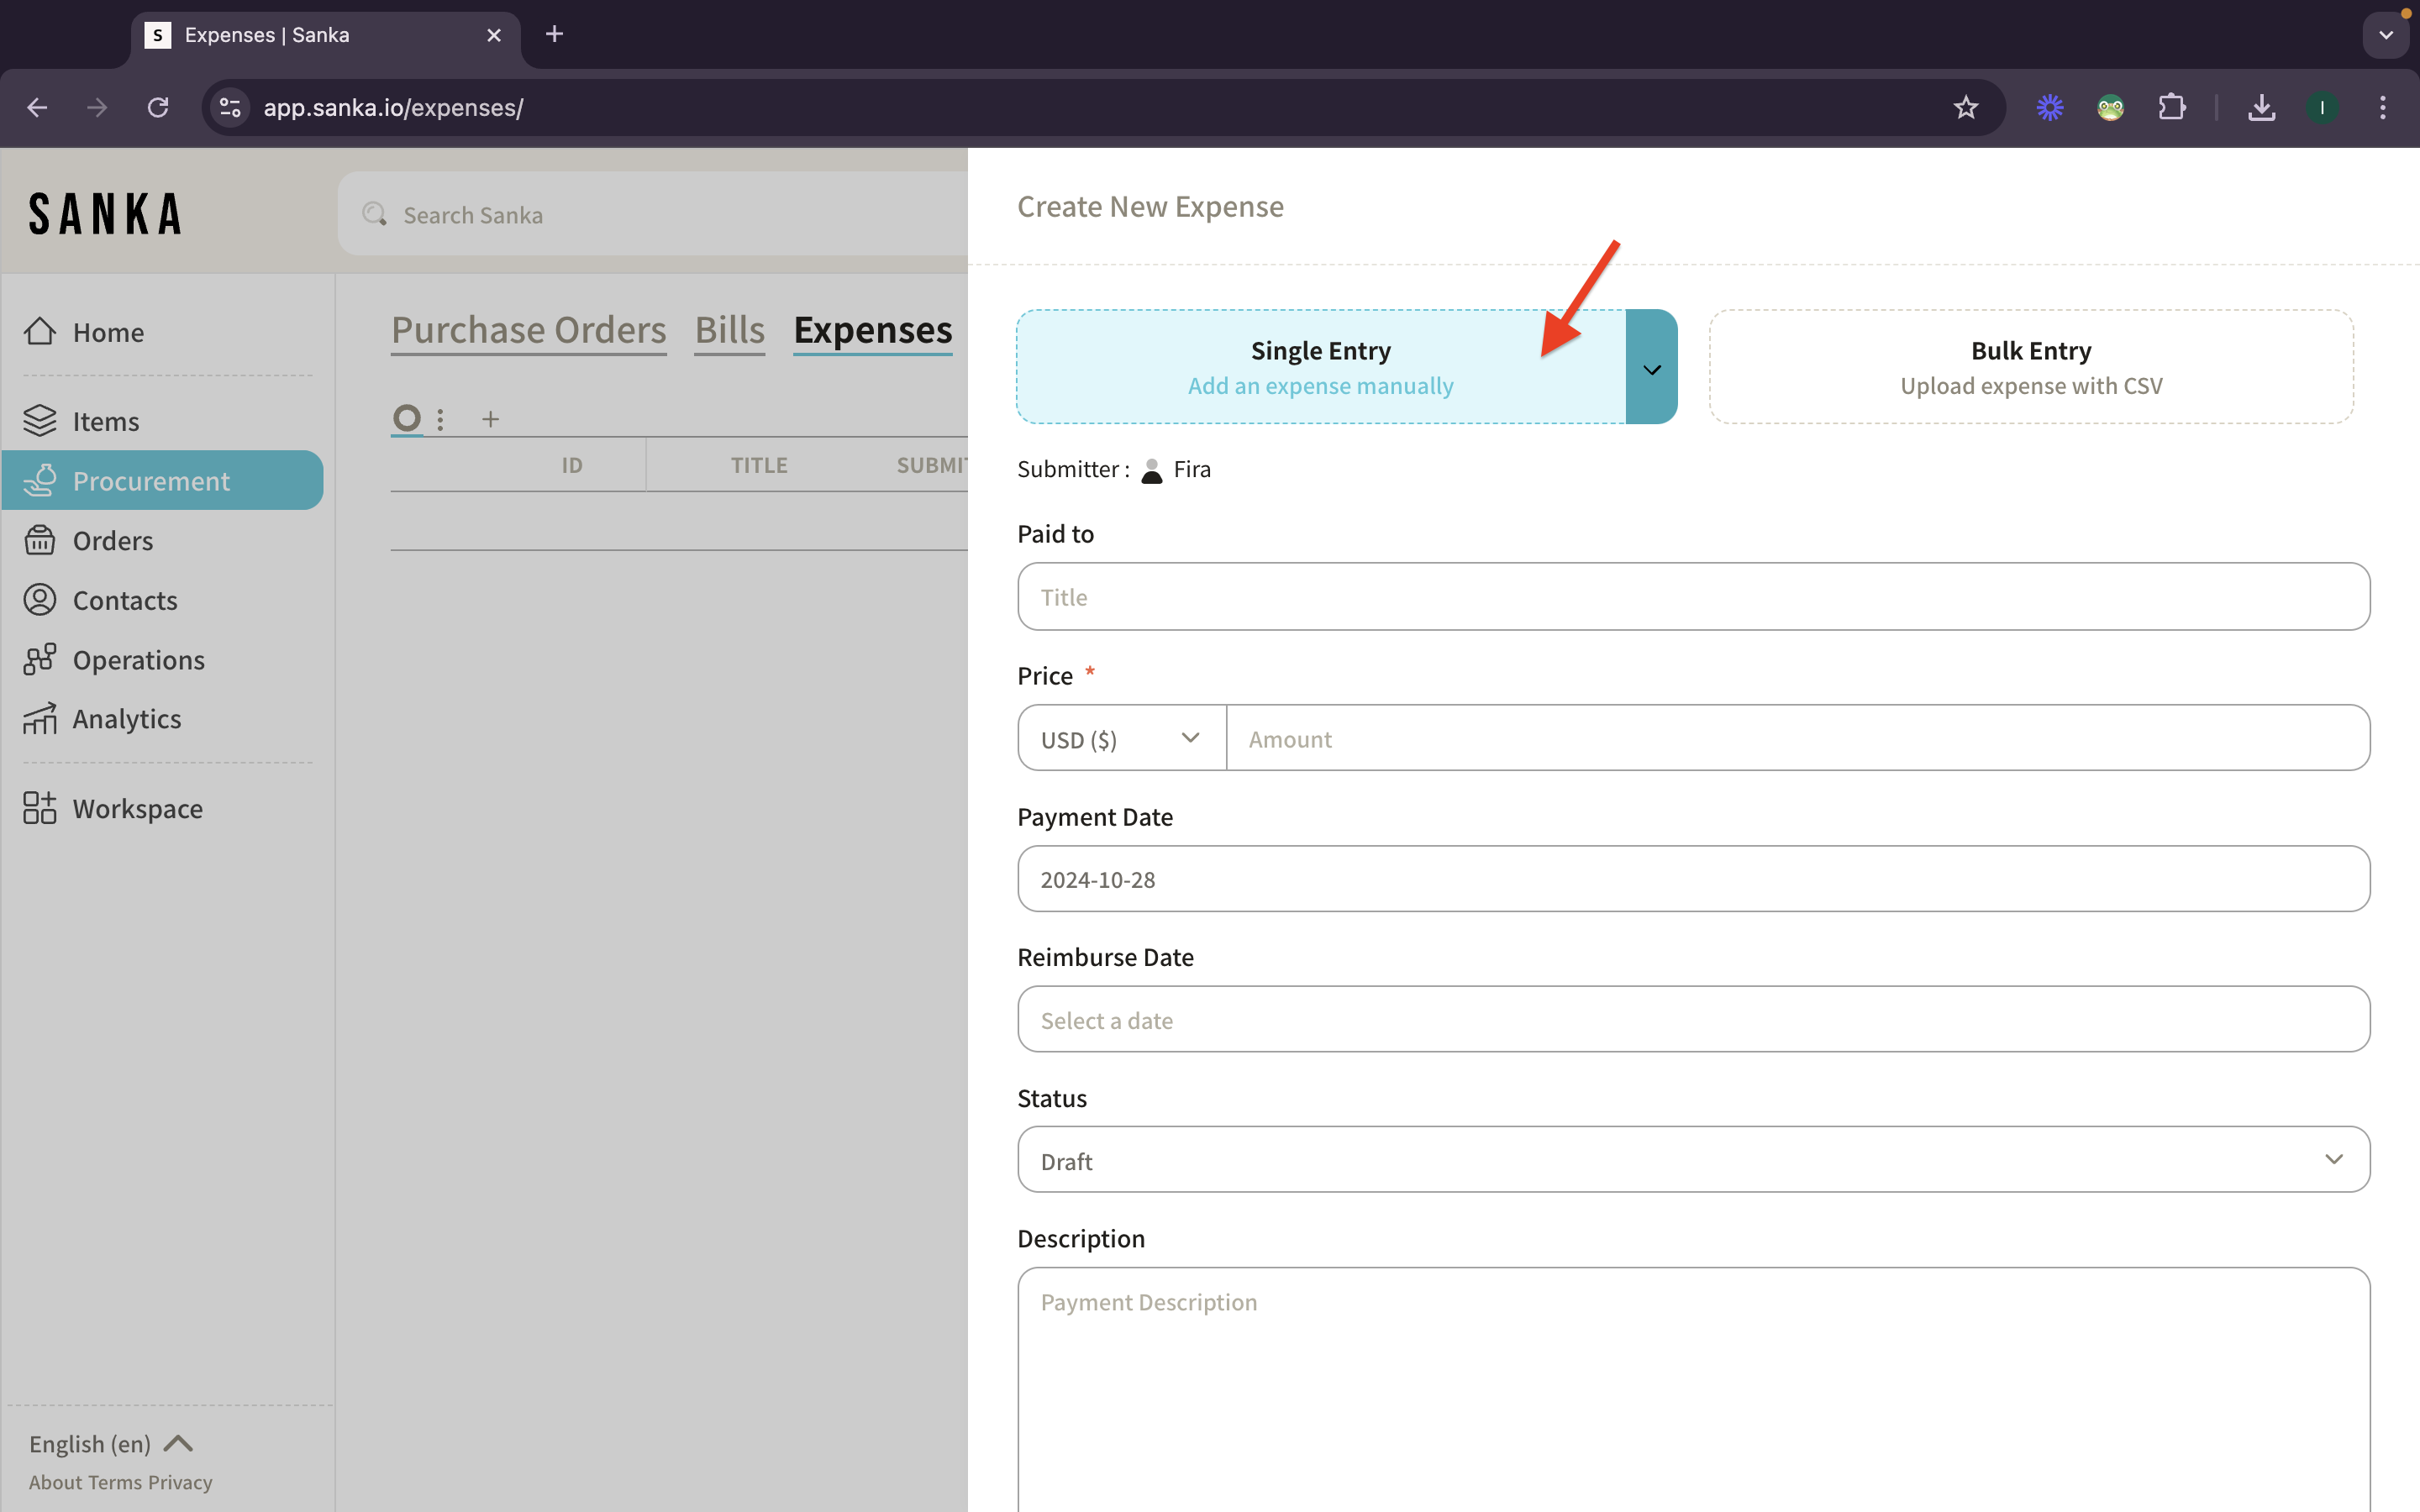
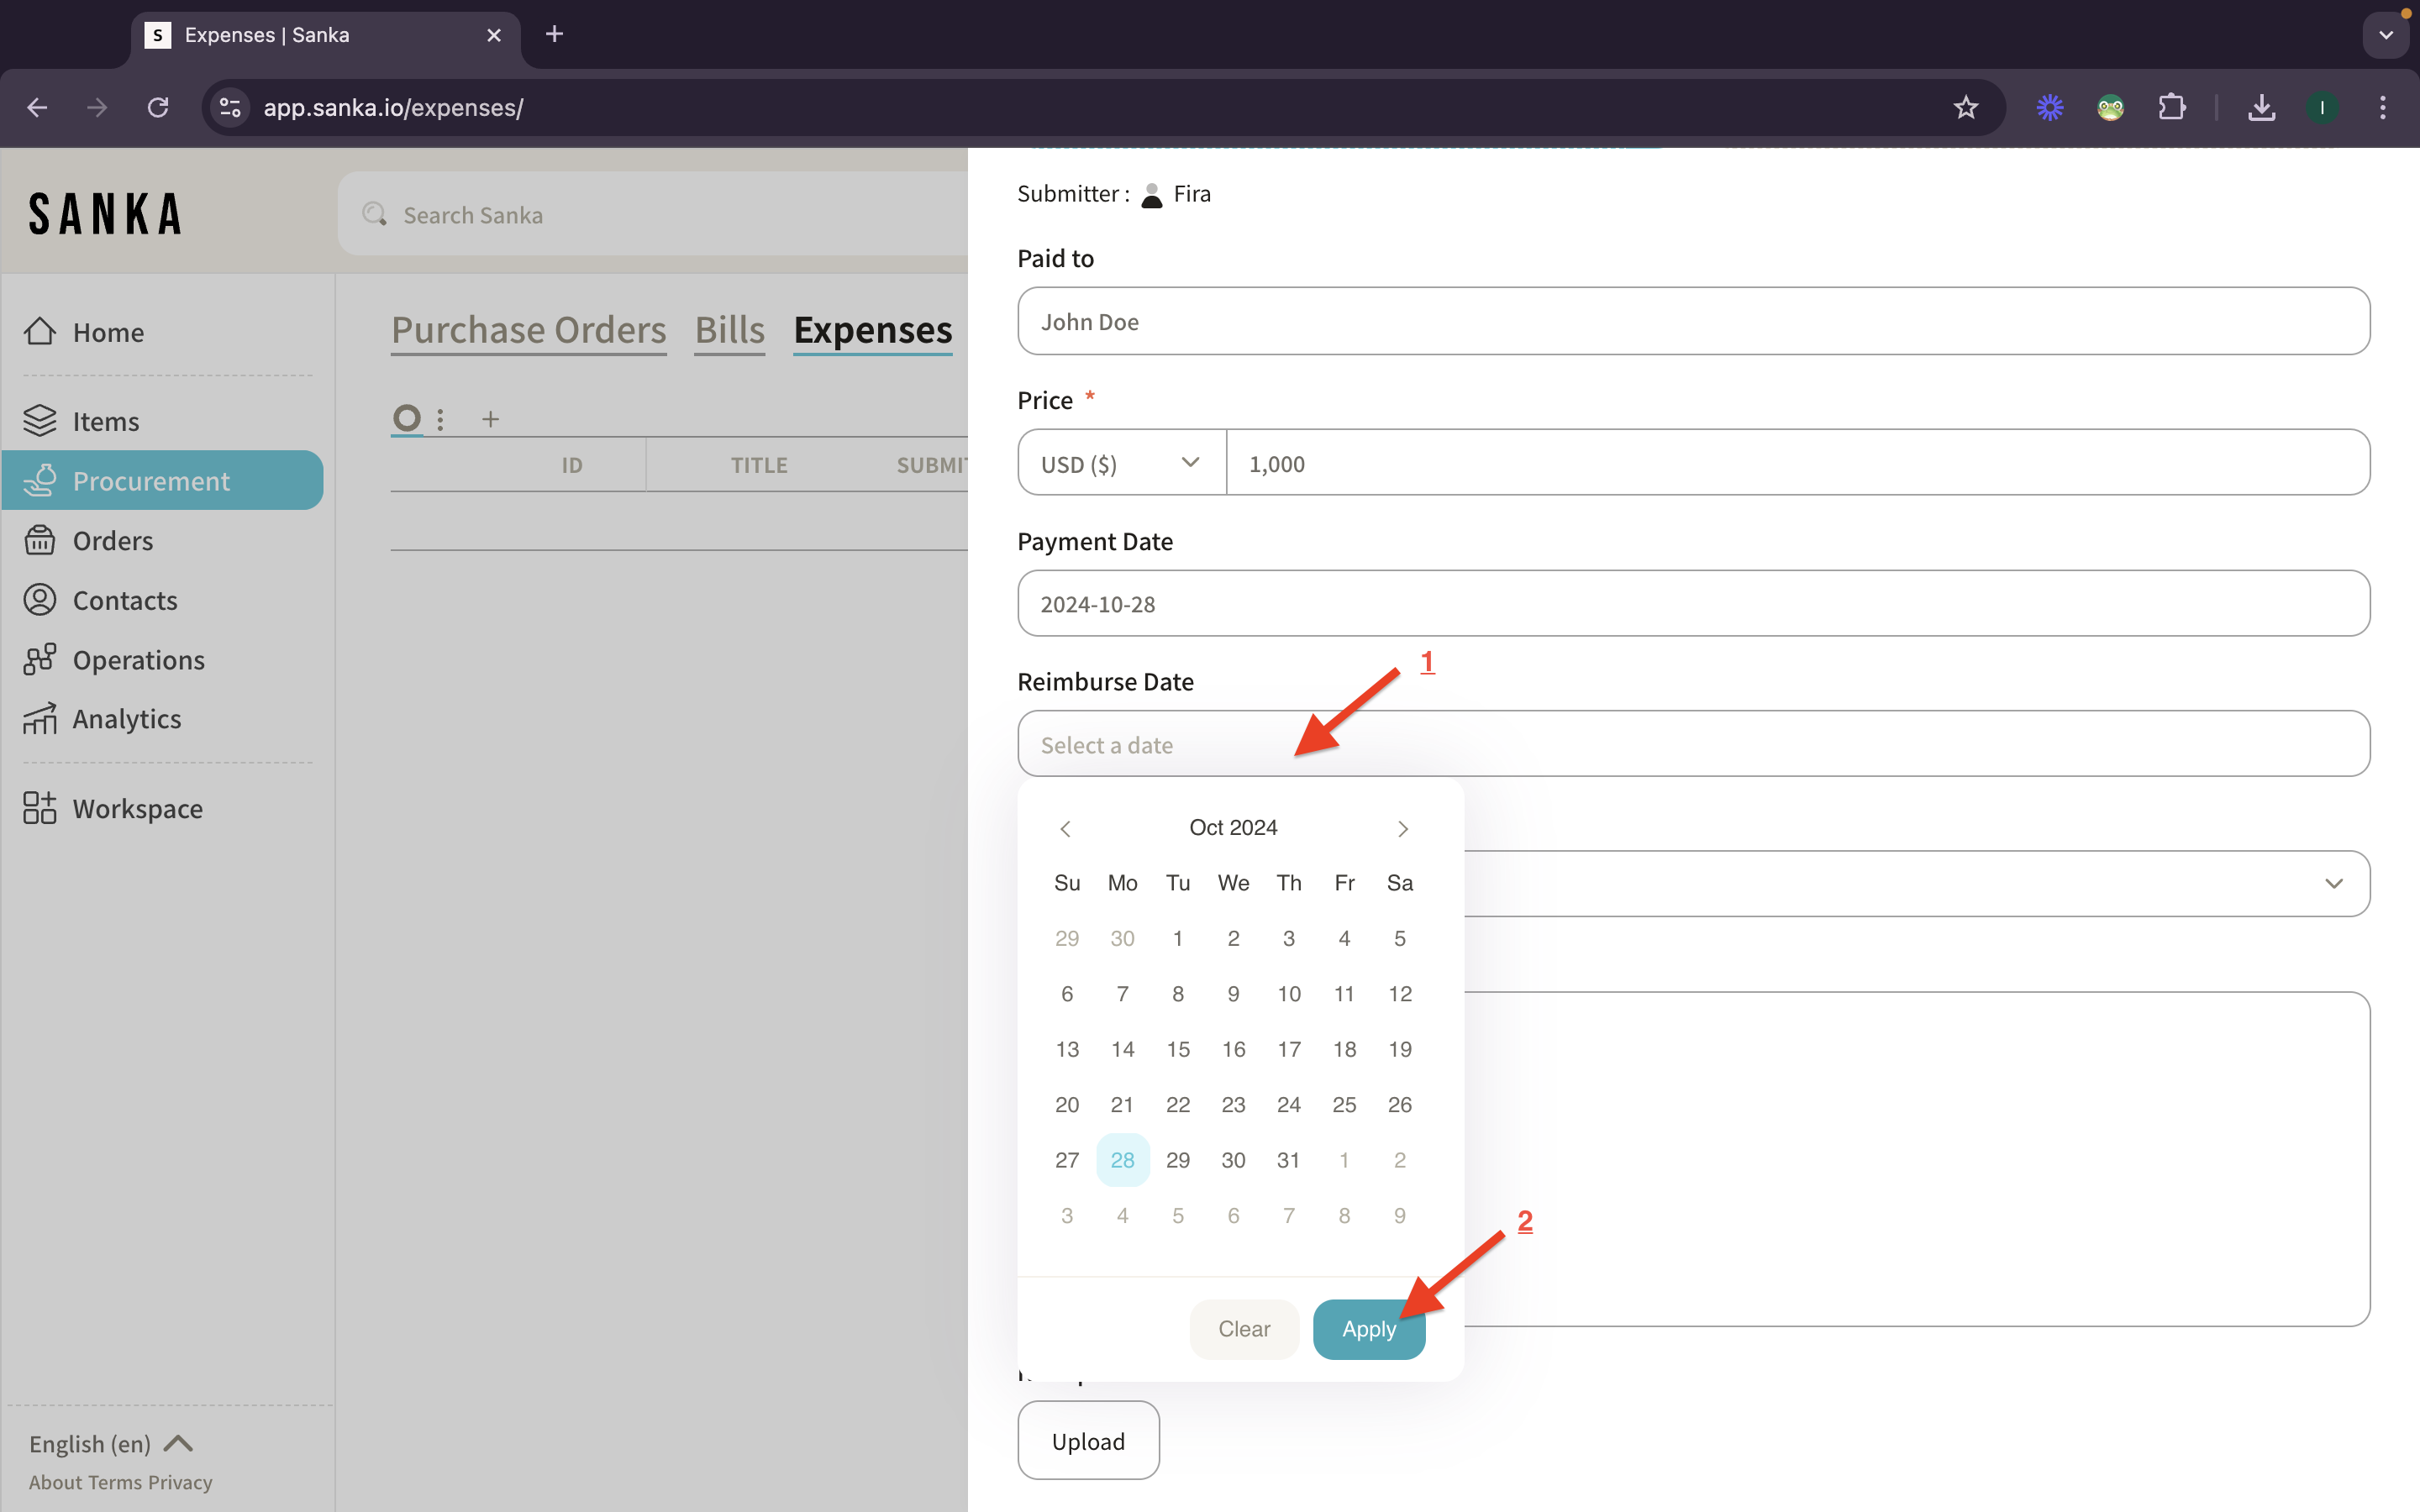
4: For Reimburse Date, you can click on the properties and calender drawer will show up. Select the date and click apply.
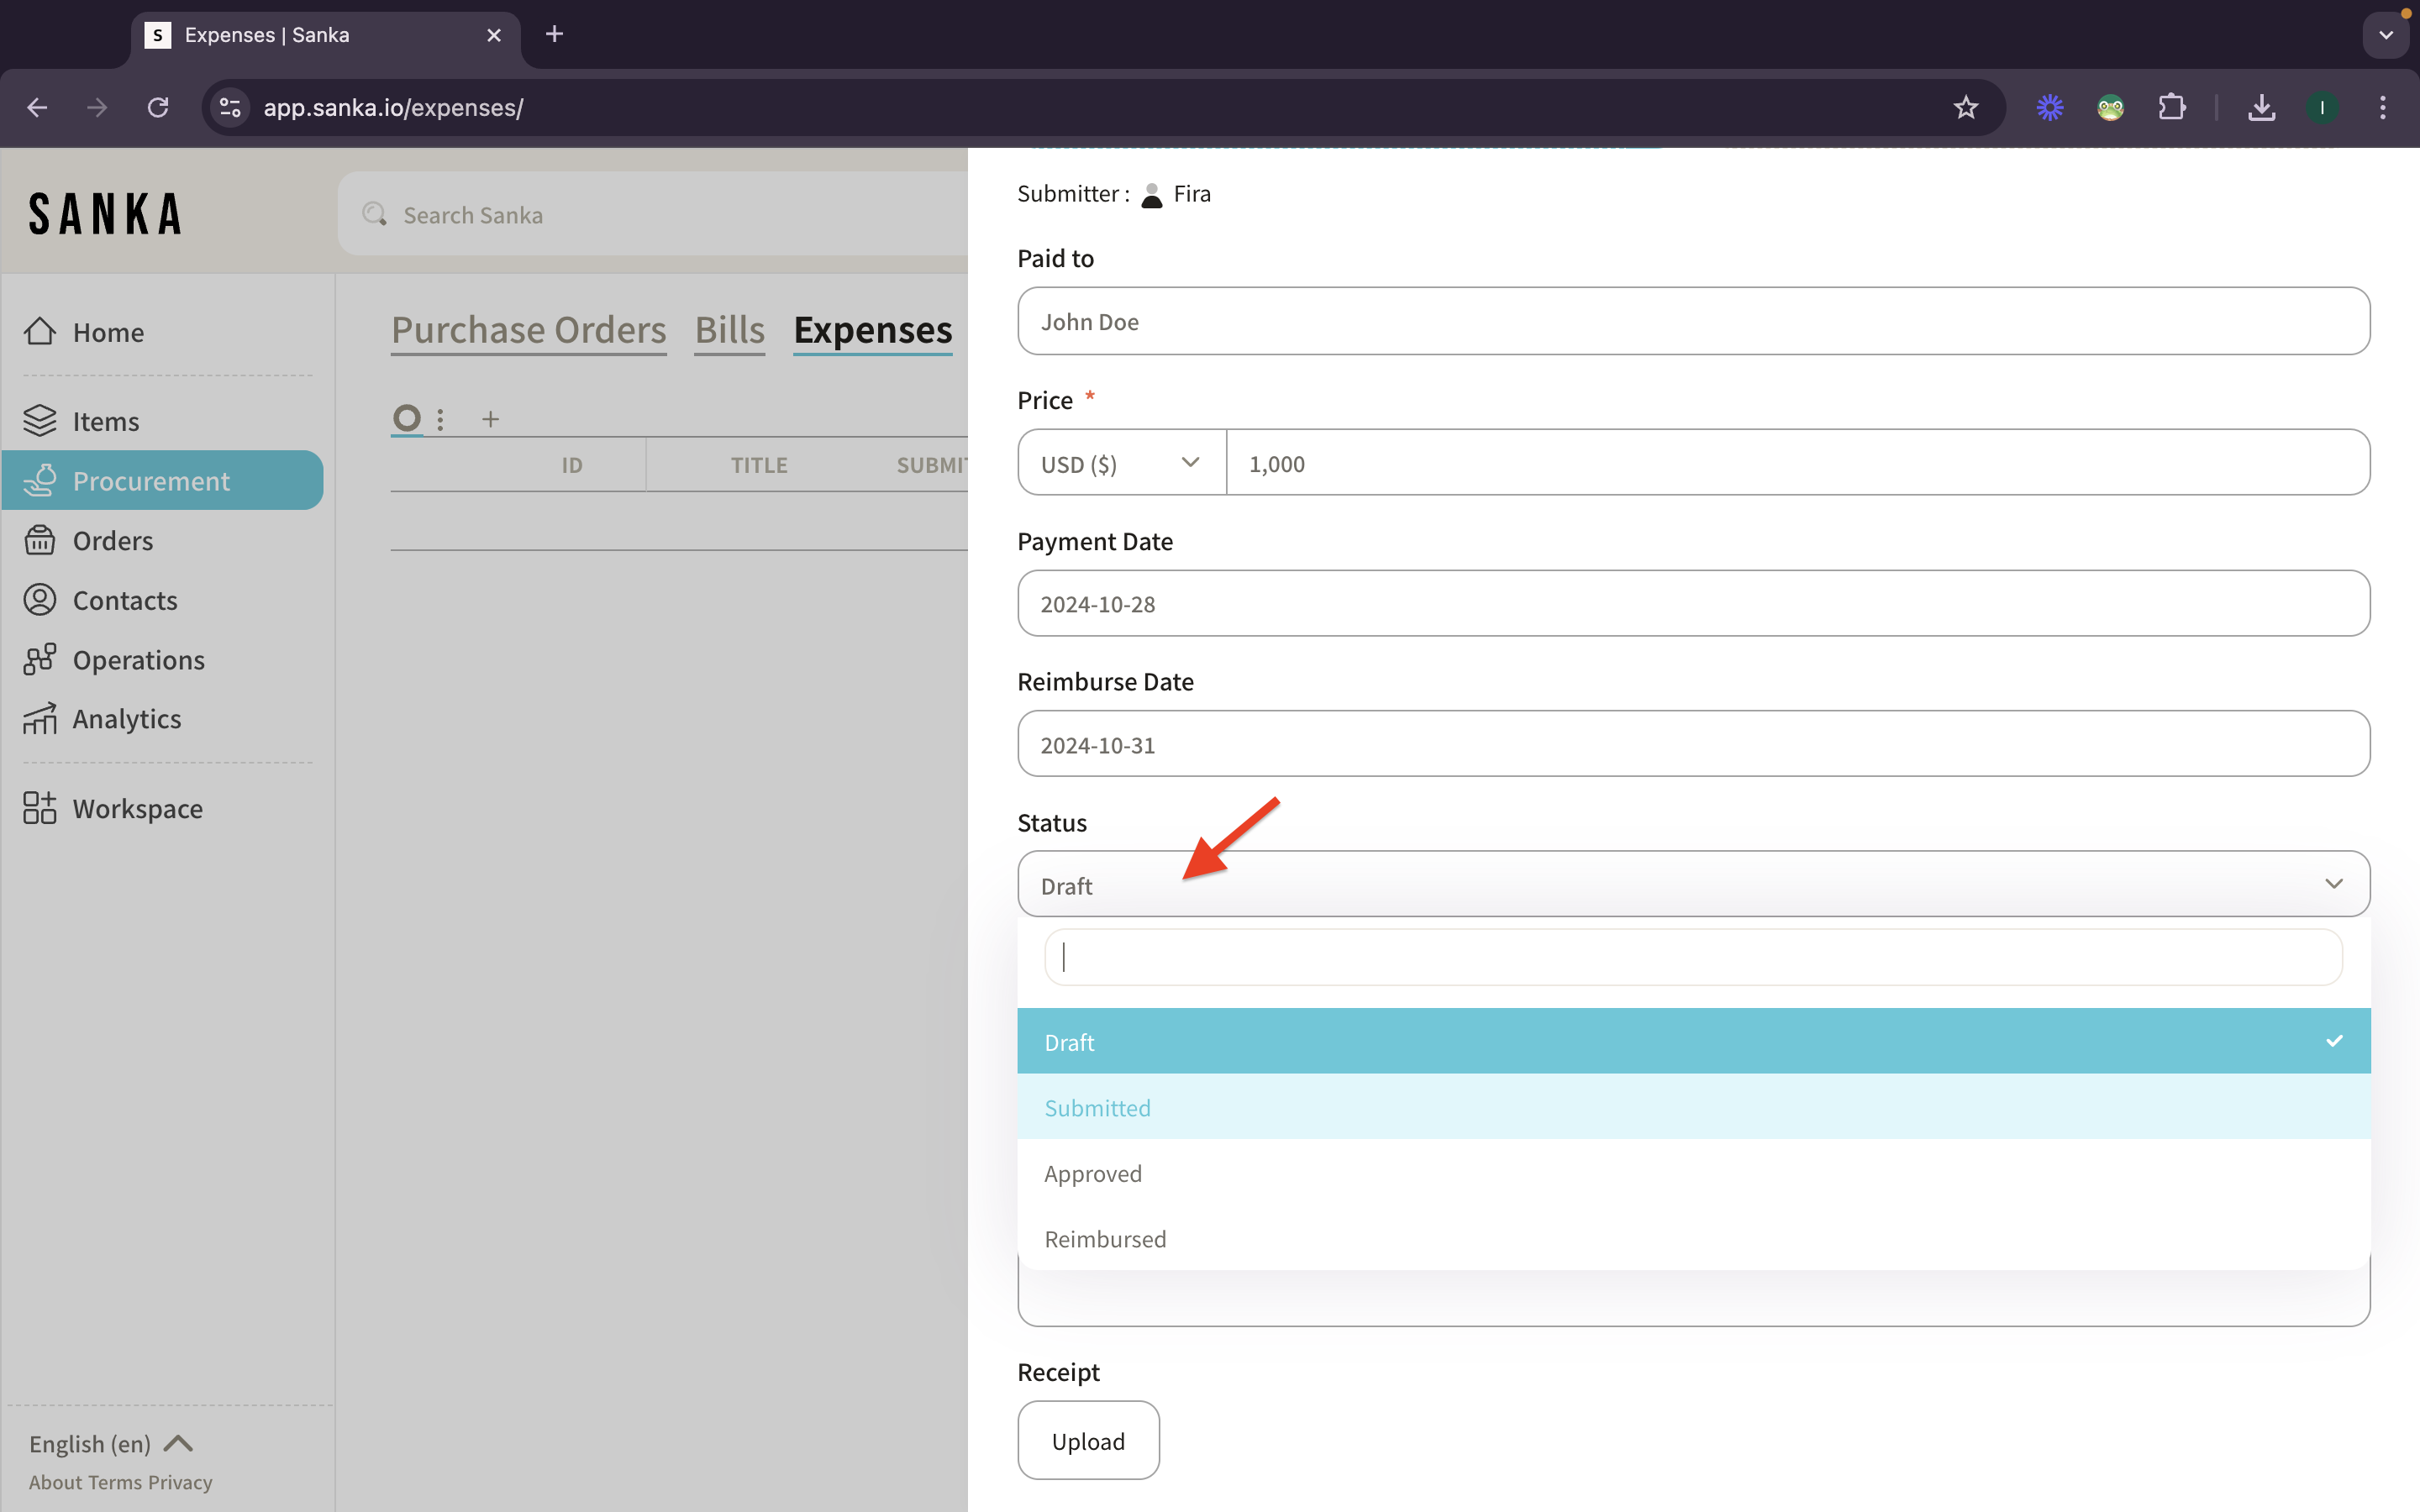
5: Select the status of the Expense.
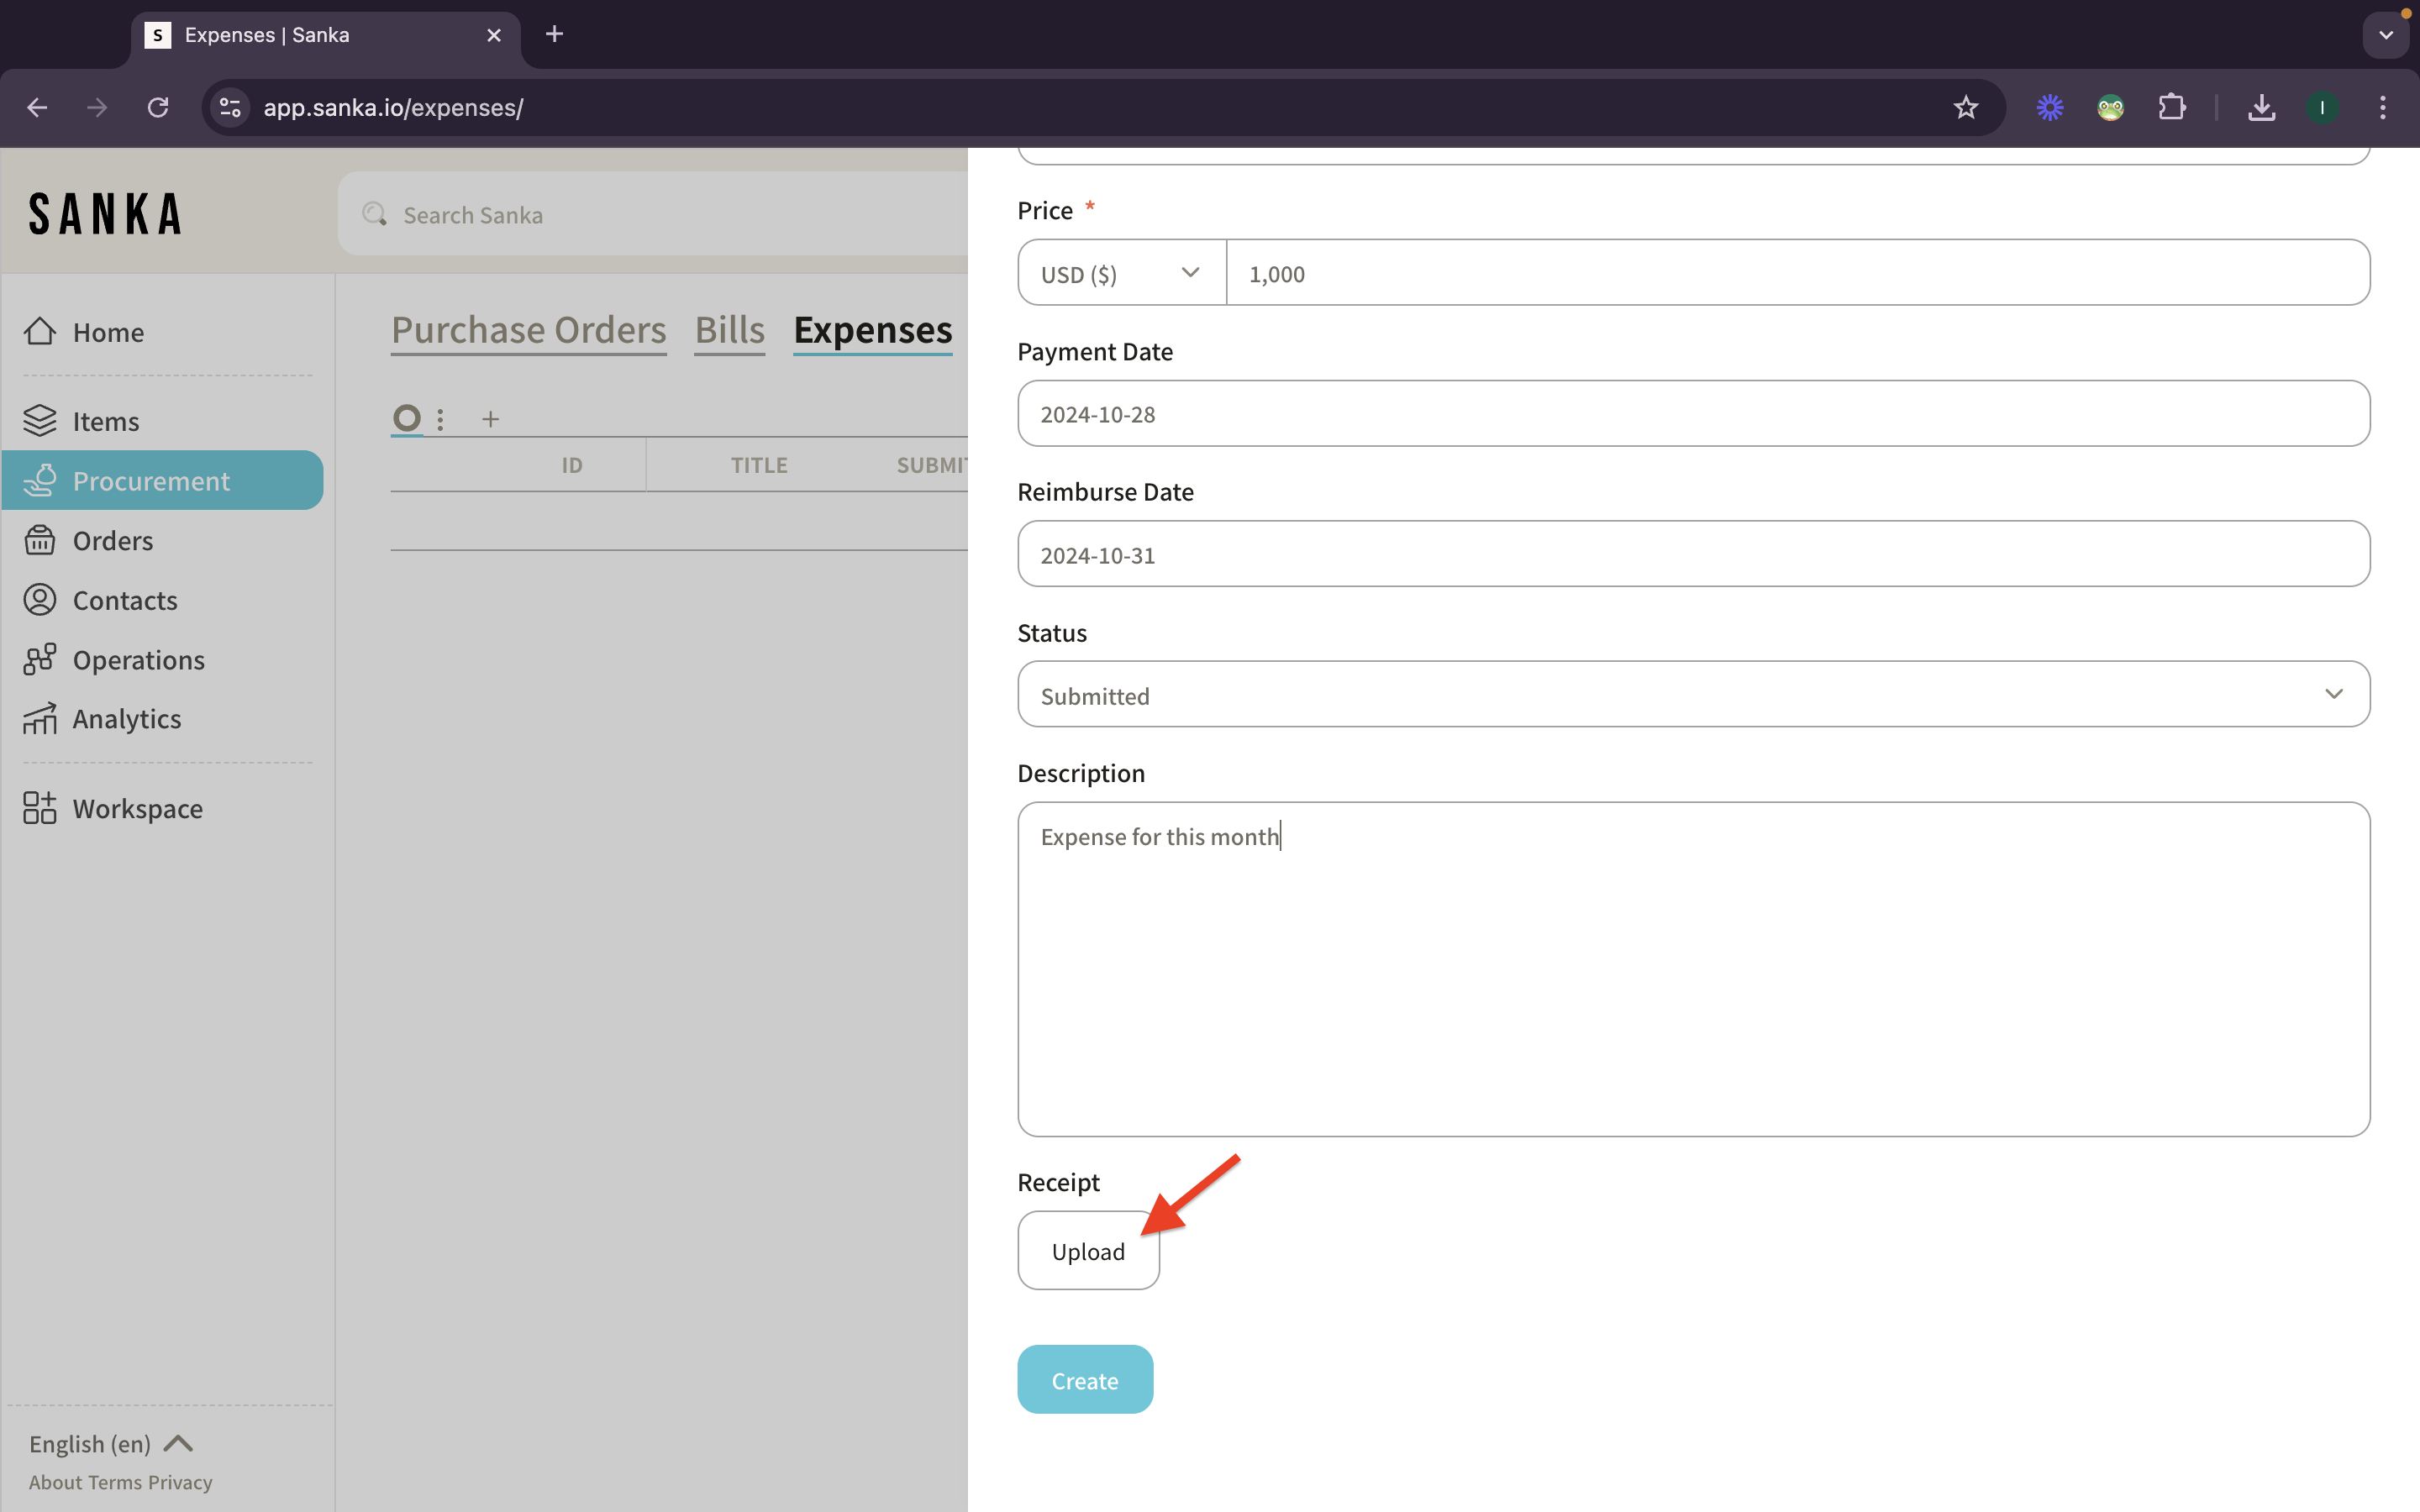
6: Fill the description of the Expense if necessary. You can also upload receipt or any relevant file of your Expense.
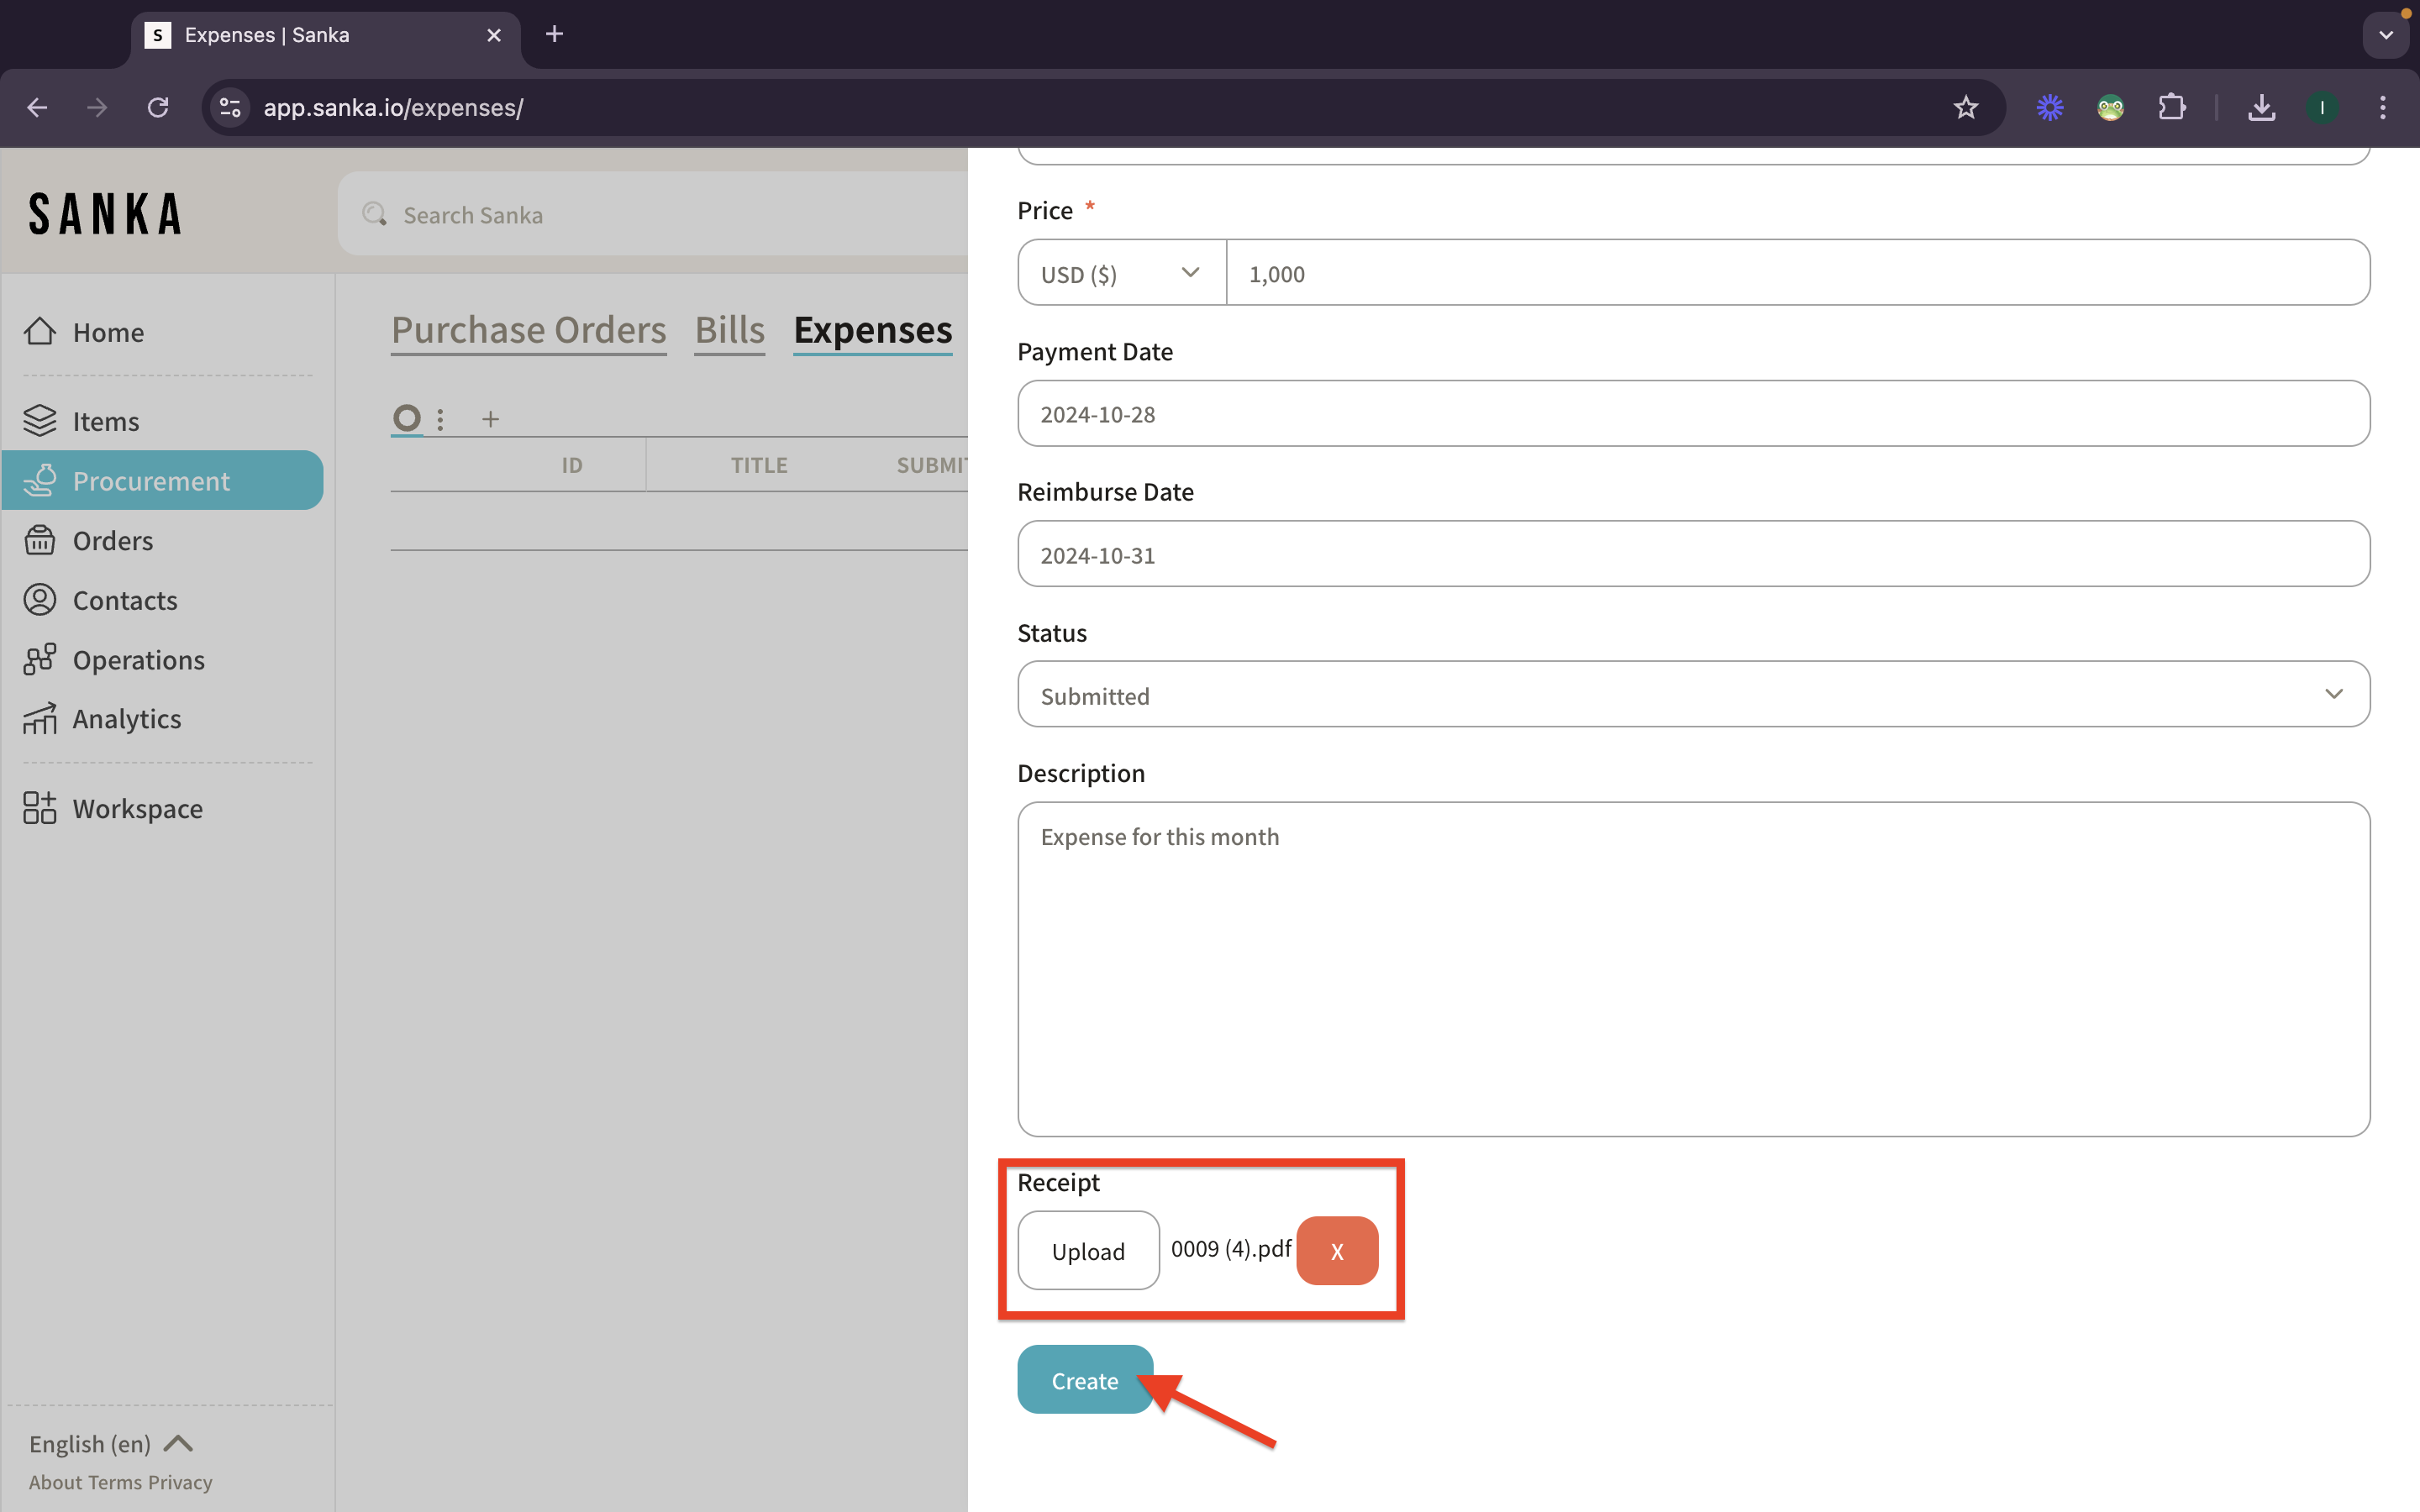
7: After you select the receipt file, the file preview (name) will show up. If your information filled, click create button below.
8: Your expense record will appear on the record table.
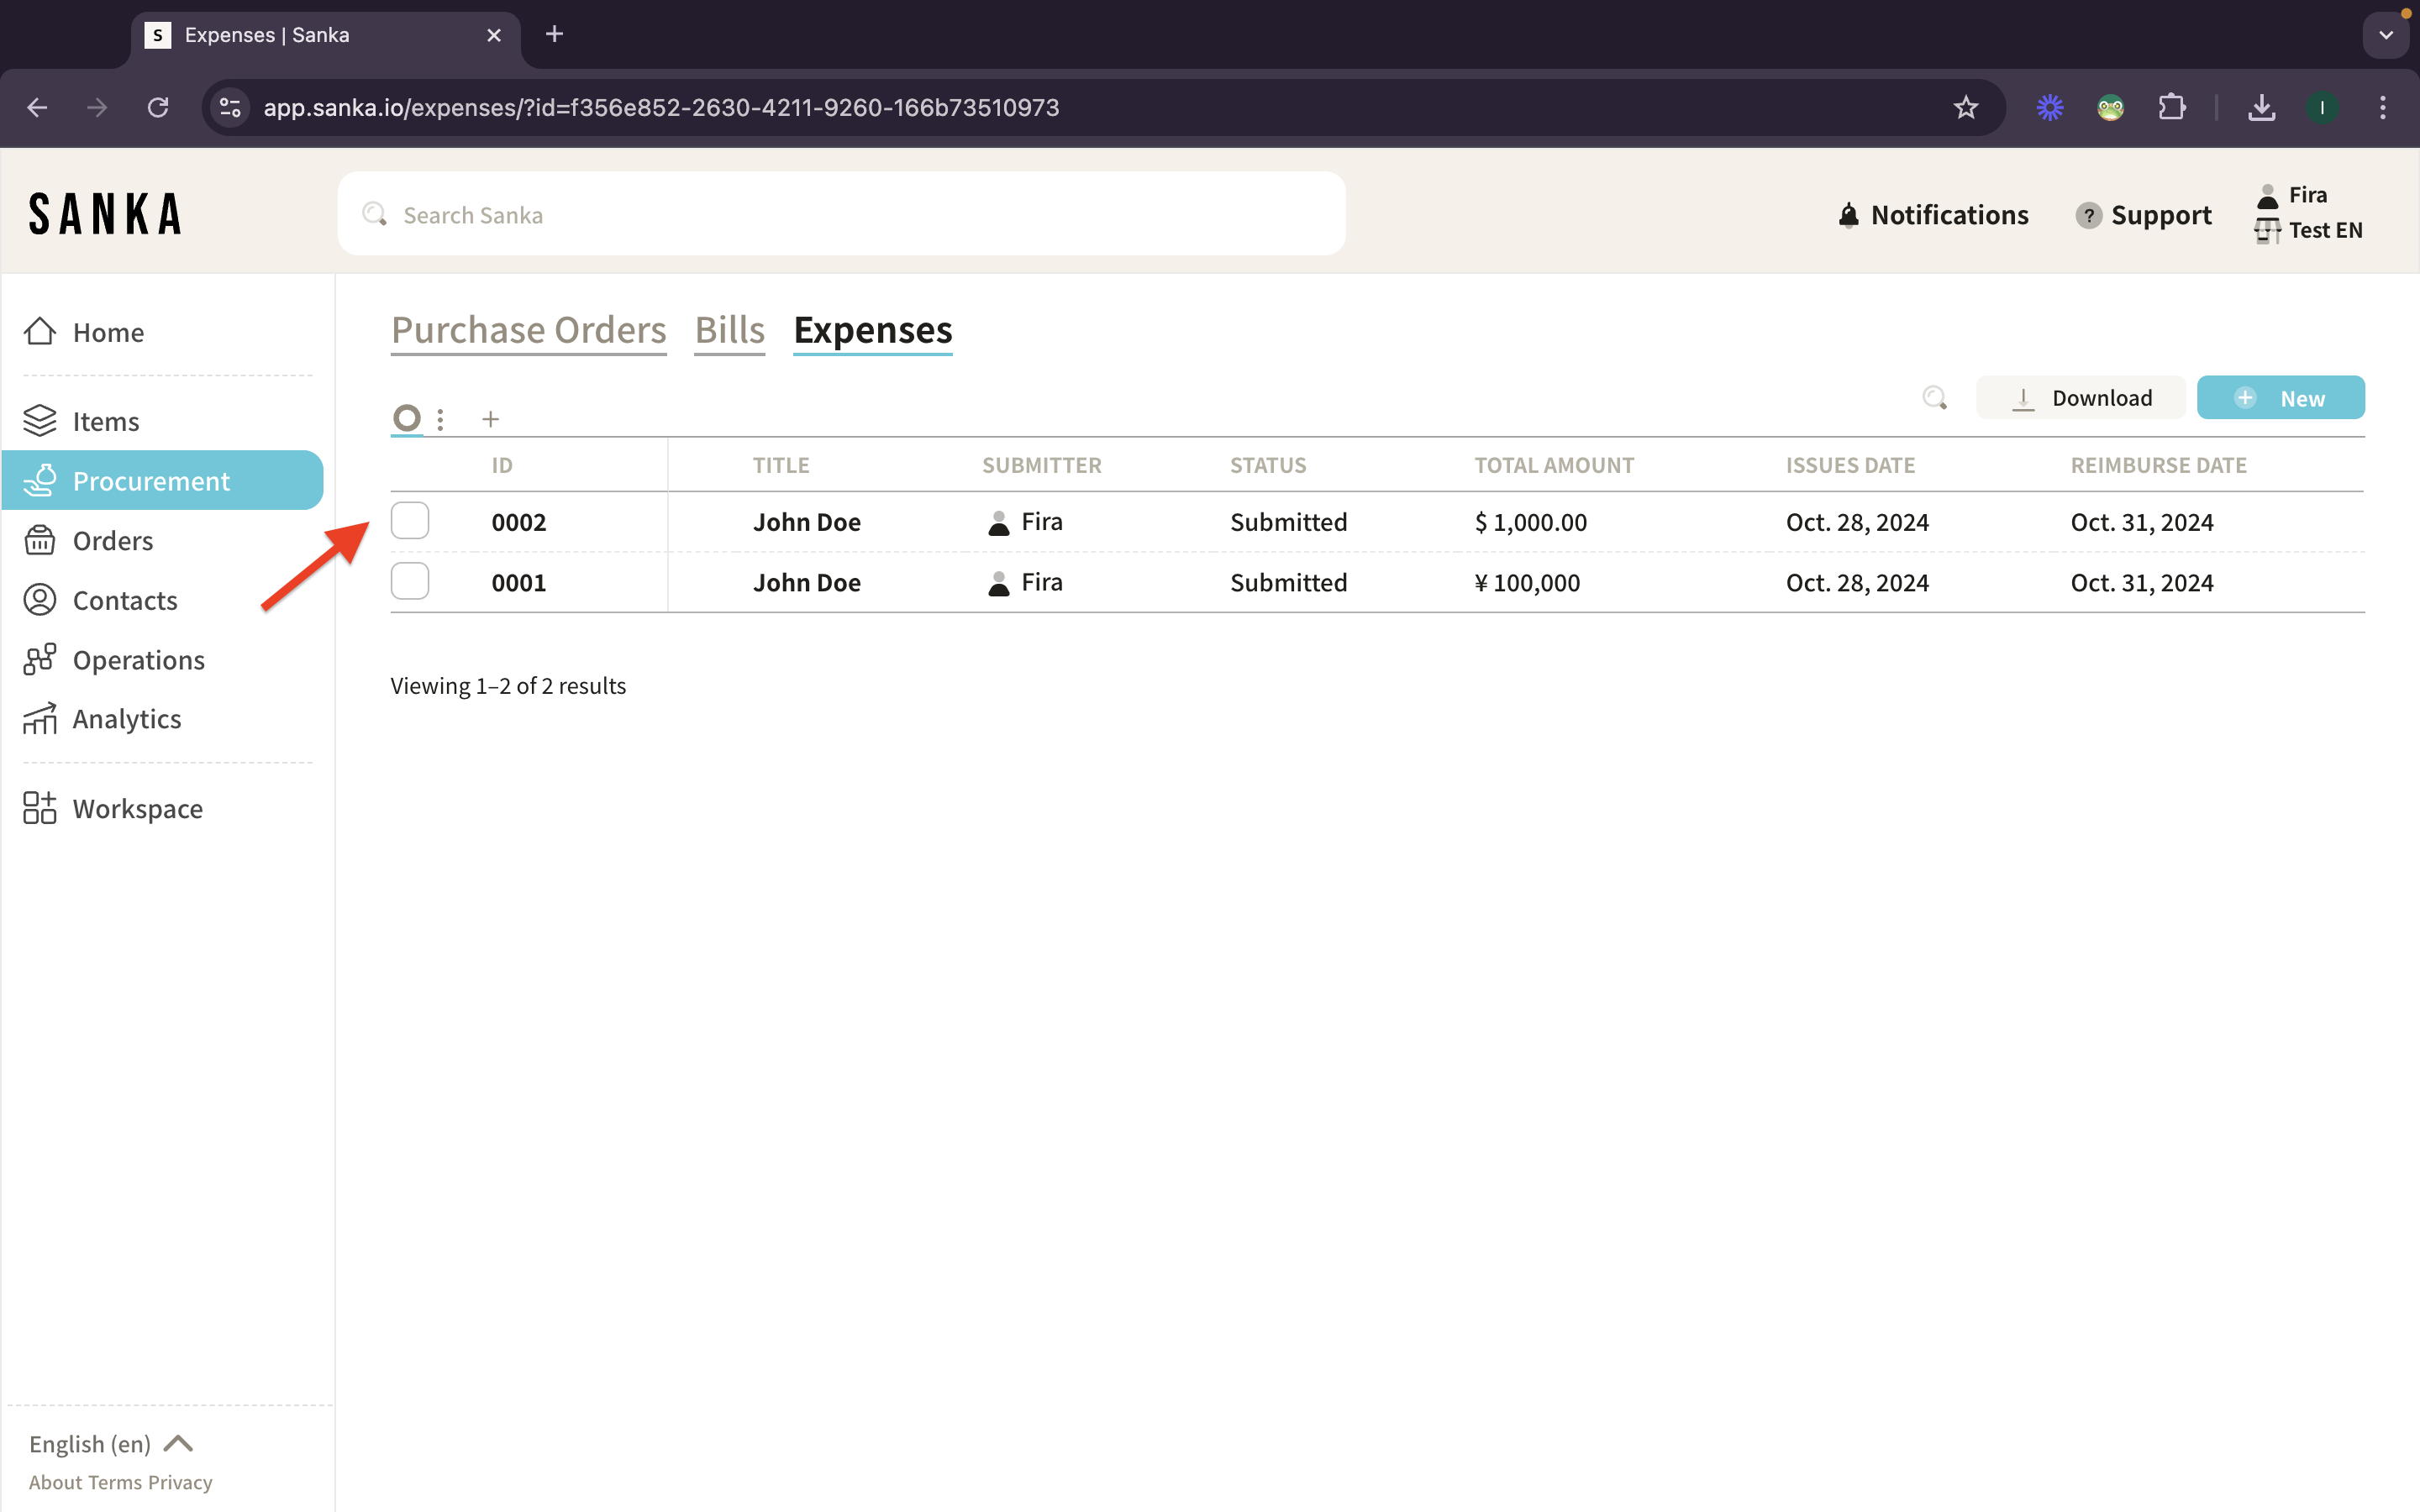
9: If you click ID or Title, the detailed page will show up. You can edit , archive, or download payment file of the Expense Records.
